Removing all the receiver
associations
Turning off the LEDs
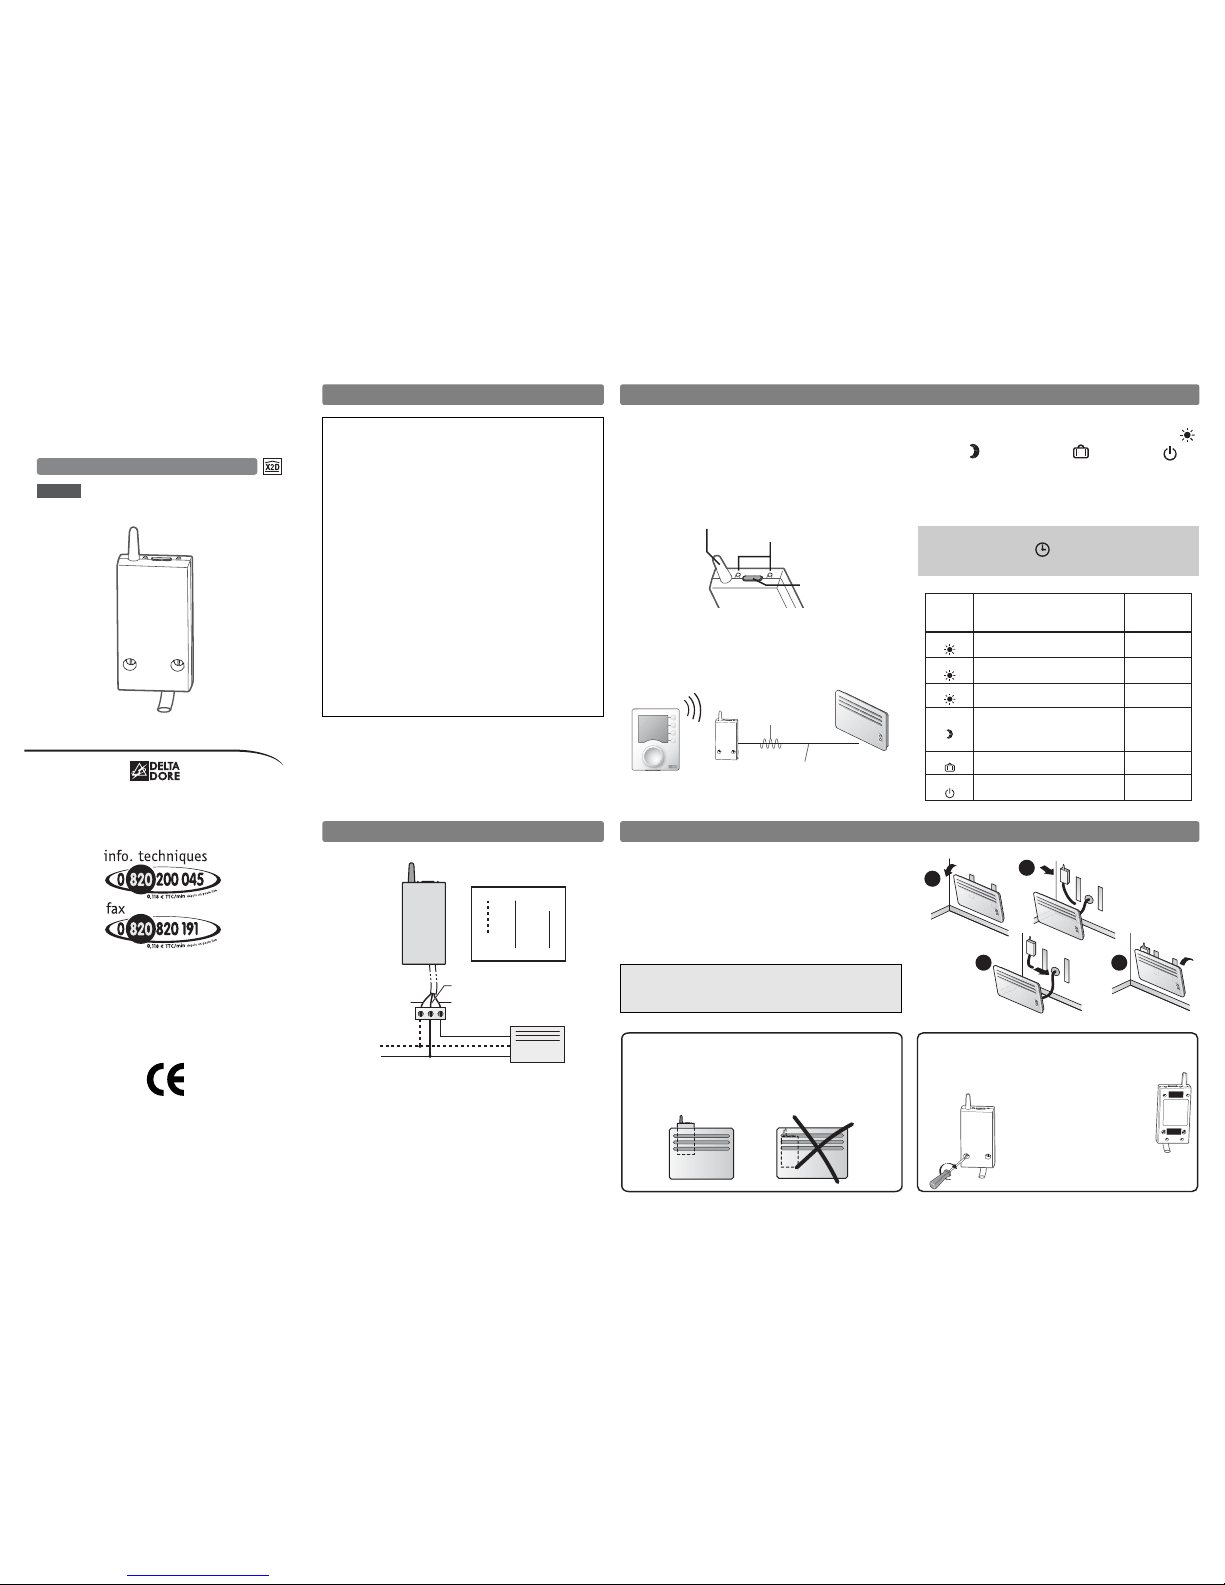
• 230 V, 50 Hz power supply, +/-10%
• Class II insulation
• Power consumption: 0.5 VA
• Pilot wire output 0.1 A, 230 V,
• Radio frequency 868 MHz (standard EN 300 220)
• Radio range 100 to 300 metres outside, variable
depending on the associated equipment (the
range can be altered depending on the installation
conditions and the electromagnetic environment)
• Number of transmitters that may be associated
with the receiver: 8 max.
• Operating temperature: -5°C to +50°C
• Storage temperature: -10 to +70°C
• Dimensions: 102 x 54 x 20 mm,
• Protection index: IP44 - IK 04
• Install in an environment with normal pollution
levels
Troubleshooting
You cannot associate a transmitter with your
receiver.
The maximum number of transmitters to associate
with a receiver function is 8.
Reset the unit to associate the transmitters again
(see the "Association" section).
The receiver doesnot recognise the command
from a transmitter.
• The transmitter is not associated with the receiver.
• The receiver is still in association mode.
• The transmitter batteries are low.
• The receiver is too far from the transmitter.
The temperature of a room doesnot reach the
mode chosen by the programmer.
• The convector is not in the correct position.
Check that the convector is set to the AUTOMATIC
position.
• The power of the convector is insufficient.
Replace the convector with a more powerful model.
• You have subscribed to the
tempo
tariff and you are
in an economy period.
Association
Technical characteristics
Associating the receiver with a transmitter
On the receiver:
Press the button for about 3 seconds until the two
LEDs flash: the receiver is in association mode.
On the transmitter:
Depending on the transmitter, go to radio
configuration mode.
Send the association radio information.
(see the transmitter guide).
On the receiver:
The two LEDs stop flashing to confirm
the association operation.
Note: the association remains in the event of
a power failure.
Press and hold the button.
The and LEDs flash after 3 seconds.
Hold down the button.
The LEDs are deactivated after 10 seconds.
Hold down the button.
The LED flashes after 30 seconds;
all the associations are removed.
Release the button.
You can keep the LEDs turned off permanently so
that they do not annoy you during the night:
- press and hold the receiver button for about
10 seconds,
- all the LEDs switch off while letting the product
function normally.
To turn on the LEDs:
- press and hold the receiver button for about
10 seconds,
- the LEDs switch on according to the current
operating mode.
You want to associate the receiver again.
You must start by removing all the radio associations.
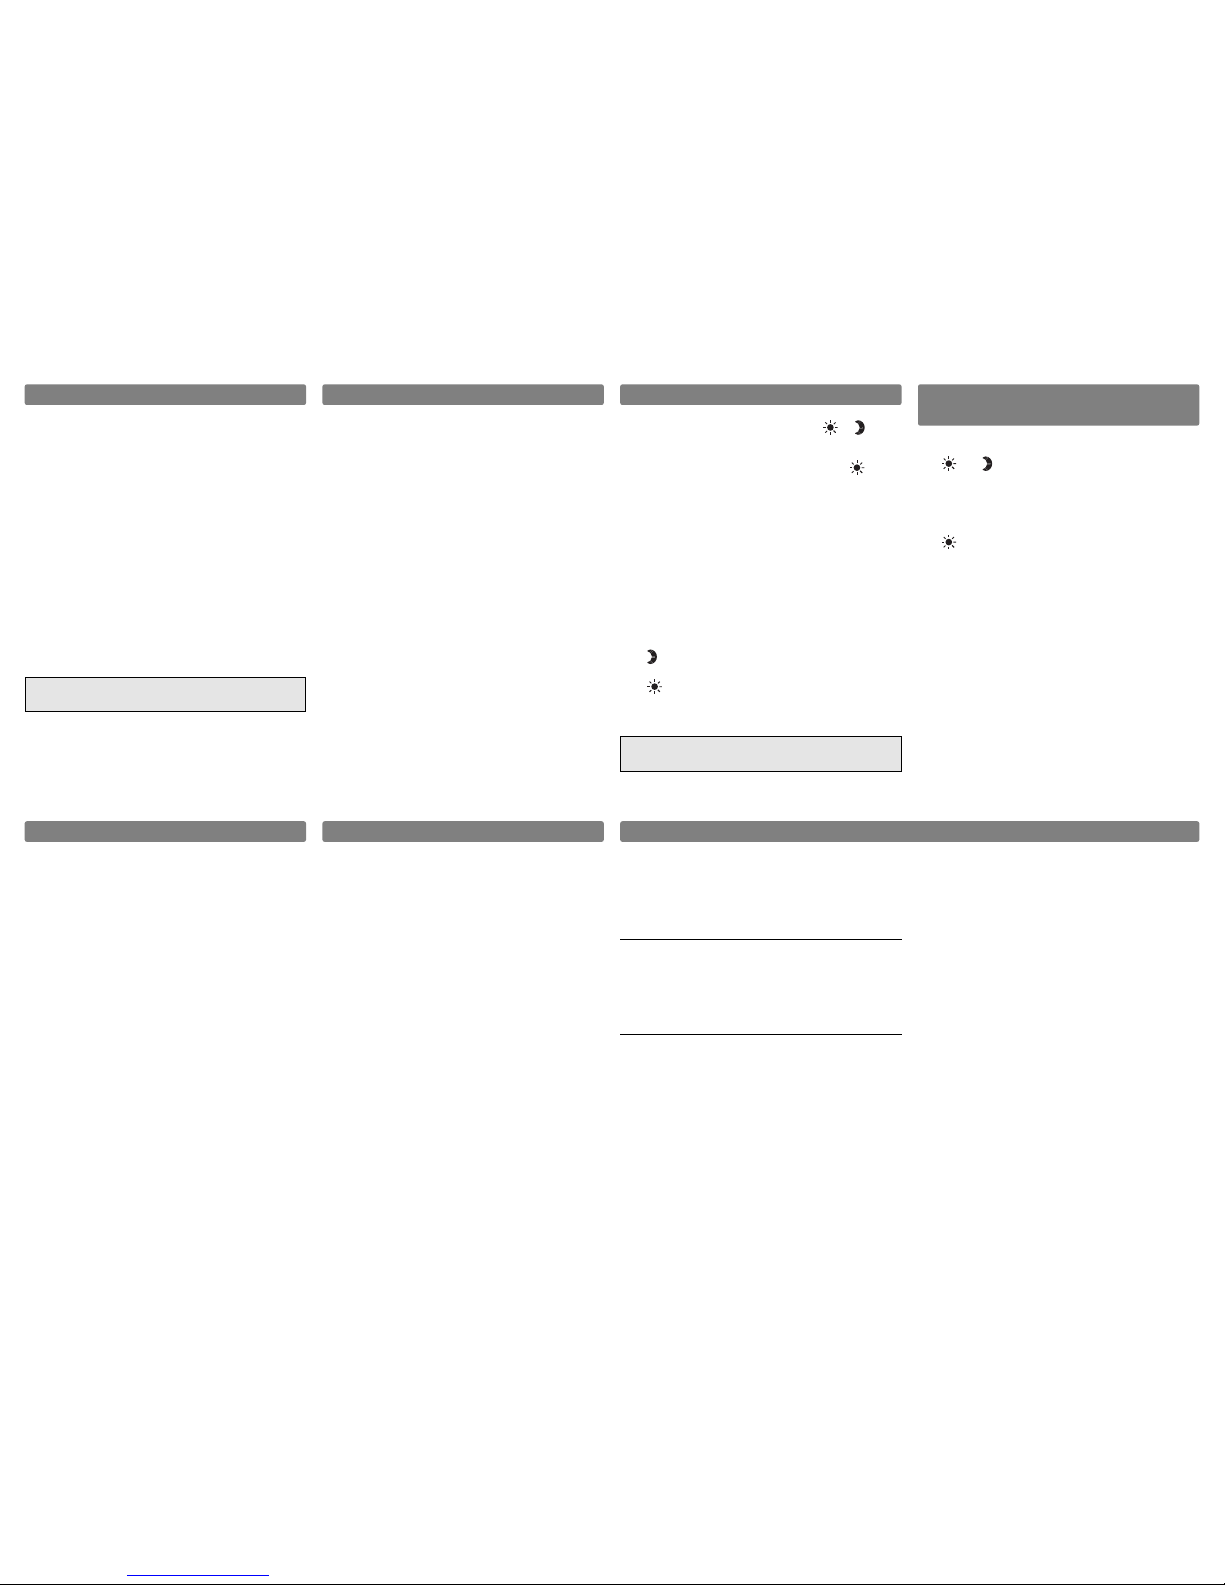
Operation
The LEDs show you the current mode: or .
The médio (Comfort -1°C) and modérato
(Comfort -2°C) modes are displayed by the LED.
The LEDS are off for the Frost Protection and Off
modes.
The heat emitter must be in the automatic setting for
the programmer to be able to control it.
Override
You can locally interrupt the current mode up to
the next change of order sent by the control unit.
Pressing the button carries out the override.
The change is shown as follows:
- the LED flashes during an override of
the Comfort mode to the Eco mode,
- the LED flashes during an override of
the Eco mode to the Comfort mode.
Important: an override is cancelled if there is
a power failure.
Home automation functions
The product is compatible with the following X2D
transmitters:
- door/window magnetic contacts (heating goes to
frost protection mode when a window is opened),
- telephone transmitters (remote control of
the heating),
- on/off, raise/lower and scenario home automation
remote controls (in automatic mode: the product
sets up a local override in Comfort or in Economy
mode),
- wireless alarm control units (in automatic mode:
switch to economy mode when the alarm is
activated and return to comfort mode when
the alarm is deactivated).
To associate the transmitters, refer to
the “Association” section.