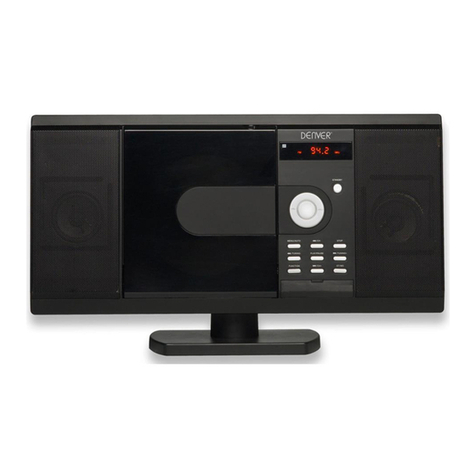
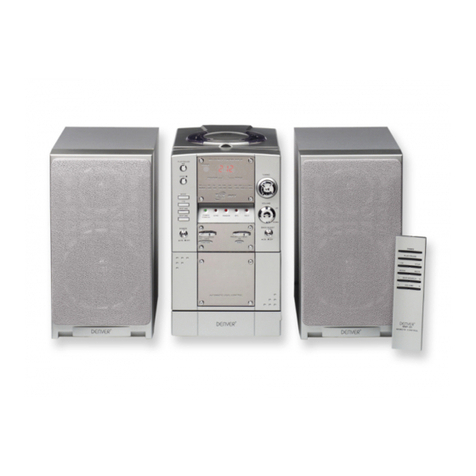
Denver MC-5400 User manual

MP3/CD/Radio
Music System
I N S T R U C T I O N M A N U A L
MC-5400
www.facebook.com/denverelectronics

WARNING
1. WARNING:Please refer the information on exterior bottom enclosure for electrical and safety
information before installing or operating the apparatus.
2. WARNING:To reduce the risk of fire or electric shock, do not exposethis apparatus to rain or
3. WARNING: The battery (battery or batteries or battery pack) shall not be exposed to excessive heat
such as sunshine, fire or the like.
4. WARNING: The mains plug is used as disconnect device, the disconnect device shall remain
readily operable.
5. Invisible laser radiation when open and interlocks defeated. Avoid exposure to beam of laser.
6. Correct Disposal of this product. This marking indicates that this product should not be disposed
with other household wastes throughout the EU. To prevent possible harm tothe environment or
human health from uncontrolled waste disposal, recycle it responsibly to promote the sustainable
reuse of material resources. To return your used device, please use the return and collection systems
or contact the retailer where the product was purchased. They can take this product for environmental
safe recycling.
7. No naked flame sources, such as lighted candles, should be placed on the apparatus.
8. Attention should be drawn to environmental aspects of battery disposal.
9. Use of the apparatus in moderate climates.
10. The rating and marking information are located at the bottom of the unit.
11. Excessive sound pressure from earphone and headphones can cause hearing loss.
12. The mains plug of unit should be obstructed or should be easily accessed during intended use.
13. To be completely disconnect the power input, the mains plug of apparatus shall be disconnected from the mains.
Danger of explosion if battery is incorrectly replaced.
Replace only with the same or equivalent type
CAUTION
moisture. The apparatus shall not be exposed to dripping or splashing and that no objects filled with
liquids, such as vases, shall be placed on apparatus.

WARNING
E-1
TO PREVENT FIRE OR SHOCK HAZARD DO NOT EXPOSE THIS APPLIANCE TO RAIN OR MOISTURE.
WARNING : SHOCK HAZARD-DO NOT OPEN
RISK OF ELECTRIC SHOCK
DO NOT OPEN
CAUTION
LIGHTNING FLASH WITH ARROWHEAD SYMBOL -
within an equilateral triangle, is intended to alert the
user to the presence of uninsulated dangerous
voltage within the products enclosure that may be of
sufficient magnitude to constitude a risk of electric
shock to persons.
EXCLAMATION POINT - within an equilateral triangle,
is used to indicate that a specific component shall be
replaced only by the component specified in that
documentation for safety reason.
The following label has been affixed to the unit, listing the proper procedure for working with the laser beam:
CLASS 1 LASER PRODUCT LABEL -
This label is attached to the place as illustrated to inform that the
apparatus contains a laser component.
WARNING LABEL INFORMING OF RADIATION -
This label is placed inside the unit. As shown in the illustration. To
warn against further measures on the unit. The equipment contains
a laser radiating laser rays according to the limit of laser product of
class 1.
CLASS 1 LASER PRODUCT
KLASS 1 LASER APPARAT
LUOKEN 1 LAISERLAITE
KLASSE 1 LASER PRODUKT

SAFETY INSTRUCTIONS
E-2
1. READ INSTRUCTIONS - All the safety and operating instructions should be read before the appliance is operated.
2. RETAIN INSTRUCTIONS - The safety and operating instruction should be retained for future reference.
3. HEEDWARNINGS - All warnings on the appliance and in the operating instructions should be adhered to.
4. FOLLOW INSTRUCTIONS - All operating instructions should be followed.
5. WATER AND MOISTURE- The appliance should not be used near water, for example, near a bathtub, washbowl,
.tnemesabtewaniroloopgnimmiws,butyrdnual,knisnehctik
6. VENTILATION - The appliance should be situated sothat its location or position does not interfere with its proper
ventilation. Do not place on bed, sofa, rug or similar surface that may block the ventilation openings, in a built-in
installation, such as a bookcase or cabinet that may impede the flow of air through the ventilation openings.
7. HEAT - The appliance should be situated away from heat sources such as radiators, stoves, or other appliances
(including amplifiers) that produce heat.
8. POWERSOURCE- The appliance should be connected to power supply only of the type described in the
operating instructions or as marked on the appliance.
9. POWER CORD PROTECTION- Power supply cords should be routed sothat they are not likely to be walked
on or pinched by items placed upon or against them.
10. POWERLINES -An outdoor antenna should be located away from power lines.
11. OBJECT and LIQUID ENTRY - Care should be taken so that objects do not fall and liquids are not spilled into
the enclosure through openings.
12. ESDWARNING - The display does not function properly or no reaction to operation of any the control may due
to the electrostatic discharge. Switch off and unplug the set. Reconnect after a few seconds.
13. DAMAGE REQUIRING SERVICE -The appliance should be serviced by qualified service personnel when:
a. The power-supply cord or plug has been damaged.
b. Objects have fallen into, or liquid has been spilled into the appliance enclosure.
c. The appliance has been exposed to rain.
d. The appliance has been dropped, or the enclosure damaged.
e. The appliance does not appear to operate normally.
14. SERVICING -The user should not attempt to service the appliance beyond that described in the user operating
instructions. All other servicing should be referred to qualified service personnel.
Notes:
a. Dirty or scratched CD may cause a skipping problem. Clean or replace the CD.
b. If an error display or malfunction occurs, disconncet the AC cord and remove all the batteries. Then turn the power
back on.
BEFORE OPERATION
Notes: CONCERNING COMPACT DISCS.
Since dirty, damaged or warped discs may damage the appliance, care should be taken of the followings items:
a. Usable compact discs. Use only compact disc with the mark shown below.
b. CD compact disc only with digital audio signals.
E-3
LOCATION OF CONTROL
AC POWER
You can power your appliance by plugging the AC power cord at the back of the appliance into a wall
AC power outlet. Check that the rated voltage of your appliance matches your local voltage.
POWER SOURCE
FM STEREO INDICATOR
PROGRAM
MODE
SKIP-
SKIP+
STOP
PLAY/PAUSE
CD DOOR
VOLUME +
VOLUME -
OPEN/CLOSE
ALBUM
MUTE
FUNCTION SELECTOR
BAND SELECTOR
TUNING
MINUTE
HOUR
TIME SET
AC CORD
FM ANTENNA
HEADPHONE JACK
LCD DISPLAY

BATTERY INSTALLATION
REMOTE CONTROL
1
7
8
2
3
6
5
4
Insert a “Cell” size batteries into the battery compartment. Be sure that the batteries are inserted
correctly to avoid damage to the remote control. Always remove the batteries when the remote
control will not be used for a long period of time, as this will cause leakage to the batteries and
subsequently damage to your set.
Notes:
- Power button on main unit must be ‘On’ in order for Remote Control to operate.
- If the distance required between the remote control and the appliance decreases, the ba tteries
are exhausted. In this case replace the batteries with new one.
SENSOR WINDOW OF THE RECEIVER
- Even if the remote control is operated within the effective range, its operation may be impossible if
there are any obstacies between the appliance and the remote control.
- If the remote control is operated near other appliances which generate infrared rays, or i f other
remote control devices using infrared rays are used near the appliance, it may operate incorrectly.
INSTALLING BATTERIES
Slide out cover and install single “Cell” battery
with polarities as shown
+
E-4
9
10
1. STANDBY
2. STOP
3. SKIP +
4. PLAY/PAUSE
5. VOLUME -
6. SKIP -
7. MODE
8. OPEN/CLOSE
9. ALBUM +
10. VOLUME +

GENERAL OPERATION
1. Set the “FUNCTION” selector to “RADIO” mode.
2. Select desired band by using the “BAND” selector.
3. Adjust radio frequency to your desired station by using the “TUNING” control.
4. Adjust the “VOLUME” control tothe desired level.
FM / FM-STEREO RECEPTION
-Set the “BAND” selector toFM mode for MONO reception.
- Set the “BAND” selector toFMST. mode for FMSTEREO reception. The Stereo indicator light up
to show FMST. mode.
RADIO OPERATION
E-5
FOR BETTER RECEPTION
FM - This appliance has aFM antenna located at the rear cabinet. This wire is completely unraveled
and extended for better reception.
AM - This appliance is equipped with a built - in directional ferrite AM antenna. Rotate the appliance
to get better reception.

CD / MP3 OPERATION
E-6
GENERAL OPERATION
PLAY / PAUSE Press to start playing CD / MP3 disc.
Press again to stop playing CD / MP3 operation temporarily.
Press again to resume playback.
SKIP + & Press to go to the next track or back to the previous track.
SKIP - Press and hold while playing until you find the point of the sound.
STOP Press to stop all CD / MP3 operation.
PLAYBACK
1. Set the “FUNCTION” selector to “CD” mode.
2. Open the CD door and place a CD / MP3 disc with the label up in the CD compartment.
3. Close the CD door.
4. Focus search is performed if disc is inside. Total number of tracks is read and appears on the
display.
5. Playbak willstart automatically from the first track.
OPEN / CLOSE Press to open/ close the CD door.
6. Adjust the “VOLUME” control to the desired level.
7. Press the “PLAY / PAUSE” button again when you want to stop temporarily.
8. Press the “STOP” button when finished.

CD / MP3 OPERATION
E-7
PROGRAM
Up to 20 tracks of CD disk, 99 tracks of MP3 disc can be programmed for disc play in any order.
Be sure to press the “STOP” button before use.
1. Press the “PROGRAM” button, the display will show “P01” and flash.
2. Select desired track by using the “SKIP +” or “SKIP -” button. ( You may select a desired album by
pressing “ALBUM” button for MP3 disc. )
3. Press the “PROGRAM” button again to confirm desired track into the program memory.
4. Repeat step 2 and 3 to enter additional tracks into the program memory.
5. When all the desired tracks have been programmed, press the “PLAY / PAUSE” button to play the
disc in the order you have programmed.
6. Press the “STOP” button twice to terminate programmed playback.
MODE
Press the “MODE” button before or during playing CD / MP3 disc,
each press switches the mode function as follows:
1 - REPEAT 1
2 - REPEAT ALBUM ( *MP3 ONLY )
3 - REPEAT ALL
4 - RANDOM
5 - NORMAL PLAYBACK
REPEAT 1
REP REP
ALBUM
REP
ALL
REPEAT
ALBUM
REPEAT
ALL
NORMAL
PLAYBACK
RAND
RANDOM

OTHER FEATURES
E-8
CLOCK SETTING
To adjust clock setting, make sure in CD mode.
1. Press the “TIME SET” button. (Do not release “TIME SET” button during time setting)
2. Press the “HOUR” button to set hour.
3. Press the “MIN” button to set minute.
4. Release all button to confirm setting. Confirmed setting will appear on the display.

Instructions on environment protection
All rights reserved
Copyright Denver Electronics
WWW.DENVER-ELECTRONICS.COM
Electric and electronic equipment and included batteries contains materials, components and
substances that can be hazardous to your health and the environment, if the waste material
(discarded electric and electronic equipment and batteries) is not handled correctly.
Electric and electronic equipment and batteries is marked with the crossed out trash can symbol,
seen below. This symbol signifies that electric and electronic equipment and batteries should not be
disposed of with other household waste, but should be disposed of separately.
As the end user it is important that you submit your used batteries to the approriate and designated
facility. In this manner you make sure that the batteries are recycled in accordance with legislature
and will not harm the environment.
All cities have established collection points, where electric and electronic equipment and batteries can
either be submitted free of charge at recycling stations and other collection sites, or be collected from
the households. Additional information is available at the technical department of your city.
www.facebook.com/denverelectronics

MP3/CD/Radio
MC-5400
Musik System
Brugsanvisning
www.facebook.com/denverelectronics

ADVARSEL
1. ADVARSEL: Læs venligst oplysningerne på ydersiden i bunden angående oplysninger om strømtilslutning og
sikkerhedsforskrifter, før apparatet installeres og anvendes.
2. ADVARSEL: For at formindske risikoen for brand eller elektrisk stød, må apparatet ikke udsættes for regn eller
fugt. Apparatet må ikke udsættes for vanddryp eller sjask, og ingen væskefyldte ting må stilles på apparatet, som
f.eks. vaser.
3. ADVARSEL: Batteriet (batteri eller batterier eller batteripakke) må ikke udsættes for stærk varme som f.eks.
solskin, åben ild eller lignende.
4. ADVARSEL: Hovedstikkontakten anvendes som frakoblingsanordning, og skal derfor skal være let tilgængelig.
5. Der forekommer usynlige laserstråler, hvis apparatet åbnes eller afskærmninger tvinges åbne. Undgå
at blive udsat for bestrålingen.
6. Korrekt bortskaffelse af dette produkt. Dette symbol angiver, at produktet ikke må bortskaffes sammen
med almindeligt husholdningsaffald, gældende overalt i EU. Til forebyggelse af miljøskader og sundhedsfare i
forbindelse med ukontrolleret skrotning skal apparatet bortskaffes korrekt, således at materialerne kan genbruges.
For at aflevere det opbrugte apparat bedes du henvende dig til din lokale affaldsordning eller kontakte
forhandleren, hvor produktet er købt. Forhandleren vil kunne tage sig af sikker bortskaffelse til genbrug.
7. Anbring ikke elementer med åben ild, som f.eks. tændte stearinlys, på apparatet.
8. Tag hensyn til miljøet ved bortskaffelse af batteriet.
9. Brug apparatet i miljøer med moderat temperatur.
10. Apparatets dataplade findes i bunden af enheden.
11. For høj lydstyrke i øreprop eller høretelefoner kan forårsage tab af hørelsen.
12. Hovedstrømtilslutningen bør ikke være utilgængelig, men skal være nemt tilgængelig under brugen.
13. For at afbryde strømforsyningen fuldstændigt skal apparatets ledning frakobles stikkontakten.
PAS PÅ!
Eksplosionsfare, hvis batteriet anbringes forkert.
Udskift kun batteriet med et nyt af samme eller tilsvarende type.

ADVARSEL
FOR AT FOREBYGGE BRAND ELLER ELEKTRISK STØD, MÅ DU IKKE UDSÆTTE APPARATET FOR REGN
ELLER FUGT.
PAS PÅ!
FARE FOR ELEKTRISK STØD
MÅ IKKE ÅBNES
ADVARSEL: FARE FOR ELEKTRISK STØD - MÅ IKKE ÅBNES
SYMBOL I FORM AF ET LYN MED PILHOVED inden i en ligesidet trekant har til formål at advare brugeren om, at
der er uisoleret farlig strømspænding inde i enhedens kabinet, som kan være stærk nok til at forårsage fare for at give
en person elektrisk stød.
UDRÅBSTEGN - inden i en ligesidet trekant anvendes til at angive, at en specifik del kun må udskiftes med en
tilsvarende del som specificeret i dokumentationen af sikkerhedshensyn.
Den følgende mærkat er anbragt på enheden, hvoraf den korrekte måde at betjene laserstrålen på fremgår:
KLASSE 1 LASERPRODUKT-MÆRKAT
Denne mærkat er anbragt på enheden for at informere om, at apparatet indeholder en laserkomponent.
ADVARSELSMÆRKAT FOR OPLYSNING OM BESTRÅLING -
Denne mærkat er anbragt inde i enheden. Som vist på tegningen som advarsel imod at foretage indgreb på enheden.
Udstyret indeholder en laserkomponent, der afgiver bestråling iht. begrænsninger for produkter i klasse 1.
DAN-1

SIKKERHEDSINSTRUKTIONER
1. LÆS INSTRUKTIONERNE - Alle instruktioner vedrørende sikkerhed og brug bør læses inden du anvender
apparatet.
2. OPBEVAR INSTRUKTIONERNE – Instruktioner om sikkerhed og brug bør opbevares for fremtidig brug.
3. VÆR OPMÆRKSOM PÅ ADVARSLER – Alle advarsler på anlægget og i brugsanvisningen bør iagttages.
4. FØLG INSTRUKTIONERNE – Alle brugs- og sikkerhedsanvisninger bør følges.
5. VAND OG FUGT - Apparatet bør ikke anvendes i nærheden af vand, f.eks. i nærheden af et badekar, håndvask,
køkkenvask, vaskekar, svømmebassin eller i en fugtig kælder.
6. VENTILATION - Apparatet bør anbringes på et sted, der ikke blokerer for enhedens ventilation. Anbring det ikke
på en seng, sofa, tæppe eller lignende overflade, som kan blokere for ventilationsåbningerne, ej heller
indbygget som f.eks. i en bogreol eller et skab, da det vil kunne forhindre lufttilstrømningen gennem
ventilationsåbningerne.
7. VARME - Apparatet bør anbringes i god afstand fra varmekilder, som f.eks. radiatorer, varmeovne eller andre
produkter (herunder højttalere), som udvikler varme.
8. STRØMFORSYNING - Apparatet bør kun tilsluttes en strømforsyning svarende til det i brugsanvisningen
angivne eller som markeret på apparatet.
9. BESKYT LEDNINGEN - Strømforsyningsledningen skal føres på en sådan måde, at der ikke trædes på den og
at ikke klemmes under ting placeret på den eller imod den.
10. STRØMFØRENDE LEDNINGEN - En evt. udendørs antenne skal anbringes i sikker afstand fra strømførende
ledningen.
11. INDFØRSEL AF GENSTANDE ELLER VÆSKE - Pas på at ingen genstande eller væske falder ind i eller
spildes gennem apparatets åbninger.
12. STATISK ELEKTRICITET - Såfremt displayet ikke fungerer korrekt eller kontrolknapper ikke reagerer, kan det
skyldes statisk elektricitet. Sluk for apparatet og træk stikket ud. Tilkobl det igen efter nogle få sekunder.
13. REPARATION AF SKADER - Apparatet bør sendes til reparation hos en kvalificeret tekniker, såfremt:
a. Strømforsyningskablet eller stikkontakten er beskadiget.
b. Genstande er faldet ind i eller væske er blevet spildt ind i apparatets kabinet.
c. Apparatet har været udsat for regn.
d. Apparatet er blevet tabt eller kabinettet er beskadiget.
e. Apparatet ikke ser ud til at fungere normalt.
14. SERVICEINDGREB - Brugeren bør ikke selv foretage reparationsindgreb på apparatet ud over hvad der er
angivet i brugsanvisningen. Henvend dig til kvalificeret servicepersonale i tilfælde af alle andre reparationer.
DAN-2

Bemærkninger:
a. Snavsede eller ridsede CD'er kan forårsage problemer med overhop. Rengør eller udskift CD'en.
b. I tilfælde af fejlmeddelelse eller fejlfunktion skal ledningens stik trækkes ud og alle batterier fjernes. Forsøg
herefter at tilkoble strømmen igen.
FØR BRUG
Bemærkninger: VEDRØRENDE COMPACT DISCS.
Da snavsede, beskadigede eller ridsede CD'er kan beskadige apparatet, bør man udvise forsigtighed med følgende:
a. Brugelige CD'er. Brug kun CD'er markeret som vist herunder.
b. Brug kun CD'er med digital lyd.
DAN-3

KONTROLKNAPPER OG -DELE
STRØMFORSYNINGSKILDE
FM STEREO INDIKATOR
PROGRAM
MODE
CD FORRIGE
CD NÆSTE
STOP
PLAY/PAUSE
CD-RUM
VOLUME OP
VOLUME NED
ÅBN/LUK CD-RUM
ALBUM
MUTE
FUNKTIONSVÆLGER
BÅNDVÆLGER
RADIO TUNING
MINUT
TIME
INDSTIL TID
STRØMKABEL
FM ANTENNE
INDGANG TIL HOVEDTELEFONER
LCD DISPLAY
AC STRØMFORSYNING
Du tilkobler strømforsyning til apparatet ved at tage AC strømkablet fra bagsiden af apparatet og
tilslutte stikket til en AC stikkontakt. Kontroller om spændingen markeret på dit apparat svarer til den
lokale strømspænding.
DAN-4

FJERNBETJENING
INSTALLATION AF BATTERIER
Indsæt et cellebatteri i batterirummet. Kontroller at batteriet er indsat korrekt for at undgå skade på
fjernbetjeningen. Fjern altid batteriet, hvis fjernbetjeningen ikke skal anvendes i et længere tidsrum, da
der ellers kan opstå lækage i batteriet, som forårsager skade på enheden.
INSTALLATION AF BATTERIER
Træk afskærmningen væk og indsæt et enkelt cellebatteri med polerne vendt som vist på tegningen
Bemærkninger:
- Hvis det er nødvendigt at formindske afstanden mellem fjernbetjeningen og apparatet, er batterierne
ved at være opbrugte. Udskift i så fald batterierne med nye.
- Tænd/sluk-knappen på hovedenheden skal være på 'On' for at fjernbetjeningen kan fungere.
MODTAGERENS SENSOR-VINDUE
- Selv om fjernbetjeningen anvendes indenfor den funktionsrigtige afstand, kan det være umuligt at få
den til at fungere, hvis der befinder sig forhindringer mellem apparatet og fjernbetjeningen.
- Hvis fjernbetjeningen bruges i nærheden af andre apparater, der afgiver infrarøde stråler, eller hvis
andre fjernbetjeningsenheder med infrarøde stråler anvendes i nærheden af apparatet, fungerer
apparatet måske ikke korrekt.
DAN-5
1
7
8
2
3
6
5
4
9
10
1. STANDBY
2. STOP
3. CD NÆSTE
4. PLAY/PAUSE
5. VOLUME NED
6. CD FORRIGE
7. MODE
8. ÅBN/LUK CD-RUM
9. ALBUM NÆSTE
10. VOLUME OP

BRUG AF CD-AFSPILLEREN
GENEREL BRUG
SPIL / PAUSE Tryk for at starte afspilning af CD.
Tryk igen for at stille afspilningen på midlertidig pause.
Tryk igen for at genoptage afspilningen.
SKIP + , SKIP- Tryk for at gå videre til næste spor eller tilbage til forrige spor.
Tryk og hold under afspilningen, indtil du finder det ønskede sted
på sound-track'et.
STOP Tryk for at standse al CD-aktivitet.
AFSPILNING
1. Sæt "FUNKTIONSVÆLGEREN" hen på "CD".
2. Åbn CD-lågen og anbring en CD med mærkaten opad i CD-rummet.
3. Luk CD-lågen.
4. Afspilleren gennemsøger disken i diskrummet. Antallet af lydspor i alt på disken vises på
skærmen.
6. Juster lydstyrken med "VOLUME" til det ønskede niveau.
5. Afspilningen starter automatisk fra første skæring på disken.
7. Tryk på "PLAY / PAUSE"-knappen igen, hvis du vil standse afspilningen midlertidigt.
8. Tryk på "STOP"-knappen, når du er færdig med at lytte.
DAN-6
ÅBN/LUK CD-RUM Tryk for ÅBN/LUK CD-RUM
BRUG AF RADIOEN
GENEREL BRUG
1. Sæt "FUNKTIONSVÆLGEREN" hen på "RADIO".
2. Vælg den ønskede bølgelængde ved hjælp af radiobølgevælgeren.
3. Finjuster radiofrekvensen til den ønskede station ved hjælp af "TUNING"-knappen.
4. Juster lydstyrken med "VOLUME" til det ønskede niveau.
FM / FM-STEREO MODTAGELSE
- Indstil "BAND"-vælgeren til FM for modtagelse i MONO.
- Indstil "BAND"-vælgeren til FM ST. for modtagelse i FM STEREO. Stereo-indikatoren lyser for at
vise, at apparatet sender FM i stereo.
FOR BEDRE MODTAGELSE
FM - Dette apparat har en FM-antenne, der befinder sig på bagsiden af kabinettet. Denne
antenneledning kan rulles helt ud og udtrækkes for at få en bedre modtagelse.
AM - Dette apparat er udstyret med en indbygget retningsbestemt AM-antenne. Drej apparatet for at få
en bedre modtagelse.

BRUG AF CD-AFSPILLEREN
PROGRAM
Afspilning af op til 20 lydspor på CD’en, (99 lydspor på en MP3 CD) kan programmeres til at foregå i
den ønskede rækkefølge
Husk at trykke på "STOP"-knappen før brugen.
1. Tryk på "PROGRAM"-knappen, så viser displayet "P01" og blinker.
2. Vælg det ønskede lydspor ved hjælp af "SKIP+" eller "SKIP-" knappen.(Du kan vælge et bestemt
album på en MP3 CD ved at trykke på ALBUM knappen)
3. Tryk på "PROGRAM"-knappen igen for at bekræfte det ønskede lydspor til programhukommelsen.
4. Gentag trin 2 og 3 for at tilføje yderligere spor i programhukommelsen.
5. Når alle de ønskede lydspor er programmeret: Tryk på “PLAY / PAUSE”-knappen for at afspille
disken i den rækkefølge, du har programmet, så blinker program-indikatoren.
6. Tryk på "STOP"-knappen en gang for at afslutte den programmerede afspilning, så slukkes
program-indikatoren.
MODE
Tryk på MODE knappen før eller under afspilning af CD / MP3 CD for at skifte modus som
nedenstående:
1 – GENTAG
2 – GENTAG ALBUM (Kun MP3 CD)
3 – GENTAG ALLE
4 – BLAND LYDSPOR
5 – NORMAL AFSPILNING
DAN-7
GENTAG
REP REP
ALBUM REP
ALL
GENTAG
ALBUM
GENTAG
ALLE
NORMAL
AFSPILNING
RAND
BLAND
LYDSPOR
Table of contents
Languages:
Other Denver Stereo System manuals

Denver
Denver MCA-220DAB+ User manual

Denver
Denver MRD-166 User manual

Denver
Denver MDA-260 User manual

Denver
Denver MMP-355 User manual

Denver
Denver MMP 351 User manual

Denver
Denver MCA-210 User guide

Denver
Denver MRP-161 User manual

Denver
Denver MRD-51 User manual

Denver
Denver MCA-160 User manual

Denver
Denver MCI-101 User manual

Denver
Denver MC-5230DAB+ User manual

Denver
Denver MCD-30 User manual

Denver
Denver MMP-390 User manual

Denver
Denver MCB-700 User manual

Denver
Denver MCA - 150 User manual

Denver
Denver MC-7100S User manual

Denver
Denver MDA-250 User manual

Denver
Denver MCD-63 User manual

Denver
Denver MC-7150 User manual

Denver
Denver MC-5230DAB+ User manual