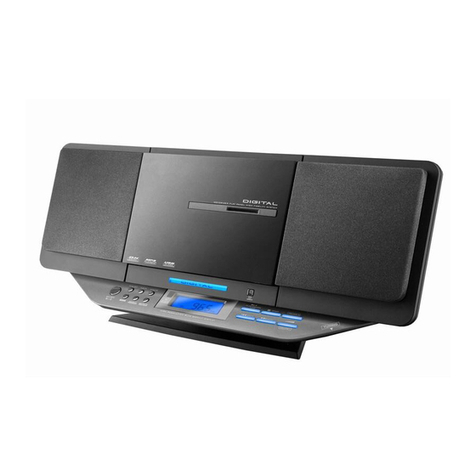
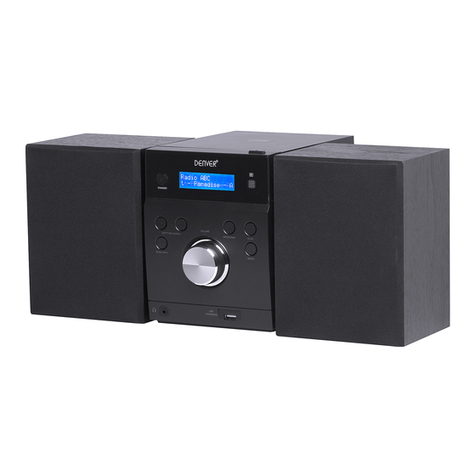
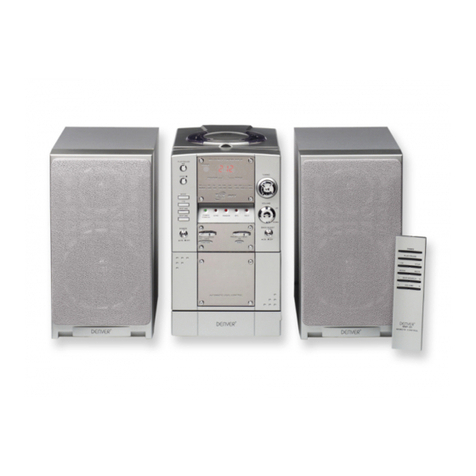
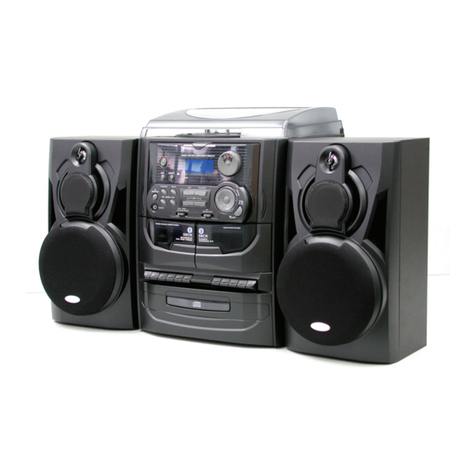
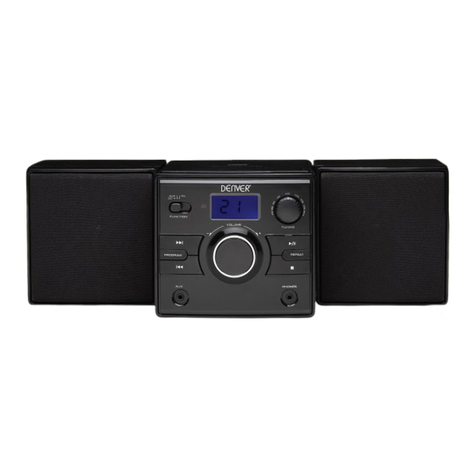
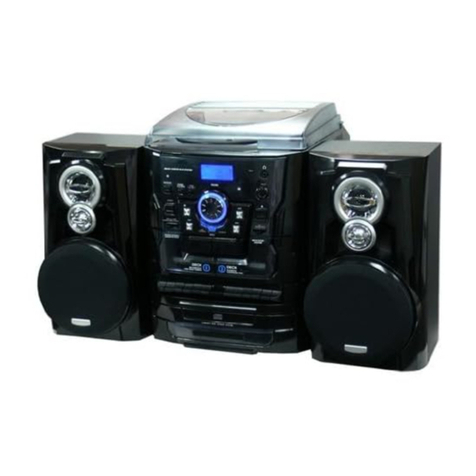
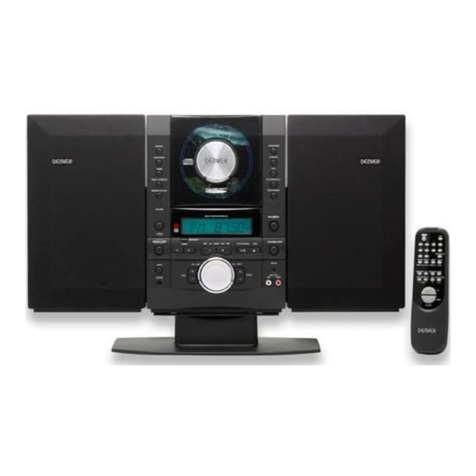
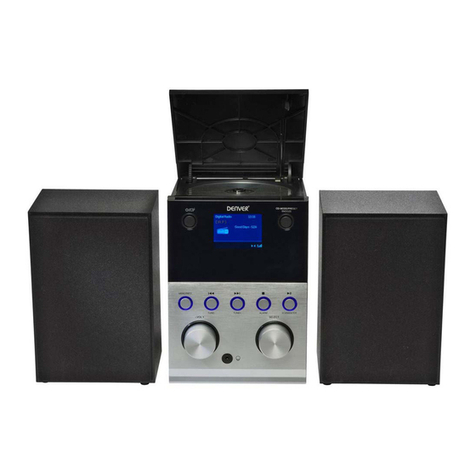
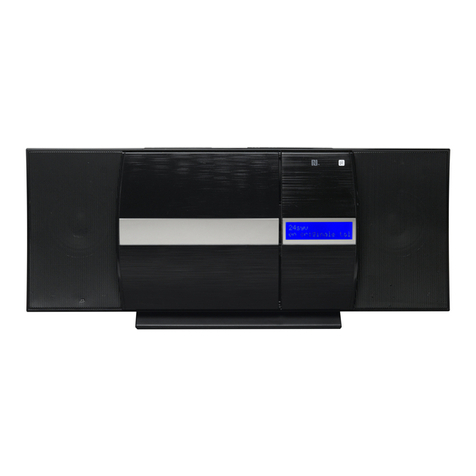
Denver MCB-700 User manual

BLUETOOTH/USB/MP3/
CD/RadioMicro System
I N S T R U C T I O N M A N U A L
MCB-700

WARNING
1. WARNING:Please refer the information on exterior bottom enclosure for electrical and safety
information before installing or operating the apparatus.
2. WARNING:To reduce the risk of fire or electric shock, do not expose this apparatus to rain or
3. WARNING: The battery (battery or batteries or battery pack) shall not be exposed to excessive heat
such as sunshine, fire or the like.
4. WARNING: The mains plug is used as disconnect device, the disconnect device shall remain
readily operable.
5. Invisible laser radiation when open and interlocks defeated. Avoid exposure to beam of laser.
6. Correct Disposal of this product. This marking indicates that this product should not be disposed
with other household wastes throughout the EU. To prevent possible harm to the environment or
human health from uncontrolled waste disposal, recycle it responsibly to promote the sustainable
reuse of material resources. To return your used device, please use the return and collection systems
or contact the retailer where the product was purchased. They can take this product for environmental
safe recycling.
7. No naked flame sources, such as lighted candles, should be placed on the apparatus.
8. Attention should be drawn to environmental aspects of battery disposal.
9. Use of the apparatus in moderate climates.
10. The rating and marking information are located at the back of the unit.
11. Excessive sound pressure from earphone and headphones can cause hearing loss.
12. The mains plug of unit should be obstructed or should be easily accessed during intended use.
13. To be completely disconnect the power input, the mains plug of apparatus shall be disconnected from the mains.
Danger of explosion if battery is incorrectly replaced.
Replace only with the same or equivalent type
CAUTION
moisture. The apparatus shall not be exposed to dripping or splashing and that no objects filled with
liquids, such as vases, shall be placed on apparatus.
This equipment is a Class II or double insulated electrical appliance. It has been designed in such a way
that it does not require a safety connection to electrical earth.
14.

WARNING
E-1
TO PREVENT FIRE OR SHOCK HAZARD DO NOT EXPOSE THIS APPLIANCE TO RAIN OR MOISTURE.
WARNING : SHOCK HAZARD-DO NOT OPEN
RISK OF ELECTRIC SHOCK
DO NOT OPEN
CAUTION
LIGHTNING FLASH WITH ARROWHEAD SYMBOL -
within an equilateral triangle, is intended to alert the
user to the presence of uninsulated dangerous
voltage within the products enclosure that may be of
sufficient magnitude to constitude a risk of electric
shock to persons.
EXCLAMATION POINT - within an equilateral triangle,
is used to indicate that a specific component shall be
replaced only by the component specified in that
documentation for safety reason.
The following label has been affixed to the unit, listing the proper procedure for working with the laser beam:
CLASS 1 LASER PRODUCT LABEL -
This label is attached to the place as illustrated to inform that the
apparatus contains a laser component.
WARNING LABEL INFORMING OF RADIATION -
This label is placed inside the unit. As shown in the illustration. To
warn against further measures on the unit. The equipment contains
a laser radiating laser rays according to the limit of laser product of
class 1.
CLASS 1 LASER PRODUCT
KLASS 1 LASER APPARAT
LUOKEN 1 LAISERLAITE
KLASSE 1 LASER PRODUKT

SAFETY INSTRUCTIONS
1. READ INSTRUCTIONS - All the safety and operating instructions should be read before the appliance is operated.
2. RETAIN INSTRUCTIONS - The safety and operating instruction should be retained for future reference.
3. HEED WARNINGS - All warnings on the appliance and in the operating instructions should be adhered to.
4. FOLLOW INSTRUCTIONS - All operating instructions should be followed.
5. WATER AND MOISTURE - The appliance should not be used near water, for example, near a bathtub, washbowl,
.tnemesabtewaniroloopgnimmiws,butyrdnual,knisnehctik
6. VENTILATION - The appliance should be situated so that its location or position does not interfere with its proper
ventilation. Do not place on bed, sofa, rug or similar surface that may block the ventilation openings, in a built-in
installation, such as a bookcase or cabinet that may impede the flow of air through the ventilation openings.
7. HEAT - The appliance should be situated away from heat sources such as radiators, stoves, or other appliances
(including amplifiers) that produce heat.
8. POWER SOURCE - The appliance should be connected to power supply only of the type described in the
operating instructions or as marked on the appliance.
9. POWER CORD PROTECTION - Power supply cords should be routed so that they are not likely to be walked
on or pinched by items placed upon or against them.
10. POWER LINES - An outdoor antenna should be located away from power lines.
11. OBJECT and LIQUID ENTRY - Care should be taken so that objects do not fall and liquids are not spilled into
the enclosure through openings.
12. ESD WARNING - The display does not function properly or no reaction to operation of any the control may due
to the electrostatic discharge. Switch off and unplug the set. Reconnect after a few seconds.
13. DAMAGE REQUIRING SERVICE - The appliance should be serviced by qualified service personnel when:
a. The power-supply cord or plug has been damaged.
b. Objects have fallen into, or liquid has been spilled into the appliance enclosure.
c. The appliance has been exposed to rain.
d. The appliance has been dropped, or the enclosure damaged.
e. The appliance does not appear to operate normally.
14. SERVICING - The user should not attempt to service the appliance beyond that described in the user operating
instructions. All other servicing should be referred to qualified service personnel.
Notes:
a. Dirty or scratched CD may cause a skipping problem. Clean or replace the CD.
b. If an error display or malfunction occurs, disconncet the AC cord and remove all the batteries. Then turn the power
back on.
BEFORE OPERATION
Notes: CONCERNING COMPACT DISCS.
Since dirty, damaged or warped discs may damage the appliance, care should be taken of the followings items:
a. Usable compact discs. Use only compact disc with the mark shown below.
b. CD compact disc only with digital audio signals.
E-2
AC POWER
You can power your appliance by plugging the AC power cord at the back of the appliance into a wall
AC power outlet. Check that the rated voltage of your appliance matches your local voltage.
POWER SOURCE
LOCATION OF CONTROL
1.) LCD DISPLAY
2.) BLUETOOTH INDICATOR
3.) REMOTE SENSOR
4.) TUNING CONTROL
5.) SKIP -
6.) ON/ OFF/ FUNCTION
7.) PLAY/ PAUSE/ STOP
8.) MODE/ DISPLAY/ CLOCK SET
9.) USB SLOT
10.) SKIP +
11.) VOL - / AL1
12.) VOL +/ AL2
14.) SPEAKER JACKS ( L / R )
15.) FM AUTENNA
16.) AUX-IN JACK
17.) AC POWER CORD
E-3
13.) FOLDER
18.) SNOOZE
19.) CD DOOR OPEN/ CLOSE
2
1
3
5
6
8
9
7
10
4
11
12
13
14
17
19
16
18
15

BATTERY INSTALLATION
REMOTE CONTROL
1 7
8
9
10
11
12
2
3
4
5
6
1. ON/ OFF
2. STOP
3. SKIP -
4. VOL -/ AL 1
5. ALBUM -
6. MODE/ CLOCK
7. FUNCTION
8. PLAY/ PAUSE
9. SKIP +
10. VOL +/AL 2
11. ALBUM +
12. PROGRAM
Insert a “Cell” size batteries into the battery compartment. Be sure that the batteries are inserted
correctly to avoid damage to the remote control. Always remove the batteries when the remote
control will not be used for a long period of time, as this will cause leakage to the batteries and
subsequently damage to your set.
Notes:
- Power button on main unit must be ‘On’ in order for Remote Control to operate.
- If the distance required between the remote control and the appliance decreases, the batteries
are exhausted. In this case replace the batteries with new one.
SENSOR WINDOW OF THE RECEIVER
- Even if the remote control is operated within the effective range, its operation may be impossible if
there are any obstacies between the appliance and the remote control.
- If the remote control is operated near other appliances which generate infrared rays, or if other
remote control devices using infrared rays are used near the appliance, it may operate incorrectly.
INSTALLING BATTERIES
Slide out cover and install single “Cell” battery
with polarities as shown
+
E-4

GE
FM-STEREO RECEPTION
NERAL OPERATION
1. Press “FUNCTION” to enter “RADIO FM” or “RADIO AM” mode.
2. Adjust radio frequency to your desired station by using the “TUNING CONTROL”.
3. Adjust volume by pressing “VOL+” or “VOL-”.
RADIO OPERATION
FOR BETTER RECEPTION
FM - This appliance has a FM antenna located at the rear cabinet. This wire is completely unraveled
and extended for better reception.
AM - This appliance is equipped with a built - in directional ferrite AM antenna. Rotate the appliance
to get better reception.
E-5
- The “STEREO” icon will show on display when unit searched the FM STEREO RECEPTION.
MODE:
1. Press “FUNCTION” once for power on.
2. Press “FUNCTION” to enter the next mode.
3. Press & hold “FUNCTION” for power off.
GENERAL OPERATION
RADIO FM RADIO AM CD USB AUX-IN BLUETOOTH

CD / MP3 OPERATION
GENERAL OPERATION
PLAY / PAUSE / Press to start playing CD / MP3 disc.
Press again to stop playing CD / MP3 operation temporarily.
Press again to resume playback.
SKIP + &
SKI -P
Press and hold to stop all CD / MP3 operation.
PLAYBACK
1. Press “FUNCTION” to enter “CD” mode.
2. Open the CD door and place a CD / MP3 disc with the label up in the CD compartment.
3. Close the CD door.
4. Focus search is performed if disc is inside.
5
6.
. Playback will start automatically from the first track.
Adjust the volume by pressing “VOL+” or “VOL-”.
Press the “ ” button once when you want to stop playback temporarily.
7.
Press to go to the next track or back to the previous track.
Press and hold while playing until you find the point of the sound.
E-6
STOP
Press and hold “ ” button to stop the CD operation.
8.

MODE
Press the “MODE” button before or during playing CD / MP3 disc,
each press switches the mode function as follows:
1 - REPEAT 1
2 - REPEAT ALBUM ( *MP3 ONLY )
3 - REPEAT ALL
4 - RANDOM
5 - NORMAL PLAYBACK
REPEAT 1
REP REP
ALBUM REP
ALL
REPEAT
ALBUM REPEAT
ALL
NORMAL
PLAYBACK
RAND
RANDOM
CD / MP3 OPERATION
PROGRAM
Be sure to press the “STOP” button before use.
1. Press the “MODE” button, the display will show “P01” and flash.
2. Select desired track by using the “SKIP +” or “SKIP -” button. ( You may select a
desired album by pressing the “ALBUM” button. )
3. Press the “MODE” button again to confirm desired track into the program memory.
4. Repeat step 2 and 3 to enter additional tracks into the program memory.
5. When all the desired tracks have programmed, press the “ ” butto to play the disc
in the order you have programmed.
6. Press & hold “ ” twice to terminate programmed playback.
Up to 20 tracks fo CD disc, 99 tracks of MP3 disc can be programmed for disc play in any order.
E-7
n once

PROGRAM, MODE
The operation of PROGRAM, MODE are as the same as that of CD / MP3. Please refer to CD / MP3
OPERATION.
USB OPERATION
GENERAL OPERATION
Press to start playing tracks from the USB.
Press again to stop playing USB operation temporarily.
P
Press and hold to stop all USB operation.
ress again to resume playback.
SKIP + & Press to go to the next track or back to the previous track.
SKIP - Press and hold while playing until you find the point of the sound.
PLAYBACK
1. P
Press “FUNCTION” to enter USB mode.
lug or slot in USB device to the port.2.
3.
4. P
Press and hold ” “ button to stop.
layback will start automatically from the first track.
5. Press the “ ” button again, playback will start from the first track.
E-8
PLAY / PAUSE / STOP

BLUETOOTH OPERATION
E-9
1. Press “FUNCTION” to enter bluetooth mode, “bt” will show on screen.
2. Bluetooth indication will flash with blue light and start searching for device pairing.
3. Switch on the bluetooth function on the device.
4. Search for the unit named with “MCB-700” (available to re-name), connect with password “0000”
and click for pairing.
5. Once connection success, the bluetooth indication blue light will always on.
6. Open the music center apps to start playing music.
Remark:
1. Unit having memory function which will automatic search for the last pairing device.
2. To connect with other device, press “MODE” button to disconnect the existing pairing.
CLOCK SETTING
OTHER FEATURES
1. Use a 3.5mm Male-to-Male Stereo cable to connect any external audio device with a 3.5mm
Headphone or Line-Out jack to the AUX IN jack on the front panel of the stereo.
2 . Start playback on the external audio device. Adjust the volume on the audio device (do not set the
volume too high to avoid distortion). You may also adjust the volume on the appliance.
3. To control playback function, use the controls provided by the external audio device.
AUX IN
1. Make sure the unit is in standby mode.
2. Press and hold “CLOCK SET” button untill the unit entered the year setting.
3. Press “SKIP+” or “SKIP-” to select the desired year.
4. Press “CLOCK SET” button once to confirm.
5. Repeat step 3&4 for setting Month,Date,12/24hr,Hour and Minute.

All rights reserved Copyright Denver Electronics
Electric and electronic equipment contains materials, components and substances that can be
hazardous to your health and the environment, if the waste material (discarded electric and
electronic equipment) is not handled correctly.
Electric and electronic equipment is marked with the crossed out trash can symbol, seen below.
This symbol signifies that electric and electronic equipment should not be disposed of with other
household waste, but should be disposed of separately.
All cities have established collection points, where electric and electronic equipment can either be
submitted free of charge at recycling stations and other collection sites, or be collected from the
households. Additional information is available at the technical department of your city.
Imported by:
Inter Sales A/S
WWW.DENVER-ELECTRONICS.COM
www.facebook.com/denverelectronics
www.denver-electronics.com

BLUETOOTH/USB/MP3/
CD/RadioMikrosystem
BEDIENUNGSANLEITUNG
MCB-700

ACHTUNG
1. WARNUNG: Siehe Sicherheitshinweise unter dem Gerät, bevor Sie es anschließen und in Betrieb nehmen.
2. WARNUNG: Zur Vermeidung von Feuer und Stromschlag setzen Sie das Gerät nicht Regen oder Feuchtigkeit
aus. Setzen Sie das Gerät nicht Spritzwasser oder Tropfwasser aus und stellen Sie keine mit Wasser gefüllten
Gegenstände auf dem Gerät ab.
3. WARNUNG: Setzen Sie Batterien nicht übermäßiger Hitze, direkter Sonneneinstrahlung oder Feuer aus.
4. WARNUNG: Der Netzstecker dient dem vollständigen Abtrennen des Geräts vom Stromnetz; die Steckdose
muss jederzeit frei zugänglich sein.
7. Stellen Sie keine offenen Flammen (wie brennende Kerzen) auf dem Gerät ab.
8. Entsorgen Sie Batterien stets umweltgerecht.
9. Benutzen Sie das Gerät nur in moderatem Klima.
10. Das Typenschild befindet sich auf der Geräterückseite.
11. Überhöhter Schalldruck von Ohrhörern kann zu Hörschäden führen.
12. Der Netzstecker muss jederzeit frei zugänglich sein.
13. Zum vollständigen Abtrennen des Geräts vom Stromnetz müssen Sie den Netzstecker ziehen.
angeschlossen werden.
werden darf. Zur Vermeidung von Umwelt- oder Gesundheitsschäden durch unkontrollierte Entsorgung recyceln Sie
das Gerät auf verantwortungsvolle Weise, um die Wiederverwertung von natürlichen Ressourcen zu unterstützen.
Bitte geben Sie das Gerät an einer Sammelstelle für Elektroschrott ab oder wenden Sie sich an Ihren Fachhändler.
Hier wird das Gerät für umweltgerechtes Recycling entgegengenommen.
14. Das Gerät entspricht der Klasse II und ist doppelt isoliert. Es muss nicht an einer geerdeten Steckdose
5. Unsichtbare Laserstrahlung, wenn das Gerät geöffnet und die Sicherungsmechanismen umgangen
Un werden. Blicken Sie nicht direkt in den Laserstrahl.
Entsorgung: Dieses Symbol bedeutet, dass das Gerät innerhalb der EU nicht mit dem Hausmüll entsorgt
6.
Explosionsgefahr, wenn Batterien nicht korrekt eingesetzt werden.
Ersetzen Sie Batterien nur mit gleichwertigen Batterien.
VORSICHT

DE-1
ZUR VERMEIDUNG VON FEUER UND STROMSCHLAG SETZEN SIE DAS GERÄT NICHT REGEN ODER
FEUCHTIGKEIT AUS.
WARNUNG: STROMSCHLAGGEFAHR - NICHT ÖFFNEN
STROMSCHLAGGEFAHR -
NICHT ÖFFNEN
VORSICHT
Der BLITZ -
im gleichseitigen Dreieck weist auf
Hochspannung im Gerät hin, die zu
einem Stromschlag führen kann.
im gleichseitigen Dreieck weist auf
Sicherheitshinweise in der
Dokumentation des Geräts hin.
Das AUSRUFUNGSZEICHEN -
Der nachstehende Aufkleber auf dem Gerät bedeutet, dass das Gerät mit einem Laserstrahl arbeitet:
WARNAUFKLEBER STRAHLUNG -
Dieser Aufkleber befindet sich im Gerät. Wie in der Abbildung
dargestellt. Zur Warnung vor einem weiteren Öffnen des Geräts.
Das Gerät arbeitet mit einem Laserstrahl der Klasse 1.
CLASS 1 LASER PRODUCT
KLASS 1 LASER APPARAT
LUOKEN 1 LAISERLAITE
KLASSE 1 LASER PRODUKT
ACHTUNG
KLASSE 1 LASERPRODUKT -
Der Aufkleber auf dem Gerät bedeutet, dass das Gerät
mit einem Laserstrahl arbeitet.

1. ALLE ANWEISUNGEN LESEN - Vor dem Betrieb des Gerätes sollten alle Sicherheits- und
Bedienungshinweise gelesen werden.
2. ANWEISUNGEN AUFBEWAHREN - Die Sicherheits- und Bedienungshinweise sollten für künftiges
Nachschlagen aufbewahrt werden.
3. WARNUNGEN BEACHTEN - Die Warnungen auf dem Gerät und in den Bedienungsanleitungen müssen
beachtet werden.
4. ANLEITUNGEN BEFOLGEN - Alle Sicherheits- und Bedienungshinweise müssen befolgt werden.
5. WASSER UND FEUCHTIGKEIT - Dieses Gerät nicht in der Nähe von Wasser verwenden, z.B. in der Nähe
einer Badewanne, eines Waschbeckens, einer Küchenspüle, eines Waschzubers, in einem feuchten
Keller, in der Nähe eines Schwimmbeckens usw.
7. WÄRME - Das Gerät muss fern von Wärmequellen wie Heizkörpern, Heizungen, Öfen und anderen
Wärme erzeugenden Geräten (einschließlich Verstärker) aufgestellt werden.
8. STROMVERSORGUNG - Das Gerät darf nur mit der auf dem Typenschild angegebenen
Stromversorgungsart betrieben werden.
9. NETZKABELSCHUTZ - Netzkabel sollten so verlegt werden, dass möglichst nicht darauf getreten wird
und dass sie nicht eingeklemmt werden, mit besonderer Beachtung der Kabel an Steckern,
Verlängerungskabeln und dem Austritt des Kabels aus dem Gerät.
10. HOCHSPANNUNGSKABEL - Eine Hausantenne darf nicht in unmittelbarer Nähe von
Hochspannungsleitungen installiert werden.
11. EINDRINGEN VON FREMDKÖRPERN UND FLÜSSIGKEIT - Niemals Objekte irgendwelcher Art durch die
Öffnungen in das Gerät einführen, da diese unter Hochspannung stehende Teile berühren oder
kurzschließen können, wodurch es zu Feuer oder Stromschlag kommen kann. Niemals Flüssigkeiten
irgendwelcher Art auf dem Gerät verschütten.
14. WARTUNG - Versuchen Sie nicht, dieses Gerät selbst zu reparieren, da Sie sich durch das Öffnen bzw.
Entfernen von Abdeckungen hohen Spannungen und sonstigen Gefahren aussetzen können. Wartung
nur durch den autorisierten Kundendienst.
13. BESCHÄDIGUNGEN, DIE EINE REPARATUR ERFORDERN - Ziehen Sie den Netzstecker und wenden Sie
sich an einen autorisierten Kundendienst, wenn eine der folgenden Bedingungen vorliegt:
a. Netzkabel oder Stecker sind beschädigt.
b. Flüssigkeiten oder Fremdkörper sind in das Gerät eingedrungen.
c. Das Gerät war Regen oder Wasser ausgesetzt.
d. Das Gerät ist heruntergefallen und das Gehäuse wurde beschädigt.
e. Das Gerät funktioniert, auch beim Befolgen der Bedienungsanleitung, nicht normal.
12. ELEKTROSTATISCHE ENTLADUNG - Das Display funktioniert nicht korrekt, wenn das Gerät
elektrostatischer Entladung ausgesetzt war. Schalten Sie das Gerät aus und ziehen Sie den Netzstecker.
Schließen Sie es nach einigen Sekunden wieder an.
6. VENTILATION - Schlitze und Öffnungen im Gehäuse dienen der Ventilation. Sie sind für den zuverlässigen
Betrieb des Geräts und zum Schutz vor Überhitzung erforderlich und dürfen nicht blockiert oder abgedeckt
werden. Die Öffnungen sollten niemals dadurch blockiert werden, dass das Gerät auf ein Bett, ein Sofa,
einen Teppich oder eine ähnliche Fläche gestellt wird. Das Gerät sollte nur dann in Einbauinstallierung
wie in einem Bücherschrank oder einem Regal verwendet werden, wenn angemessene Ventilation
vorgesehen ist bzw. die Anweisungen des Herstellers befolgt worden sind.
DE-2
TURVALLISUUSOHJEET
Hinweise:
a. Eine verschmutzte oder verkratzte CD kann springen. Reinigen oder ersetzen Sie die CD.
b. Bei Fehleranzeigen oder Fehlfunktionen ziehen Sie den Netzstecker und nehmen Sie die Batterien heraus.
Dann schalten Sie das Gerät wieder ein.
VOR DER ERSTEN INBETRIEBNAHME
Hinweise: HINWEISE ZU CDs.
Verschmutzte, beschädigte und verbogene CDs können das Gerät beschädigen, daher beachten Sie bitte die
folgenden Hinweise:
a. Abspielbare CDs. Benutzen Sie nur CDs mit nachstehender Markierung.
b. Benutzen Sie nur CDs mit digitalen Audiosignalen.

NETZVERSORGUNG
Sie können das Gerät mit Netzstrom versorgen, indem Sie das Netzkabel auf der Rückseite des
Geräts und an einer Steckdose anschließen. Vergewissern Sie sich, dass die Netzspannung den
Angaben auf dem Typenschild entspricht.
BEDIENELEMENTE
1.) LCD-DISPLAY
2.) BLUETOOTH-ANZEIGE
3.) SENSOR FERNBEDIENUNG
4.) SENDERWAHL
5.) SKIP -
6.) EIN/AUS/FUNKTION
7.) WIEDERGABE / PAUSE / STOPP
8.) MODUS / DISPLAY / UHR EINSTELLEN
9.) USB-PORT
10.) SKIP +
11.) LAUTSTÄRKE - / AL1
12.) LAUTSTÄRKE + / AL2
14.) LAUTSPRECHERANSCHLÜSSE (L / R)
15.) UKW-ANTENNE
16.) AUX-EINGANG
17.) NETZKABEL
DE-3
13.) ALBUM
18.) WEITERSCHLUMMERN
19.) CD-LAUFWERK ÖFFNEN / SCHLIEßEN
STROMVERSORGUNG
2
1
3
5
6
8
9
7
10
4
11
12
13
14
17
19
16
18
15

BATTERIE EINSETZEN
FERNBEDIENUNG
1 7
8
9
10
11
12
2
3
4
5
6
1. EIN/AUS
2. STOPP
3. SKIP -
4. LAUTSTÄRKE - / AL1
5. ALBUM -
6. MODUS/UHR
7. FUNKTION
8. WIEDERGABE / PAUSE
9. SKIP +
10. LAUTSTÄRKE + / AL2
11. ALBUM +
12. PROGRAMMIEREN
Setzen Sie eine Knopfzelle in das Batteriefach ein. Achten Sie auf die korrekte Polarität,
da anderenfalls die Fernbedienung beschädigt werden kann. Nehmen Sie stets die Batterie
heraus, wenn die Fernbedienung für längere Zeit nicht benutzt wird. Dies verhindert ein
Auslaufen und Schäden an der Fernbedienung.
Hinweise:
- Das Gerät muss eingeschaltet sein, damit die Fernbedienung benutzt werden kann.
- Lässt die Reichweite der Fernbedienung nach, so ist die Batterie erschöpft. Die Batterie muss
nun ausgetauscht werden.
SENSORFENSTER FÜR FERNBEDIENUNG
- Selbst bei Benutzung der Fernbedienung innerhalb der Reichweite können Hindernisse die
Funktion beeinträchtigen.
- Wird die Fernbedienung in unmittelbarer Nähe anderer Geräte benutzt, die Infrarotstrahlung
abgeben oder wenn andere Fernbedienungen in unmittelbarer Nähe benutzt werden, kann
es zu Fehlfunktionen kommen.
BATTERIE EINSETZEN
Ziehen Sie die Batterielade heraus und setzen
Sie eine Knopfzelle mit korrekter Polarität ein,
wie dargestellt
+
DE-4

ALLGEMEINE BEDIENUNGSHINWEISE
UKW-STEREO
1. Drücken Sie FUNCTION zum Aufrufen von „RADIO FM“ (UKW) oder „RADIO AM“ (Mittelwelle).
2. Stellen Sie die Frequenz mit der SENDERWAHL auf den gewünschten Sender ein.
3. Drücken Sie VOL + oder VOL - zum Einstellen der Lautstärke.
FÜR BESSEREN EMPFANG
- Das Gerät ist mit einer UKW-Wurfantenne auf der Geräterückseite ausgestattet.
Wickeln Sie die Antenne für besten Empfang vollständig ab.
MW - Das Gerät ist mit einer integrierten Ferritantenne für Mittelwelle ausgestattet.
Richten Sie das Gerät für besten Empfang aus.
DE-5
- „STEREO“ wird angezeigt, wenn Sie einen UKW-Sender in Stereo empfangen.
MODUS:
1. Drücken Sie einmal FUNCTION zum Einschalten des Geräts.
2. Drücken Sie FUNCTION zum Durchlaufen der Funktionen.
3. Halten Sie FUNCTION zum Ausschalten des Geräts gedrückt.
UKW MW CD USB AUX-IN BLUETOOTH
ALGEMENE BEDIENING
RADIO
UKW

Halten Sie gedrückt, um die CD-Wiedergabe zu beenden.
CD / MP3
ALLGEMEINE BEDIENUNGSHINWEISE
WIEDERGABE / PAUSE /
STOPP Drücken Sie die Taste zur Wiedergabe von CD-/MP3-Discs.
Drücken Sie erneut, um die Wiedergabe zu unterbrechen.
Drücken Sie erneut, um die Wiedergabe fortzusetzen.
UND
SKIP -
Halten Sie die Taste zum Beenden der CD-/MP3-Wiedergabe gedrückt.
WIEDERGABE
1. Drücken Sie FUNCTION zum Aufrufen von „CD“.
2. Öffnen Sie das CD-Laufwerk und legen Sie eine CD-/MP3-Disc mit dem Aufdruck nach oben ein.
3. Schließen Sie das CD-Laufwerk wieder.
4. Die Disc wird eingelesen.
5
6.
. Die Wiedergabe beginnt automatisch ab dem ersten Musiktitel.
Drücken Sie VOL + oder VOL - zum Einstellen der Lautstärke.
Drücken Sie einmal , um die Wiedergabe zu unterbrechen
7.
Drücken Sie die Taste, um zum nächsten oder vorherigen Musiktitel
zu springen.
Halten Sie die Taste während der Wiedergabe gedrückt, um den
schnellen Vorlauf oder Rücklauf durch den Musiktitel zu haben.
DE-6
8.
SKIP +
Table of contents
Languages:
Other Denver Stereo System manuals

Denver
Denver MCA-190 User manual

Denver
Denver MCI-103 User manual

Denver
Denver MCA-171 User manual

Denver
Denver MRD-51 User manual

Denver
Denver MCA-220DAB+ User manual

Denver
Denver MC-5400 User manual

Denver
Denver MRP-151 User manual

Denver
Denver MCU-5301 User manual

Denver
Denver MCB-600 User manual

Denver
Denver MC-7100S User manual

Denver
Denver MMP-360 User manual

Denver
Denver TCU-209 User manual

Denver
Denver MC-7150 User manual

Denver
Denver MRP-141 User manual

Denver
Denver MMP-355 User manual

Denver
Denver MRP-161 User manual

Denver
Denver MCA-160 User manual

Denver
Denver MRP-131 User manual

Denver
Denver MDA-270 User manual

Denver
Denver MDA-260 User manual