manuals.online logo
Brands
  1. Home
  2. •
  3. Brands
  4. •
  5. Desalto
  6. •
  7. Indoor Furnishing
  8. •
  9. Desalto Ellis User manual

Desalto Ellis User manual

Istruzioni di montaggio
Assembly instruction
Montageanleitung
Instructions de montage
Instrucciones de montaje
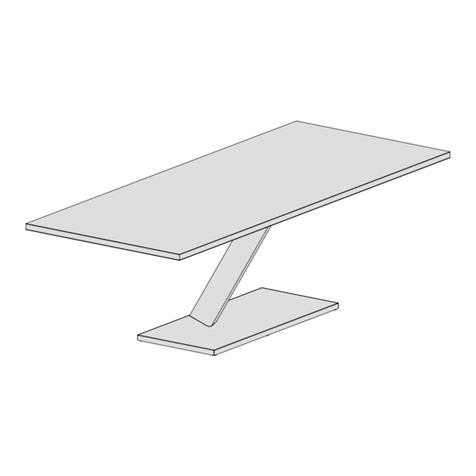
Ellis
design by Pocci + Dondoli
table
Ellis Bistrò Ø 60 cm / 60 x 60 cm h. 73 cm pag. 5
Ø 60 cm / 60 x 60 cm h. 90 cm pag. 5
Ø 60 cm / 60 x 60 cm h. 105 cm pag. 5
Ø 70 cm / 70 x 70 cm h. 73 cm pag. 5
Ø 70 cm / 70 x 70 cm h. 90 cm pag. 5
Ø 70 cm / 70 x 70 cm h. 105 cm pag. 5
Ø 80 cm / 80 x 80 cm h. 73 cm pag. 5
Ellis Home Ø 100 cm h. 73 cm pag. 8
Ø 120 cm h. 73 cm pag. 8
100 x 100 cm h. 73 cm pag. 8
120 x 120 cm h. 73 cm pag. 8
Ellis Home 115 x 200 cm h. 73 cm pag. 12
120 x 240 cm h. 73 cm pag. 12
2 3Desalto - Ellis Desalto - Ellis
1
2
Ellis Bistrò
40 x 40
Ø 60 cm \ 60 x 60 cm
Ø 70 cm \ 70 x 70 cm
Ø 80 cm \ 80 x 80 cm
H. 73 / 90 / 105 cm
H. 73 / 90 / 105 cm
H. 73 / 90 cm
Montare la base seguendo l’ordine dei pezzi e l’orientamento indicato nel disegno.
Assemble the base following the numerical order of the pieces and the direction indicated
in the drawing.
Montieren Sie die Basis gemäß der in der Zeichnung angegebenen Reihenfolge der Teile
und der Richtung.
Assembler la base en suivant l’ordre des pièces et de la direction indiqué sur le dessin.
Montar la base siguiendo el orden de las piezas y de la direción indicadas en el dibujo.
A
B
!
!
4 5Desalto - Ellis Desalto - Ellis
4
3
Posizionare il Top e avvitare le viti centrali, successivamente quelle lungo il perimetro.
Place the Top and screw the central screws rst, then those along the perimeter.
Positionieren Sie die Platte und schrauben Sie zuerst die mittleren Schrauben, dann die
Schwauben entlang des Umfangs
Place the Top and screw the central screws rst, then those along the perimeter.
Colocar la encimera y atornillar los tornillos centrales primero, luego los del perímetro.
TOP CERAMICA / CERAMIC TOP / KERAMIKPLATTE
/ DESSUS EN CÉRAMIQUE / TAPA DE CERÁMICA
Avvitare completamente la vite Ca mano, successivamente stringere utilizzando
l’apposita chiave. Ad operazione conclusa, capovolgere la base.
Screw in the screw C by hand throughout, then tighten it using the appropriate
wrench. At the end of the operation, turn the base upside down.
Die Schraube C von Hand ganz hineindrehen, dann mit dem passenden
Schraubenschlüssel festziehen. Drehen Sie am Ende des Vorgangs die Basis um.
Visser complètement la vis C à la main, puis serrer à l’aide de la clé appropriée. A la n
de l’opération, retourner la base.
Atornillar completamente el tornillo C a mano, y luego apretarlo con la llave apropiada.
Al nal de la operación, volcar la base.
C
D
E
6 7
Desalto - Ellis Desalto - Ellis
1
Ellis Home
50 x 50
A
B
Ø 100 cm \ 100 x 100 cm
Ø 120 cm \ 120 x 120 cm
H. 73 cm
H. 73 cm
Montare la base seguendo l’ordine dei pezzi e l’orientamento indicato nel disegno.
Assemble the base following the numerical order of the pieces and the direction indicated
in the drawing.
Montieren Sie die Basis gemäß der in der Zeichnung angegebenen Reihenfolge der Teile
und der Richtung.
Assembler la base en suivant l’ordre des pièces et de la direction indiqué sur le dessin.
Montar la base siguiendo el orden de las piezas y de la direción indicadas en el dibujo.
!
2Avvitare completamente la vite Ca mano, successivamente stringere utilizzando
l’apposita chiave. Ad operazione conclusa, capovolgere la base.
Screw in the screw C by hand throughout, then tighten it using the appropriate
wrench. At the end of the operation, turn the base upside down.
Die Schraube C von Hand ganz hineindrehen, dann mit dem passenden
Schraubenschlüssel festziehen. Drehen Sie am Ende des Vorgangs die Basis um.
Visser complètement la vis C à la main, puis serrer à l’aide de la clé appropriée. A la n
de l’opération, retourner la base.
Atornillar completamente el tornillo C a mano, y luego apretarlo con la llave apropiada.
Al nal de la operación, volcar la base.
C
D
E
8 9
Desalto - Ellis Desalto - Ellis
3Posizionare il Top e avvitare le viti centrali, successivamente quelle lungo il
perimetro.
Place the Top and screw the central screws rst, then those along the perimeter.
Positionieren Sie die Platte und schrauben Sie zuerst die mittleren Schrauben, dann
die Schwauben entlang des Umfangs
Place the Top and screw the central screws rst, then those along the perimeter.
Colocar la encimera y atornillar los tornillos centrales primero, luego los del perímetro.
10 11
Desalto - Ellis Desalto - Ellis
TOP CERAMICA / CERAMIC TOP / KERAMIKPLATTE
/ DESSUS EN CÉRAMIQUE / TAPA DE CERÁMICA
TOP CERAMICA / CERAMIC TOP / KERAMIKPLATTE
/ DESSUS EN CÉRAMIQUE / TAPA DE CERÁMICA
12 13
Desalto - Ellis Desalto - Ellis
1
Ellis Home
90 x 45
115 x 200 cm
120 x 240 cm
H. 73 cm
H. 73 cm
Montare la base seguendo l’ordine dei pezzi e l’orientamento indicato nel disegno.
Assemble the base following the numerical order of the pieces and the direction indicated
in the drawing.
Montieren Sie die Basis gemäß der in der Zeichnung angegebenen Reihenfolge der Teile
und der Richtung.
Assembler la base en suivant l’ordre des pièces et de la direction indiqué sur le dessin.
Montar la base siguiendo el orden de las piezas y de la direción indicadas en el dibujo.
2Avvitare completamente la vite Ca mano, successivamente stringere utilizzando
l’apposita chiave. Ad operazione conclusa, capovolgere la base.
Screw in the screw C by hand throughout, then tighten it using the appropriate
wrench. At the end of the operation, turn the base upside down.
Die Schraube C von Hand ganz hineindrehen, dann mit dem passenden
Schraubenschlüssel festziehen. Drehen Sie am Ende des Vorgangs die Basis um.
Visser complètement la vis C à la main, puis serrer à l’aide de la clé appropriée. A la n
de l’opération, retourner la base.
Atornillar completamente el tornillo C a mano, y luego apretarlo con la llave apropiada.
Al nal de la operación, volcar la base.
A
B
C
D
14 15
Desalto - Ellis Desalto - Ellis
TOP CERAMICA / CERAMIC TOP / KERAMIKPLATTE
/ DESSUS EN CÉRAMIQUE / TAPA DE CERÁMICA
3Posizionare il Top e avvitare le viti centrali, successivamente quelle lungo il
perimetro.
Place the Top and screw the central screws rst, then those along the perimeter.
Positionieren Sie die Platte und schrauben Sie zuerst die mittleren Schrauben, dann
die Schwauben entlang des Umfangs
Place the Top and screw the central screws rst, then those along the perimeter.
Colocar la encimera y atornillar los tornillos centrales primero, luego los del perímetro.
16 17
Desalto - Ellis Desalto - Ellis
Desalto Spa
via per Montesolaro
22063 Cantù - CO
Italy
T +39 031 7832211
info@desalto.it
www.desalto.it 10 / 2022

Other manuals for Ellis

1

Other Desalto Indoor Furnishing manuals
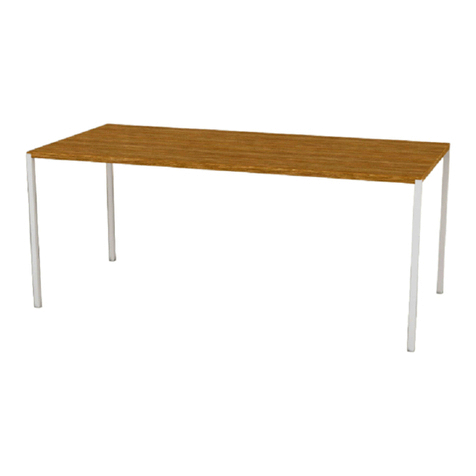
Desalto Micro Clay Operational manual

Desalto

Desalto Micro Clay Operational manual

Desalto EVERY User manual

Desalto

Desalto EVERY User manual

Desalto SKIN User manual

Desalto

Desalto SKIN User manual

Desalto MINI BOOXX User manual

Desalto

Desalto MINI BOOXX User manual

Desalto SKIN ALLUNGABILE User manual

Desalto

Desalto SKIN ALLUNGABILE User manual

Desalto Tender User manual

Desalto

Desalto Tender User manual

Desalto STILT User manual

Desalto

Desalto STILT User manual

Desalto HELSINKI User manual

Desalto

Desalto HELSINKI User manual

Desalto L45 User manual

Desalto

Desalto L45 User manual

Desalto FILL User manual

Desalto

Desalto FILL User manual

Desalto HEXAGON User manual

Desalto

Desalto HEXAGON User manual

Desalto Hang User manual

Desalto

Desalto Hang User manual
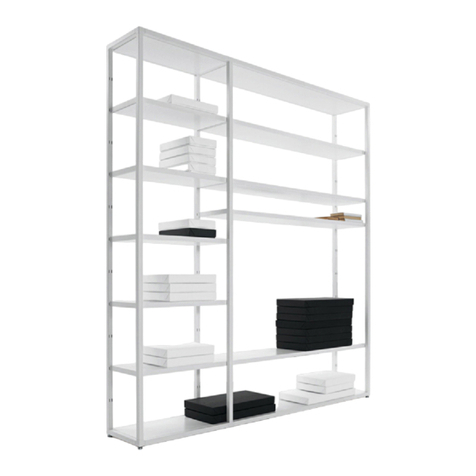
Desalto TENDER User manual

Desalto

Desalto TENDER User manual

Desalto CLAY ROUND User manual

Desalto

Desalto CLAY ROUND User manual

Desalto Clay User manual

Desalto

Desalto Clay User manual

Desalto Clay User manual

Desalto

Desalto Clay User manual

Desalto Iblea User manual

Desalto

Desalto Iblea User manual

Desalto HANG User manual

Desalto

Desalto HANG User manual

Desalto Ellis User manual

Desalto

Desalto Ellis User manual

Desalto 25 User manual

Desalto

Desalto 25 User manual

Desalto Caronni + Bonanomi Helsinki User manual

Desalto

Desalto Caronni + Bonanomi Helsinki User manual

Desalto L45 User manual

Desalto

Desalto L45 User manual

Desalto CARONNI + BONANOMI ICARO 015 User manual

Desalto

Desalto CARONNI + BONANOMI ICARO 015 User manual

Desalto Koki Wire User manual

Desalto

Desalto Koki Wire User manual

Popular Indoor Furnishing manuals by other brands

Argos 346/4423 Assembly instructions

Argos

Argos 346/4423 Assembly instructions

Bob's Discount Furniture 20061751036 Assembly instructions

Bob's Discount Furniture

Bob's Discount Furniture 20061751036 Assembly instructions

nurus Uneo Assembly guide

nurus

nurus Uneo Assembly guide

RECARO Star Short operating instructions

RECARO

RECARO Star Short operating instructions

AKANTE ENIGMA CT305 Assembly instructions

AKANTE

AKANTE ENIGMA CT305 Assembly instructions

Inval ES 14903 Assembly instructions

Inval

Inval ES 14903 Assembly instructions

Bertolini 6053EX ASSEMBLY HANDBOOK

Bertolini

Bertolini 6053EX ASSEMBLY HANDBOOK

Dum Beech Connect 71 Assembly instructions

Dum

Dum Beech Connect 71 Assembly instructions

Spacetronik ET118WE-N installation guide

Spacetronik

Spacetronik ET118WE-N installation guide

Arjo ConformX Instructions for use

Arjo

Arjo ConformX Instructions for use

interlübke studimo Assembly instructions

interlübke

interlübke studimo Assembly instructions

kenson BONO quick guide

kenson

kenson BONO quick guide

P. Graham Dunn POPPK1 instructions

P. Graham Dunn

P. Graham Dunn POPPK1 instructions

Furinno FNAJ-11068 Assembly instruction

Furinno

Furinno FNAJ-11068 Assembly instruction

Takara Belmont INOVA-EX Installation instruction

Takara Belmont

Takara Belmont INOVA-EX Installation instruction

Royal Catering RC-FT 8 user manual

Royal Catering

Royal Catering RC-FT 8 user manual

Home Decorators Collection KENTWELL PEWTER 082-4PC-Y Use and care guide

Home Decorators Collection

Home Decorators Collection KENTWELL PEWTER 082-4PC-Y Use and care guide

Crestron CS-SHADE-ROLLER-BATT product manual

Crestron

Crestron CS-SHADE-ROLLER-BATT product manual

manuals.online logo
manuals.online logoBrands
  • About & Mission
  • Contact us
  • Privacy Policy
  • Terms and Conditions

Copyright 2025 Manuals.Online. All Rights Reserved.