manuals.online logo
Brands
  1. Home
  2. •
  3. Brands
  4. •
  5. Desalto
  6. •
  7. Indoor Furnishing
  8. •
  9. Desalto HANG User manual

Desalto HANG User manual

ISTRUZIONI DI MONTAGGIO
ASSEMBLY INSTRUCTION
MONTAGEANLEITUNG
INSTRUCTIONS DE MONTAGE
INSTRUCCIONES DE MONTAJE
MADE IN ITALY
HANG
DESIGN CLAUDIO CARAMEL
3DESALTO - HANG
1
!
x 2
x 1
x 1
08.mc,alosneM 3 x Shelf, Etagère,Hängeregal, Balda
021.mc4 x Mensola, Shelf, Etagère,Hängeregal, Balda
061.mc5 x Mensola, Shelf, Etagère,Hängeregal, Balda
002.mc6 x Mensola, Shelf, Etagère,Hängeregal, Balda
x 1
I tasselli forniti in dotazione sono indicati per fissaggio in:
calcestruzzo, mattone pieno, pietra naturale, forato “doppio
UNI”, forato in “Poroton”, forato cemento o “Leca”,
spugnocemento.
Verificare il tipo e la tenuta della parete ed eventualmente
utilizzare viti e tasselli alternativi adeguati.
Los tacos incluidos en dotacìon para colocarlos en:
Calcestruzzo, ladrillo completo, piedra natural, agujerado
“doble UNI”, agujerado en “Poroton”, cemento agujerado o
“Leca”, cemento esponja.
Verificar el tipo y el aguante de la pared y si es necesario
utilizar tornillos y tacos alternativos màs adecuados.
The rawlplugs provided are suitable for fixing to:
concrete, full brick, natural stone, double UNI-standard
perforated brick, “Poroton” perforated brick, perforated
cement or spongy “Leca” cement.
Check the type and fastness of the wall and possibly use
suitable alternative screws and rawlplugs.
Les chevilles qui sont fournies sont indiqué es pour la fixation
dans:
le béton, les briques pleines, la pierre naturelle, mur percé
“double UNI”, percé en “Poroton”, en ciment ou “Leca”, en
béton mousse.
Contrôler le type et la tenue du mur et, éventuellement,
utiliser des vis et d'autres chevilles appropriées.
Die mitgelieferten Dübel eignen sich zur Montage auf
Mauerwerk aus:
Beton, Vollziegel, Naturstein, Lochziegeln Typ “ UNI doppelt”,
Lochziegeln Typ “Poroton”, Lochziegeln aus Zement oder Typ
“Leca”, geschäumter Zement.
Kontrollieren Sie die Entsprechung der Dübel zum Mauerwerk,
und benutzen Sie ggf. andere und besser angemessenere
Dübel und Schrauben.
x 1
2
x1
x1
x2
x1
x1 x 3
x 4
x 5
x 6
I tasselli forniti in dotazione sono indicati per fissaggio in: calcestruzzo, mattone pieno, pietra
naturale, forato “doppio UNI”, forato in “Poroton”, forato cemento o “Leca”, spugnocemento.
Verificare il tipo e la tenuta della parete ed eventualmente utilizzare viti e tasselli alternativi
adeguati.
The rawlplugs provided are suitable for fixing to: concrete, full brick, natural stone, double UNI-
standard perforated brick, “Poroton” perforated brick, perforated cement or spongy “Leca” cement.
Check the type and fastness of the wall and possibly use suitable alternative screws and rawlplugs.
Die mitgelieferten Dübel eignen sich zur Montage auf Mauerwerk aus: Beton, Vollziegel, Naturstein,
Lochziegeln Typ “ UNI doppelt”, Lochziegeln Typ “Poroton”, Lochziegeln aus Zement oder Typ “Leca”,
geschäumter Zement. Kontrollieren Sie die Entsprechung der Dübel zum Mauerwerk, und benutzen
Sie ggf. andere und besser angemess- enere Dübel und Schrauben.
Les chevilles qui sont fournies sont indiqué es pour la fixation dans: le béton, les briques pleines,
la pierre naturelle, mur percé “double UNI”, percé en “Poroton”, en ciment ou “Leca”, en béton
mousse. Contrôler le type et la tenue du mur et, éventuellement, utiliser des vis et d’autres chevilles
appropriées.
Los tacos incluidos en dotacíon para colocar en: hormigón, ladrillo completo, piedra natural, agujerado
“doble UNI”, agujerado en “Poroton”, cemento agujerado o “Leca”, cemento esponja. Verificar el tipo y
el aguante de la pared y si es necesario utilizar tornillos y tacos alternativos más adecuados.
!
4DESALTO - HANG 5DESALTO - HANG
1
!
x 2
x 1
x 1
08.mc,alosneM 3 x Shelf, Etagère,Hängeregal, Balda
021.mc4 x Mensola, Shelf, Etagère,Hängeregal, Balda
061.mc5 x Mensola, Shelf, Etagère,Hängeregal, Balda
002.mc6 x Mensola, Shelf, Etagère,Hängeregal, Balda
x 1
I tasselli forniti in dotazione sono indicati per fissaggio in:
calcestruzzo, mattone pieno, pietra naturale, forato “doppio
UNI”, forato in “Poroton”, forato cemento o “Leca”,
spugnocemento.
Verificare il tipo e la tenuta della parete ed eventualmente
utilizzare viti e tasselli alternativi adeguati.
Los tacos incluidos en dotacìon para colocarlos en:
Calcestruzzo, ladrillo completo, piedra natural, agujerado
“doble UNI”, agujerado en “Poroton”, cemento agujerado o
“Leca”, cemento esponja.
Verificar el tipo y el aguante de la pared y si es necesario
utilizar tornillos y tacos alternativos màs adecuados.
The rawlplugs provided are suitable for fixing to:
concrete, full brick, natural stone, double UNI-standard
perforated brick, “Poroton” perforated brick, perforated
cement or spongy “Leca” cement.
Check the type and fastness of the wall and possibly use
suitable alternative screws and rawlplugs.
Les chevilles qui sont fournies sont indiqué es pour la fixation
dans:
le béton, les briques pleines, la pierre naturelle, mur percé
“double UNI”, percé en “Poroton”, en ciment ou “Leca”, en
béton mousse.
Contrôler le type et la tenue du mur et, éventuellement,
utiliser des vis et d'autres chevilles appropriées.
Die mitgelieferten Dübel eignen sich zur Montage auf
Mauerwerk aus:
Beton, Vollziegel, Naturstein, Lochziegeln Typ “ UNI doppelt”,
Lochziegeln Typ “Poroton”, Lochziegeln aus Zement oder Typ
“Leca”, geschäumter Zement.
Kontrollieren Sie die Entsprechung der Dübel zum Mauerwerk,
und benutzen Sie ggf. andere und besser angemessenere
Dübel und Schrauben.
x 1
2
1
1
!
x 2
x 1
x 1
08.mc,alosneM 3 x Shelf, Etagère,Hängeregal, Balda
021.mc4 x Mensola, Shelf, Etagère,Hängeregal, Balda
061.mc5 x Mensola, Shelf, Etagère,Hängeregal, Balda
002.mc6 x Mensola, Shelf, Etagère,Hängeregal, Balda
x 1
I tasselli forniti in dotazione sono indicati per fissaggio in:
calcestruzzo, mattone pieno, pietra naturale, forato “doppio
UNI”, forato in “Poroton”, forato cemento o “Leca”,
spugnocemento.
Verificare il tipo e la tenuta della parete ed eventualmente
utilizzare viti e tasselli alternativi adeguati.
Los tacos incluidos en dotacìon para colocarlos en:
Calcestruzzo, ladrillo completo, piedra natural, agujerado
“doble UNI”, agujerado en “Poroton”, cemento agujerado o
“Leca”, cemento esponja.
Verificar el tipo y el aguante de la pared y si es necesario
utilizar tornillos y tacos alternativos màs adecuados.
The rawlplugs provided are suitable for fixing to:
concrete, full brick, natural stone, double UNI-standard
perforated brick, “Poroton” perforated brick, perforated
cement or spongy “Leca” cement.
Check the type and fastness of the wall and possibly use
suitable alternative screws and rawlplugs.
Les chevilles qui sont fournies sont indiqué es pour la fixation
dans:
le béton, les briques pleines, la pierre naturelle, mur percé
“double UNI”, percé en “Poroton”, en ciment ou “Leca”, en
béton mousse.
Contrôler le type et la tenue du mur et, éventuellement,
utiliser des vis et d'autres chevilles appropriées.
Die mitgelieferten Dübel eignen sich zur Montage auf
Mauerwerk aus:
Beton, Vollziegel, Naturstein, Lochziegeln Typ “ UNI doppelt”,
Lochziegeln Typ “Poroton”, Lochziegeln aus Zement oder Typ
“Leca”, geschäumter Zement.
Kontrollieren Sie die Entsprechung der Dübel zum Mauerwerk,
und benutzen Sie ggf. andere und besser angemessenere
Dübel und Schrauben.
x 1
2
2
6DESALTO - HANG 7DESALTO - HANG
3
B
A
3
A
(A) (B)Agganciare la mensola al profilo e successivamente bloccarla avvitando i grani posizionati sul fondo .
(A) Enganchar la balda al perfil y(B) sucesivamente bloquearla atornillando las piezas posicionados en el fondo.
(A)Connect the shelf to the profile and (B) subsequently lock it in position by screwing in the dowels positioned on the bottom .
(A)Accrocher l'étagè re sur le profil , (B) puis la bloquer en vissant les vis sans tête qui se trouvent sur le fond .
(A)Haken Sie das Regal in das Profilelement ein,(B) und blockieren Sie es anschließend, indem Sie die auf dem Boden präsenten
Dübelstifte festziehen .
(A) con la
chiave in dotazione (B)
(C)
Se la mensola non risultasse perfettamente orizzontale, regolare
le viti indicate dai talloncini rossi .
Terminate tutte le regolazioni strappare i talloncini .
(A) Si la balda no quedase perfectamente horizontal, regular con la llave
incluida los tornillos indicados en las piezas rojas (B).
Una vez terminadas las regulaciones arrancar las piezas.
(A)If the shelf is not perfectly horizontal, adjust the screws indicated by the
red labels (B) with the key provided.
(C) Once all the adjustments are finished, tear off the labels .
(A) Si l'étagère n'est pas parfaitement horizontale, à l'aide de la clé fournie à
cet effet, régler les vis qui sont indiquées par les petits talons rouges (B).
(C) Tous les réglages étant effectués, arracher les petits talons.
(A)Wenn das Regal nicht perfekt horizontal sein sollte, so kann die Neigung
mit dem mitgelieferten Schlüssel über Einstellung der mit den roten
Etiketten markierten(B) Schrauben geregelt werden.
(C ) Entfernen Sie nach erfolgter Regelung die roten Etiketten .
(C)
5
4
C
Inserire i fianchetti di chiusura; l’adesione avviene automaticamente
mediante magneti.
Introducir los laterales de cierre; la uniòn serà automàtica mediante
imanes.
Insert the closing side pieces; adhesion takes place automatically
through magnets.
Insérer les petits bords de fermeture; l'adhésion se fait
automatiquement au moyen d'aimants.
Setzen Sie die abschließenden Seitenteile ein; der Anschluß erfolgt
automatisch mittels Magneten.
Nel caso di posizionamento in nicchia, inserire i
fianchetti
Se si coloca introducido en un hueco, introducir los
laterales
prima dell’istruzione n°3.
antes de la instruciòn n°3.
If positioning in a niche, insert the side pieces
En cas de positionnement en niche, insé
rer les petits bords
Bei Installation in einer Nische müssen die
abschließenden Seitenteile vor Ausführung des
Schritts Punkt 3 .
before
instruction no. 3.
avant le point n° 3.
eingesetzt werden 3
!
( A ) Agganciare la mensola al profilo e ( B ) successivamente bloccarla
avvitando i grani posizionati sul fondo.
( A ) Connect the shelf to the profile and ( B ) subsequently lock it in position by
screwing in the dowels positioned on the bottom.
( A ) Haken Sie das Regal in das Profilelement ein, ( B ) und blockieren Sie es
anschließend, indem Sie die auf dem Boden präsenten Dübelstifte festziehen.
( A ) Accrocher l’étagè re sur le profil, ( B ) puis la bloquer en vissant les vis sans
tête qui se trouvent sur le fond.
( A ) Enganchar la balda al perfil y ( B ) sucesivamente bloquearla atornillando las
piezas posicionados en el fondo.
( A )
( B )
( A )se la mensola non risultasse perfettamente orizzontale, regolare con la chiave in
dotazione le viti indicate dai talloncini rossi ( 2 ). Terminate tutte le regolazioni strappare
i talloncini ( 3 ) .
( A ) If the shelf is not perfectly horizontal, adjust the screws indicated by the red labels ( B ) with
the key provided. Once all the adjustments are finished, tear off the labels ( C ).
( A )Wenn das Regal nicht perfekt horizontal sein sollte, so kann die Neigung mit dem
mitgelieferten Schlüssel über Einstellung der mit den roten Etiketten markierten ( B ) Schrauben
geregelt werden. Entfernen Sie nach erfolgter Regelung die roten Etiketten ( C ).
( A ) Si l’étagère n’est pas parfaitement horizontale, à l’aide de la clé fournie à cet effet, régler
les vis qui sont indiquées par les petits talons rouges ( B ). Tous les réglages étant effectués,
arracher les petits talons ( C ).
( A ) Si la balda no quedase perfectamente horizontal, regular con la llave incluida los tornillos
indicados en las piezas rojas ( B ). Una vez terminadas las regulaciones arrancar las piezas ( C ).
B
A
3
A
(A) (B)Agganciare la mensola al profilo e successivamente bloccarla avvitando i grani posizionati sul fondo .
(A) Enganchar la balda al perfil y(B) sucesivamente bloquearla atornillando las piezas posicionados en el fondo.
(A)Connect the shelf to the profile and (B) subsequently lock it in position by screwing in the dowels positioned on the bottom .
(A)Accrocher l'étagè re sur le profil , (B) puis la bloquer en vissant les vis sans tête qui se trouvent sur le fond .
(A)Haken Sie das Regal in das Profilelement ein,(B) und blockieren Sie es anschließend, indem Sie die auf dem Boden präsenten
Dübelstifte festziehen .
(A) con la
chiave in dotazione (B)
(C)
Se la mensola non risultasse perfettamente orizzontale, regolare
le viti indicate dai talloncini rossi .
Terminate tutte le regolazioni strappare i talloncini .
(A) Si la balda no quedase perfectamente horizontal, regular con la llave
incluida los tornillos indicados en las piezas rojas (B).
Una vez terminadas las regulaciones arrancar las piezas.
(A)If the shelf is not perfectly horizontal, adjust the screws indicated by the
red labels (B) with the key provided.
(C) Once all the adjustments are finished, tear off the labels .
(A) Si l'étagère n'est pas parfaitement horizontale, à l'aide de la clé fournie à
cet effet, régler les vis qui sont indiquées par les petits talons rouges (B).
(C) Tous les réglages étant effectués, arracher les petits talons.
(A)Wenn das Regal nicht perfekt horizontal sein sollte, so kann die Neigung
mit dem mitgelieferten Schlüssel über Einstellung der mit den roten
Etiketten markierten(B) Schrauben geregelt werden.
(C ) Entfernen Sie nach erfolgter Regelung die roten Etiketten .
(C)
5
4
C
Inserire i fianchetti di chiusura; l’adesione avviene automaticamente
mediante magneti.
Introducir los laterales de cierre; la uniòn serà automàtica mediante
imanes.
Insert the closing side pieces; adhesion takes place automatically
through magnets.
Insérer les petits bords de fermeture; l'adhésion se fait
automatiquement au moyen d'aimants.
Setzen Sie die abschließenden Seitenteile ein; der Anschluß erfolgt
automatisch mittels Magneten.
Nel caso di posizionamento in nicchia, inserire i
fianchetti
Se si coloca introducido en un hueco, introducir los
laterales
prima dell’istruzione n°3.
antes de la instruciòn n°3.
If positioning in a niche, insert the side pieces
En cas de positionnement en niche, insé
rer les petits bords
Bei Installation in einer Nische müssen die
abschließenden Seitenteile vor Ausführung des
Schritts Punkt 3 .
before
instruction no. 3.
avant le point n° 3.
eingesetzt werden 3
!
( A )
( B )
( C )
4
8DESALTO - HANG 9DESALTO - HANG
B
A
3
A
(A) (B)Agganciare la mensola al profilo e successivamente bloccarla avvitando i grani posizionati sul fondo .
(A) Enganchar la balda al perfil y(B) sucesivamente bloquearla atornillando las piezas posicionados en el fondo.
(A)Connect the shelf to the profile and (B) subsequently lock it in position by screwing in the dowels positioned on the bottom .
(A)Accrocher l'étagè re sur le profil , (B) puis la bloquer en vissant les vis sans tête qui se trouvent sur le fond .
(A)Haken Sie das Regal in das Profilelement ein,(B) und blockieren Sie es anschließend, indem Sie die auf dem Boden präsenten
Dübelstifte festziehen .
(A) con la
chiave in dotazione (B)
(C)
Se la mensola non risultasse perfettamente orizzontale, regolare
le viti indicate dai talloncini rossi .
Terminate tutte le regolazioni strappare i talloncini .
(A) Si la balda no quedase perfectamente horizontal, regular con la llave
incluida los tornillos indicados en las piezas rojas (B).
Una vez terminadas las regulaciones arrancar las piezas.
(A)If the shelf is not perfectly horizontal, adjust the screws indicated by the
red labels (B) with the key provided.
(C) Once all the adjustments are finished, tear off the labels .
(A) Si l'étagère n'est pas parfaitement horizontale, à l'aide de la clé fournie à
cet effet, régler les vis qui sont indiquées par les petits talons rouges (B).
(C) Tous les réglages étant effectués, arracher les petits talons.
(A)Wenn das Regal nicht perfekt horizontal sein sollte, so kann die Neigung
mit dem mitgelieferten Schlüssel über Einstellung der mit den roten
Etiketten markierten(B) Schrauben geregelt werden.
(C ) Entfernen Sie nach erfolgter Regelung die roten Etiketten .
(C)
5
4
C
Inserire i fianchetti di chiusura; l’adesione avviene automaticamente
mediante magneti.
Introducir los laterales de cierre; la uniòn serà automàtica mediante
imanes.
Insert the closing side pieces; adhesion takes place automatically
through magnets.
Insérer les petits bords de fermeture; l'adhésion se fait
automatiquement au moyen d'aimants.
Setzen Sie die abschließenden Seitenteile ein; der Anschluß erfolgt
automatisch mittels Magneten.
Nel caso di posizionamento in nicchia, inserire i
fianchetti
Se si coloca introducido en un hueco, introducir los
laterales
prima dell’istruzione n°3.
antes de la instruciòn n°3.
If positioning in a niche, insert the side pieces
En cas de positionnement en niche, insé
rer les petits bords
Bei Installation in einer Nische müssen die
abschließenden Seitenteile vor Ausführung des
Schritts Punkt 3 .
before
instruction no. 3.
avant le point n° 3.
eingesetzt werden 3
!
Inserire i fianchetti di chiusura; l’adesione avviene automaticamente mediante
magneti.
Insert the closing side pieces; adhesion takes place automatically through magnets.
Setzen Sie die abschließenden Seitenteile ein; der Anschluß erfolgt automatisch
mittels Magneten.
Insérer les petits bords de fermeture; l’adhésion se fait automatiquement au moyen
d’aimants.
Introducir los laterales de cierre; la uniòn serà automàtica mediante imanes.
Nel caso di posizionamento in nicchia, inserire
i fianchetti prima dell’istruzione n°3.
If positioning in a niche, insert the side pieces
before instruction no. 3.
Bei Installation in einer Nische müssen die
abschließenden Seitenteile vor Ausführung des
Schritts Punkt 3 eingesetzt werden 3.
En cas de positionnement en niche, insé rer les
petits bords avant le point n° 3.
Se si coloca introducido en un hueco, introducir
los laterales antes de la instruciòn n°3.
B
A
3
A
(A) (B)Agganciare la mensola al profilo e successivamente bloccarla avvitando i grani posizionati sul fondo .
(A) Enganchar la balda al perfil y(B) sucesivamente bloquearla atornillando las piezas posicionados en el fondo.
(A)Connect the shelf to the profile and (B) subsequently lock it in position by screwing in the dowels positioned on the bottom .
(A)Accrocher l'étagè re sur le profil , (B) puis la bloquer en vissant les vis sans tête qui se trouvent sur le fond .
(A)Haken Sie das Regal in das Profilelement ein,(B) und blockieren Sie es anschließend, indem Sie die auf dem Boden präsenten
Dübelstifte festziehen .
(A) con la
chiave in dotazione (B)
(C)
Se la mensola non risultasse perfettamente orizzontale, regolare
le viti indicate dai talloncini rossi .
Terminate tutte le regolazioni strappare i talloncini .
(A) Si la balda no quedase perfectamente horizontal, regular con la llave
incluida los tornillos indicados en las piezas rojas (B).
Una vez terminadas las regulaciones arrancar las piezas.
(A)If the shelf is not perfectly horizontal, adjust the screws indicated by the
red labels (B) with the key provided.
(C) Once all the adjustments are finished, tear off the labels .
(A) Si l'étagère n'est pas parfaitement horizontale, à l'aide de la clé fournie à
cet effet, régler les vis qui sont indiquées par les petits talons rouges (B).
(C) Tous les réglages étant effectués, arracher les petits talons.
(A)Wenn das Regal nicht perfekt horizontal sein sollte, so kann die Neigung
mit dem mitgelieferten Schlüssel über Einstellung der mit den roten
Etiketten markierten(B) Schrauben geregelt werden.
(C ) Entfernen Sie nach erfolgter Regelung die roten Etiketten .
(C)
5
4
C
Inserire i fianchetti di chiusura; l’adesione avviene automaticamente
mediante magneti.
Introducir los laterales de cierre; la uniòn serà automàtica mediante
imanes.
Insert the closing side pieces; adhesion takes place automatically
through magnets.
Insérer les petits bords de fermeture; l'adhésion se fait
automatiquement au moyen d'aimants.
Setzen Sie die abschließenden Seitenteile ein; der Anschluß erfolgt
automatisch mittels Magneten.
Nel caso di posizionamento in nicchia, inserire i
fianchetti
Se si coloca introducido en un hueco, introducir los
laterales
prima dell’istruzione n°3.
antes de la instruciòn n°3.
If positioning in a niche, insert the side pieces
En cas de positionnement en niche, insé
rer les petits bords
Bei Installation in einer Nische müssen die
abschließenden Seitenteile vor Ausführung des
Schritts Punkt 3 .
before
instruction no. 3.
avant le point n° 3.
eingesetzt werden 3
!
5
L’inserimento di tutti gli accessori è facilitato dal foro presente al centro dei binari (superiore e inferiore) della mensola.
La colocacìon de todos los accesorios se facilita por el agujero presente en el centro del raìl (superior e inferior) de la balda.
The insertion of all the accessories is facilitated by the hole present in the centre of the tracks (upper and lower) of the shelf.
L'insertion de tous les accessoires est facilitée par le trou qui se trouve au milieu des rails (supérieur et inférieur) de l'étagère.
Der Einsatz der Zubehörelemente wird durch die in der Mitte der (oberen und unteren) Führungsschienen befindliche Bohrung vereinfacht.
Binario superiore
Raìl superior
Upper track
Rail supérieur
Obere Führungsschiene
Binario inferiore
Raìl inferior
Lower track
Rail inférieur
Untere Führungsschiene
HANG: accessori, accessoriosaccessories, accessoires, Zubehör,
Fermalibri
Sujetalibros
Bookends
Serre-livres
Buchstützen
Mensola porta carta A4
Balda porta folios A4
A4 paper holder shelf
Étagère pour papier A4
Papierablage A4
Mensola porta carta A3
Balda porta folios A3
A3 paper holder shelf
Étagère pour papier A3
Papierablage A3
Portaoggetti CD / DVD
R
Portaobjetos CD/DVD
CD/DVD holder
angement pour CD/DVD
CD/DVD Container
Porta CD
R
Porta CD
CD holder
angement pour CD
CD Container
Bicchiere
Vaso
Beaker
Gobelet
Glas
Mensola porta VCR / DVD
Balda porta VCR/DVD
VCR/DVD shelf
Étagère pour VCR/DVD
VCR/DVD Container
Vaschetta porta cancelleria
S
Bandeja portaobjetos de escritorio
tationery tray
Bac à fournitures
Schale zur Schreibwarenablage
Barra appendi tutto
U
Bara colgador
niversal hanger bar
Barre à tout accrocher
Vielzweck-Einhängeschiene
Gancio appendiabiti
Ganco colgador
Clothes hanger hook
Portemanteau
Kleiderhaken
L’inserimento di tutti gli accessori è facilitato dal foro presente al centro dei
binari (superiore e inferiore) della mensola.
The insertion of all the accessories is facilitated by the hole present in the centre
of the tracks (upper and lower) of the shelf.
Der Einsatz der Zubehörelemente wird durch die in der Mitte der (oberen und
unteren) Führungsschienen befindliche Bohrung vereinfacht.
L’insertion de tous les accessoires est facilitée par le trou qui se trouve au milieu
des rails (supérieur et inférieur) de l’étagère.
La colocacìon de todos los accesorios se facilita por el agujero presente en el
centro del raìl (superior e inferior) de la balda.
Binario inferiore
Lower track
Untere Führungsschiene
Rail inférieur
Raìl inferior
Binario superiore
Upper track
Obere Führungsschiene
Rail supérieur
Raìl superior
6
10 DESALTO - HANG
L’inserimento di tutti gli accessori è facilitato dal foro presente al centro dei binari (superiore e inferiore) della mensola.
La colocacìon de todos los accesorios se facilita por el agujero presente en el centro del raìl (superior e inferior) de la balda.
The insertion of all the accessories is facilitated by the hole present in the centre of the tracks (upper and lower) of the shelf.
L'insertion de tous les accessoires est facilitée par le trou qui se trouve au milieu des rails (supérieur et inférieur) de l'étagère.
Der Einsatz der Zubehörelemente wird durch die in der Mitte der (oberen und unteren) Führungsschienen befindliche Bohrung vereinfacht.
Binario superiore
Raìl superior
Upper track
Rail supérieur
Obere Führungsschiene
Binario inferiore
Raìl inferior
Lower track
Rail inférieur
Untere Führungsschiene
HANG: accessori, accessoriosaccessories, accessoires, Zubehör,
Fermalibri
Sujetalibros
Bookends
Serre-livres
Buchstützen
Mensola porta carta A4
Balda porta folios A4
A4 paper holder shelf
Étagère pour papier A4
Papierablage A4
Mensola porta carta A3
Balda porta folios A3
A3 paper holder shelf
Étagère pour papier A3
Papierablage A3
Portaoggetti CD / DVD
R
Portaobjetos CD/DVD
CD/DVD holder
angement pour CD/DVD
CD/DVD Container
Porta CD
R
Porta CD
CD holder
angement pour CD
CD Container
Bicchiere
Vaso
Beaker
Gobelet
Glas
Mensola porta VCR / DVD
Balda porta VCR/DVD
VCR/DVD shelf
Étagère pour VCR/DVD
VCR/DVD Container
Vaschetta porta cancelleria
S
Bandeja portaobjetos de escritorio
tationery tray
Bac à fournitures
Schale zur Schreibwarenablage
Barra appendi tutto
U
Bara colgador
niversal hanger bar
Barre à tout accrocher
Vielzweck-Einhängeschiene
Gancio appendiabiti
Ganco colgador
Clothes hanger hook
Portemanteau
Kleiderhaken
Fermalibri
Bookends
Buchstützen
Serre-livres
Sujetalibros
Gancio appendiabiti
Clothes hanger hook
Kleiderhaken
Portemanteau
Ganco colgador
DESALTO
VIA PER MONTESOLARO - C.P. 150
22063 CANTÙ (COMO) ITALY
TEL +39 031 7832211
FAX +39 031 7832290
INFO@DESALTO.IT
WWW.DESALTO.IT 07 / 2017

Other Desalto Indoor Furnishing manuals

Desalto EVERY User manual

Desalto

Desalto EVERY User manual

Desalto FILL User manual

Desalto

Desalto FILL User manual

Desalto L45 User manual

Desalto

Desalto L45 User manual

Desalto GRID User manual

Desalto

Desalto GRID User manual

Desalto Clay User manual

Desalto

Desalto Clay User manual

Desalto ICARO User manual

Desalto

Desalto ICARO User manual

Desalto L45 User manual

Desalto

Desalto L45 User manual

Desalto 25 User manual

Desalto

Desalto 25 User manual

Desalto Caronni + Bonanomi Helsinki User manual

Desalto

Desalto Caronni + Bonanomi Helsinki User manual

Desalto Mini Boox User manual

Desalto

Desalto Mini Boox User manual

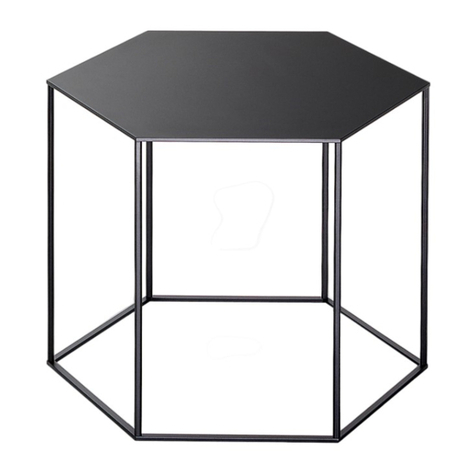
Desalto HEXAGON User manual

Desalto

Desalto HEXAGON User manual

Desalto Koki Wire User manual

Desalto

Desalto Koki Wire User manual

Desalto Fan User manual

Desalto

Desalto Fan User manual

Desalto Iblea User manual

Desalto

Desalto Iblea User manual

Desalto L45 User manual

Desalto

Desalto L45 User manual

Desalto TENDER User manual

Desalto

Desalto TENDER User manual

Desalto SKIN User manual

Desalto

Desalto SKIN User manual

Desalto HELSINKI User manual

Desalto

Desalto HELSINKI User manual

Desalto Element Tavolino User manual

Desalto

Desalto Element Tavolino User manual

Desalto Micro Clay Operational manual

Desalto

Desalto Micro Clay Operational manual

Desalto CLAY ROUND User manual

Desalto

Desalto CLAY ROUND User manual

Desalto SKIN ALLUNGABILE User manual

Desalto

Desalto SKIN ALLUNGABILE User manual

Desalto Ellis User manual

Desalto

Desalto Ellis User manual

Desalto Clay User manual

Desalto

Desalto Clay User manual

Popular Indoor Furnishing manuals by other brands

Urban Barn STAUNTON Assembly instructions

Urban Barn

Urban Barn STAUNTON Assembly instructions

Allen + Roth OPHELIA 24AL installation manual

Allen + Roth

Allen + Roth OPHELIA 24AL installation manual

Emmezeta VIVA VIVK02 Assembling instructions

Emmezeta

Emmezeta VIVA VIVK02 Assembling instructions

Acme Furniture 71835 Assembly instructions

Acme Furniture

Acme Furniture 71835 Assembly instructions

aspenhome I349-6641S-WST Assembly instructions

aspenhome

aspenhome I349-6641S-WST Assembly instructions

Delabie NT 5160 Seies installation instructions

Delabie

Delabie NT 5160 Seies installation instructions

Triarch 75301/10 Assembly instructions

Triarch

Triarch 75301/10 Assembly instructions

American Standard 3636Y1.SR-.XXX installation instructions

American Standard

American Standard 3636Y1.SR-.XXX installation instructions

Woodendot Alba Floating nightstand Assembly instructions

Woodendot

Woodendot Alba Floating nightstand Assembly instructions

Balt Lumina Flipper-60 Assembly instructions

Balt

Balt Lumina Flipper-60 Assembly instructions

Sauder Boulevard Cafe 422356 quick start guide

Sauder

Sauder Boulevard Cafe 422356 quick start guide

BRW TIP-TOP Assembly manual

BRW

BRW TIP-TOP Assembly manual

Seconique Furniture CORONA 5 Assembly instructions

Seconique Furniture

Seconique Furniture CORONA 5 Assembly instructions

NOA & NANI FRANK Assembly instructions

NOA & NANI

NOA & NANI FRANK Assembly instructions

venture horizon 2641 Assembly instructions

venture horizon

venture horizon 2641 Assembly instructions

Rize Clarity II Enhanced owner's manual

Rize

Rize Clarity II Enhanced owner's manual

Core Products CB800 Instruction leaflet

Core Products

Core Products CB800 Instruction leaflet

sprogs SPG-71830 Assembly instructions

sprogs

sprogs SPG-71830 Assembly instructions

manuals.online logo
manuals.online logoBrands
  • About & Mission
  • Contact us
  • Privacy Policy
  • Terms and Conditions

Copyright 2025 Manuals.Online. All Rights Reserved.