Digital Monitoring Products 9000 Series Installation Guide
4
Backlit Logo
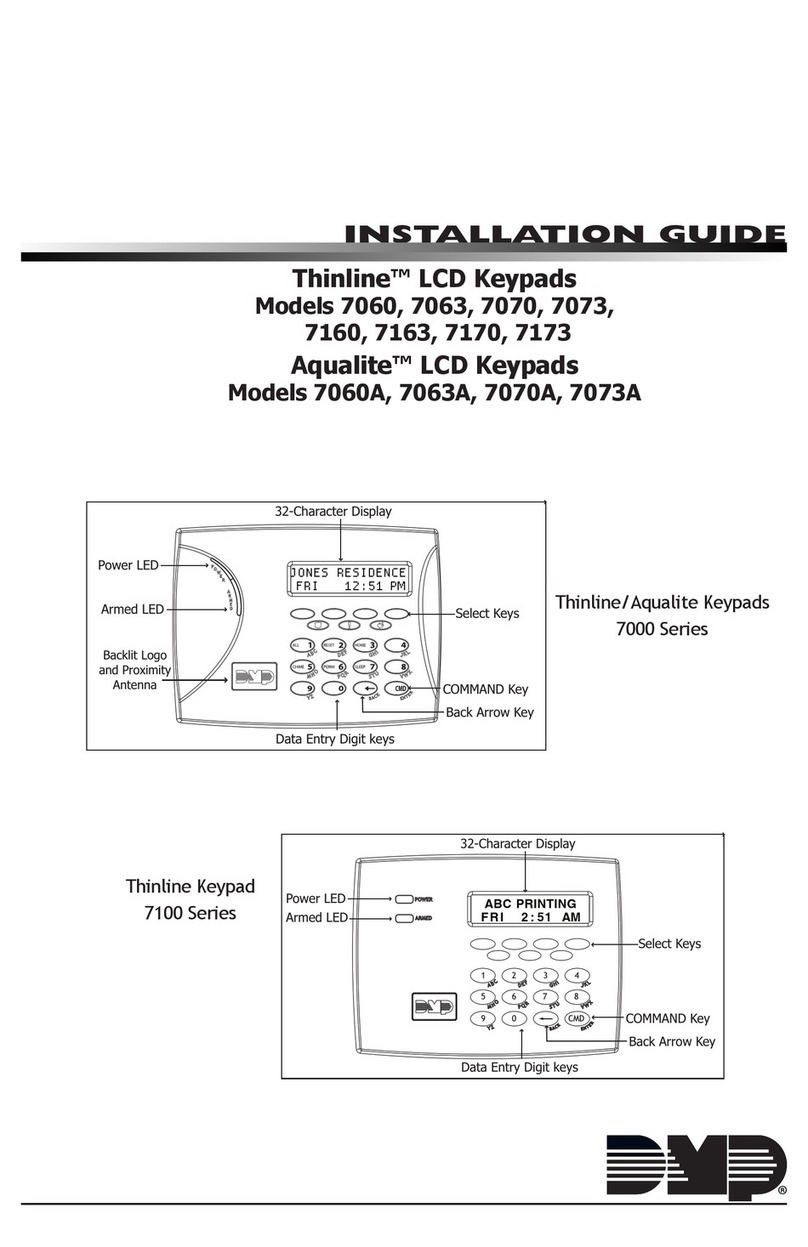
The backlit logo indicates the armed status of the panel and the power and battery status of the keypad. Depending on
the status, the LED displays in Red or Green as listed in the table.
Color and Activity Operation
Green Steady Panel Disarmed, Primary Power OK, Battery OK
Green Blinking Panel Disarmed, Primary Power OK, Battery Fault
No Light Panel Disarmed, Primary Power Fault, Battery OK
Red Steady Panel Armed, Primary Power OK, Battery OK
Red/Green Alternate Panel Armed, Primary Power OK, Battery Fault
Red Blinking Panel Armed, Primary Power Fault, Battery OK
End-User Options
All keypads provide three keypad adjustments the end-user can make through a User Options Menu. The user can also
view the keypad model number and serial number.
On all keypads press and hold the Back Arrow (<—) and CMD (COMMAND) keys for two seconds to access User Options. The
keypad display changes to SET BRIGHTNESS. Use the COMMAND key to display the next Option or press the Back Arrow to
exit.
Set brightneSS
< >
Backlighting Brightness
Set the keypad LCD Display brightness level, and the Green keyboard backlighting. Use the
left Select key to lower the brightness and the right Select key to raise the brightness. If the
brightness level is lowered, it reverts to maximum intensity whenever a key is pressed. If no
keys are pressed, and the speaker has not sounded for 10 seconds, the user-selected brightness
level restores.
Note: During primary power loss, the backlighting turns completely off after the 10 seconds of
no activity to conserve the standby battery.
Set tOne
< >
Internal Speaker Tone
Set the keypad internal speaker tone. At the SET TONE display, use the left Select key to lower
the tone and the right Select key to raise the tone.
Set VOLUMe LeVeL
< >
Internal Volume Level
Set the keypad internal speaker volume for key presses and entry delay tone conditions.
During alarm and trouble conditions, the volume is always at maximum level. Use the left
Select key to decrease the volume and the right Select key to increase the volume.
MOdeL nUMber
9060 V100
Model Number
The LCD displays the keypad model number and rmware version/date.
SeriAL#:
Serial Number Display
The LCD displays the keypad serial number.
Entering Alpha Characters
To enter an alpha character, press the key that has the desired letter written
below it. The keypad display shows the number on that key. To change the
number to a letter, press the top row Select key that corresponds to the letter
location under the key. For example, if you press key number 1, the letters for
that key are A, B, and C. Press the rst Select key for A, the second Select key
for B, the third Select key for C, and the fourth Select key for special characters.
Entering Non-Alphanumeric Characters
Each key also has a special, non-alpha character. These characters are not shown
on the keypad. Enter a space by pressing 9 then the third Select key. The following
non-alpha characters are available: ( ) ! ? / & $ ‚ (space) ’ starting with the left
bracket on the 1 digit key to the blank space and apostrophe on the 9 digit key. Use
the 0 digit key to enter - . * # (dash, period, asterisk, or number sign).
1 2 3 4
9 0 CMD
5 6 7 8
A
(
C
B
D
)
F
E
G
!
I
H
J
?
L
K
V
,
X
W
S
$
U
T
P
&
R
Q
M
/
O
N
Y
'
(space)
Z
-
#
*
.
Keys with Non-Alpha Characters
First Letter
Second Letter
Third Letter
Special Character
(CBA
Entering Alpha Characters
