manuals.online logo
Brands
  1. Home
  2. •
  3. Brands
  4. •
  5. Dimplex
  6. •
  7. Temperature Controllers
  8. •
  9. Dimplex RX0 10007 User manual

Dimplex RX0 10007 User manual



ContactDetails

Pleasenotethatsomeofthecontactdetailson
thisPDFdocumentmaynotbecurrent.

Pleaseusethefollowingdetailsifyouneedto
contactus:

Telephone:08448793588
Email:[email protected]


Thecustomersupportsectionofourwebsitealsofeaturesawide
rangeofinformationwhichmaybeofusetoyouandisavailable
24hoursaday.Itincludes:

•Operatingandinstallationinstructions
•Easy‘Howtouse’guidesforstorageheaters
•Serviceandrepairs
•Wheretobuyourproducts
•Literaturedownloads
•Heatingrequirementcalculator

Visit‐www.dimplex.co.uk/support
A division of GDC Group Ltd
Millbrook House Grange Drive Hedge End Southampton SO30 2DF
www.dimplex.co.uk
Re
g
istered No: 1313016 En
g
land
VAT GB 287 1315 50004
EEE Producer Registration Number –
WEE/GE0057TS
Paper from sustainable sources
3. INSTALLATION
3.1 Where to install
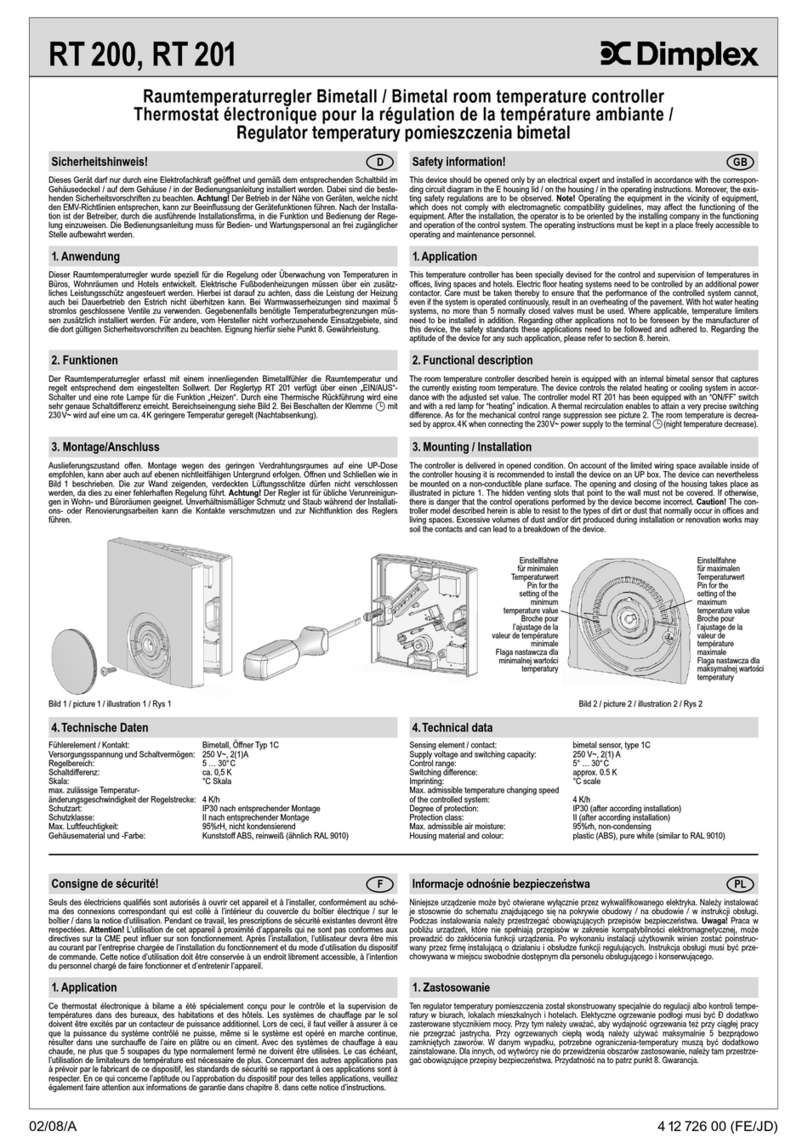
The unit can be installed anywhere in your home and enables the
remote control of all heaters connected to the system from the
central programmer.
3.2 Fixing
To wall-mount the unit, it is necessary to remove the base.
To do this, remove the single screw from underneath the unit as
shown in Fig.1.
Once separated from the unit, the base should be fixed to the
wall using screws/plugs or to a connection box (60mm fixing
centres) using the holes provided.
Recessed gaps are provided to let the connection wires through
for the connection box, for surface mounting.
50 Hz
Fréquence
porteuse
Réseau EDF 230V
Transmitter Receiver
2
3
Fig 1
RX010007
Two-Zone Wall Mounted Programmer
– Mains Borne Signalling
1. SPECIFICATION
•230V, +/-10%, 50Hz power supply
•Clock back-up in case of power cut:
4 hrs approx. (by capacitor)
•Consumption: 4 VA
•Class II insulation
•Function mode selection switch
•Choice of four permanent modes
(Frost-protection, Setback, Comfort,
Off) and one customisable programme
per day, per zone
•Automatic override by zone until next
programme change
•Programmable frost-protection
adjustable for 1 to 99 days
2. GENERAL PRINCIPLE
The main principle of “MBS”transmissions is
to superimpose a coded signal with a higher
frequency and lower amplitude on the 50Hz
mains frequency, between the live and
neutral wires.
Appliance conforms to the requirements of
directives CEE 89/336 (Electromagnetic
Accountability) and CEE 73/23 modified
CEE 93/68 (Low tension safety).
Guarantee
Your product is guaranteed for one year from
the date of purchase. We undertake to repair
or exchange free of charge within the
guarantee period any part found to be
defective. Your rights under the guarantee
are additional to your statutory rights, which
in turn are unaffected by this guarantee.
If the programmer is not working correctly,
please contact our Customer Helpline on
0870 727 0101.
This guarantee only applies in the United
Kingdom.
Installation and Operating Instructions
Glen Dimplex UK Ltd
Millbrook House, Grange Drive
Hedge End, Southampton
SO30 2DF
Customer Helpline
Tel: 0870 727 0101 8am-6pm Mon-Fri
8:30am-1pm Sat
Fax: 0870 727 0102
Republic of Ireland: 01 842 4833
Fig 3
Fig 2
1
1
T0203/05/A
3
1
2
2 3
3
•Emission frequency: 132.45kHz
•Emission power conforms to standard
CENELEC EN 50065-1
•Internal resistance: 5Ω
•Reception sensitivity: 2.5mV
•“House”addressing: 65000 factory-
coded combinations
•Digital display
•Control panel: 128 x 85 x 43 mm
•Wall fixing to connection box or surface-
mount
•Protection index: IP 30
In the case of a three-phase installation, you should use a phase
coupler to transmit over the 3 phases simultaneously.
Signal
230V mains
circuit
50Hz
3.3 Connection
The electrical installation must be carried
out by a competent electrician and be in
strict accordance with the current IEE
regulations for Electrical Equipment in
Buildings.
Before doing anything, switch off the
power supply.
Pull off the termnal block (Fig 2) from the
pins on the board. Connect the two supply
wires to the terminals and replace the block
on the pins.
Position the unit on the base, first hooking
the two recesses in the inside top over the
hooks on the base, then swing the unit down
into position. Ensure the wires are not
trapped behind transformer . Secure with
the fixing screw as shown in Fig 1.
Programmer Z1
Day zone Z2
Night zone
5. START-UP
This procedure sets up the communication between the programmer and the heaters in
the system.
1. Go into the service mode by turning the switch to .
The display will show “PArA”.
2. Press and hold down the + and –buttons together for
approx. 5 seconds.
The display will show FP4 and markings for zone 1.
Press OK twice.
If display shows FP6, press the + or –key to reset the
display to FP4.
3. Press OK. The display will show “ENET”. Press OK
again.
4. Display shows “ENET”and markings next to zone 1.
The code for zone 1 is now being transmitted.
5. Insert a receiver cassette into each heater, as per the
cassette instructions. Ensure heater is set to the
position.
6. On each heater for zone 1, press and hold down the
button on the receiver cassettefor approx. 10
seconds until the LED indicator starts to flash.
Release the button, then press again to confirm; the
LED will light continuously.
7. Press OK on the programmer and repeat steps 2-5
for all the heaters in zone 2.
8. Press OK when completed and before changing the
switch position - see over.
N Ph1 Ph2 Ph3
Coupleur de phases
Phase coupler
Mettre le
bouton sur
Diagnostic / Solutions
8.1 Permanent comfort, setback or frost-protection
8.2 Automatic mode
8.3 Setting the daily program
8.4 Overriding the daily program
The program for either zone can be temporarily overridden.The number of bars in the display denotes the
current mode, ie = Comfort and = Setback.
8.5 Holiday (Timed Absence) mode
Holiday mode operates all heaters in both zones at frost protection temperature
for up to 99 days, after which the program is resumed automatically.
8.6. Stopping the heat
Nothing appears on the
control panel screen There is no power supply
Check your circuit breaker
The programmer displays
“PArA”The switch is in position
Change the switch position to AUTO
6.1 Heating programming
•One customisable program per day and
per zone
• Program override:
Possible to temporarily override a
program (e.g. from Comfort to Setback),
in either zone, until the next automatic
program change.
• Absence:
All heaters in both zones can be set at
frost protection temperature permanently,
or for up to 99 days (e.g. while on
holiday) after which the program is
resumed automatically.
Appui bref : Avance lente
Appui maintenu : Avance rapi
Mettre le
bouton sur
1
2
3
4
5
6
7
7. SETTING THE TIME
Short press: slow progress
Long press: fast progress
Turn the
switch to
Each time you pass 0h00,
the day will change to the next day
Note: In the event of a power
failure, the clock will continue to run
for approx. 4 hours
Mettre le
bouton
sur AUTO
1
2
3
4
5
6
7
1
2
3
4
5
6
7
L'appareil suit la programmation
(ex :confort sur la zone 1,
réduit sur la zone 2) Pour une dérogation sur la zone 2,
appuyer sur
Sur la zone 1, l'appareil fonctionne
en réduit jusqu'au prochain
changement du programme
Turn the
switch to AUTO The heaters will follow the
programming (e.g. Comfort
in zone 1, Setback in zone 2)
In zone 1, the heaters will now work in
Setback mode. Press the button again to
revert to Comfort mode. Each press
toggles the zone between Setback and
Comfort modes.
To override zone 2 program, press BLUE
Z2 button as above.
button as above.
Press BLUE Z1 button to
change mode (e.g. from
Comfort to Setback). The
number of bars shown at
bottom of screen changes
accordingly.
Ordre envoyé
par la centrale Température correspondante
sur l'élément de chauffe
Confort Réglage confort (molette thermostat)
Réduit Réglage réduit ou -2˚C ou -3˚C par rapport
au réglage confort (selon modèle)
Hors Gel Hors Gel fixe à 7˚C ou 8˚C (selon modèle)ou
Arrêt Arrêt du chauffage
Central control
signal Corresponding heater
room temperature setting
Comfort Comfort setting (thermostat dial)
Setback Setback - adjustable on heater
(according to model)
Frost-protect or Temperature fixed at 5°C
(according to model)
OFF No heating
Mettre le
bouton
sur PROG Z1
Pour modifier la programmation de la zone 2, mettre le bouton sur PROG Z2
et recommencer les opérations ci-dessus.
1
2
3
4
5
6
7
Le 1er créneau
horaire clignote
Ex.: Confort de 6h à9h,
de 12h à14h,
de 18h à23h
Recommencer
pour chaque
créneau horaire
Validation et passage
au jour suivant.
Recommencer pour
chaque jour.
Mettre le
bouton
sur AUTO
1 h de confort
1 h de réduit
1
2
3
4
5
6
7
Turn the
switch to
PROG Z1
for Zone 1 The first time
slot will flash
Press –for each
hour of Setback
Press + for each
hour of Comfort
Repeat for each
time slot E.g. Comfort from 06:00
to 09:00, 12:00 to 14:00,
18:00 to 23:00
When program is set,
press OK to move to
next day
To alter the programming for zone 2, turn the switch to PROG
Z2 and follow the steps above.
Mettre le
bouton sur
Confort permanent
Mettre le
bouton sur Mettre le
bouton sur
Hors gel permanent
Réduit permanent
Permanent comfort Permanent setback Permanent frost-protection
Turn the
switch to Turn the
switch to Turn the
switch to
Mettre le
bouton sur AUTO
1
2
3
4
5
6
7
Turn the
switch to AUTO
The heaters will follow the programming
To run the
program, turn
the switch to
AUTO
A heater is not responding to
the programmer The receiver cassette is not functioning correctly
Reprogram the receiver cassette - see 5. START -UP
Replace the receiver cassette
6. CONTROLS
2
3
4
5
1
6
7
8
9
4
∂Day of the week
∑Time (24hr)
∏Current mode: Comfort Setback
Daily program profile ( : Comfort, : Setback)
πHeating zones reference points
∫Modification/Override buttons
❻Timed absence function
➐Validation button (program mode)
ΩSelector switch index mark
❾Mode selector switch
8. CHOICE OF FUNCTION MODE
The mains borne signalling system enables
the function mode of the heaters
connected to the system to be controlled
from the central programmer.
Room temperatures are controlled by the
thermostats on the individual heaters.
Turn the
switch to
Heaters are OFF and the system is in Standby mode.
A partir
du mode
AUTO Appui prolongé(environ 3 sec.)
jusqu'àafficher Ab 01 Réglage du nombre
de jours d'absence
Exemple : Départ le 10 Janvier, retour
le 19 Janvier, indiquez 09 jours.
Le fonctionnement automatique sera
repris le 19 Janvier à00H00.
Le décompte commence
Starting from
AUTO mode Hold down (about 5 seconds)
until Ab01 is displayed. Press + to increase the
number of days away
Example: Leaving 10 January, returning
19 January, indicate 09 days.
The countdown begins.
The heaters will be in frost-protection mode
until the automatic function restarts on
19 January at 00:00.
Note: Selector switch MUST be left at AUTO.

Other Dimplex Temperature Controllers manuals

Dimplex SOLCU3 User manual

Dimplex

Dimplex SOLCU3 User manual

Dimplex RT 100 User manual

Dimplex

Dimplex RT 100 User manual

Dimplex BRTU 101 UN Operating instructions

Dimplex

Dimplex BRTU 101 UN Operating instructions

Dimplex RTW 401 UN User manual

Dimplex

Dimplex RTW 401 UN User manual

Dimplex BT 401 UN User manual

Dimplex

Dimplex BT 401 UN User manual

Dimplex RT 200 User manual

Dimplex

Dimplex RT 200 User manual

Dimplex RTK 602 U User manual

Dimplex

Dimplex RTK 602 U User manual

Dimplex AC3N User manual

Dimplex

Dimplex AC3N User manual

Dimplex RTS 207 User manual

Dimplex

Dimplex RTS 207 User manual

Dimplex SOLCU User manual

Dimplex

Dimplex SOLCU User manual

Dimplex Smart-RTC User manual

Dimplex

Dimplex Smart-RTC User manual

Dimplex RTV 101EO User manual

Dimplex

Dimplex RTV 101EO User manual

Dimplex RTK 601 U User manual

Dimplex

Dimplex RTK 601 U User manual

Dimplex RT 202 User manual

Dimplex

Dimplex RT 202 User manual

Popular Temperature Controllers manuals by other brands

Shinko BCR2 Communication instruction manual

Shinko

Shinko BCR2 Communication instruction manual

S+S Regeltechnik HYGRASGARD 4100 Series Operating instructions & installation manual

S+S Regeltechnik

S+S Regeltechnik HYGRASGARD 4100 Series Operating instructions & installation manual

Airstream INTER 2V4SA user manual

Airstream

Airstream INTER 2V4SA user manual

2VV ESSENSSE NEO COMFORT Installation and operation instructions

2VV

2VV ESSENSSE NEO COMFORT Installation and operation instructions

Tempco TEC-9200 user manual

Tempco

Tempco TEC-9200 user manual

Pentair Raychem RTD-200 installation instructions

Pentair

Pentair Raychem RTD-200 installation instructions

WallyHome Temperature Controller product manual

WallyHome

WallyHome Temperature Controller product manual

Johnson Controls A419 Series Product/Technical Bulletin

Johnson Controls

Johnson Controls A419 Series Product/Technical Bulletin

Autonics TX4S Series instruction manual

Autonics

Autonics TX4S Series instruction manual

Siemens RLE132 installation instructions

Siemens

Siemens RLE132 installation instructions

Full Gauge Controls TC-940Ri plus manual

Full Gauge Controls

Full Gauge Controls TC-940Ri plus manual

Aurora ZS Pro-F installation guide

Aurora

Aurora ZS Pro-F installation guide

OWL Intuition RBT-3C installation instructions

OWL

OWL Intuition RBT-3C installation instructions

F&F RT-825 user manual

F&F

F&F RT-825 user manual

Schluter Systems BTERWL/BW operating instructions

Schluter Systems

Schluter Systems BTERWL/BW operating instructions

Nibe ECS 40 Installer manual

Nibe

Nibe ECS 40 Installer manual

Carbolite Type 301 operating instructions

Carbolite

Carbolite Type 301 operating instructions

Novus N1050 instruction manual

Novus

Novus N1050 instruction manual

manuals.online logo
manuals.online logoBrands
  • About & Mission
  • Contact us
  • Privacy Policy
  • Terms and Conditions

Copyright 2025 Manuals.Online. All Rights Reserved.