manuals.online logo
Brands
  1. Home
  2. •
  3. Brands
  4. •
  5. Draper
  6. •
  7. Projection Screen
  8. •
  9. Draper Silhouette C Series Manual

Draper Silhouette C Series Manual

Installation
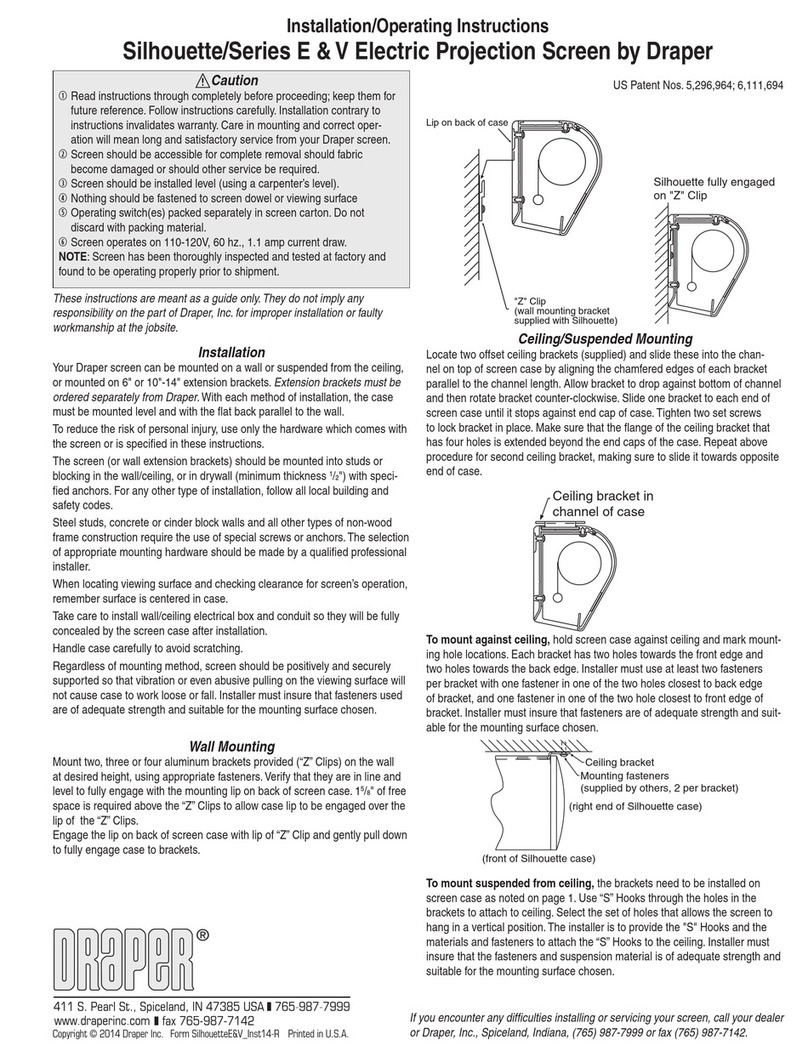
Your Draper screen can be mounted on a wall or suspended from the ceiling,
or mounted on special 6" extension bracket.
Extension brackets must be
ordered separately from Draper
. With each method of installation, the case
must be mounted level and with the flat back parallel to the wall.
To reduce the risk of personal injury, use only the hardware which comes
with the screen or is specified in these instructions.
The screen (or extension brackets) should be mounted into studs or
blocking in the wall/ceiling, or in drywall (minimum thickness
1
/
2
") with
specified anchors. For any other type of installation, follow all local building
and safety codes.
Steel studs, concrete or cinder block walls and all other types of non-wood
frame construction require the use of special screws or anchors. The
selection of appropriate mounting hardware should be made by a qualified
professional installer.
When locating viewing surface and checking clearance for screen’s opera-
tion, remember surface is centered in case. Handle case carefully to avoid
scratching. Regardless of mounting method, screen should be positively
and securely supported so that vibration or even abusive pulling on the
viewing surface will not cause case to work loose or fall. Installer must insure
that fasteners used are of adequate strength and suitable for the mounting
surface.
Wall Mounting
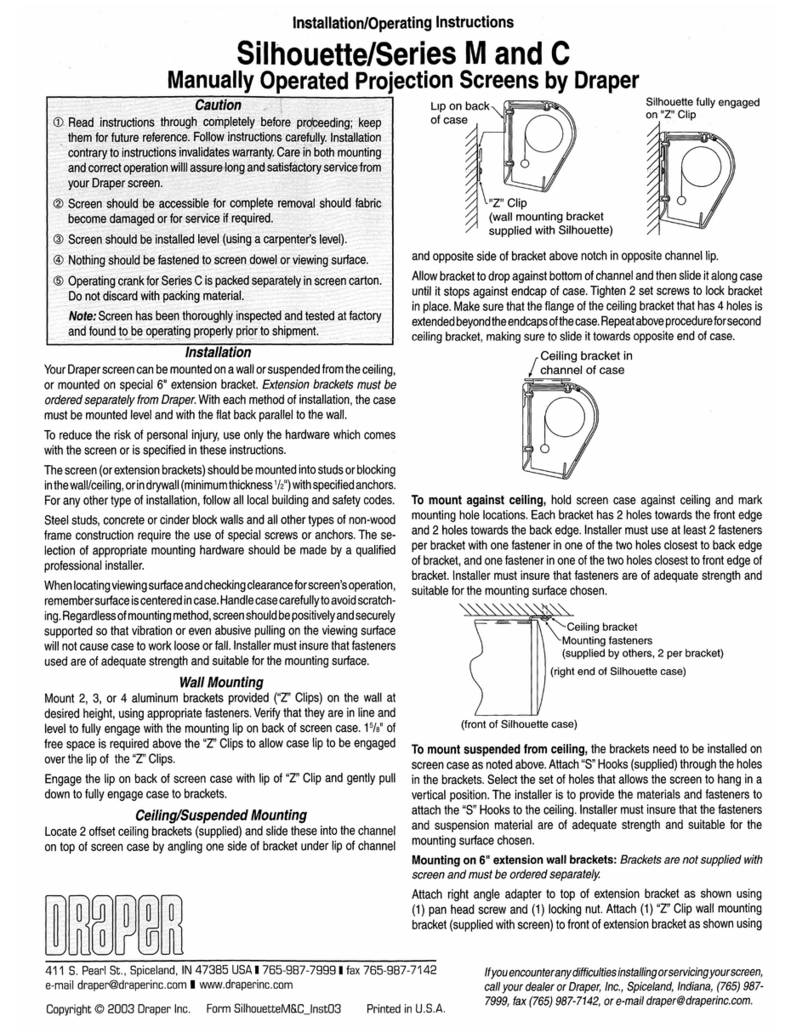
Mount 2, 3, or 4 aluminum brackets provided (“Z” Clips) on the wall at desired
height, using appropriate fasteners. Verify that they are in line and level to
fully engage with the mounting lip on back of screen case. 1
5
/
8
" of free space
is required above the “Z” Clips to allow case lip to be engaged over the lip
of the “Z” Clips.
Engage the lip on back of screen case with lip of “Z” Clip and gently pull down
to fully engage case to brackets.
Ceiling/Suspended Mounting
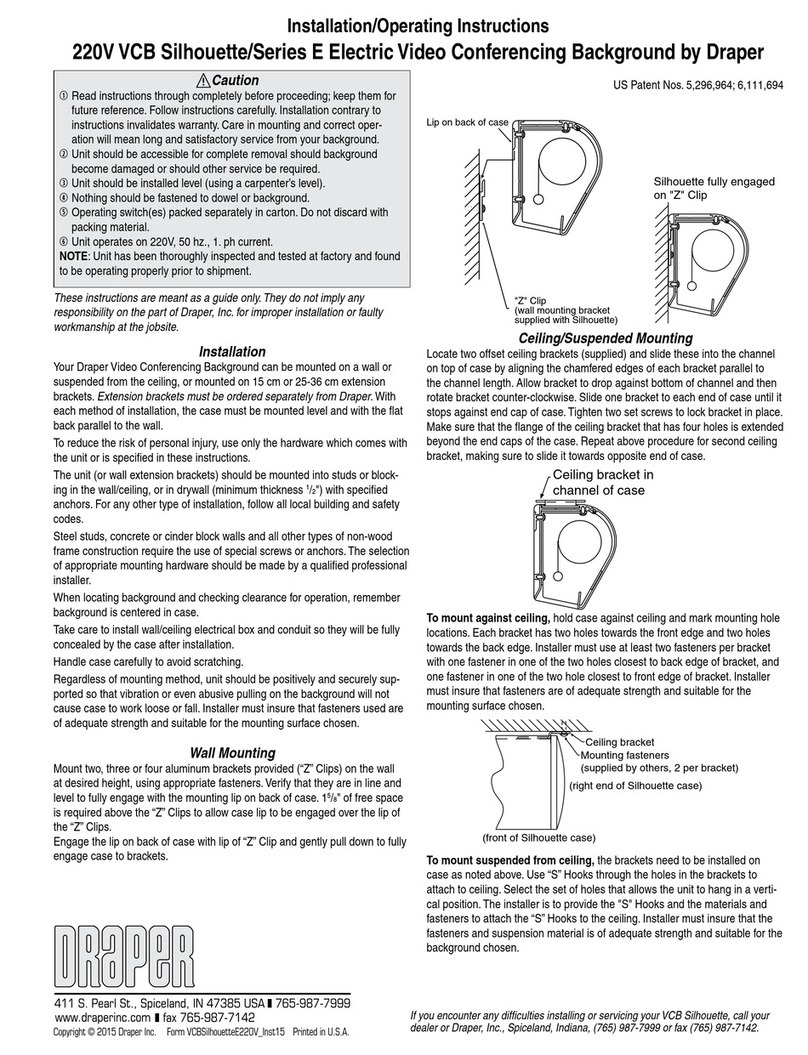
Locate 2 offset ceiling brackets (supplied) and slide these into the channel
on top of screen case by angling one side of bracket under lip of channel and
opposite side of bracket above notch in opposite channel lip.
Allow bracket to drop against bottom of channel and then slide it along case
until it stops against endcap of case. Tighten 2 set screws to lock bracket
in place. Make sure that the flange of the ceiling bracket that has 4 holes is
extended beyond the endcaps of the case. Repeat above procedure for
second ceiling bracket, making sure to slide it towards opposite end of case.
To mount against ceiling, hold screen case against ceiling and mark
mounting hole locations. Each bracket has 2 holes towards the front edge
and 2 holes towards the back edge. Installer must use at least 2 fasteners
per bracket with one fastener in one of the two holes closest to back edge
of bracket, and one fastener in one of the two holes closest to front edge of
bracket. Installer must insure that fasteners are of adequate strength and
suitable for the mounting surface chosen.
To mount suspended from ceiling, the brackets need to be installed on
screen case as noted above. Attach “S” Hooks (supplied) through the holes
in the brackets. Select the set of holes that allows the screen to hang in a
vertical position. The installer is to provide the materials and fasteners to
attach the “S” Hooks to the ceiling. Installer must insure that the fasteners
and suspension material are of adequate strength and suitable for the
mounting surface chosen.
Ceiling bracket in
channel of case
Ceiling bracket
Mounting fasteners
(supplied by others, 2 per bracket)
(front of Silhouette case)
(right end of Silhouette case)
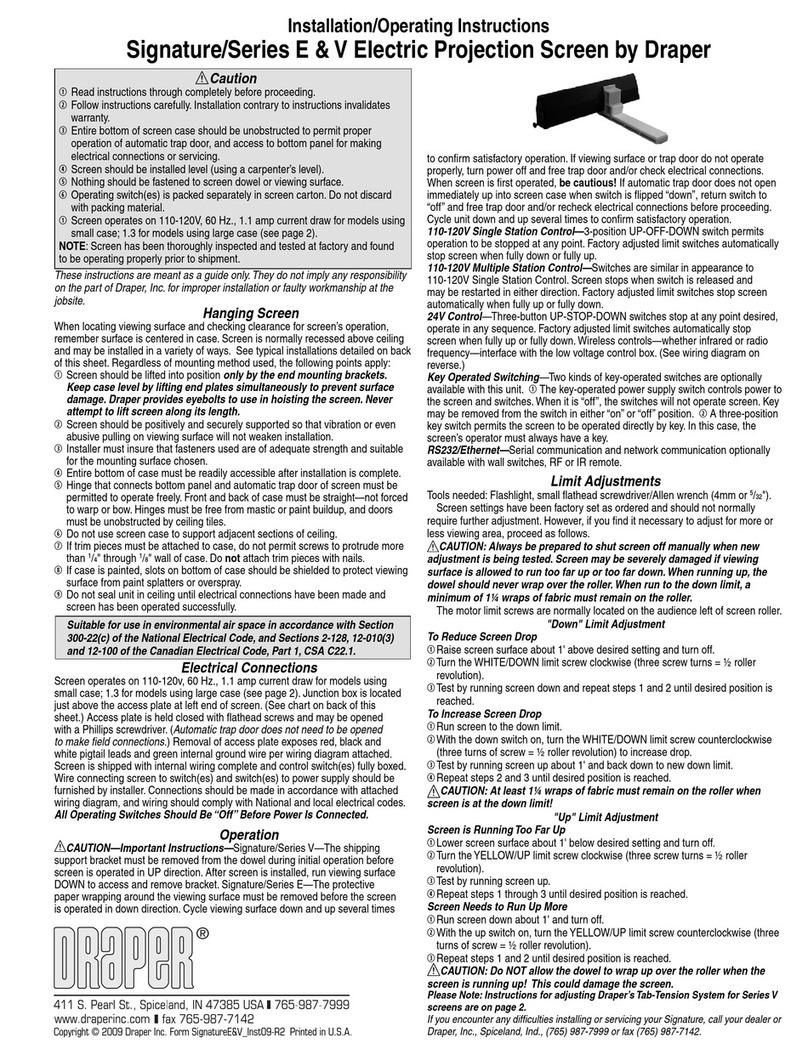
Installation/Operating Instructions
Silhouette/Series M and C
Manually Operated Projection Screens by Draper
Lip on back
of case
"Z" Clip
(wall mounting bracket
supplied with Silhouette)
Silhouette fully engaged
on "Z" Clip
Copyright © 2000 Form Sil/MCI00 Printed in U.S.A.
411 S. Pearl St., Spiceland, IN 47385 USA
❚
765-987-7999
❚
fax 765-987-7142
e-mail [email protected] ❚www.draperinc.com
Caution
➀
Read instructions through completely before proceeding; keep
them for future reference. Follow instructions carefully. Installation
contrary to instructions invalidates warranty. Care in both mounting
and correct operation willl assure long and satisfactory service from
your Draper screen.
➁
Screen should be accessible for complete removal should fabric
become damaged or for service if required.
➂
Screen should be installed level (using a carpenter’s level).
➃
Nothing should be fastened to screen dowel or viewing surface.
➄
Operating crank for Series C is packed separately in screen carton.
Do not discard with packing material.
Note:
Screen has been thoroughly inspected and tested at factory
and found to be operating properly prior to shipment.
Locking screw
"Z" Clip*
Angle adapter*
Extension bracket
Side view of assembled extension bracket
Pan head screw
Hex nut
Pan
head
screw
* Provided with screen
Mounting on 6" extension wall brackets:
Brackets are not supplied with
screen and must be ordered separately.
Attach right angle adapter to top of extension bracket as shown using (1)
pan head screw and (1) locking nut. Attach (1) “Z”Clip wall mounting
bracket (supplied with screen) to front of extension bracket as shown using
(1) pan head screw and (1) locking nut. (Make sure “Z”Clip is oriented 90°
to angle adapter.)
Wall mount the extension brackets to wall, making sure they are level and
vertically plumb. Installer must insure fasteners are of adequate strength
and suitable for chosen mounting surface. Back out the top stop screw until
it is flush with front side of angle adapter.
Engage the lip on back of screen case with lip of “Z”Clip and gently pull
down to fully engage case to brackets. Screw in stop screw on each bracket
to lock screen case in place.
Operating Instructions
Series M Spring Operated Screen:
To lower picture surface, pull screen
down to desired position.
Hesitate
—then allow screen to slightly retract
very slowly
until it locks in place.
To raise picture surface, pull down on the pull bail, then raise quickly, as a
window shade. Keep control of the picture surface. Do not allow it to roll
uncontrolled into the case, or damage is sure to result.
Series C Crank Operated Screen:
To lower screen surface, attach the
crank handle to the “U”joint stud located on the left hand side of the screen.
With the crank handle in its operating position, rotate counterclockwise. An
internal pin within the gear box will stop the screen when fully extended. The
crank handle can be removed if desired. The shipping support brackets
must be removed from each end of dowel during initial operation.
Locking screw
Wall bracket*
Angle adapter*
Extension
bracket
*Supplied with screen
Silhouette/Series M and Series C by Draper Page 2 of 2
Angle adapter
Wall bracket
Extension Arm
Front view of assembled
extension bracket
90˚
1½"Viewing Surface
To raise screen surface, attach the crank handle to the “U”joint stud located
on the left hand side of the screen. With the crank handle in its operating
position, rotate in a clockwise direction. An internal pin within the roller will
stop the screen when fully retracted. The crank handle can be removed if
desired.
Removing Case Fascia
Case fascia is removable to access roller assembly. To remove fascia,
depress outward the spring lip located inside lower front corner of screen
case and pull lower corner of fascia outward. Repeat this at right end of
case. Support fascia from center and rotate lower front edge upward
approximately 40°to disengage the Roll-Lok hinge at the top front of screen
case. Fascia can now be completely removed from case.
To install fascia, generally reverse instructions above making sure the Roll-
Lok hinge is completely engaged before rotating fascia down towards the
closed position. Depress spring clips outward, push lower corners of fascia
inward until lips of spring clips hook behind fascia.
2
3
/
8
"
4¾"
6"
If you encounter any difficulties installing or servicing your screen, call your
dealer or Draper, Inc., Spiceland, Indiana, (765) 987-7999, fax (765) 987-
7142, or e-mail [email protected].
Case Dimensions
Silhouette/Series M
Silhouette/Series C

Other manuals for Silhouette C Series

1

This manual suits for next models

1

Other Draper Projection Screen manuals

Draper Nocturne User manual

Draper

Draper Nocturne User manual

Draper Premier PRE-28 User manual

Draper

Draper Premier PRE-28 User manual

Draper Luma 2 User manual

Draper

Draper Luma 2 User manual

Draper Targa User manual

Draper

Draper Targa User manual

Draper Paragon Series Manual

Draper

Draper Paragon Series Manual

Draper Access XL E User manual

Draper

Draper Access XL E User manual

Draper Access MultiView Manual

Draper

Draper Access MultiView Manual

Draper Series E Manual

Draper

Draper Series E Manual

Draper Portable Projection Screen User manual

Draper

Draper Portable Projection Screen User manual

Draper Odin User manual

Draper

Draper Odin User manual

Draper Access/Series M Manual

Draper

Draper Access/Series M Manual

Draper Targa 220V Manual

Draper

Draper Targa 220V Manual

Draper Acumen Recharge E Programming manual

Draper

Draper Acumen Recharge E Programming manual

Draper nocturne+ c User manual

Draper

Draper nocturne+ c User manual

Draper Silhouette/Series V Manual

Draper

Draper Silhouette/Series V Manual

Draper Cinefold Portable Folding Projection Screen User manual

Draper

Draper Cinefold Portable Folding Projection Screen User manual

Draper Traveller User manual

Draper

Draper Traveller User manual

Draper Signature E Series Manual

Draper

Draper Signature E Series Manual

Draper Cinefold User manual

Draper

Draper Cinefold User manual

Draper Onyx User manual

Draper

Draper Onyx User manual

Draper Access Fit Series User manual

Draper

Draper Access Fit Series User manual

Draper Clarion User manual

Draper

Draper Clarion User manual

Draper Rolleramic Electric Projection Screen Manual

Draper

Draper Rolleramic Electric Projection Screen Manual

Draper Premier XL Programming manual

Draper

Draper Premier XL Programming manual

Popular Projection Screen manuals by other brands

Screen Technics ELECTRICINEMA A instructions

Screen Technics

Screen Technics ELECTRICINEMA A instructions

Elite Screens Evanesce Plus Series user guide

Elite Screens

Elite Screens Evanesce Plus Series user guide

Stumpfl VARIO CURVE manual

Stumpfl

Stumpfl VARIO CURVE manual

INSTAAL INSMAN user manual

INSTAAL

INSTAAL INSMAN user manual

Lippert Components Screen Defender Installation and owner's manual

Lippert Components

Lippert Components Screen Defender Installation and owner's manual

Jula Hard Head operating instructions

Jula

Jula Hard Head operating instructions

Genius Sierra 800 installation instructions

Genius

Genius Sierra 800 installation instructions

Elite Screens Kestrel Tab-Tension 2 CLR Series manual

Elite Screens

Elite Screens Kestrel Tab-Tension 2 CLR Series manual

Screen Research FS3 installation manual

Screen Research

Screen Research FS3 installation manual

Elite Screens Elite Tripod Series user guide

Elite Screens

Elite Screens Elite Tripod Series user guide

Monoprice 7337 user manual

Monoprice

Monoprice 7337 user manual

Da-Lite Slimline Electrol Instruction book

Da-Lite

Da-Lite Slimline Electrol Instruction book

Elite Screens Spectrum2 Series user guide

Elite Screens

Elite Screens Spectrum2 Series user guide

TEREN THD quick start guide

TEREN

TEREN THD quick start guide

Rostra 250-8274 Installation  & owners guide

Rostra

Rostra 250-8274 Installation & owners guide

Vivid VFS492SVS user manual

Vivid

Vivid VFS492SVS user manual

DMT Fast-Setup Screen Pro manual

DMT

DMT Fast-Setup Screen Pro manual

Screen International MODIGLIANI VELVET installation manual

Screen International

Screen International MODIGLIANI VELVET installation manual

manuals.online logo
manuals.online logoBrands
  • About & Mission
  • Contact us
  • Privacy Policy
  • Terms and Conditions

Copyright 2025 Manuals.Online. All Rights Reserved.