6
STANDARD BOTTLE/ STARTING TEMPERATURE ESTIMATED TIME
NARROW/PLASTIC (before warming) (minutes)
60 ml Liquid Room temperature (22°C) 2:10
60 ml Liquid Refrigerator (4°C) 3:00
60 ml Liquid Freezer (-18°C) 8:00 + :30
120 ml Liquid Room temperature (22°C) 2:30
120 ml Liquid Refrigerator (4°C) 3:55
120 ml Liquid Freezer (-18°C) 8:00 + 1:05
250 ml Liquid Room temperature (22°C) 3:00
250 ml Liquid Refrigerator (4°C) 5:00
250 ml Liquid Freezer (-18°C) 8:00 + 3:30
GLASS STARTING TEMPERATURE ESTIMATED TIME
BOTTLE (before warming) (minutes)
120 ml Liquid Room temperature (22°C) 2:00
120 ml Liquid Refrigerator (4°C) 2:50
120 ml Liquid Freezer (-18°C) 7:00
250 ml Liquid Room temperature (22°C) 2:30
250 ml Liquid Refrigerator (4°C) 4:20
250 ml Liquid Freezer (-18°C) 8:00 + 2:10
NOTE: DO NOT FREEZE DR. BROWN’S BOTTLES WITH THE VENT SYSTEM IN PLACE. WE SUGGEST
THAT YOU WARM THE BOTTLE AND FROZEN FLUID, AND THEN REASSEMBLE THE VENT SYSTEM
BEFORE USE.
CAUTION: If using glass bottles, use only glass thermo-resistant bottles, as sudden temperature
change may cause glass to break.
WIDE-NECK BOTTLE/ STARTING TEMPERATURE ESTIMATED TIME
plastic (before warming) (minutes)
120 ml Liquid Room temperature (22°C) 2:20
120 ml Liquid Refrigerator (4°C) 4:00
120 ml Liquid Freezer (-18°C) 8:00 + 3:00
240 ml Liquid Room temperature (22°C) 3:20
240 ml Liquid Refrigerator (4°C) 5:35
240 ml Liquid Freezer (-18°C) 8:00 + 6:10
FOOD JAR STARTING TEMPERATURE ESTIMATED TIME
(before warming) (minutes)
120 ml Room temperature (22°C) 2:30
120 ml Refrigerator (4°C) 2:45
CAUTION: Heating frozen food jars with this warmer is NOT RECOMMENDED. Always thaw
them first.
Never heat an empty bottle or jar in this product.
PACIFIER OR SMALL ACCESSORY STERILIZATION ESTIMATED TIME
Soother/Pacifier 2:00
TO OPERATE THE APPLIANCE:
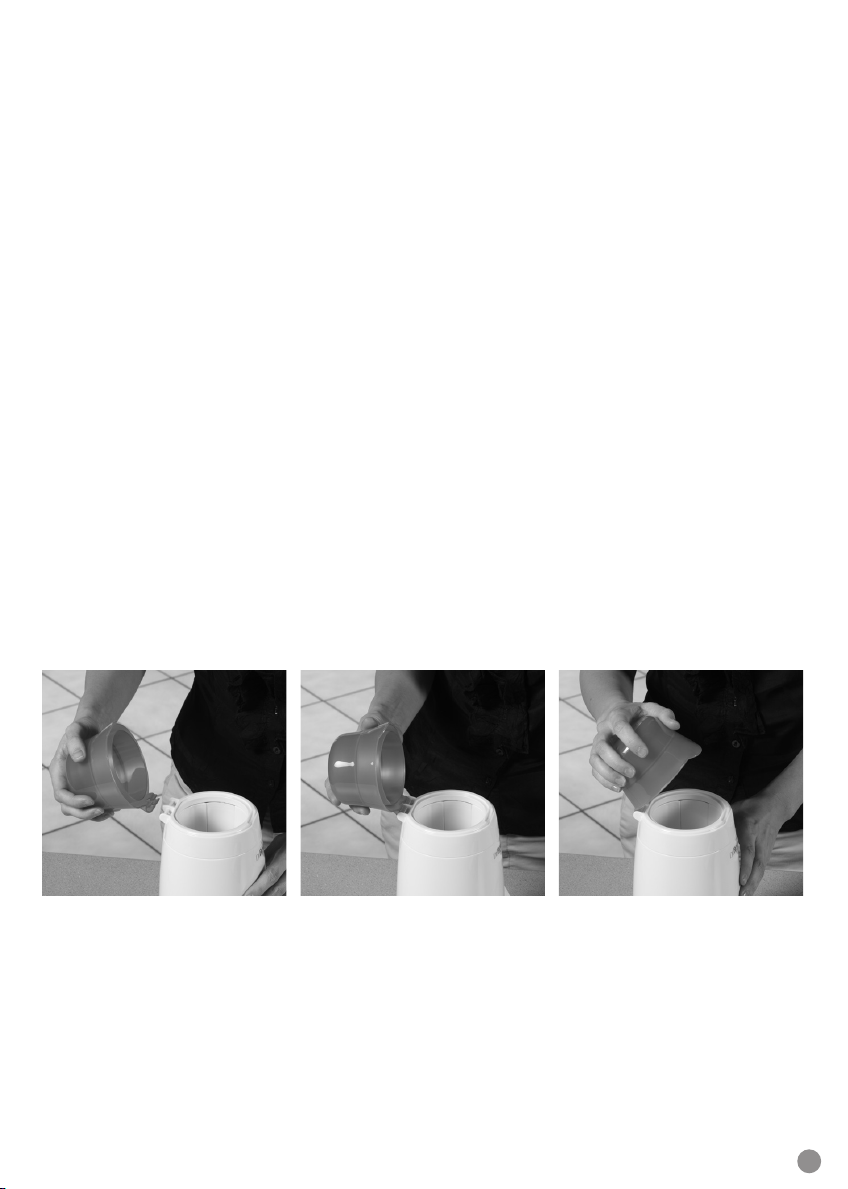
1. Remove any protective cap, position the
bottle or jar in the basket and then place it
into the heating chamber.
NOTE: The basket has 2 parts. The bottom
section can be turned upside down so that
smaller bottles sit higher up in the heating
chamber and are easier to remove.
(SEE FIGURE 4)
CAUTION: Before warming Dr. Brown’s bottles in this appliance, always remove all bottle
components before warming to prevent the vent from leaking fluid if gas forms during warming.
If leaking occurs during warming, pour out any remaining water in the appliance’s heating
chamber and reservoir, and refill the reservoir with fresh water.
NOTE: To empty the heating chamber, unplug the product and remove the reservoir from the
side. With the cover open, tip the unit over a sink with the reservoir opening facing up and
drain any remaining fluid from inside the heating chamber through the top opening.
2. Close the cover. Never use this appliance without the basket insert in place and properly
adjusted for the bottle or jar size.
CAUTION: DO NOT open the lid of the heating chamber once the heating cycle has been started.
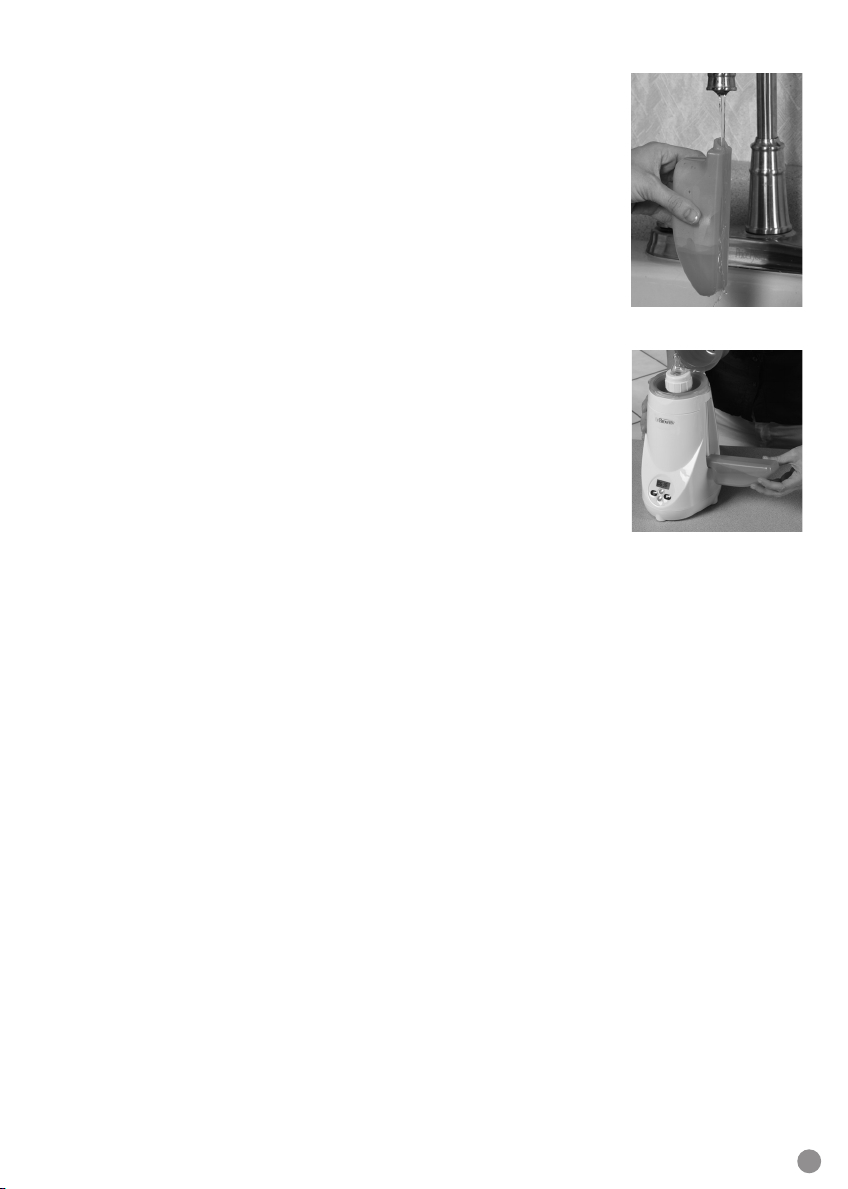
3. Press any button on the keypad (except O) to display the “last time
used”. If correct, press >. If you want to adjust the time, press the up
arrow button to increase the length of time or the down arrow
button to decrease the time.
NOTE: Pressing and holding an arrow button will cause the timer
display to change very fast. To change the timer slowly, push and
release the arrow button so the numbers move incrementally.
Once the display shows the desired time, press start button.
(SEE FIGURE 5)
4. When the heating cycle is complete the display will flash 00:00 for 60 seconds and then shut
off. At that time, there will be 5 audible beeps that indicate that cycle time you selected is
complete and the bottle or food is ready to be removed from the appliance. You can open the
top of the product at this point.
NOTE: You can turn the appliance off anytime by pressing the O button.
CAUTION: Be careful of the steam rising out from the heating chamber. DO NOT put your hands
on or around the heating chamber during or immediately after the heating cycle.
FIGURE 4
FIGURE 5
5. Grasp the side tabs of the basket and remove it immediately to prevent residual heating. Place it
on the countertop and remove the bottle or jar. (SEE FIGURE 6)
6. Gently swish the fluid in the bottle around or stir the food thoroughly so the temperature
becomes uniform throughout the container.
7. ALWAYS TEST THE TEMPERATURE OF THE FLUID OR FOOD BEFORE FEEDING YOUR BABY.
NOTE: The appliance is programmed to automatically reduce the time for an additional heating
cycle started within 15 minutes of the end of the previous cycle. If you heat a second bottle
immediately, you will see that time is reduced by a pro-rated amount unless you override the
feature and set a new time yourself.
NOTE: The appliance is equipped with an internal sensor that will automatically shut the unit off
if it gets too hot or runs out of water. The switch will automatically reset once the unit cools down.
NOTE: For microbiological and hygienic reasons, once milk or food is heated, it should not be
re-heated again and should be discarded if not used immediately. Please consult your health
professional for further guidance about safety recommendations on feeding.
TO CLEAN THE APPLIANCE:
• Always unplug the appliance and ensure it is cool before cleaning any part.
• Remove water reservoir and empty all water out of the unit.
• Wipe the exterior surfaces as well as the inside of the heating chamber with a damp cloth or
sponge using mild soap. DO NOT submerge the unit in any water or liquid.
• Removable baskets are dishwasher safe (top rack) or wash with soapy water. Rinse with clean
water. Air dry.
• DO NOT use scouring pads, abrasives, bleach or solvents for cleaning.
• DO NOT disassemble the product. There are no serviceable parts inside.
TO DE-SCALE THE APPLIANCE:
For best results and easiest care, it is recommended to use distilled water. It is important to
de-scale this appliance every 4 weeks to ensure that it continues to work properly. Pour all
remaining water out of the water chamber and reservoir. To de-scale, mix 2 oz (50 ml) of white
vinegar with 4 oz (100 ml) of cold water in the water reservoir, and then run the mixture through
the bottle warmer as you normally would until any scaling has been removed. Please ensure
proper ventilation when descaling with vinegar.