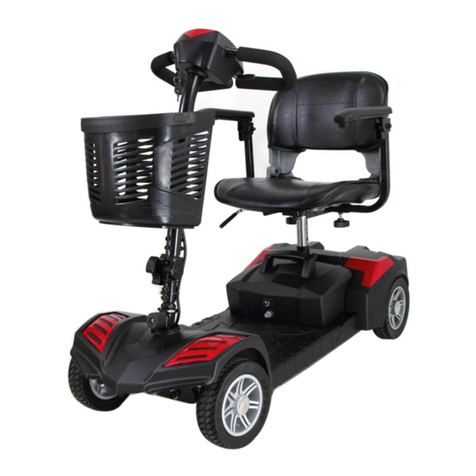
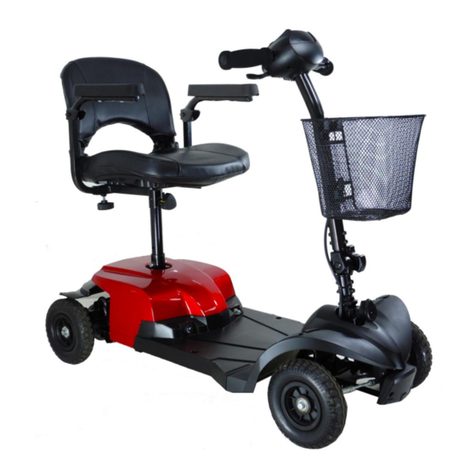
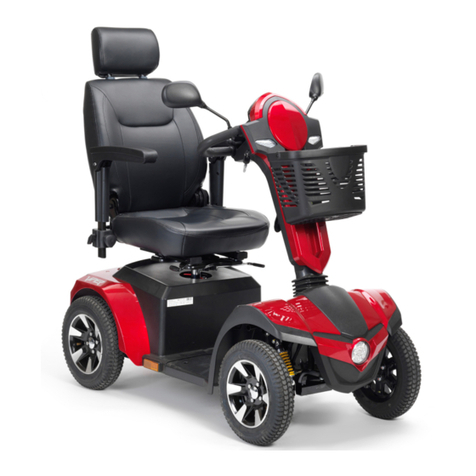
Drive Odyssey LX User manual

O
W
OD
Y
W
NE
R
Y
SSE
Y
R
’S M
A
Y
LX
A
NU
A
A
L

1
1. PREFACEAND INTRODUCTION ……..…………………………………… 2
2. SAFETY NOTICE………………………………………………………...…..
2.1 Before driving
2.2 While driving
2.3 Labeling
3
3. PARTS INTRODUCTION……………………………………………..……….
Parts description
7
4. OPERATION…………………………………………………………………....
4.1 Control panel
4.2 How to operate your scooter
8
5. BATTERY CHARGING AND CARE……………………………………….....
5.1 Charging the battery
5.2 Battery
11
6.
INSPECTION AND MAINTENANCE……………………………………..…
6.1 Inspection
6.2 Regular maintenance record
6.3 Battery, fuse and tire
6.4 Storage
6.5 Moving about
14
7. TROUBLE SHOOTING AND SPECIFICATION…………….…………… 16
8. WARRANTY………………………………………………………………….....
17
TABLE OF CONTENTS

2
1. PREFACE AND INTRODUCTION
Carefully read this owner’s manual before using the vehicle. Improper use of the vehicle could result in
harm, injury or accidents.
The symbols used in this manual are explained below:
Warning
Improper use could result in serious injury or death
Attention
Improper use could lead to injury and/or damage to your scooter.
Suggestion
Follow these instructions to keep your vehicle in a good operating order.
This manual includes a copy of repair and maintenance record chart and warranty information. Please
keep it in a safe place or in the scooter.
If someone else uses the scooter, please make sure that you provide them with the instruction manual
for proper use of the scooter.
As designs change some illustrations and pictures in the manual may not correspond to the vehicle
that you purchased. We reserve the right to make design modifications.
Suggestion
To maximize your batteries service life, fully charge your new battery
before its first time use.

3
2.1 BEFORE DRIVING
The user needs to be familiar with the use and operation of this vehicle before driving. Always keep the
following safety notices in mind.
■ The same traffic rules apply to the use of this vehicle as apply to pedestrians
For your safety, please follow the rules that apply to pedestrians.
Ride on the pavement, single lane roads, or pedestrian areas only. Never ride on highways.
Do not drive your scooter after consuming alcohol or when you are tired.
Be careful when driving your scooter in low light. It has not been designed for use at night.
Be extremely cautious when driving your scooter on a busy street or in shopping malls.
■ Practice operating your vehicle
Before using the scooter in busy or potentially dangerous areas, familiarize yourself with the operation
of your scooter. Practice in a wide and open area like a park. In order to avoid accidents with your
scooter while driving, consider driving motions, such as accelerating, stopping, turning, reversing, or
going up and down ramps.
Turn the speed dial to low speed position for your initial use.
Only use higher speed setting when you are confident that you can easily operate and control your
scooter.
■ The Scooter is only to be used by one person at a time
Do not carry passengers on your scooter (including children)
■ Do not use this vehicle to carry or haul goods
Maximum user weight is 400 lbs / 182 kg.
Maximum loading weight for basket is 6.5 lbs / 3 kg.
2.2 WHILE DRIVING
■ Please carry out daily inspections. Refer to the section entitled “DAILY INSPECTION”
■ Always keep your arms and legs on the scooter during operation.
Pay attention that your clothes do not tangle in the wheels.
2. SAFETY NOTICE

4
■ Do not use your vehicle under the circumstances below.
On roads with heavy traffic or roads that are muddy, sandy, bumpy, narrow, snow covered, or icy.
Do not drive at night or when it is raining, snowing, misty, or windy.
Do not drive your vehicle in an “S” pattern or make erratic turnings.
Do not take the scooter onto escalators.
UNDER NO CIRCUMSTANCES SHOULD THE SCOOTER BE USED AS A SEAT IN A
MOTOR VEHICLE.
■ About Mobile Phones and other electrical equipment
Do not use a mobile phone or other wireless communication devices while driving.
Always switch off the scooter and remove the ignition key before using a mobile phone.
Do not charge the mobile phone or any other electrical devices from your scooter’s battery.
■ Automatic Power Shut Down
In order to avoid accidental battery run down, your scooter is equipped with an automatic power shut
down. If the scooter is switched on, after remaining undisturbed for a period of thirty minutes it will
automatically turn off. Should this occur, simply switch your scooter off and back on and it will be
ready to use once again.
■ Ramps, inclines and drops
Do not drive onto steep ramps greater than the specified gradient. Refer to the section entitled
“CLIMBING ANGLE” in “7. SPECIFICATION“
Always use a low speed setting when ascending or descending a gradient.
Slow down when driving on roads with inclines.
Do not make sudden turns when driving on gravel roads or ramps.
Always lean forward when climbing a steep gradient.
■ Starting and Driving
1. Make sure the seat is installed properly.
2. Make sure the tiller has been secured properly.
3. Fold down the armrests so you can rest your arms on them.
4. Turn the power switch to “ON”. If necessary, turn on the headlights.
5. Check battery indicator to see whether there is enough power for your journey. If you have any
doubt about the remaining power, recharge the batteries before departure.
6. Set the speed dial to a position you feel safe and comfortable with.
2. SAFETY NOTICE

5
2. SAFETY NOTICE
7. Check the forward/reverse speed lever works correctly.
8. Make sure the electromagnetic brake works correctly.
9. Make sure it is safe around you before you drive on the street.
WARNING !
Do not set in the freewheel mode when driving on a gradient.
Always re-engage the anti-freewheel device before use. Failure to do so may result in injury.
To protect your safety, the power will automatically cut off and electromagnetic brake system will
activate while you are driving down a steep gradient. This will limit the speed to a safe level. Turn the
power on again to re-start your scooter.
Maximum User Weight Limit
Refer to section entitled “MAX. USER WEIGHT” in “ 8. SPECIFICATION “. Overloading past the
weight limit may lead to damage of your scooter or cause it to malfunction and will endanger your
safety. The warranty does not cover this type of damage.
Attention
1. Do not push both RH & LH sides of the speed control lever simultaneously.
2. Do not turn the power switch to OFF while driving as this will lead to an emergency stop and
possible risk of accident and injury.
3. Do not set to the highest speeds while driving indoors.
4. Do not adjust the speed dial while driving, a sudden change in speed may cause danger to you and
others, and may cause damage to your scooter.
5. Do not place magnetic devices near the area of the operation handle as this could affect the safe
operation of your scooter.
6. Be careful while driving in heavy traffic or crowded areas.
7. While in reverse, beware of people or objects behind you.
▓Stopping
1.Release the speed control lever completely. The vehicle will naturally brake and stop.
2.Turn the power switch to (OFF). Then pull out the key.
▓Driving on the pavement
Ensure the limit switch is set to the slowest setting when using the scooter on the pavement.
This will limit the scooter to a maximum speed of 8 mph / 12.8km/h.
The limit switch can be set to the fastest setting for use on the road or on private ground.

6
2. SAFETY NOTICE
2.3 LABELING
Carefully read all labels on the scooter before driving it. For future reference, do not remove them.
NEVER LIFT THE SCOOTER UP BY THE FRONT
OR REAR SHROUD
W
ARNING:
Radio waves may affect scooter control.
Radio wave sources, such as radio stations, amateur radio (HAM) transmitters, two-way
radios, and cellular phones, can affect powered motorized scooters. Following the
warning listed below should reduce the chance of unintended brake release or powered
scooter movement which could result in serious injury. .
1. Do not turn ON hand-held personal communication devices, such as citizens band
(CB) radios and cellular phones, while the powered scooter is turned ON.
2. Be aware of near by transmitters, such as radio or TV stations, and try to avoid
coming close to them.
3. If unintended movement or brake release occurs, turn the powered scooter OFF as
soon as it is safe.
4. Be aware that adding accessories or components, or modifying the powered
scooter, may make it more susceptible to interference from radio wave sources.
(Note: There is no easy way to evaluate their effect on powered scooter.)
WARNING
Do not operate the scooter unless the handle bar is in
a lock position.
Do not lean against or pull forward on the handle bar
while mounting or dismounting from the scooter.
Serious harm or injury can occur.

7
3. PARTS INTRODUCTION
3.1 PARTS DESCRIPTION
1. Indicator Lamp 2. Charger Socket Cover 3. Basket Bracket
4. Tiller Adjust Lever 5. Head Lamp 6. Seat
7. Side Reflector 8. Rear Lamp 9. Anti-tip Wheel
10. Rear Reflector 11.Fold up and Width adjustable armrests
12.Rear Pocket
.
1
2
3
4
5
6
7
11
9
12
10
8

4.
1
4.
2
■
T
■
■
■
■
1
CONTR
O
1.Speed
D
2. Horn
B
3. Indicat
o
4. Head li
5. Batter
y
6. Emerg
e
7.Indoor
/
2
HOW T
O
■
Power sw
i
T
urn the ke
y
(ON) :
P
(OFF) :
P
■
Speed Di
a
Turn the
speed o
f
increase
anticloc
k
■
Forward,
Push
Push
The
h
Rele
a
elect
r
■
Indicator
The l
right.
Retu
r
■
Horn But
t
Press the
h
O
L PANE
L
D
ial
B
utton
or
lamp sw
i
ght / Rear
L
y
Indicator
e
ncy lamp s
/
Outdoor S
w
O
OPERA
T
i
tch
y
to power
O
P
ower is tu
r
P
ower is tu
r
a
l
speed di
a
f
the scoo
t
the spee
d
k
wise to
d
Reverse,
a
the speed
c
the speed
c
h
orn will b
e
a
se the sp
e
r
omagnetic
Lamp Sw
i
ight will fl
a
r
n the switc
h
ton
h
orn button
L
i
tch
L
ight Butto
n
witch
w
itch
T
E YOUR
S
O
N or OF
F
r
ned on
r
ned off
a
l to deter
m
t
er. Turn t
h
d
setting a
n
d
ecrease t
h
a
nd Brakin
g
c
ontrol leve
r
c
ontrol leve
r
e
ep when th
e
e
ed contro
brake in th
e
tch
a
sh and bu
z
h
back to t
h
to sound t
h
4. O
P
n
S
COOTE
R
F
m
ine the
m
h
e dial cl
o
n
d turn th
h
e speed
s
g
r
forwards
w
r
forwards
w
e
vehicle is
o
l lever fr
e
e
motor wil
z
zer will m
a
h
e middle, t
h
h
e horn. Re
l
8
P
ERA
T
R
m
aximum
o
ckwise t
o
e dial
s
etting.
w
ith your r
i
w
ith your l
e
in reverse.
e
ely while
l be activat
e
a
ke a
b
eepi
n
h
e indicato
r
l
ease the bu
t
T
ION
o
i
ght thumb
a
e
ft thumb a
n
either go
i
e
d, and the
n
g sound w
h
r
will be ca
n
t
ton to stop
a
nd the veh
n
d the vehi
c
i
ng forwa
r
vehicle wil
l
h
en turnin
g
n
celled.
the horn.
Slowest
icle will m
o
c
le will mo
v
r
d or reve
r
l
stop.
g
the switch
setting
o
ve forwar
d
v
e backwar
d
r
se, and t
h
to the left
o
Fastest se
t
d
.
d
.
h
e
o
r
t
ting

■
■
T
h
a
c
y
o
a
i
m
B
W
W
n
o
Light But
t
Push the
Push the
Battery I
n
h
e battery i
n
c
olor code t
o
ur batteries
draining
c
m
mediate re
c
The rem
a
will var
y
you dri
v
will con
s
Battery
C
1.
You sh
o
b
atteries s
h
2.
After c
h
capacity i
s
3.
In wint
e
4.
When
d
5.
Even i
f
results in
r
b
atteries
w
to use the
o
raking
4.
Electro-m
will be ac
t
W
arning
hen on a gr
a
o
t be applie
d
t
on
light butto
n
button aga
i
n
dicator
n
dicator on
t
o indicate t
h
. Green ind
i
c
harge(10
~
c
harge is n
e
a
ining pow
e
y
by the ac
t
v
e. Repeate
s
ume the p
o
C
are
o
uld rechar
g
h
ould be c
h
h
arging or
r
s
sufficient.
e
rtime, the
b
d
riving on
a
f
the battery
r
educed bat
t
w
ere new, it
o
ld battery
OPER
A
m
agnetic br
a
t
ivated aut
o
a
dient NE
V
d
. This may
n
to switch
i
n to turn t
h
t
he tiller c
o
h
e approxi
m
i
cates (40
~
~
30%),and
e
cessary.
e
r suggeste
d
t
ual drivin
g
d starting,
o
wer more
q
g
e the batte
r
h
arged at le
a
r
eplacing a
n
b
attery ma
y
a
gradient, t
h
is used pro
p
t
ery range.
W
is time to r
e
when it sh
o
A
TION4
a
ke: Releas
e
o
matically,
a
V
ER switch
result in i
nj
4. O
P
the front a
n
h
e lights of
f
o
nsole uses
m
ate power
~
100%) ca
p
red indic
a
d
by the bat
t
g
time incu
r
stopping,
a
q
uickly.
r
ies after e
a
a
st once a
w
n
ew
b
atter
y
y
respond
m
h
e battery i
n
p
erly, it is
n
W
hen you
f
e
place them
o
uld be repl
. OPE
R
e
the speed
a
nd the sco
o
4. O
P
the vehicle
nj
ury.
9
P
ERA
T
n
d rear ligh
t
f
.
remaining
i
p
acity, yello
a
tes that
a
t
ery indicat
o
r
red and ho
a
nd climbi
n
a
ch time the
w
eek even i
f
y
, drive the
v
m
ore slowly
n
dicator lig
n
atural for t
h
f
ind the bat
t
. See your
d
a
ced, it co
u
R
ATION
control le
v
o
ter will st
o
P
ERA
T
to the free
w
T
ION
t
s on.
i
n
w
a
n
o
r
w
n
g
vehicle is
u
f
the scoote
r
v
ehicle for
2
and the
b
a
t
ht might m
o
h
e
b
attery’s
t
ery’s range
d
ealer for r
e
u
ld lead to
a
4. OP
E
v
er comple
t
o
p.
T
ION
w
heel mod
e
R
u
sed to ens
u
r
is not use
d
2
-3 minutes
t
tery range
m
o
ve up and
capacity to
is about 5
0
e
placement
b
a
rapid decli
E
RATIO
t
ely, and th
e
. The elect
r
R
ED
Y
u
re maxim
u
d
.
to make s
u
m
ay be red
u
down. Thi
s
reduce wit
h
0
% of the ra
n
b
atteries. I
f
ne in perfo
r
N
e electrom
a
r
omagnetic
b
Y
ELLOW
u
m range. T
h
u
re the
b
atte
r
u
ced.
s
is a norma
h
time, whi
c
n
ge when t
h
f
you contin
u
r
mance.
a
gnetic bra
k
b
rakes will
GREEN
h
e
r
y
l.
c
h
h
e
u
e
k
e

e
at can
b
e t
u
h
e seat adju
s
s
e the lever,
n
n
the seat t
o
e
the limit s
w
d
just the a
r
e
knobs at t
h
w
ith the wid
t
e
-position
t
a
n slide
b
ac
k
e
driving p
o
v
er at the fr
o
d
justment
be adjuste
d
h
e lever to
a
h
e lever to
s
c
uit Break
e
voltage in
y
loads or st
e
a
ge. Reset
t
5. B
A
u
rned to 45
s
tment leve
r
continue r
o
o
the forwar
w
itch is set
r
mrest wi
d
h
e back of t
h
t
h, tighten t
h
t
he seat
k
ward and
f
o
sition. To
s
o
nt the seat
d
into many
a
djust the ti
s
ecure the
t
e
r (Reset
B
y
our scoote
r
e
ep inclines
,
t
he breaker
A
TTE
R
degrees or
9
r
forward a
n
o
tating the
s
d position
b
to the slo
w
d
th
h
e seat fra
m
h
e knob.
f
orward for
s
lide the se
a
and reposit
differen
t
p
o
ller to posi
t
t
iller.
B
utton)
r
’s batterie
s
,
the main c
by pressin
g
R
Y C
H
10
9
0 degrees.
n
d rotate se
s
eat until it
b
efore drivi
n
w
est setting
w
m
e and adjus
t
a
at
,
ion as requ
i
o
sitions to
s
t
ions you d
e
s
becomes l
o
ircuit brea
k
g
.
H
ARG
I
at.
locks in po
s
n
g.
w
hen using
t
the armre
s
i
red.
s
uit each dr
e
sire.
o
w or the s
c
k
er may trip
I
NG
A
s
ition.
the scoote
r
s
t width by
s
iver.
c
ooter is he
a
to protect t
h
A
ND C
Slide leve
r
r
on the pa
v
s
liding the
a
a
vily strain
e
h
e motor a
n
ARE
r
v
ement.
a
rmrest. On
c
e
d because
o
n
d electroni
c
Swivel lev
e
c
e
o
f
c
s
e
r

5
W
1.
2.
3.
N
.1
CHAR
1.
Turn th
e
2.
Connec
3.
Open t
h
charger
’
4.
Turn o
n
5.
Both th
e
The ch
a
perform
recom
m
6.
Both th
e
orange
L
7.
Turn of
f
scooter.
Warning
The f
a
when co
to overh
There
charger
i
Attention
While gr
i
While ret
u
W
arning
Keep aw
a
Do not s
m
a well-v
e
Never c
o
disconne
c
N
OTE: The
i
mak
e
GING TH
E
e
power sw
i
t the charg
e
h
e charging
’
s round pl
u
n
the switch
e
charger’s
a
rging dur
a
ance a 1
0
m
end a char
g
e
charger’s
L
L
ED will t
u
f
the charg
e
a
n inside th
e
nnected to
t
eating of t
h
is a red LE
D
i
s defectiv
e
i
pping or f
o
u
rning the
b
a
y from fla
m
m
oke while
e
ntilated sp
a
o
nnect or d
i
c
t the plug
o
i
mmovable
f
e
your scoo
t
5. B
A
E
BATTE
R
i
tch to (OF
F
e
r’s power
c
socket ca
p
u
g to the ch
a
on the cha
r
red and or
a
a
tion is a
b
0
-hour cha
r
g
ing more t
h
L
EDs will
b
u
rn green w
h
e
r; disconn
e
charger
w
t
he charger
h
e charger a
n
D
present o
n
e
, please co
n
o
lding the h
a
b
attery pac
k
m
mable ob
j
charging a
s
a
ce.
i
sconnect t
h
o
r cord wh
e
f
unction w
i
er inopera
b
A
TTE
R
R
Y
F
)
c
ord into th
e
p
on the sc
o
a
rging sock
e
r
ger.
a
nge LEDs
b
out 6 ho
u
r
ge is re
c
h
an 24 con
s
b
e lit durin
g
h
en chargi
n
ect
t
he po
w
w
ill be activ
a
or the gree
n
n
d cause a
f
n
the charg
e
n
tact your
d
a
ndle bar,
b
k
to the
b
att
e
j
ects while
c
s
the batter
y
h
e plug or
e
n they are
w
i
ll be activ
a
b
le.
R
Y C
H
11
e
power ou
t
o
oter’s till
e
e
t.
will be lit
w
u
rs. To e
n
c
ommende
d
s
ecutive ho
u
g
the chargi
n
n
g is compl
e
w
er cord a
n
a
ted when
y
n
light is no
t
f
ire as a res
u
e
r to illustr
a
d
ealer.
b
eware of fi
n
e
ry pack ca
v
c
harging as
y
may relea
s
cord with
w
w
et, it may
a
ted while
y
H
ARG
I
t
let.
e
r. Connect
w
hen charg
i
n
sure opti
m
d
. We do
u
rs.
n
g process.
T
e
te.
n
d the roun
y
ou turn on
t
showing,
D
u
lt.
a
te operatio
n
n
ger or ha
n
v
ity of shro
it may lea
d
s
e hydroge
n
w
et hands
w
lead to ele
c
y
our scoote
r
I
NG
A
the
i
ng.
m
um
not
T
he
d plug fro
m
the charge
r
D
O NOT us
n
. If this L
E
n
ds caught i
n
ud, be care
f
d
to fire or
e
n
gas. Alwa
y
w
hile char
g
c
tric shock.
r
is in char
g
A
ND C
m
charger
s
r
. If the fan
d
e this char
g
E
D does not
n
the handl
e
f
ul not to p
i
e
xplosion o
f
y
s charge y
o
g
ing. Do n
o
g
ing
s
tatus,
ARE
s
ocket on t
h
d
oes not w
o
g
er. It may l
e
illuminate
t
e
area.
i
nch finger
s
f
the
b
atter
y
o
ur battery
o
t connect
o
which wil
l
h
e
o
r
k
e
ad
t
he
s
..
y
.
in
o
r
l

12
Attention - Follow these procedures below to avoid accidents while charging.
1. Please use the enclosed charger only, and recharge the battery to its full capacity every time. You may
damage the battery and scooter if you use a charger which is not to the correct specification.
2. Please charge in a well-ventilated space where it is not directly exposed to the sunlight. Do not charge
in surroundings where it is humid or under rainfall and morning dews.
3. Do not charge in temperatures less than 14°F /-10°C or higher than 122°F / +50°C as the charger may
not work well and the batteries may become damaged.
5.2 BATTERY
Do not expose the battery to temperatures below 14°F /-10°C or above 122°F / +50°C when
charging or storing the vehicle. Under the above temperature range can cause the battery either to
freeze or over heat. This will damage the batteries and shorten their life.
These batteries are maintenance free and there is no need to refill with water.
5. BATTERY CHARGING AND CARE

13
■ Cleaning the battery
If the batteries are contaminated by water, battery acid, dust or other substances, they will discharge
quickly. The batteries supplied with the scooter are sealed and as such are maintenance free with no risk
of battery leakage. Please follow the steps below to clean the battery.
1. Turn the scooter power switch to “OFF”.
2. Remove the seat and dust cover.
3. Remove the shroud and unplug the terminal of the taillight and signal lights.
4. Use a clean cloth to wipe off the soiled area.
5. Take out the battery.
6. Clean the battery with a clean cloth. If the terminal is covered by white powder, please wipe it
clean using warm water.
Warning
1. The wiring system and charger is located in battery pack while assembled in plant. Do not attempt to
move the wiring system by yourself. The improper layout of wiring system may result in the wires
pinched by battery box, which may result in electronic system failure.
2. Be sure the battery wires are connected to the correct battery terminal.
Suggestions
If necessary, ask for assistance from your dealer for advice about maintaining and replacing the
battery.
Suggestions
1. Make sure the terminals are installed properly and put the cover back on.
2. Do not use the battery to charge telecom equipment or other items.
3. Battery efficiency will vary with outside conditions; the driving distances will be shorter in the
winter. If the vehicle is not used for a long time, please charge the battery at least every week.
4. Replace both batteries together.
6. INSPECTION AND MAINTENANCE

14
6.1 INSPECTION
Clean the scooter with a damp cloth and dust down approximately once a week to preserve the
appearance of the scooter.
Adjust the tiller height and return to the original position and swivel the seat once a week to ensure
the parts adjust and remove smoothly and easily when required.
Check for signs of wear and tear on the tires and the upholstery on a regular basis.
6.2 BATTERY, FUSE AND TYPE
■ Battery
Refer to the section entitled “ 5.2 BATTERY” in “5. BATTERY CHARGINGAND CARE ”.
■ Fuse
If the battery charger is turned on and no LEDs are lit, check the fuse.

15
6. INSPECTION AND MAINTENANCE
Suggestion
Ask for assistance from your scooter dealer to inspect or replace the fuse, since the tiller shroud has to
be removed first before you can replace the fuse.
▓Tires
The condition of the tires depends on how you drive and use your scooter.
Inspecting tire tread
Check the tread groove regularly. Replace the tires when the tread groove is less than 0.5 mm.
Attention
1. When tread groove is below 0.5mm it can easily lead to vehicle slippage, making braking
distances longer. Replace the tires as early as possible when they have insufficient tread depth.
2. The tire pressure shall be kept at about 26 PSI (approx. 1.8KG/cm) for the best ride and handling.
Attention
When conducting maintenance of your vehicle, turn the power switch to OFF and remove the charger
cords.
Suggestions
Do not splash water directly to wash your scooter as this could lead to malfunction of the system
electronics.
Do not use caustic solvents or vaporizing solution as these may deform or damage the shrouds.
Do not use wax.
6.4 STORAGE
Make sure the vehicle is stored under the following circumstances:
-Make sure the seat is set in the “Forward”position
-Make sure the Power switch is turned to OFF
Suggestion
Store the scooter in a location where it is away from the direct sunlight, rain, or moisture. When
storing for a long period of time, charge the battery to full power and then disconnect the battery
terminal.
6.5 TRANSPORTING
Turn the power switch “OFF” before moving.
Lift the scooter by the chassis, and not by the bumpers. Lifting the scooters by the bumper could
cause damage or injury.
For your safety, always ask for help if required. You will need 2 or 3 persons when moving or
lifting.
7. TROUBLE SHOOTING AND SPECIFICATION

16
■ TROUBLE SHOOTING
Symptom Remedy
The scooter will not switch on Try recharging the battery
Check the fuse and circuit breaker in the scooter
The scooter switches on, but the
scooter will not move. Ensure there is enough power in the batteries. If not, recharge
the batteries.
Ensure the freewheel lever is engaged in the ‘DRIVE’
position.
The scooter appears slow Check the battery power level and recharge
Check the speed dial is not set to slow.
The seat turns when in operation Slowly rotate the seat until it drops in to place and is secure
The handlebar appears loose Tighten the height adjustment handle to secure the handleba
r
Involuntarily horn sounds Ensure that the wigwag paddle is released.
Switch the scooter off and on.
Recharge the batteries.
If problem persists contact your WU’S dealer.
9. WARRANTY
9.1 WARRANTY
There is a limited lifetime warranty on your new Odyssey LX power chair. The warranty covers the power chair
for
p
arts onl
y
durin
g
this
p
eriod. For more detail
,
p
lease see the Warrant
y
Conditions below.

17
Warranty Conditions:
Any work or replacement part installation must be carried out by an authorized Drive dealer / service agent.
To apply the warranty should your power chair require attention please contact your service provider.
The warranty on your new Odyssey LX power chair is as follows:
a) Frame: Limited Lifetime Warranty
b) Electronics: 12 months limited warranty
c) Battery: 6 months
Note: The warranty is not transferable
Any replaced parts will be covered by this warranty for the balance of the warranty period on the power chair.
Parts replaced after the original warranty has expired will by covered by a three months warranty.
Wearable items will not generally be covered under the normal warranty period which includes but not limited to
the seat assembly or cover, tires, shroud, armrests, footplates, and lights.
The above warranty conditions apply to brand new power chairs purchased at the full retail price. If you are
unsure whether your power chair is covered, check with the service agent.
Under normal circumstances, no responsibility will be accepted where the power chair has failed as a direct
result of:
a) The power chair part not having been maintained in accordance with the manufacturer’s recommendations.
b) Failure to use the manufacturer’s specified parts
c) The power chair or part having been damaged due to neglect, accident or improper use
d) The power chair or part having been altered from the manufacturer’s specifications or repairs having been
attempted before the service agent is notified
Please note your local service agent’s contact details in the box below. In the event of your power chair requiring
attention, contact them and give all relevant details so they can act quickly. The manufacturer reserves the right
to alter without notices any weights, measurements or other technical data shown in this manual. All figures,
measurements and capacities shown in this manual are approximate and do not constitute specifications.
DRIVE authorized Service Agent
Name
Address
Tel
Postcode

P
99 Se
a
P
ort Wa
s
5
1
8
7
www.
d
18
a
view B
o
s
hington,
1
6-998-
4
7
7-224-
0
d
riveme
d
o
ulevard
NY 110
4
600
0
946
d
ical.co
m
50
m
Table of contents
Other Drive Scooter manuals

Drive
Drive Osprey User manual

Drive
Drive Stingray User manual

Drive
Drive Phoenix HD Operator's manual

Drive
Drive PHOENIXHD3 User manual

Drive
Drive Spitfire Scout User manual

Drive
Drive Ambassador User guide

Drive
Drive PHOENIX HD 3 User manual

Drive
Drive EASY RIDER User manual

Drive
Drive Spitfire EX 1320 User manual

Drive
Drive Scout User manual

Drive
Drive ST5D User manual

Drive
Drive Ventura 4 User manual

Drive
Drive Viper User manual

Drive
Drive PHOENIXHD4 User manual

Drive
Drive Spitfire Scout User manual

Drive
Drive Maverick User manual

Drive
Drive Bobcat X3 User manual

Drive
Drive ST3 User manual

Drive
Drive VENTURA User manual

Drive
Drive KING COBRA User guide