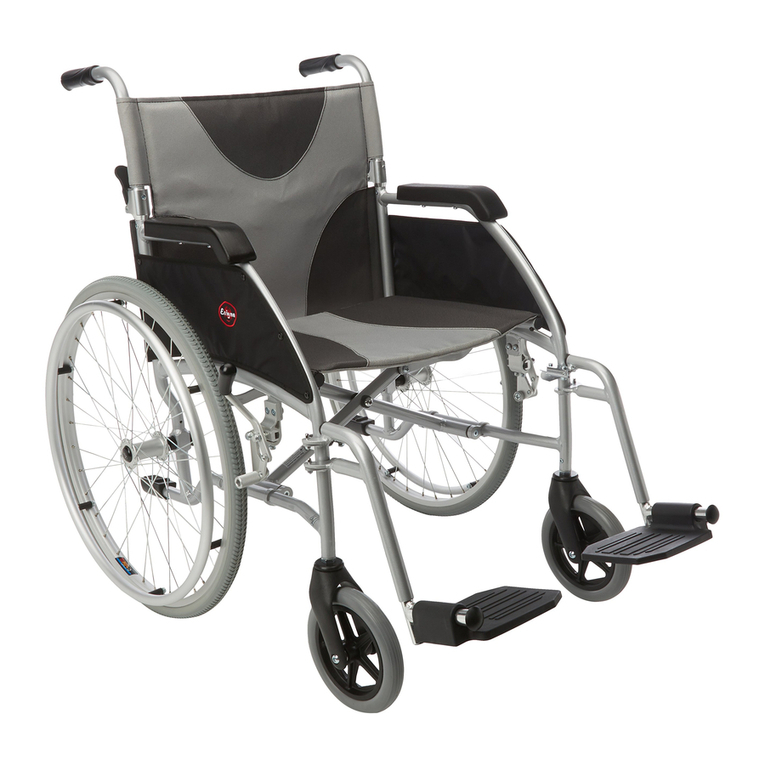
Drive Seren Powerchair User manual

www.drivemedical.co.uk
Seren Powerchair
User Manual

SEREN
TABLE OF CONTENTS
INRDCIN
IMPRN PRECINS
EECRMNEIC INERFERENCE ND RNINS
IDENIFICIN F PRS
PERIN R PER CIR
DISSSEMBIN RE-SSEMBIN R PER CIR
CRIN E BERIES
CRE ND MINENNCE
RBESIN
ECNIC SPECIFICINS
---------------------------------------------------------1
------------------------------------------2
-------3
------------------------------------------
---------------------------------
-12
----------------------------------------1
------------------------------------------1
-------------------------------------------------1
--------------------------------------2
Instruction Booklet

SEREN
Information of European Representative :
EMERGO EUROPE
Molenstraat 1
213 B he ague
he Netherlands
If you have any question, please contact your local dealer or:
INTRODUCTION
1
Thank you and congratulation on purchasing your new Drive Power Chair. It is
designed to provide you with transportation ability indoors and outdoors.
e ride ourselves on roviding sae and coortale roducts ur goal is to ensure
your colete satisaction with our roduct e are certain that you will enoy your
Drive Medical ower chair
Please read and oserve all warning and instruction rovided in owners anual eore
oerating with this ower chair lso retain this ooklet or uture reerence
Instruction Booklet

SEREN
IMPORTANT PRECAUTIONS
2
•nly one erson at a tie can ride a Drive Medical Power Chair
•Maiu load is 13 kg3 ls
•urn o ower eore getting on or o your ower chair
•
lways drive careully with your eet on the ootlate and e aware o others in your area
•lways use edestrian crossings wherever ossile ake etree when care crossing
roads
•Do not drive on sloes eceeding degrees and take etree care when turning on
sloes
•Do not use ull ower when turning to shar corners
•ake great care and drive in low seeds when acking u riding downhill or on uneven
suraces and cliing cur
•he ower chair ay not oerate well in high huidity
•Never ut your ower chair in neutral when staying on sloes
•Follow all traic laws when riding in the vicinity o ulic roads
•It is N recoended to use your ower chair in wet environents as it ay cause
daage
Instruction Booklet

SEREN
ELECTROMAGNETIC INTERFERENCE
AND WARNINGS
3
CAUTION: It is very important that you read this information regarding the possible
effects of Electromagnetic Interference on your power chair.
Powered wheelchairs and otoried scooters ay e suscetile to electroagnetic
intererence EMI which is interering electroagnetic energy EM eitted ro sources
such a radio stations V stations aateur radio M transitters two-way radios and
cellular hones he intererence ro radio wave sources can cause the otoried
scooter to release its rakes ove y itsel or ove in unintended directions It can also
eranently daage the otoried scooter control syste he intensity o the interering
EM energy can e easured in volts er eter V Each otoried scooter can resist
EMI u to a certain intensity his is called its iunity level he higher the iunity
level the greater the rotection will e t this tie current technology is caale o
achieving at least a 2 V iunity level which would rovide useul rotection ro
the ore coon sources o radiated EMI he iunity level o this otoried scooter
odel is 2 V
here are a nuer o sources o relatively intense electroagnetic ields in the everyday
environent Soe o these sources are ovious and easy to avoid thers are not
aarent and eosure is unavoidale owever we elieve that y ollowing the warnings
listed elow your risk to EMI will e iniied
Some cellular telephones and similar devices transmit signals while
they are ON, even when not being used.
The sources of radiated EMI can be broadly classified into three types:
1and-held ortale transceivers transitters-receivers with the antenna ounted
directly on the transitting unit Eales include citiens and CB radios walkie
talkie security ire and olice transceivers cellular telehones and other ersonal
counication devices
2Mediu-range oile transceivers such as those used in olice cars ire trucks
aulances and tais hese usually have the antenna ounted on the outside o
the vehicle
Instruction Booklet

SEREN
3ong-range transitters and transceivers such as coercial roadcast transitters
radio and V roadcast antenna towers and aateur M radios
Because EM energy raidly ecoes ore intense as one oves closer to the transitting
antenna source the EM ields ro hand-held radio wave sources transceivers are o
secial concern It is ossile to unintentionally ring high levels o EM energy very close
to the ower chair control syste while using these devices his can aect ower chair
oveent and raking hereore the warnings listed elow are recoended to revent
ossile intererence with the control syste o the ower chair
Other types of hand-held devices, such as cordless phones, laptop computers,
AM/FM radios, TV sets, CD players, and cassette players, and small appliances,
such as electric shavers and hair dryers, so far as we know, are not likely to
cause EMI problems to your motorized scooter.
Power Chair Electromagnetic Interference:
Electroagnetic intererence EMI ro sources such as radio and V stations aateur
radio M transitters two-way radios and cellular hones can aect the ower chair
Following the warnings listed elow should reduce the chance o unintended rake release
or ower chair oveent which could result in serious inury
1Do not oerate hand-held transceivers transitters-receivers such as citiens and
CB radios or turn N ersonal counication devices such as cellular hones
while the ower chair is turned N
2Be aware o neary transitters such as radio or V stations and try to avoid coing
close to the
3I unintended oveent or rake release occurs turn the ower chair FF as soon
as it is sae
Be aware that adding accessories or coonents or odiying the ower chair ay
ake it ore suscetile to EMI and
Reort all incidents o unintended oveent or rake release to the distriutor listed
on the inside ront cover o this anual Note whether there is a source o EMI neary
Warnings:
Important Information
12 volts er eter V is a generally achievale and useul iunity level against EMI
as o May 1 he higher the level the greater the rotection
2he iunity level o this roduct is 2 V
Instruction Booklet

SEREN
n
Button
orn
Joystick
Seed Control Button
Sel Diagnostic
arning ights
Battery auge
Rear Bag
rrest width
dustent
huscrews
rrest height dustent huscrews
Rear Relectors
Figure 1 - Seren Power Chair Front View
Figure 2 - Seren Joystick
Figure 3 - Seren Power Chair Rear View
IDENTIFICATION OF PARTS
Beore atteting to drive this ower chair on your own it is iortant that you ailiarie
yoursel with the controls and how they oerate
1 Mid-Back Seat
w d eadrest Seat Belt
idth eight
dustale rrests
Etended Footlate
with 3-ngle dustent
1
Drive heels
Instruction Booklet

JOYSTICK:
•Sel Diagnostic arning ights
Flashing o lights indicates there is a role within ower chair See age 1 or ore
inoration
•Battery auge
here are eleven ED lights on oystick hen all ED lights are on atteries are
ully charged he Battery auge is used to indicate ower on and rovides an estiate
o the reaining attery caacity
ny green EDs lit indicate well charged atteries
I only aer and red EDs are lit the atteries are oderately charged Recharge
eore undertaking a long tri
I only red EDs are lit the atteries are running out o charge Recharge as soon as
ossile
•Etendale Bracket
By releasing no B the oystick racket C is ale to etend and retract ith oystick
retracted this enales you to ull u to any tale and tighten kno B when adusted
to a coortasle osition
ARMREST:
•rrest width height dustent huscrews
oosen two thuscrews to adust arrest width height tighten again to lock in
desired osition
Figure Figure
Figure
C B
SEREN Instruction Booklet

SEREN
FOOTPLATE:
•Footlate
he ootlate can e adusted according to your seciic needs It can e width
adusted vertically or horiontally o adust ootlate loosen screw and arrange height
to desired osition then tightened screw to secure late in lace D E
Figure Figure
POWER BASE:
•Free-heeling ever
hen lever is in N Neutral osition ower chair can e oved anually
hen lever is in D Drive osition ower chair can e driven Noral osition is D
Figure Figure
D
E
Instruction Booklet

SEREN
Figure Figure
Figure 1Figure 1
OPERATING YOUR SCOOTER
Beore eginning your ourney with your new ower chair ake sure ower chair is on
a level surace and clear o any ostacle lthough your ower chair is ale to cli sloes
it is saer to ractice on a leveled surace
1Beore oerating with your ower chair check the ollowing
• ree-wheeling lever is on D
• seed dial is at the lowest seed ully turned counterclockwise
2Sit on chair and asten seat elt
3hen ower is turned on all attery gauge ED lights should e lit lighting he sel-
diagnostic warning lights should not e linking
hile resting your ar on arrests oystick should e within reach By ushing oystick
slightly orward ower chair will ove orward slowly and ushing oystick ully orward
chair will ove at noral seed nd adusting seed dial will also decrease or increase
seed lso with oystick you are ale to turn chair in 3o hen oystick is let go and
ack in center osition chair will sto
Practice driving where there is no ostacle Start at slowest seed and ove orward
and ackward ake soe turns s you get ore coortale you can increase the
seed y turning seed dial kno clockwise
F
Instruction Booklet
Figure 11
Figure 12
Headrest Adjustment:
Seat Adjustment:
By ressing k to adust the headrest J u down to a coortale osition
By liting u lever to rotate seat See Fig 12
Note Do not swivel seat angle over degrees to revent wires twist
While standing up, avoid stepping on footplate as it may cause injury.
he atteries should e charged as soon as ossile ater each ride See CHARGING
THE BATTERIES on age 1
J
Figure 13
Front View
Right rrest Bracket
no
et rrest Bracket
Optional Seat (A~D):
rrests idth dustent
By releasing oth sides knos and adust arrests to a coortale osition then
tighten with knos
SEREN Instruction Booklet

SEREN
1
Figure 1Figure 1
Fiation ScrewFiation Screw
B Seats Deth dustent
By releasing iation screws ro ack sides and adust to a coortale osition
then tighten with iation screws
Figure 1Figure 1
Fiation Vel-croFiation Vel-cro
C Backrest ngle dustent
By ulling the iation vel-cro ackwards to disengage the ins ro the holes and
adust angle to a coortale osition then release iation vel-cro to engage to its
osition
Figure 1Figure 1
Backrest PadBackrest Pad
Figure 1Figure 1
Front ViewFront View
Fiation ScrewFiation Screw Fiation ScrewFiation Screw
Rear ViewRear View
D Seats idth dustent
1By taking rontrear and suort races iation screwscs o
2ake o ackrest ad y release its vel-cro
Instruction Booklet

SEREN
Other Operating Information:
Hill climbing : ou ay need to use a higher seed For a higher seed turn seed dial
clockwise
Down slopes :
Proceed with dawnward sloe slowly and turn seed dial counterclockwise
his enales good control when seed is set in slower otion owever
your ower chair will not sel accelerate down hills due to autoatic
raking taking eect should you attet to drive too ast
Curb climbing : roach slowly ro right angles to the cur direct aroach is
needed Do not attet greater than a 2 cur
I Sel-Diagnostic arning ights start to lash identiy role ro chart on age 1
and take action
If power chair breaks down and must be moved, please follow below directions :
1et o ower chair
2Push ree-wheeling lever to N
3Move ower chair slowly to a sae location
Push ree-wheeling lever ack to D
11
Keep in mind these rules:
•se your ower chair only where it is sae or walking
•
Drive in low seed when reversing riding downhill on ra or cur or on uneven surace
3Release all ackrests vel-cro stras
dust rae to a coortale width osition and adust vel-cro to aroriate tightness
then ut ackrest ad ack colete y tighten cs o width iation screws
Figure 1Figure 1
Rear ViewRear View
Figure 1Figure 1
Instruction Booklet

SEREN
12
DISASSEMBLING / RE-ASSEMBLING
YOUR POWER CHAIR
Joystick Cable Removal:
Please ollow instructions elow to reove oystick cale M ro arrest
1nlug oystick cale See Fig 2
2Press lock ins underneath ront and along seat sides to unlock then lit chair u to
reove See Fig 21 Joystick cale is tied u y 3 cord clis on arrest See white circle
Reove cale ro arrest
Seat Removal:
1Fold down seat ack
2Pull u the seat lock lever N
3it u on seat assely to ensure the seat is secure See Fig 1
Body Shroud Removal:
By using a screw driver to pressing down at the center of the push rivet, to
release the shroud.
1 Reove 3 ush rivets P1 ro oth ront shroud P and rear shroud P2
2 Follow the arrows direction to lit u shrouds See Fig 22
aking aart your ower chair enales you to save sace when keeing it in storage or
carrying it along in your vehicle aving ower chair disasseled is easier than ever
since no tools are reuired
Figure 2Figure 2 Figure 21Figure 21
M
N
Figure 22Figure 22
P1
P1
P2 P
Instruction Booklet

SEREN
Be careful when carry the batteries as they are heavy.
DO NOT connect the Positive (+) to the Negative (-) battery terminal by any
conductive metals.
Battery Removal:
1Disconnect two attery lugs See Fig 23
2nasten velcro stra that hold atteries in lace See Fig 2
3Reove two atteries S See Fig 2
13
Figure 23Figure 23 Figure 2Figure 2
Figure 2Figure 2
R
S
Re-assemble:
o re-assele your ower chair you can reeat disassely directions in reverse
Instruction Booklet

SEREN
1
CHARGING THE BATTERIES
Your Drive power chair is equipped with two, service free 12V 36Ah rechargeable
batteries and one 24V/5A off-board charger. Batteries must be charged before using
power chair for the first time and it is recommended to be charged up to 8 - 14 hours
after each day's use. Be sure power switch is in OFF position and free-wheeling
lever is in "D" position.
1Position Seren ower chair net to a standard wall outlet
2Insert the the attery charger cord into the chair inut attery charging socket which
is located on the rout o the oystick
3Plug the other end o ower cord into a standard electrical wall outlet
Switch the charger ower n
If charging your power chair for over 8 - 14 hours and it does not function,
please check :
•fuse is not burned out
•power chair is turned off
•circuit breaker is pushed in
•if none of above is the problem, contact your authorized dealer.
Charging the batteries:
hile the atteries are eing recharged a orange light aear on the attery charger
indicating that the ower is connected and charging is in rogress
During the recharge:
1 green light will aear on the charger his indicates that the atteries are ully charged
and ready or use
2Please unlug ower cord ro wall outlet and ower chair he ower cord should e
stored in a sae and dry area until net use
At the end of the recharge cycle:
Figure 2Figure 2
Instruction Booklet

SEREN
The time needed to recharge will vary depending on depletion of batteries.
Charging for longer than necessary will not harm batteries. They cannot
be overcharged.
Keep in mind these rules:
•Fully charge atteries at least once a onth ore i you use ower chair regularly
Charge ater each tri eceeding 3 kiloeters 1 iles
•I storing your ower chair or soe tie one onth or ore ake sure atteries
are ully charged and on returning charge the again eore using ower chair
Batteries will only give aiu erorance ater ower chair has een used and
atteries have een recharged u to 1 ties
For saety lease ollow guidelines elow
1D N use charger i ower cord is daaged
2D N use an etension cord when charging atteries risk o ire andor electric
shock could e encountered
3D N take charger aart as this will void warranty
1
Instruction Booklet

SEREN
An authorized dealer should handle all maintenance and repair associating
with electronics, batteries, motor parts, and tires. Here are the guidelines
that can be followed by authorized dealer.
1
CARE AND MAINTENANCE
aking care o your ower chair will kee it in to-notch condition It is recoended
that you have your dealer to rovide a thorough insection and servicing Regular cleaning
will reveal loose or worn arts and enhance the sooth oeration o your owered scooter
Routine aintenance will etend the lie and eiciency o your ower scooter
BODY SHROUD:
I your ower chair is dirty use a da or lightly soay cloth to wie it down Do not use
running water to wash or rinse ower chair in order to rotect electrical arts Polish
with an autootive liuid olish
SEAT AND ARMRESTS:
he seat aterial used y Drive is o high uality and will reain in good condition or
any years i treated resonsily sing a da cloth hels clean the uholstery greatly
Please note that using ower chair outdoors could lead to sun daage to uholstery
aterial and noral wearing and tearing is not covered under warranty
SEAT BELT:
da cloth with ild soasuds should only e used to clean seat elts ie seat elts
gently and reove residue Do not use any cheical roducts to clean seat elts as aric
will e weakened
FLAT SPOT (for solid tires only):
During storage eriod a lat sot ay occur to solid tires eather conditions and storage
eriod deterine the condition o lat sots By driving ower chair 2 to 3 inutes lat
sots could e eliinated
Instruction Booklet

SEREN
1
TIRE PRESSURE (for air-filled tires only):
he condition o tires and aintenance o seciied tire ressures not only inluence
tire lie ut also eect road saety to a very considerale etent Incorrect ressure is
oten a cause o tire roles and could result in an accident he recoended tire
ressure is 3 si
TIRE TREAD:
Insect the tires reuently or any signs o daage such as unusual wearing or insuicient
tread deth read deth should not e allowed to dro elow 1
ELECTRICAL CONNECTIONS:.
Make sure attery terinals and all lug connectors are secured and irly attached I
attery terinals are corroded lease contact your dealer or relaceent
HARDWARE:
Check that all hardwares and are securely astened Relace any issing hardware y
contacting your dealer
STORING:
lso etween uses your ower chair is est stored in a dry location at roo teerature
Instruction Booklet

SEREN
TROUBLESHOOTING
Flash Code Description
1
2
3
1
11
ser Fault
Battery Fault
et Motor Fault
Right Motor Fault
et Park Brake Fault
Right Park Brake Fault
SR Reote Fault
SR Power Module
Fault
SR
Counications Fault
nknown Fault
Incoatile Reote
Possile stall tieout or user error
Release the oystick to neutral and try again
ry charging the atteries
Batteries ay reuire relacing
Check the atteries and caling
Check the let otor connections and
caling
Check the right otor connections and
caling
Check the let ark rake connections and
caling
Check the right ark rake connections and
caling
Check the SR Counications Bus
connections and wiring
Relace the Reote
Check SR connections and wiring
Relace the Power Module
Check Battery voltage is greater than 1V
Check SR Bus Cale
Relace the SR Power Module
Relace the SR Reote
Check all connections and wiring
Consult a service agent
he Reote is incoatile with the Power
Module
Ensure the rand o the Power Module
atches that o the Reote
Flash codes indicate the nature o an anoral condition directly ro the SR lnoration
auge ithout the use o any servicing tools the condition can e sily diagnosed
1
TROUBLESHOOTING
Instruction Booklet
Table of contents
Other Drive Wheelchair manuals

Drive
Drive rebel wheelchair User manual

Drive
Drive RTL12203KDR User manual

Drive
Drive Teak RTL12350KDR User manual

Drive
Drive Inspired Kanga User manual

Drive
Drive NRS185008 User manual

Drive
Drive DuoMotion User manual

Drive
Drive DeVilbiss Healthcare LPHWCSP19SIL User manual

Drive
Drive 12203KD-4 User manual

Drive
Drive Alu Freetec User manual

Drive
Drive EXP19RD User manual

Drive
Drive KG P800 User manual

Drive
Drive SSP118FA-SF User manual

Drive
Drive Inspired WCM-2000-2G User manual

Drive
Drive 12021KD-1 User manual

Drive
Drive CIRRUS User guide

Drive
Drive 11120SV-1F User manual

Drive
Drive 550 200 100 User manual

Drive
Drive Seren User manual

Drive
Drive blue streak User manual

Drive
Drive RTL12202KDR User manual