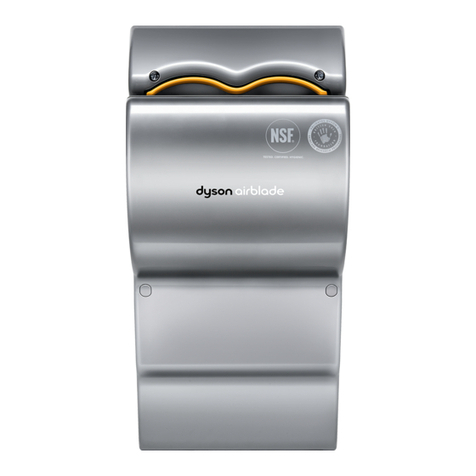
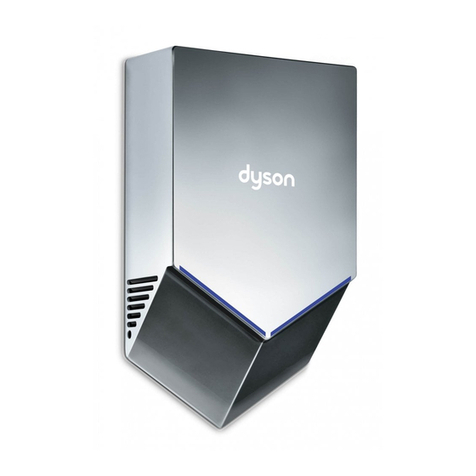
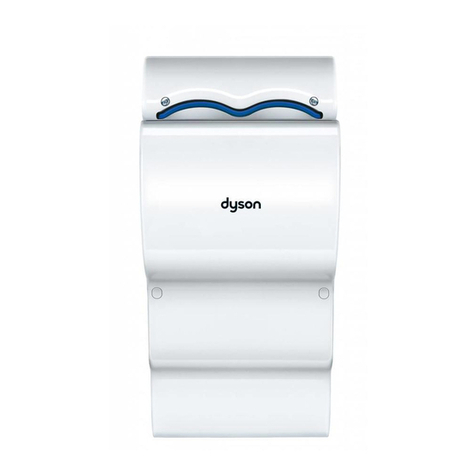
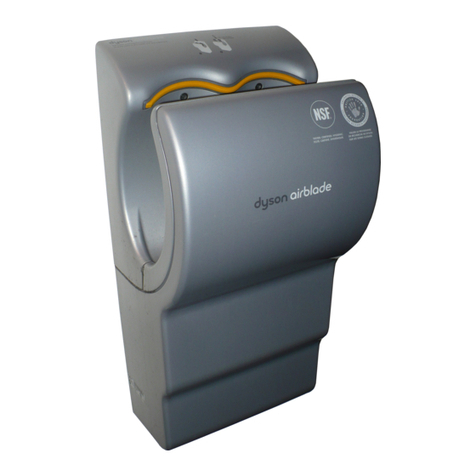
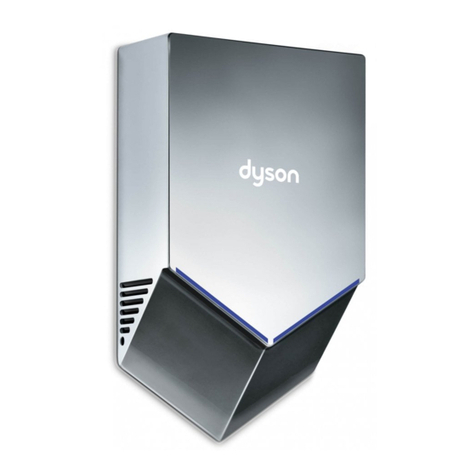
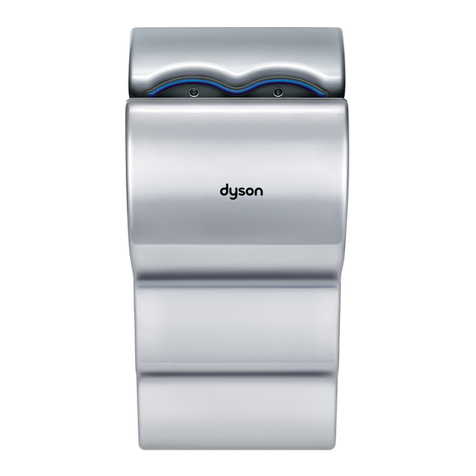
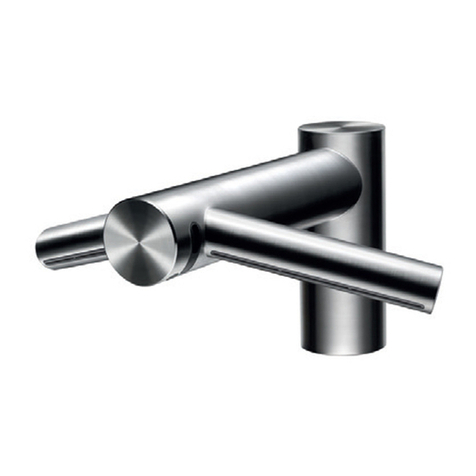
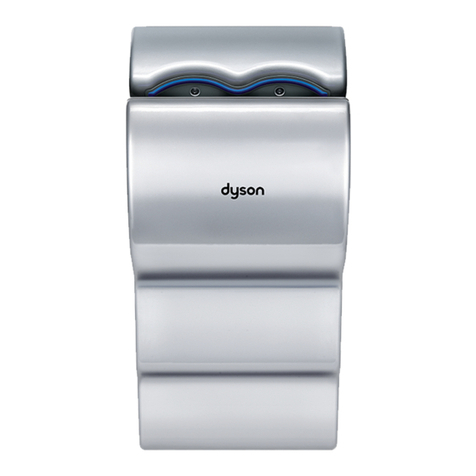
Dyson Airblade Series User manual

1
GB/IE
READ AND SAVE THESE
INSTRUCTIONS
IMPORTANT SAFETY INSTRUCTIONS
BEFORE INSTALLING OR USING THIS APPLIANCE, READ
ALL INSTRUCTIONS AND CAUTIONARY MARKINGS IN THE
INSTALLATION INSTRUCTIONS AND MAINTENANCE MANUAL.
When using an electrical appliance, basic precautions should
always be followed, including the following:
WARNING
TO REDUCE THE RISK OF FIRE, ELECTRIC SHOCK OR INJURY TO
PERSONS, OBSERVE THE FOLLOWING:
1. This Dyson appliance can be used by children aged from
8 years and above and persons with reduced physical, sensory
or reasoning capabilities, or lack of experience and knowledge,
only if they have been given supervision or instruction by a
responsible person concerning use of the appliance in a safe
way and understand the hazards involved. Children shall not
play with the appliance. Cleaning and user maintenance shall
not be made by children without supervision.
2. Before servicing or cleaning the appliance, switch the power
off at the service panel. Ensure the switch is locked to prevent
the power from being switched on accidentally. If the means
of switching off the power cannot be locked, securely fasten a
prominent warning device, such as a tag, to the service panel.
3. Do not use sealant when fixing the appliance to the wall.
4. Do not install directly above a heating appliance.
5. The maximum altitude of use is 2,300 metres.
6. The size of the lead wire used for the wiring connection
(including grounding lead) shall not be smaller than 18AWG.
DO NOT USE ANY JETWASH EQUIPMENT FOR CLEANING ON
OR NEAR THIS APPLIANCE.
WARNING
ALL ELECTRICAL INSTALLATION AND REPAIR WORK SHOULD BE
CARRIED OUT BY A QUALIFIED ELECTRICIAN OR DYSON FIELD
SERVICE ENGINEER IN ACCORDANCE WITH CURRENT LOCAL
CODES OR REGULATIONS.
CAUTION
The appliance should be located indoors. Operating temperature
range 0°C (32°F) to 40°C (104°F). To reduce the risk of fire or
electric shock, do not expose the internal mechanisms/components
of this appliance to moisture.
Installation instructions

2
Suitable screwdriver for wall type fixings
Small Phillips screwdriver
Small flat head screwdriver
Dyson tool (supplied)
Tape measure and pencil
Hand drill
Suitable drill bit
Pliers/wire strippers
Knife
Tools required
Pre-installation
checks
Pre-installation planning
The machine is designed for a dry, internal
location only.
Conformity and compliance is the
responsibility of the installer. Consult
local and national accessibility
codes and regulations for relevant
installation guidelines.
Install the machine in compliance with all
building codes and/or regulations.
Isolate the power supply before installation
or service.
Make sure that no pipework (gas, water,
air) or electrical cables, wires or ductwork
are located directly behind the drilling/
mounting area.
Select a location that will allow accessibility
to the machine and proper clearance from
surroundings and floor.
Make sure that there are no obstructions
between the machine and the floor and at
least 210mm above for filter removal.
Dyson recommends the use of protective
clothing, eye wear and materials when
installing/repairing as necessary.
Fig. A
Wall fixing requirements
Do not fix to unsupported plasterboard
(drywall) as this will not provide a safe and
secure installation for the machine and may
also invalidate the guarantee.
Where only unsupported plasterboard is
available for installation, a Dyson backplate
must be used. Contact the Dyson Helpline for
further information.
If the wall has an airgap, the fixings used
must be of a sufficient length to provide a
secure installation.
Don't use sealant when fixing the machine to
the wall.
Fig. B
Power modes
This Dyson Airblade™ hand dryer has
two power modes, 900W and 650W.
The machine is set to 900W as default. If
required, change the power mode to 650W
before installation.
For more information about the power
modes, go to www.dyson.com/airblade
Electrical
Input voltage/frequency: refer to rating plate.
Make sure that the power supply is switched
off before installing.
Cable specification: 3 core cable (live/
neutral/earth).
Local electrical regulations must be adhered
to when installing or repairing this machine.
Rated power: refer to rating plate.
Operating temperature range: 0°C to 40°C.
Maximum length of strip-back of Live and
Neutral wire insulation: 7mm.
Quality testing
The Dyson Airblade™ hand dryer has
undergone extensive quality testing, to
make sure it can withstand forces and
impacts typical of a commercial and public
bathroom environment.
Installing the
Dyson Airblade™
hand dryer
WARNING: Risk of electric shock!
Ensure that the power supply is switched off
before continuing.
Fig. 1
Drill the mounting holes
Select the installation location and
appropriate height.
Recommended mounting heights are
shown on the Mounting template. It may be
necessary to adjust the measurements for
individual installations.
Fix the supplied Mounting template to the wall
in the correct location.
Rear cable entry installation: the electricity
supply cable must align from the wall to the
entry point on the Mounting template.
Side cable entry installation: an additional
hole will need drilling. Refer to the Mounting
template for location.
Drill the holes, where marked, using a
suitable drill bit.
Fig. 2
For rear cable entry
installation
Unscrew and remove the cable clamp,
terminal block and terminal block holder
from the backplate. Loosen all three screws
on the terminal block, ensuring the pre-
installed earth wire remains in place.
Cut the gland smaller than the diameter of
the cable and feed the cable through the
conduit box and gland. Don't remove the
gland from the backplate.
Using suitable fixings (not countersunk
screws), fix the backplate to the wall.
Make sure that the cable sits securely in the
cable guide. Any part of the cable not seated
securely may prevent the machine from being
fixed properly onto the backplate.
Secure the live, neutral and earth wires to
the appropriate terminal block locations, as
indicated on the backplate. Ensure the pre-
installed earth wire remains securely inserted
into the connector block.
Secure the terminal block to the backplate
with the terminal block holder and secure the
cable clamp.
Only clamp double insulated cables with the
cable clamp.
Don't overtighten any of the electrical fixtures.

3
Fig. 3
For side cable entry
installation
Using suitable fixings (not countersunk
screws), fix the backplate to the wall.
Identify which side the cable will enter.
Unscrew the entry tab on the machine.
Cut the rubber side tab of the conduit box
on the side that will be facing downwards
after installaton.
Use a suitable cable gland/conduit connector
(not supplied) for the installation.
Secure the conduit box on the wall using
suitable fixings.
Unscrew and remove the cable clamp,
terminal block and terminal block holder
from the backplate. Loosen all three screws
on the terminal block, ensuring the pre-
installed earth wire remains in place.
Cut the gland smaller than the diameter of
the cable and feed the cable through the
conduit box and gland. Don't remove the
gland from the backplate.
Make sure that the cable sits securely in the
cable guide. Any part of the cable not seated
securely may prevent the machine from being
fixed properly onto the backplate.
Secure the live, neutral and earth wires to
the appropriate terminal block locations, as
indicated on the backplate. Ensure the pre-
installed earth wire remains securely inserted
into the connector block.
Secure the terminal block to the backplate
with the terminal block holder and secure the
cable clamp.
Only clamp double insulated cables with the
cable clamp.
Don't overtighten any of the electrical fixtures.
Fig. 4
Install the main body
This Dyson Airblade™ hand dryer has
two power modes, 900W and 650W.
The machine is set to 900W as default. If
required, change the power mode to 650W
before installation.
Hook the machine on to the backplate and
gently lower the bottom of the machine
until it is flush with the wall. Check that both
backplate hooks are securely in position
before continuing.
Fix the 2 security screws into the bottom of the
machine using the tool supplied.
Fig. 5
Complete the installation
Place the filter unit in the machine and make
sure it clicks securely into place. Turn on the
mains power supply and test the machine is
working as it should by placing hands in sight
of the sensors.
Please hand this manual to the
owner/facilities manager.

4
GB/IE
READ AND SAVE THESE
INSTRUCTIONS
IMPORTANT SAFETY INSTRUCTIONS
BEFORE INSTALLING OR USING THIS APPLIANCE, READ
ALL INSTRUCTIONS AND CAUTIONARY MARKINGS IN THE
INSTALLATION INSTRUCTIONS AND MAINTENANCE MANUAL.
When using an electrical appliance, basic precautions should
always be followed, including the following:
WARNING
TO REDUCE THE RISK OF FIRE, ELECTRIC SHOCK OR INJURY TO
PERSONS, OBSERVE THE FOLLOWING:
1. This Dyson appliance can be used by children aged from
8 years and above and persons with reduced physical, sensory
or reasoning capabilities, or lack of experience and knowledge,
only if they have been given supervision or instruction by a
responsible person concerning use of the appliance in a safe
way and understand the hazards involved. Children shall not
play with the appliance. Cleaning and user maintenance shall
not be made by children without supervision.
2. Do not allow the appliance to be used for any purpose other
than drying hands. Use this appliance only in the manner
intended by the manufacturer. If you have any questions, contact
the manufacturer.
3. Before servicing or cleaning the appliance, switch the power
off at the service panel. Ensure the switch is locked to prevent
the power from being switched on accidentally. If the means
of switching off the power cannot be locked, securely fasten a
prominent warning device, such as a tag, to the service panel.
4. The maximum altitude of use is 2,300 metres.
DO NOT USE ANY JETWASH EQUIPMENT FOR CLEANING ON
OR NEAR THIS APPLIANCE.
WARNING
ALL ELECTRICAL INSTALLATION AND REPAIR WORK SHOULD BE
CARRIED OUT BY A QUALIFIED ELECTRICIAN OR DYSON FIELD
SERVICE ENGINEER IN ACCORDANCE WITH CURRENT LOCAL
CODES OR REGULATIONS.
CAUTION
The appliance should be located indoors. Operating temperature
range 0°C (32°F) to 40°C (104°F). To reduce the risk of fire or
electric shock, do not expose the internal mechanisms/components
of this appliance to moisture.
Maintenance

5
Looking after your
hand dryer
Please register as a Dyson
hand dryer owner
To help us ensure you receive a prompt and
efficient service, please register your machine
at www.dyson.com/airblade. This will
register your guarantee, confirm ownership
of your Dyson machine in the event of an
insurance loss, and enable us to contact you
if necessary.
You will need your serial number, which can
be found on the rating plate inside the main
body and on the information sticker on the
front of the machine.
Please ensure all instructions and guidance in
the Installation instructions and Maintenance
manual are adhered to or your guarantee
may be invalidated.
Maintenance
How to use
Place your hands beneath the Dyson
Airblade™ hand dryer arms and it will start
automatically, creating sheets of air that
scrape water from your hands.
For best dry time results:
Keep your hands flat and parallel to the
machine's surface, approximately 5mm from
the air aperture, drawing your hands through
the airflow from your wrists to finger tips.
Move your hands slowly through the airflow,
keeping a consistent speed (approx.
2.5 seconds per side), alternating between
front and back each time.
Keep your hands flat, close the gaps between
your fingers and keep your thumbs tucked in,
so the whole of your hand is drawn through
the airflow.
For more information about the power
modes, go to www.dyson.com/airblade
Troubleshooting
Hand dryer cuts out
After 30 seconds of continued use the hand
dryer will turn off automatically. Remove and
replace hands to restart.
Turn the machine off and on again at the
mains electricity supply.
Make sure the sensors are clean.
Check the air apertures are clean and free of
dust and blockages. If the air apertures are
dusty, simply remove dust.
Check that the air inlet is free from blockages.
Dry time has increased
Make sure that the correct power mode has
been selected.
Check that the air inlet is free from blockages.
Inspect the air apertures for dust,
and remove.
Airflow is running hotter
than usual
Check that the air inlet is free from blockages.
Inspect the air apertures for dust,
and remove.
Air is continuously running
After 30 seconds of continued use the hand
dryer will turn off automatically. Remove and
replace hands to restart.
Check that the air inlet is free from blockages.
Inspect the air apertures for dust,
and remove.
Contact Dyson for further support
and information or online at
www.dyson.com/airblade
Cleaning
The hand dryer should be cleaned daily.
Wipe the sensors using a soft cloth and non-
abrasive cleaner.
Important information
Don't pressure wash the machine.
All cleaning chemicals should be used
exactly as indicated by the manufacturer’s
instructions (including appropriate dilution).
Any chemicals intended for use should first be
tested on an inconspicuous area to confirm
suitability. Aside from cleaning chemicals,
care should be taken to avoid any harmful
fluids from coming into contact with the
machine, in particular oils and alcohol-
based products.
Filter maintenance
Regularly check the air inlet to ensure that it is
free from dust and debris. Simply wiping the
inlet with a soft cloth should be sufficient to
remove dust and debris.
If the air inlet gets clogged, further cleaning
or a filter change might be required.
If required for high usage environments, a
Dyson filter change kit provides everything
needed to change your machine’s HEPA
filter on site. Contact the Dyson Helpline for
more information.
Filter cleaning or replacement for your hand
dryer can be carried out by carefully following
the instructions given in the filter change kit. If
in any doubt, consult a qualified electrician or
contact the Dyson Helpline for support.
Servicing
If your hand dryer needs servicing, please
call the Dyson Helpline or visit the website at
www.dyson.com/airblade

6
Additional
information
Disposal information
• Dyson products are made from high
grade recyclable materials. Recycle
where possible.
• This marking indicates that this product
should not be disposed with other
household wastes throughout the
EU. To prevent possible harm to the
environment or human health from
uncontrolled waste disposal, recycle it
responsibly to promote the sustainable
reuse of material resources. To return
your used device, please use the return
and collection systems or contact
the retailer where the product was
purchased. They can take this product
for environmentally safe recycling.
Your guarantee
Terms and conditions of the Dyson
5 year guarantee
• If you have registered your machine
online, your guarantee will start from
the date of purchase. Please retain your
proof of purchase. If you do not have
your proof of purchase, your guarantee
will start 90 days after the date of
manufacture, according to Dyson’s
records.
• Where this machine is sold within the
EU, this guarantee will only be valid (i)
if the machine is installed and used in
the country in which it was sold or (ii),
if the machine is installed and used in
Austria, Belgium, France, Germany,
Ireland, Italy, Netherlands, Spain or the
United Kingdom and the same model as
this machine is sold at the same voltage
rating in the relevant country. Where
this machine is sold outside of the EU,
this guarantee will only be valid if the
machine is installed and used in the
country in which it was sold.
What is covered
• All factory parts of your hand dryer are
guaranteed against original defects,
material and workmanship when used
in accordance with the Dyson manual
for a period of 5 years from the start of
your guarantee.
• Please call the Dyson Helpline for
more information.
• Where Dyson determines that the main
body assembly needs replacing, Dyson
will send a replacement to be fitted
by the customer on site. The customer
will need to return any defective parts
to Dyson using the prepaid postage
box provided.
• Any replaced parts must be returned
to Dyson or an administration fee will
be levied.
• Where a filter change is required, Dyson
will provide a filter change kit to be
installed on site by the customer.
• Any parts which are returned and
replaced by Dyson will become the
property of Dyson.
• The replacement of any part of your
machine under guarantee will not
extend the period of guarantee.
• The guarantee provides benefits which
are additional to and do not affect
any statutory rights you may have as
a consumer.
What is not covered
Dyson does not guarantee the repair or
replacement of a product as a result of:
• Accidental damage, faults caused by
negligent use or care, unintentional or
deliberate misuse, neglect, vandalism,
careless operation or handling of the
machine which is not in accordance with
the Dyson manual.
• Use of parts not assembled or installed
in accordance with the instructions
of Dyson.
• Use of parts and accessories which are
not genuine Dyson components.
• Faulty installation, or installation that
does not precisely follow the installation
instructions supplied by Dyson (except
where installed by Dyson).
• Repairs or alterations carried out other
than in accordance with instructions
by Dyson.
• Damage from external sources such as
transit, weather, electrical outages or
power surges.
• Normal wear and tear (e.g. fuse, etc.).
• Damage caused by cleaning which
is not in line with the instructions in
the manual.
• Damage caused by water ingress due
to cleaning or treatment prohibited in
the manual.
• Any electrical, flooding or structural
damage, or any loss of business or
revenue as a result of product failure.
If you are in any doubt as to what is
covered by your guarantee, please
contact Dyson.
Summary of cover
• You must provide proof of (both the
original and any subsequent) delivery/
purchase before any work can be
carried out on your Dyson machine
or before any replacement parts will
be supplied. Without this proof, any
work carried out or parts supplied will
be chargeable. Keep your receipt or
delivery note.
• Subject to the exclusions above, all work
to be carried out under this guarantee
will be carried out by Dyson or its
authorised agents.
Important data protection information
When registering your Dyson machine:
• You will need to provide us with basic
contact information to register your
machine and enable us to support
your guarantee.
• When you register, you will have the
opportunity to choose whether you
would like to receive communications
from us. If you opt-in to communications
from Dyson, we will send you details
of special offers and news of our
latest innovations.
• We never sell your information to third
parties and only use information that
you share with us as defined by our
privacy policies which are available on
our website: privacy.dyson.com
7
AU/NZ
READ AND SAVE THESE
INSTRUCTIONS
IMPORTANT SAFETY INSTRUCTIONS
BEFORE INSTALLING OR USING THIS APPLIANCE READ ALL
INSTRUCTIONS AND CAUTIONARY MARKINGS IN THE
INSTALLATION INSTRUCTIONS AND MAINTENANCE MANUAL.
When using an electrical appliance, basic precautions should
always be followed, including the following:
WARNING
TO REDUCE THE RISK OF FIRE, ELECTRIC SHOCK OR INJURY TO
PERSONS, OBSERVE THE FOLLOWING:
1. This appliance can be used by children aged from 8 years and
above and persons with reduced physical, sensory or mental
capabilities or lack of experience and knowledge if they have
been given supervision or instruction concerning use of the
appliance in a safe way and understand the hazards involved.
Children shall not play with the appliance. Cleaning and user
maintenance shall not be made by children without supervision.
2. Before servicing or cleaning the appliance, switch the power
off at the service panel. Ensure the switch is locked to prevent
the power from being switched on accidentally. If the means
of switching off the power cannot be locked, securely fasten a
prominent warning device, such as a tag, to the service panel.
3. Do not use sealant when fixing the appliance to the wall.
4. Do not install directly above a heating appliance.
5. The maximum altitude of use is 2,300 metres.
6. The size of the lead wire used for the wiring connection
(including grounding lead) shall not be smaller than 18AWG.
DO NOT USE ANY JETWASH EQUIPMENT FOR CLEANING ON
OR NEAR THIS APPLIANCE.
WARNING
ALL ELECTRICAL INSTALLATION AND REPAIR WORK SHOULD BE
CARRIED OUT BY A QUALIFIED ELECTRICIAN IN ACCORDANCE
WITH CURRENT LOCAL CODES OR REGULATIONS.
CAUTION
Your hand dryer should be located indoors. Operating temperature
range 0°C (32°F) to 40°C (104°F). To reduce the risk of fire or
electric shock, do not expose the internal mechanisms/components
of this appliance to moisture.
Installation instructions

8
Suitable screwdriver for wall type fixings
Small Phillips screwdriver
Small flat head screwdriver
Dyson tool (supplied)
Tape measure and pencil
Hand drill
Suitable drill bit
Pliers/wire strippers
Knife
Tools required
Pre-installation
checks
Pre-installation planning
The machine is designed for a dry, internal
location only.
Conformity and compliance is the
responsibility of the installer. Consult
local and national accessibility
codes and regulations for relevant
installation guidelines.
Install the machine in compliance with all
building codes and/or regulations.
Isolate the power supply before installation
or service.
Ensure no pipe work (gas, water, air)
or electrical cables, wires or ductwork
are located directly behind the drilling/
mounting area.
Select a location that will allow accessibility
to the machine and proper clearance from
surroundings and floor.
Make sure that there are no obstructions
between the machine and the floor and at
least 210mm above for filter removal.
Dyson recommends the use of protective
clothing, eyeware and materials when
installing/repairing as necessary.
Fig. A
Wall fixing requirements
Do not fix to unsupported plasterboard
(drywall) as this will not provide a safe and
secure installation for the machine and may
also invalidate the guarantee.
Where only unsupported plasterboard is
available for installation, a Dyson backplate
must be used. Contact the Dyson Helpline for
further information.
If the wall has an airgap, the fixings used
must be of a sufficient length to provide a
secure installation.
Do not use sealant when fixing the machine
to the wall.
Fig. B
Power modes
This Dyson Airblade™ hand dryer has
two power modes, 900W and 650W.
The machine is set to 900W as default. If
required, change the power mode to 650W
before installation.
For more information about the power
modes, go to www.dyson.com/airblade
Electrical
Input voltage/Frequency: refer to rating plate.
Make sure that the power supply is switched
off before installing.
Cable specification: 3 core cable (live/
neutral/earth).
Local electrical regulations must be adhered
to when installing or repairing this machine.
Rated power: refer to rating plate.
Operating temperature range: 0°C to 40°C.
Maximum length of strip-back of Live and
Neutral wire insulation: 7mm.
Quality testing
The Dyson Airblade™ hand dryer has
undergone extensive quality testing, to
make sure it can withstand forces and
impacts typical of a commercial and public
bathroom environment.
Installing the
Dyson Airblade™
hand dryer
WARNING: Risk of electric shock!
Ensure that the power supply is switched off
before continuing.
Fig. 1
Drill the mounting holes
Select the installation location and
appropriate height.
Recommended mounting heights are
shown on the Mounting template. It may be
necessary to adjust the measurements for
individual installations.
Fix the supplied Mounting template to the wall
in the correct location.
Rear cable entry installation: the electricity
supply cable must align from the wall to the
entry point on the Mounting template.
Side cable entry installation: an additional
hole will need drilling. Refer to the Mounting
template for location.
Drill the holes, where marked, using a
suitable drill bit.
Fig. 2
For rear cable entry
installation
Unscrew and remove the cable clamp,
terminal block and terminal block holder
from the backplate. Loosen all three screws
on the terminal block, ensuring the pre-
installed earth wire remains in place.
Cut the gland smaller than the diameter of
the cable and feed the cable through the
conduit box and gland. Don't remove the
gland from the backplate.
Using suitable fixings (not countersunk
screws), fix the backplate to the wall.
Make sure that the cable sits securely in the
cable guide. Any part of the cable not seated
securely may prevent the machine from being
fixed properly onto the backplate.
Secure the live, neutral and earth wires to
the appropriate terminal block locations, as
indicated on the backplate. Ensure the pre-
installed earth wire remains securely inserted
into the connector block.
Secure the terminal block to the backplate
with the terminal block holder and secure the
cable clamp.
Only clamp double insulated cables with the
cable clamp.
Don't overtighten any of the electrical fixtures.

9
Fig. 3
For side cable entry
installation
Using suitable fixings (not countersunk
screws), fix the backplate to the wall.
Identify which side the cable will enter.
Unscrew the entry tab on the machine.
Cut the rubber side tab of the conduit box
on the side that will be facing downwards
after installaton.
Use a suitable cable gland/conduit connector
(not supplied) for the installation.
Secure the conduit box on the wall using
suitable fixings.
Unscrew and remove the cable clamp,
terminal block and terminal block holder
from the backplate. Loosen all three screws
on the terminal block, ensuring the pre-
installed earth wire remains in place.
Cut the gland smaller than the diameter of
the cable and feed the cable through the
conduit box and gland. Don't remove the
gland from the backplate.
Make sure that the cable sits securely in the
cable guide. Any part of the cable not seated
securely may prevent the machine from being
fixed properly onto the backplate.
Secure the live, neutral and earth wires to
the appropriate terminal block locations, as
indicated on the backplate. Ensure the pre-
installed earth wire remains securely inserted
into the connector block.
Secure the terminal block to the backplate
with the terminal block holder and secure the
cable clamp.
Only clamp double insulated cables with the
cable clamp.
Don't overtighten any of the electrical fixtures.
Fig. 4
Install the main body
This Dyson Airblade™ hand dryer has
two power modes, 900W and 650W.
The machine is set to 900W as default. If
required, change the power mode to 650W
before installation.
Hook the machine on to the backplate and
gently lower the bottom of the machine
until it is flush with the wall. Check that both
backplate hooks are securely in position
before continuing.
Fix the 2 security screws into the bottom of the
machine using the tool supplied.
Fig. 5
Complete the installation
Place the filter unit in the machine and make
sure it clicks securely into place. Turn on the
mains power supply and test the machine is
working as it should by placing hands in sight
of the sensors.
Please hand this manual to the
owner/facilities manager.

10
AU/NZ
READ AND SAVE THESE
INSTRUCTIONS
IMPORTANT SAFETY INSTRUCTIONS
BEFORE INSTALLING OR USING THIS APPLIANCE READ ALL
INSTRUCTIONS AND CAUTIONARY MARKINGS IN THE
INSTALLATION INSTRUCTIONS AND MAINTENANCE MANUAL.
When using an electrical appliance, basic precautions should
always be followed, including the following:
WARNING
TO REDUCE THE RISK OF FIRE, ELECTRIC SHOCK OR INJURY TO
PERSONS, OBSERVE THE FOLLOWING:
1. This appliance can be used by children aged from 8 years and
above and persons with reduced physical, sensory or mental
capabilities or lack of experience and knowledge if they have
been given supervision or instruction concerning use of the
appliance in a safe way and understand the hazards involved.
Children shall not play with the appliance. Cleaning and user
maintenance shall not be made by children without supervision.
2. Do not allow the appliance to be used for any purpose other
than drying hands. Use this appliance only in the manner
intended by the manufacturer. If you have any questions, contact
the manufacturer.
3. Before servicing or cleaning the appliance, switch the power
off at the service panel. Ensure the switch is locked to prevent
the power from being switched on accidentally. If the means
of switching off the power cannot be locked, securely fasten a
prominent warning device, such as a tag, to the service panel.
4. The maximum altitude of use is 2,300 metres.
DO NOT USE ANY JETWASH EQUIPMENT FOR CLEANING ON
OR NEAR THIS APPLIANCE.
WARNING
ALL ELECTRICAL INSTALLATION AND REPAIR WORK SHOULD BE
CARRIED OUT BY A QUALIFIED ELECTRICIAN IN ACCORDANCE
WITH CURRENT LOCAL CODES OR REGULATIONS.
CAUTION
Your hand dryer should be located indoors. Operating temperature
range 0°C (32°F) to 40°C (104°F). To reduce the risk of fire or
electric shock, do not expose the internal mechanisms/components
of this appliance to moisture.
Maintenance

11
Looking after your
hand dryer
Please register as a Dyson
hand dryer owner
To help us ensure you receive a prompt and
efficient service, please register your machine
at www.dyson.com/airblade. This will
register your guarantee, confirm ownership
of your Dyson machine in the event of an
insurance loss, and enable us to contact you
if necessary.
You will need your serial number, which can
be found on the rating plate inside the main
body and on the information sticker on the
front of the machine.
Please ensure all instructions and guidance in
the Installation instructions and Maintenance
manual are adhered to or your guarantee
may be invalidated.
Maintenance
How to use
Place your hands beneath the Dyson
Airblade™ hand dryer arms and it will start
automatically, creating sheets of air that
scrape water from your hands.
For best dry time results:
Keep your hands flat and parallel to the
machine's surface, approximately 5mm from
the air aperture, drawing your hands through
the airflow from your wrists to finger tips.
Move your hands backwards and forwards
slowly through the air, turning them over
so both back and front are exposed to
the airflow.
Keep your hands flat, close the gaps between
your fingers and keep your thumbs tucked in,
so the whole of your hand is drawn through
the airflow.
For more information about the power
modes, go to www.dyson.com/airblade
Troubleshooting
Hand dryer cuts out
After 30 seconds of continued use the hand
dryer will turn off automatically. Remove and
replace hands to restart.
Turn the machine off and on again at the
mains electricity supply.
Make sure the sensors are clean.
Check the air apertures are clean and free of
dust and blockages. If the air apertures are
dusty, simply remove dust.
Check that the air inlet is free from blockages.
The dry time has increased
Make sure that the correct power mode has
been selected.
Check that the air inlet is free from blockages.
Inspect the air inlets for dust and remove.
The airflow is running
hotter than usual
Check that the air inlet is free from blockages.
Inspect the air inlets for dust and remove.
Air is continuously running
After 30 seconds of continued use the hand
dryer will turn off automatically. Remove and
replace hands to restart.
Check that the air inlet is free from blockages.
Inspect the air inlets for dust and remove.
Contact Dyson for further support
and information or online at
www.dyson.com/airblade
Cleaning
The hand dryer should be cleaned daily.
Wipe the sensors using a soft cloth and non-
abrasive cleaner.
Important information
Do not pressure wash the machine.
All cleaning chemicals should be used exactly
as indicated by the manufacturer’s
instructions (including appropriate dilution).
Any chemicals intended for use should
first be tested on an inconspicuous area
to confirm suitability. Aside from cleaning
chemicals, care should be taken to avoid any
harmful fluids from coming into contact with
the product, in particular oils and alcohol-
based products.
Filter maintenance
Regularly check the air inlet to ensure that it is
free from dust and debris. Simply wiping the
inlet with a soft cloth should be sufficient to
remove dust and debris.
If the air inlet gets clogged, further cleaning
or a filter change might be required.
If required for high usage environments, a
Dyson filter change kit provides everything
needed to change your machine’s HEPA
filter on site. Contact the Dyson Helpline for
more information.
Filter cleaning or replacement for your hand
dryer can be carried out by carefully following
the instructions given in the filter change kit. If
in any doubt, consult a qualified electrician or
contact the Dyson Helpline for support.
Servicing
If your hand dryer needs servicing, please
call the Dyson Helpline or visit the website at
www.dyson.com/airblade

12
Additional
information
Disposal information
Dyson products are made from high grade
recyclable materials. Recycle where possible.
When your Dyson machine reaches the
end of its life, we are responsible for its safe
disposal. You can send your old Dyson
machine back to us and we will organise for
it to be recycled. Please note that not all parts
are recyclable. Recycling of parts is subject
to the capabilities of 3rd party suppliers.
Available in Australia only.
Simply:
1. Box up your old Dyson machine.
2. Either post or drop off to the
address below.
Dyson We Recycle
Dyson Service Centre
8–10 Mangrove Lane
Taren Point, NSW 2229
Your guarantee
Terms and conditions of the Dyson
5 year guarantee
• If you have registered your machine
online, your guarantee will start from
the date of purchase. Please retain
your proof of purchase. If you do not
have your proof of purchase, your
guarantee will start 90 days after the
date of manufacture, according to
Dyson’s records.
• This guarantee will be void if the
machine is installed and used in a
country outside the one in which it
was sold.
• The Dyson Guarantee does not affect
your statutory rights as a consumer,
including under the Australian
Consumer Law. In some circumstances
it may provide additional benefits.
What is covered
• All factory parts of your hand dryer are
guaranteed against original defects,
material and workmanship when used
in accordance with the Dyson manual
for a period of 5 years from the start of
your guarantee.
• Please call the Dyson Helpline for
more information.
• Where Dyson determines that the main
body assembly needs replacing, Dyson
will send a replacement to be fitted by
the customer on site. The customer will
need to return any defective parts to
Dyson using the prepaid postage box
provided.
• Any replaced parts must be returned
to Dyson or an administration fee will
be levied.
• Where a filter change is required, Dyson
will provide a filter change kit to be
installed on site by the customer.
• Any parts which are returned and
replaced by Dyson will become the
property of Dyson.
• The replacement of any part of your
machine under guarantee will not
extend the period of guarantee.
• The Dyson Guarantee does not affect
your statutory rights as a consumer,
including under the Australian
Consumer Law. In some circumstances
it may provide additional benefits.
What is not covered
Dyson does not guarantee the repair or
replacement of a product as a result of:
• Accidental damage, faults caused by
negligent use or care, unintentional or
deliberate misuse, neglect, vandalism,
careless operation or handling of the
fixture which is not in accordance with
the Dyson manual.
• Use of parts not assembled or installed
in accordance with the instructions
of Dyson.
• Use of parts and accessories which are
not genuine Dyson components.
• Faulty installation, or installation that
does not precisely follow the installation
instructions supplied by Dyson (except
where installed by Dyson).
• Repairs or alterations carried out other
than in accordance with instructions
by Dyson.
• Damage from external sources such as
transit, weather, electrical outages or
power surges.
• Normal wear and tear (e.g. fuse, etc.).
• Damage caused by cleaning which is
not in line with the instructions in the
Dyson manual.
• Damage caused by water ingress due to
cleaning or treatment prohibited in the
Dyson manual.
• Any electrical, flooding or structural
damage, or any loss of business or
revenue as a result of product failure.
If you are in any doubt as to what is
covered by your guarantee, please
contact Dyson.
Summary of cover
• You must provide proof of (both the
original and any subsequent) delivery/
purchase before any work can be
carried out on your Dyson machine
or before any replacement parts will
be supplied. Without this proof, any
work carried out or parts supplied will
be chargeable. Keep your receipt or
delivery note.
• Subject to the exclusions above, all work
to be carried out under this guarantee
will be carried out by Dyson or its
authorised agents.
Important data protection information
When registering your Dyson machine:
• You will need to provide us with basic
contact information to register your
machine and enable us to support your
Dyson guarantee.
• When you register, you will have the
opportunity to choose whether you
would like to receive communications
from us. If you opt-in to communications
from Dyson, we will send you details
of special offers and news of our
latest innovations.
• We never sell your information to third
parties and only use information that
you share with us as defined by our
privacy policies which are available on
our website: privacy.dyson.com

13
BG
ПРОЧЕТЕТЕ И ЗАПАЗЕТЕ ТЕЗИ
ИНСТРУКЦИИ
ВАЖНИ ИНСТРУКЦИИ ЗА
БЕЗОПАСНОСТ
ПРЕДИ ДА МОНТИРАТЕ И ИЗПОЛЗВАТЕ ТОЗИ УРЕД,
ПРОЧЕТЕТЕ ВСИЧКИ ИНСТРУКЦИИ И ПРЕДУПРЕДИТЕЛНИ
НАДПИСИ В ИНСТРУКЦИИТЕ ЗА МОНТАЖ И
РЪКОВОДСТВОТО ЗА ПОДДРЪЖКА.
Когато използвате електрически уред, трябва винаги да
спазвате основните предпазни мерки, включително следните:
ПРЕДУПРЕЖДЕНИЕ
ЗА ДА НАМАЛИТЕ РИСКА ОТ ПОЖАР, ТОКОВ УДАР ИЛИ
ТЕЛЕСНА ПОВРЕДА, СЪБЛЮДАВАЙТЕ СЛЕДНОТО:
1. Този уред на Dyson може да се използва от деца на възраст
8 години или по-големи и от лица с намалени физически
и сетивни възможности, и възможности за преценка,
както и от такива без опит и познания, само ако бъдат
наблюдавани или инструктирани от отговорно лице във
връзка с използването на уреда по безопасен начин и при
осъзнаване на рисковете. Деца не бива да почистват или
извършват поддръжка на уреда, без да бъдат наблюдавани.
2. Преди да започнете сервизни дейности или да почистите
уреда, изключете захранването от сервизното табло.
Уверете се, че превключвателят е заключен, за да
предотвратите случайно включване на захранването.
Ако средството за изключване на захранването не може
да бъде заключено, закрепете здраво предупредително
обозначение, като например етикет, на видно място на
сервизното табло.
3. Не използвайте уплътнител при закрепяне на уреда
към стената.
4. Не монтирайте точно над отоплителен уред.
5. Максималната надморска височина за употреба е
2300 метра.
6. Големината на проводника, използван за свързване
(включително заземяващ проводник), не трябва да е по-
малка от 18AWG.
НЕ ИЗПОЛЗВАЙТЕ ОБОРУДВАНЕ ЗА СТРУЙНО ПОЧИСТВАНЕ
ВЪРХУ ТОЗИ УРЕД ИЛИ В БЛИЗОСТ ДО НЕГО.
ПРЕДУПРЕЖДЕНИЕ
ВСИЧКИ МОНТАЖИ И РЕМОНТНИ РАБОТИ ТРЯБВА ДА СЕ
ИЗВЪРШВАТ ОТ КВАЛИФИЦИРАН ЕЛЕКТРОТЕХНИК ИЛИ
ПОЛЕВИ СЕРВИЗЕН ИНЖЕНЕР НА DYSON В СЪОТВЕТСТВИЕ
С МЕСТНИТЕ ПРАВИЛА ИЛИ НАРЕДБИ.
Инструкции за монтаж

14
ВНИМАНИЕ
Сешоарът за ръце трябва да се монтира на закрито.
Работната температура е от 0 °C (32 °F) до 40 °C(104 °F).
За да намалите риска от пожар или токов удар, не излагайте
на влага вътрешните механизми/компоненти на уреда.

15
Подходяща отвертка за закрепване към
стена
Малка кръстата отвертка
Малка плоска отвертка
Инструмент Dyson (предоставен)
Рулетка и молив
Ръчна дрелка
Подходящо свредло
Клещи/за оголване на кабели
Нож
Необходими инструменти
Проверки преди
монтаж
Планиране преди
монтажа
Машината е създадена само за сухи,
закрити помещения.
Съответствието и спазването на
изискванията са отговорност на
монтажника. Намерете съответните
указания за монтаж в местните и
национални кодекси и наредби.
Монтирайте машината в съответствие с
всички строителни норми и/или наредби.
Преди да монтирате или да
използвате уреда, прекъснете
електрическото захранване.
Уверете се, че точно зад областта
на пробиване/монтаж няма тръби
(газопроводи, водопроводи,
въздухопроводи) или електрически
кабели, проводници или
вентилационни тръбопроводи.
Изберете местоположение, което
ще позволи лесен достъп до уреда и
правилно отстояние от заобикалящите
предмети и пода.
Уверете се, че няма нищо между
машината и пода и че отгоре има поне
210 мм за премахване на филтъра.
Dyson препоръчва използването на
защитно облекло, защита за очите и
материали при монтаж/ремонт, както
е необходимо.
Фиг. A
Изисквания за
закрепване върху стени
Не монтирайте на нестабилен
гипсокартон (стена от суха зидария),
тъй като това не осигурява безопасна и
сигурна инсталация на уреда и може да
анулира гаранцията.
Ако за монтирането е наличен само
нестабилен гипсокартон, трябва
да използвате задна пластина
Dyson. Свържете се с горещата
линия на Dyson, за да получите
допълнителна информация.
Ако има въздушна междина в стената,
използваните закрепващи материали
трябва да са достатъчно дълги, за да
осигурят стабилно монтиране.
Не използвайте уплътнител при закрепяне
на уреда към стената.
Фиг. B
Power modes
Този сешоар за ръце Dyson Airblade™
има две степени на мощност, 900 W и
650 W. Уредът е настроен на 900 W по
подразбиране. Ако се налага, променете
степента на мощност на 650 W
преди монтиране.
За повече информация относно
степените на мощност посетете
www.dyson.com/airblade
Електричество
Входен волтаж/честота: вижте табелката
с данните.
Преди да монтирате уреда, уверете се, че
електрическото захранване е изключено.
Спецификация за кабела: 3-жилен кабел
(фазов/неутрален/заземителен).
При монтажа или поправката на този
уред спазвайте местните правила за
електрическите инсталации.
Номинална мощност: вижте табелката
с данните.
Диапазон на работната температура:
0°C до 40°C.
Максимална дължина на оголената част
на фазовия и неутралния проводник:
7 мм.
Тестване на качеството
Сешоарът за ръце Dyson Airblade™ е
преминал през продължително тестване
на качеството, за да е сигурно, че може
да издържи на натиск и удари, типични
за тоалетни в търговски обекти или
обществени места.
Монтаж на
сешоара за ръце
Dyson Airblade™
ПРЕДУПРЕЖДЕНИЕ: Опасност от
токов удар!
Преди да продължите,
електричеството трябва да е изключено.
Фиг. 1
Пробийте монтажните
отвори
Изберете мястото за монтаж и
подходящата височина.
Препоръчителните височини за
монтиране са показани в шаблона
за монтиране. Може да се наложи да
промените размерите в отделни случаи.
Поставете предоставения шаблон
за монтиране на правилното място
на стената.
Монтиране на задния вход за кабел:
захранващият кабел трябва да е
подравнен от стената до точката за входа
на кабела на шаблона за монтиране.
Монтиране на страничния вход за кабел:
трябва да пробиете допълнителна дупка.
Използвайте шаблона за монтиране, за
да изберете местоположение.
Пробийте дупките на отбелязаните места,
като използвате подходящо свредло.
Фиг. 2
За монтиране на заден
вход за кабел
Развийте и премахнете кабелната скоба,
клемния блок и държача за клемни
блокове от задната пластина. Разхлабете
и трите винта на терминала, като се
уверите, че фабрично инсталираният
заземяващ проводник остава на
мястото си.
Отрежете парче от уплътнителя,
което да е по-малко от диаметъра на

16
кабела, и пъхнете кабела през кутията
за електроинсталация и уплътнителя.
Не премахвайте уплътнителя от
задната пластина.
Монтирайте задната пластина на
стената, като използвате подходящи
закрепващи материали (не винтове със
скрита глава).
Уверете се, че кабелът е добре закрепен
в кабелния водач. Всяка част от кабела,
която не е добре закрепена, може да
попречи на машината да бъде монтирана
правилно на задната пластина.
Закрепете фазовия, неутралния и
заземяващия проводник към съответните
места на клемния блок, както е показано
на задната пластина. Уверете се, че
предварително монтираните заземяващи
проводници са добре закрепени в
съединителния блок.
Закрепете клемния блок към задната
пластина с рамката на клемния блок и
закрепете кабелната скоба.
Затегнете само двойно изолираните
кабели с кабелната скоба.
Не затягайте твърде много
електрическите кабели.
Фиг. 3
За монтиране на
страничен вход за кабел
Монтирайте задната пластина на
стената, като използвате подходящи
закрепващи материали (не винтове със
скрита глава).
Разберете от коя страна ще мине кабела.
Развийте входната клема на уреда.
Отрежете страничната гумена табелка
на кутията за електроинсталация от
страната, която ще бъде обърната надолу
след монтирането.
Използвайте подходящ уплътнител за
кабели/тръбен конектор (не са включени
в комплекта).
Закрепете съединителната кутия
на стената, като използвате
подходящи материали.
Развийте и премахнете кабелната скоба,
клемния блок и държача за клемни
блокове от задната пластина. Разхлабете
и трите винта на терминала, като се
уверите, че фабрично инсталираният
заземяващ проводник остава на
мястото си.
Отрежете парче от уплътнителя,
което да е по-малко от диаметъра на
кабела, и пъхнете кабела през кутията
за електроинсталация и уплътнителя.
Не премахвайте уплътнителя от
задната пластина.
Уверете се, че кабелът е добре закрепен
в кабелния водач. Всяка част от кабела,
която не е добре закрепена, може да
попречи на машината да бъде монтирана
правилно на задната пластина.
Закрепете фазовия, неутралния и
заземяващия проводник към съответните
места на клемния блок, както е показано
на задната пластина. Уверете се, че
предварително монтираните заземяващи
проводници са добре закрепени в
съединителния блок.
Закрепете клемния блок към задната
пластина с рамката на клемния блок и
закрепете кабелната скоба.
Затегнете само двойно изолираните
кабели с кабелната скоба.
Не затягайте твърде много
електрическите кабели.
Фиг. 4
Монтирайте основното
тяло
Този сешоар за ръце Dyson Airblade™
има две степени на мощност, 900 W
и 650 W. Уредът е настроен на 900
W по подразбиране. Ако се налага,
променете степента на мощност на 650 W
преди монтиране.
Прикрепете уреда към задната пластина
и спуснете внимателно долната част
на машината, докато опре до стената.
Преди да продължите, уверете се, че
и двете скоби на задната пластина са
закрепени добре.
Монтирайте 2-та предпазни винта
на дъното на уреда, като използвате
предоставения инструмент.
Фиг. 5
Завършете монтирането
Поставете филтъра в уреда и се уверете,
че щраква сигурно на място. Включете
главното електрическо захранване
и проверете дали уредът работи,
както трябва, като поставите ръце
пред сензорите.
Моля, предайте този
наръчник на собственика/
управителя на обекта.

17
BG
ПРОЧЕТЕТЕ И ЗАПАЗЕТЕ ТЕЗИ
ИНСТРУКЦИИ
ВАЖНИ ИНСТРУКЦИИ ЗА
БЕЗОПАСНОСТ
ПРЕДИ ДА МОНТИРАТЕ И ИЗПОЛЗВАТЕ ТОЗИ УРЕД,
ПРОЧЕТЕТЕ ВСИЧКИ ИНСТРУКЦИИ И ПРЕДУПРЕДИТЕЛНИ
НАДПИСИ В ИНСТРУКЦИИТЕ ЗА МОНТАЖ И
РЪКОВОДСТВОТО ЗА ПОДДРЪЖКА.
Когато използвате електрически уред, трябва винаги да
спазвате основните предпазни мерки, включително следните:
ПРЕДУПРЕЖДЕНИЕ
ЗА ДА НАМАЛИТЕ РИСКА ОТ ПОЖАР, ТОКОВ УДАР ИЛИ
ТЕЛЕСНА ПОВРЕДА, СЪБЛЮДАВАЙТЕ СЛЕДНОТО:
1. Този уред на Dyson може да се използва от деца на възраст
8 години или по-големи и от лица с намалени физически
и сетивни възможности, и възможности за преценка,
както и от такива без опит и познания, само ако бъдат
наблюдавани или инструктирани от отговорно лице във
връзка с използването на уреда по безопасен начин и при
осъзнаване на рисковете. Деца не бива да почистват или
извършват поддръжка на уреда, без да бъдат наблюдавани.
2. Не позволявайте уредът да се използва за други цели,
различни от сушене на ръце. Използвайте този уред само
по начина, предвиден от производителя. Ако имате някакви
въпроси, свържете се с производителя.
3. Преди да започнете сервизни дейности или да почистите
уреда, изключете захранването от сервизното табло.
Уверете се, че превключвателят е заключен, за да
предотвратите случайно включване на захранването.
Ако средството за изключване на захранването не може
да бъде заключено, закрепете здраво предупредително
обозначение, като например етикет, на видно място на
сервизното табло.
4. Максималната надморска височина за употреба е
2300 метра.
НЕ ИЗПОЛЗВАЙТЕ ОБОРУДВАНЕ ЗА СТРУЙНО ПОЧИСТВАНЕ
ВЪРХУ ТОЗИ УРЕД ИЛИ В БЛИЗОСТ ДО НЕГО.
ПРЕДУПРЕЖДЕНИЕ
ВСИЧКИ МОНТАЖИ И РЕМОНТНИ РАБОТИ ТРЯБВА ДА СЕ
ИЗВЪРШВАТ ОТ КВАЛИФИЦИРАН ЕЛЕКТРОТЕХНИК ИЛИ
ПОЛЕВИ СЕРВИЗЕН ИНЖЕНЕР НА DYSON В СЪОТВЕТСТВИЕ
С МЕСТНИТЕ ПРАВИЛА ИЛИ НАРЕДБИ.
ВНИМАНИЕ
Сешоарът за ръце трябва да се монтира на закрито.
Работната температура е от 0 °C (32 °F) до 40 °C(104 °F). За
да намалите риска от пожар или токов удар, не излагайте на
влага вътрешните механизми/компоненти на уреда.
Поддръжка

18
ГРИЖА ЗА
СЕШОАРА ЗА
РЪЦЕ DYSON
Моля, регистрирайте
се като притежател на
сушилна машина за
ръце Dyson
За да ни помогнете да Ви осигурим
навременно и ефективно обслужване,
моля, регистрирайте устройството си на
адрес www.dyson.com/airblade. Така ще
регистрирате гаранцията, ще потвърдите,
че сте собственик на устройство на Dyson,
в случай на загуба на застраховка, и ще
ни дадете възможност да се свържем с
Вас, ако е необходимо.
Ще Ви трябва серийният номер на
устройството, който може да бъде
намерен на табелката с технически данни
в основното тяло и на информационния
стикер в предната част на устройството.
Моля, погрижете се всички инструкции
и указания в инструкциите за монтаж и в
наръчника за поддръжка да се спазват, в
противен случай гаранцията Ви може да
бъде анулирана.
Поддръжка
НАЧИН НА УПОТРЕБА
Поставете ръцете си под сешоара за
ръце Dyson Airblade™ и той ще започне
да работи автоматично, създавайки
въздушни струи, които премахват водата
от ръцете Ви.
За най-добър резултат:
Дръжте ръцете си хоризонтално и
успоредно на повърхността на уреда,
на приблизително 5 мм от въздушния
отвор, като прекарвате ръцете си през
въздушния поток от китките до върховете
на пръстите.
Движете ръцете си бавно през въздушния
поток, като поддържате една и съща
скорост, около 2,5секунди на страна,
като сменяте страните.
Дръжте ръцете си опънати, с прибрани
пръсти и палци, за да може цялата Ви
ръка да мине през потока въздух.
За повече информация относно
степените на мощност посетете
www.dyson.com/airblade
Отстраняване на
неизправности
Сешоарът за
ръце прекъсва
След като използвате сешоара за ръце
в продължение на 30 секунди, той ще
се изключи автоматично. Отместете
ръцете си и ги поставете отново, за да
рестартирате процеса.
Изключете машината и я
включете отново към главното
електрическо захранване.
Уверете се, че сензорите са чисти.
Проверете дали въздушните отвори са
чисти и нямат прах или други пречки.
Ако по въздушните входове има прах,
премахнете го.
Проверете дали има пречки пред входа
за въздух.
Времето за изсушаване
се е увеличило.
Уверете се, че сте избрали правилната
степен на мощност.
Проверете дали има пречки пред входа
за въздух.
Проверете въздушните отвори за прах и
го отстранете.
Въздухът е по-горещ
от обикновено
Проверете дали има пречки пред входа
за въздух.
Проверете въздушните отвори за прах и
го отстранете.
Въздухът е
постоянно активен
След като използвате сешоара за ръце
в продължение на 30 секунди, той ще
се изключи автоматично. Отместете
ръцете си и ги поставете отново, за да
рестартирате процеса.
Проверете дали има пречки пред входа
за въздух.
Проверете въздушните отвори за прах и
го отстранете.
Свържете се с Dyson за допълнителна
помощ и информация или посетете
www.dyson.com/airblade
ПОЧИСТВАНЕ
Сешоарът за ръце трябва да се
почиства ежедневно.
Почистете сензорите с мека кърпа и
неабразивен почистващ препарат.
Важна информация
Не мийте уреда със струя под налягане.
Всички почистващи химически препарати
трябва да се използват точно според
инструкциите на производителя
(включително правилното им
разреждане).
Всички почистващи препарати, които
възнамерявате да използвате, трябва
предварително да се тестват върху
незабележимо място, за да сте сигурни,
че са подходящи за целта. С изключение
на почистващите препарати, трябва да
се избягва контакт между машината и
всякакви вредни течности, особено масла
и продукти на базата на алкохол.
ПОДДРЪЖКА
НА ФИЛТЪРА
Редовно проверявайте отвора за
въздух, за да се гарантира, че в него
няма натрупан прах или замърсяване.
Избърсването на входа с мека кърпа
трябва да е достатъчно за премахване на
прах и замърсяване.
Ако входът за въздух се запуши, може да
се наложи допълнително почистване или
смяна на филтъра.
Ако се изисква поради силно натоварена
среда, комплектът за смяна на филтъра
на Dyson осигурява всичко, което е
необходимо за подмяна на място на HEPA

19
Допълнителна
информация
Информация относно изхвърлянето
• Продуктите на Dyson са произведени
от висококачествени материали,
които могат да се рециклират. Моля,
изхвърляйте този продукт отговорно
и рециклирайте, когато е възможно.
• Тази маркировка означава,
че продуктът не трябва да се
изхвърля заедно с други битови
отпадъци на територията на ЕС.
За да предотвратите евентуално
нанасяне на вреда на околната
среда или на човешкото здраве
от неконтролирано изхвърляне
на отпадъци, рециклирайте ги
отговорно с цел насърчаване на
устойчивото повторно използване
на материалните ресурси. За
да върнете Вашия употребяван
уред, използвайте системите
за връщане и събиране или се
свържете с търговеца, от когото е
бил закупен продуктът. Той може да
предостави продукта за безопасно и
природосъобразно рециклиране.
Гаранция
Общи условия на 5-годишната гаранция
от Dyson
• Ако сте регистрирали уреда си
онлайн, гаранцията Ви влиза в
сила от датата на покупката. Моля,
запазете документа си за покупката.
Ако го загубите, гаранцията Ви
влиза в сила 90 дни след датата на
производство съгласно регистрите
на Dyson.
• В случаите, когато устройството се
продава в ЕС, тази гаранция ще бъде
валидна само (i) ако устройството
се инсталира и използва в
държавата, в която е закупено, или
(ii) ако устройството се инсталира
и използва в Австрия, Белгия,
Франция, Германия, Ирландия,
Италия, Нидерландия, Испания или
Обединеното кралство и същият
модел като това устройство се
продава със същите спецификации
за напрежение в съответната
държава. В случаите, когато
устройството се продава извън ЕС,
тази гаранция ще бъде валидна
само ако устройството се инсталира
и използва в държавата, в която
е закупено.
КАКВО ПОКРИВА
• Всички заводски компоненти на
сешоара за ръце имат гаранция в
случай на оригинални дефекти,
дефекти в материала или
изработката, когато машината
се използва в съответствие с
ръководството за потребителя и
ръководството за инсталиране за
период от 5 години от датата на
влизане в сила на гаранцията Ви.
• За повече информация, моля,
обадете се на телефонната линия за
обслужване на клиенти на Dyson.
• Ако Dyson определи, че основният
модул има нужда от подмяна, Dyson
ще изпрати модул за подмяна,
който да бъде монтиран на място
от клиента. Клиентът ще трябва
да върне всякакви дефектни
компоненти на Dyson, като използва
предоставената кутия за изпращане
по пощата.
• Всякакви подменени компоненти
трябва да бъдат върнати на Dyson, в
противен случай ще бъде начислена
административна такса.
• Когато е необходима подмяна на
филтъра, Dyson ще осигури комплект
за подмяна на филтъра, който да се
монтира на място от клиента.
филтъра на уреда. За повече информация
можете да се обадите на телефонната
линия за обслужване на клиенти
на Dyson.
Почистването или подмяната на филтъра
на Вашия сешоар за ръце може да се
извършва, като внимателно следвате
инструкциите в комплекта за смяна на
филтър. При възникване на съмнения
се обърнете към квалифициран
електротехник или телефонната линия за
обслужване на клиенти на Dyson.
СЕРВИЗНО
ОБСЛУЖВАНЕ
Ако Вашият сешоар за ръце има
нужда от сервизно обслужване, моля,
обадете се на телефонната линия за
обслужване на клиенти на Dyson.
Можете да посетите и уебсайта на адрес
www.dyson.com/airblade

20
• Всички части, които са върнати
и заменени от Dyson, ще станат
собственост на Dyson.
• Гаранционната поправка или
подмяна на Вашия уред не удължава
периода на гаранцията.
• Гаранцията осигурява ползи, които
са допълнителни и не засягат
законните права, които може да
имате като потребител.
Какво не покрива гаранцията
Dyson не гарантира ремонта или
подмяната на уреда като резултат от:
• Случайна повреда, дефекти,
предизвикани от небрежно
използване или липса на грижи,
неумишлена или умишлена
злоупотреба, занемаряване,
вандализъм, недобросъвестно
използване или работа с
уреда, която не съответства на
ръководството за експлоатация
на Dyson.
• Използване на части, които не
са сглобени или монтирани в
съответствие с инструкциите
на Dyson.
• Използване на части и
принадлежности, които не са
оригинални компоненти на Dyson.
• Неправилен монтаж или монтаж,
при който не са спазени точно
инструкциите за монтаж,
предоставени от Dyson (освен когато
монтажът е извършен от Dyson).
• Ремонт или изменения, извършени
в несъответствие с инструкциите
на Dyson.
• Повреди от външни източници,
като например транспорт,
атмосферни условия, прекъсване
на електрическото захранване или
пикови напрежения.
• Нормално износване (напр.
предпазители и др.).
• Повреди, предизвикани от
почистване, което не съответства на
инструкциите в това ръководство:
например почистване с препарати
или продукти, посочени като вредни
за уреда.
• Повреди, предизвикани от
проникване на вода в уреда
вследствие на метод на почистване
или обработка, забранен в
това ръководство.
• Всяка електрическа, структурна
повреда или повреда от наводнение,
или загуба на дейност или приходи
в резултат на повреда на продукта.
Ако не сте сигурни какво точно се
покрива от гаранцията Ви, моля,
обадете се на Dyson (информация ще
намерите на задната корица).
Обобщение на гаранционното покритие
• Трябва да предоставите
доказателство за доставката/
покупката (както за първоначална
покупка, така и за всяка следваща),
преди да може да се извърши
каквато и да е работа по уреда,
произведен от Dyson, или преди да
бъдат доставени резервни части.
Без такова доказателство всяка
извършена работа или доставени
части ще се заплащат. Пазете
касовата бележка или фактурата за
доставка.
• При спазване на изключенията
по-горе всички работни
дейности по гаранцията ще се
извършват от Dyson или от нейни
упълномощени представители.
Oтносно защитата на личните Ви данни
При регистриране на Вашия продукт
на Dyson:
• Ще ни е нужна информация за
контакт с Вас, за да можем да
регистрираме продукта Ви и да
обслужваме гаранцията.
• Когато се регистрирате, можете
да изберете дали да получавате
съобщения от нас. Ако се съгласите
да получавате съобщения от Dyson,
ще Ви изпращаме информация за
специални оферти и новини за
новаторските ни продукти.
• Ние не продаваме данните Ви
на трети страни; използваме
информацията, която сте ни
предоставили, според политиката
за поверителност на личните
данни, публикувана на уебсайта ни
privacy.dyson.com.
Table of contents
Languages:
Other Dyson Dryer manuals

Dyson
Dyson Airblade Mk2 AB06 User manual

Dyson
Dyson Airblade A03 User manual

Dyson
Dyson ab08 User manual

Dyson
Dyson Airblade Tap User manual

Dyson
Dyson ab12 User manual

Dyson
Dyson AIRBLADE V User manual

Dyson
Dyson AIRBLADE V User manual

Dyson
Dyson AB09 User manual

Dyson
Dyson airblade AB02 User manual

Dyson
Dyson AIRBLADE V User manual

Dyson
Dyson airblade AB02 User manual

Dyson
Dyson Airblade Tap User manual

Dyson
Dyson airblade AB02 User manual

Dyson
Dyson Airblade WD04 User manual

Dyson
Dyson AB09 User manual

Dyson
Dyson Airblade 1A Instructions for use

Dyson
Dyson ab08 User manual

Dyson
Dyson Airblade AB06 User manual

Dyson
Dyson Airblade 9KJ Manual

Dyson
Dyson AIRBLADE V User manual