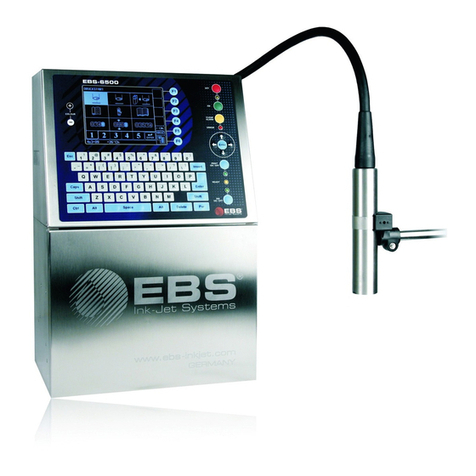
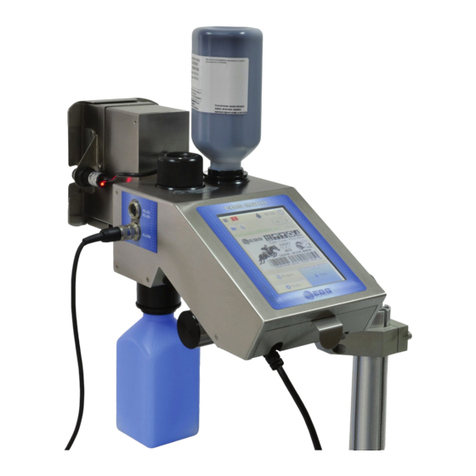
EBS 6600 Technical specifications

© Copyright 2018 EBS ink JEt SyStEmE – All rightS rESErvEd. thE doCumEnt mAy BE SuBJECt to ChAngE.
BOLTMARK®II-seRIes
EBS-6600/EBS-6900
Basic Operating instructiOns
VERSION: 2018/02/27#2.0EN

The BOLTMARK®II‑series PrinTers
Basic OPeraTing insTrucTiOns
22018/02/27#2.0EN
Preliminary information
This manual applies to the following BOLTMARK®II-series printers:
• EBS‑6600 BOLTMARK®II; a low investment printer designed for simple applicaons,
• EBS‑6900 BOLTMARK®II; an all-round printer on which the full range of opons can be
installed.
This document contains only basic informaon on the BOLTMARK®II-series printer to enable
a user to:
• start up/shut down the printer,
• create/edit a text,
• select a text for prinng,
• start/pause prinng,
• replace boles (of ink and solvent),
• keep the printhead clean.
For full informaon about printer equipment, installaon, conguraon and operaon
see The BOLTMARK®II‑series Printers User Manual.
Dear User,
This version of the document includes most of the modicaons implemented to
the EBS Ink Jet Systeme printers up to soware version 37_1A, and the descripons contained
therein correspond to the printers on which this soware version is installed.
The product delivered to you corresponds to your specic order, and it may happen that the opons
and funconality of your prinng system dier from some descripons or illustraons. As we need
to keep pace with new technological advancement and wish to meet individual requirements
of our clients, we reserve the right to introduce changes in the design and construcon as
and when necessary. Therefore, claims cannot be made regarding dierences to data, illustraons
or descripons contained in this manual. Should your printer be equipped with opons or soware
that are not illustrated or described in this manual or should you have addional queries aer
having read the manual, please contact any EBS Ink Jet Systeme authorized representave oce
for more informaon.
The manufacturer shall not be liable for any damages to the printer resulng from the failure to
follow the instrucons or from consequences of editorial or publishing errors contained in this
manual.
The applicaon and use of the products are beyond our control and are under full responsibility
of the user.
This document has originally been drawn up in English. Any other language versions are translaons
from the original version. Should any discrepancies occur, the English language version shall prevail.

The BOLTMARK®II‑series PrinTers
Basic OPeraTing insTrucTiOns
32018/02/27#2.0EN
• Responsibility
EBS Ink Jet Systeme shall not be responsible for damage or personal injuries that might occur
during installaon, operaon or maintenance of the EBS Ink Jet Systeme printers due to
the failure to follow the safety instrucons and also the good manufacturing pracces and safe-
ty standards generally established in the industry.
Every user who modies or repairs the EBS Ink Jet Systeme printers using consumables, spare
parts or accessories other than those supplied by EBS Ink Jet Systeme or inconsistent with
the EBS Ink Jet Systeme specicaons, does that on his/her own responsibility and therefore
shall not be entled to make claims under the warranty given to him/her.
EBS Ink Jet Systeme shall not be responsible for any failures or damage caused by modicaons
to the printer or by the applicaon of the printer to other purposes than those the printer is
designed for. The user shall be responsible for ensuring that any required precauons are taken
each me the EBS Ink Jet Systeme printer is used.
The EBS Ink Jet Systeme consumables, spare parts and accessories are designed for use in
the EBS Ink Jet Systeme printers. The applicaon of consumables, spare parts and accessories
not manufactured or recommended by EBS Ink Jet Systeme for use with a parcular printer may
cause printer malfuncon or lead to printer damage, and it always results in loss of the right to
warranty claims.
The EBS Ink Jet Systeme printers are tested together with EBS Ink Jet Systeme consumables
and spare parts according to the relevant safety regulaons and standards, therefore any use of
consumables and spare parts other than those supplied by EBS Ink Jet Systeme may distort the
test condions and aect the conformity of the printer with certain standards, as well as it may
impair specied parameters, properes or performances of the printer. The user shall bear all
risks involved with the use of improper consumables and spare parts.
• safety Rules
No eorts have been spared to design the printer diligently so that its operaon is safe and re-
liable. However, the knowledge and observance of a few safety rules and precauons are
the prerequisite for safe use of the printer.
• Before using the BOLTMARK®II-series printer read carefully the consumable data sheets.
• Every service operaon must be performed exclusively by the manufacturer’s authorized
service sta or by a user who has been trained by the manufacturer’s authorized representa-
ves in performing such operaons. This shall also apply to:
- installaon and removal of the printer,
- the operaons that involve opening or taking o any protecve shields dierent than
printhead cover and consumables compartment door. An untrained user can remove print-
head cover exclusively when the printer is disconnected from the electric mains.
Safety inStructionS

The BOLTMARK®II‑series PrinTers
Basic OPeraTing insTrucTiOns
42018/02/27#2.0EN
Safety inStructionS
• A printer user can enjoy OPERATOR and ADVANCED OPERATOR privileges.
The SERVICEMAN access level, which oers access to all service procedures, is de-
signed exclusively for the manufacturer’s authorized service sta.
• The printer should be operated by trained personnel. It is recommended that the printer be
supervised during operaon.
• Do not print on objects whose temperature exceeds 100°C (212°F) at the me of labeling.
• Make any manipulaons in the electrical part of the printer only when the power is turned
o.
• Never direct the printhead outlet towards persons or animals. Even if the printer is shut
down.
• Wear protecve clothing and goggles while performing any operaons in the ink system
and the printhead.
• While an iModule® and boles are being installed/replaced in the consumables compart-
ment be careful not to get wounded with the needles that are part of their connectors.
• Do not use plasc vessels for washing. Drip pans of metal are recommended.
• If you need to disconnect the printer from the electrical mains, take out power plug from
the mains or set main power switch POWER to the ”O” posion.
• Do not use the printer if it is not fully operaonal.
• incase of accident
When ink spills, wipe the spilled liquid with absorbent material and dispose of it following the
re and health and safety at work regulaons.
Take the splashed clothes o as soon as possible.
If eyes or skin get irritated:
• EYES need rinsing with running water over 15 minutes; then contact
an ophthalmologist,
• SKIN needs washing with water and soap.

The BOLTMARK®II‑series PrinTers
Basic OPeraTing insTrucTiOns
52018/02/27#2.0EN
Safety inStructionS
• fiRe pRotection
The instrucons described in the data sheets for every ink or solvent should be followed strictly.
• Place a re exnguisher (designed for exnguishing electrical equipment and ammable
solvent res) near the printer.
• Do not print in the areas where an explosion hazard exists.
• Do not use open ames or sparking devices in the printer work area.
• Do not leave ink, solvent or wash-up in open containers.
• Before coming close to ammable liquids touch a grounded metal object (e.g. the grounded
printer housing).
• Ensure good venlaon in the area where the printer is installed (especially near the print-
head) and where consumables are stored.
• WoRking conditions
• Connect the printer to an electric outlet equipped with protecve grounding.
• Supply voltage: 100 ‑ 240 VAC, 50/60 Hz.
• Working temperature:
+5 ‑ +40 ºC (+41 ‑ +104 ºF) for stac operaon.
+15 ‑ +40 ºC (+59 ‑ +104 ºF) for dynamic operaon.
• Relave humidity: up to 90% without condensaon.
• Connect the protecve pin of the printer to a grounded element of the industrial plant, e.g.
to a belt conveyor. This is required especially when the printer is connected to a telecommu-
nicaons network.
• Discharge vapors via an unobstructed pipe to the outside of the building.
• Ensure free access to the printer, especially to the main power switch POWER which is
a safety switch.
• Put the printer in a horizontal posion on an EBS Ink Jet Systeme table or stand or hang it
on a rack; the printer should be protected against movement.
• Put the photodetector and the printhead in a convenient place to label objects comfortably;
the printhead should be situated in a place where no shock or vibraon occurs.
• The printer is equipped with a built-in, non-replaceable lit-manganese baery. The baery
must not be removed, replaced, crushed, punched, thrown into water or re.

The BOLTMARK®II‑series PrinTers
Basic OPeraTing insTrucTiOns
62018/02/27#2.0EN
• compliance With standaRds
The manufacturer declares with its full responsibility that when installed and operated in
compliance with the manufacturer’s instrucons, the BOLTMARK®II-series printers together
with their manufacturer-supplied accessories meet the essenal requirements and other
relevant provisions of the following European Union Direcves:
• 1999/5/EC,
• 2011/65/UE
and meet the following harmonized standards:
Standard RED Direcve reference
•EN 60950‑1:2006 + A11:2009 + A1:2010
+ A12:2011 + A2:2013,
•EN 50364:2010,
The user and other persons’ health and safety
requirements - with reference to Art. 3,
par. 1 a)
•ETSI EN 301 489‑1 V1.9.2,
•ETSI EN 301 489‑3 V1.6.1,
•EN 61000‑6‑4:2007 + A1:2011,
•EN 61000‑6‑2:2005 + AC:2005,
The protecon requirements with respect to
electromagnec compability - with refer-
ence to Art. 3, par. 1 b)
•ETSI EN 300 330‑1 V1.8.1,
•ETSI EN 300 330‑2 V1.6.1.
Eecve use of the spectrum allocated to
radio communicaon - with reference to
Art. 3, par. 2
Therefore the BOLTMARK®II-series printers bear the mark:
* - the number of the noed
body involved in the conformity
assessment procedure.
1471*
The full EC Declaraon of Conformity is available at a client’s request from authorized
distributors.
The BOLTMARK®II-series printers are class A equipment as dened by
EN 55022:2010 + AC:2011 (industrial environment). In a domesc environment they may cause
radio interference in which case the user may be required to take adequate counter measures.
comPliance with StandardS

The BOLTMARK®II‑series PrinTers
Basic OPeraTing insTrucTiOns
72018/02/27#2.0EN
Printer inStallation
The printer should be installed for the rst me by the distributor’s authorized serviceman.
A trained user can reinstall/move the printer to another workplace provided that the printer:
• is lled with ink,
• has previously been prepared for transporng in compliance with the instrucons given
in The BOLTMARK®II‑series Printers User Manual or
has been supplied without iModule®, and a new iModule® unit (or the one used in that print-
er before) has been delivered separately.
Recommended modes of installaon
• installing on a CIJ printer stand,
• installing on a hanger,
• installing on a rm table.
Place the printer in a convenient place to ensure easy access to:
• operator panel,
• accessories connector plate, including main power switch POWER, which is a safety cut-o
switch,
• the consumables chamber
Discharge vapors to the outside of the building.
Secure the printer and other elements of the prinng system against movement.
Connect the protecve pin of the printer to a grounded element of the industrial plant.
Install the printhead in a place that:
• ensures convenient access to objects to be labeled,
• is free from shocks and vibraon,
• makes contact of the head cable with another object impossible.
The printhead can print in any posion.
The minimum head cable bend radius is:
• 75 mm for stac operaon,
• 150 mm for dynamic operaon.

The BOLTMARK®II‑series PrinTers
Basic OPeraTing insTrucTiOns
82018/02/27#2.0EN
1. Operator panel.
2. Power switch POWER; a safety cut-o switch.
3. Accessories connector plate.
4. Photodetector.
5. Printhead.
6. Ink bole (with a black cap).
7. Solvent bole (with a white cap).
8. iModule®.
Printer overview
678
5
4
3
3
2
1
EBS‑6600 BOLTMARK®II
EBS‑6900 BOLTMARK®II

The BOLTMARK®II‑series PrinTers
Basic OPeraTing insTrucTiOns
92018/02/27#2.0EN
oPerator Panel
1. LCD touch screen.
2. Funcon buons.
3. Main panel.
A. Printer shutdown buon.
B. LED indicator of printer state: on ( ), o ( ).
C. Printer startup buon.
D. LED indicator of ink ow in the printhead: ow started ( ), ow in the process of be-
ing started/stopped ( ).
E. Buon for starng/stopping ink ow in the printhead.
F. LED indicator of readiness of the printer for prinng.
G. LED indicator of prinng state.
H. Buon for starng/pausing prinng.
I. LED indicator of alarm state.
J. Buon for clearing an alarm.
K. Navigaon buons.
4. Alphanumerical keyboard.
5. LCD color change buons.
COLOUR
EBS-6600 OFF
ON
INK
ON / OFF
READY
CLEAR
ALARM
ERROR
PRINT
ON / OFF
Enter
Delete Par
Shift
Space
Alt Alt
Shift
Caps
Esc
Insert
Ctrl
Enter
F5
F4
F3
F2
F6
F1
BOLTMARK®II
5
A
C
E
H
J
K
G
B
D
I
1 2
F
4 3

The BOLTMARK®II‑series PrinTers
Basic OPeraTing insTrucTiOns
102018/02/27#2.0EN
1. Name of the acve or printed text.
2. Informaon bar.
3. Current me and the icon of the currently logged in user.
4. Funcon idencaon icons bar.
A. Printer shutdown icon.
B. Icon for starng/stopping Ink ow in the printhead.
C. User shortcut icons - unavailable to OPERATOR .
D. Navigaon icon - unavailable to OPERATOR .
5. iModule® consumpon/wear indicator.
6. Ink level indicator.
7. Solvent level indicator.
8. Power supply (s) and printhead (h) temperatures.
9. Printhead status.
10. Printer status bar.
11. User Interface working window.
uSer interface
A
B
D
5
6
31 2
9
10
8 7
11
C
4

The BOLTMARK®II‑series PrinTers
Basic OPeraTing insTrucTiOns
11 2018/02/27#2.0EN
menu Structure
* available to OPERATOR
Select acve text
*
*
*
*
Rows read
Conguraon of
special registers
Edit acve text
Print with code
switching
Start prinng
Stop prinng
USB memory
service
Print with text
changing
Auxilliary print
parameters
Code switch
emulator
Variable Field
Universal Date
Counters
Photocell sengs
Delete param.
block library
USB memory
service
Param. block
library
Set shi
counter
Counters
Copy and edit text
USB memory
service
Shi counter
Parameters service
Delete text
Delete param.
block
Texts & print sengs
Set global
counter
Link parameters
block to text
Edit exisng text
Edit parameters
block
Copy and edit
param. block
Create new param.
block
Global counter
Save current print
parameters as a block
Global prinng
parameters
Create new text
Library service
Auxiliary print & text opons
Texts service
Log in/ Log o
Clear error
Read text
library
Delete text
library

The BOLTMARK®II‑series PrinTers
Basic OPeraTing insTrucTiOns
122018/02/27#2.0EN
menu Structure
Nozzle service
Ink system OFF
Ink circulaon
(ltering)
Fast ink ON/ Fast
ink OFF
Solvent ON
Printer sengs
IMS version
Consumables
iModule
informaon
Bole
informaon
Number of
texts/1l
Boles
diagnoscs
Remove protec-
on me
Printer, ink,
solvent type
Operang me
iModule
diagnoscs
Remove protec-
on me
iModule type
iModule
Operang me
Service
Printer
opons
Print head service
Service funcons
Service mode ON/
Service mode OFF
Program opons
Date of next
service visit
Nozzle unclog
Printer parame-
ters control
Prepare for
monthly storage
& switch o
Thicken the ink
& switch o
SMP service tool
Two objects on
conveyer
According to
sha. data
iModule
replacement
Nozzle cleaning
Conveyor
measurement
Date and me sengs
Switch to text
user interface
Interface language
Edit/set password
Auxiliary sengs
Alarm service
Unlock printer
Display errors
Check Time &
date
Read error report
Clear error
Unlock printer using
keyboard
Acvity me
* available to OPERATOR

The BOLTMARK®II‑series PrinTers
Basic OPeraTing insTrucTiOns
13 2018/02/27#2.0EN
Starting the Printer uP
The procedure for starng
the printer up follows.
The printer enters standby mode.
Printer ready for prinng.
1
3
When the startup procedure is followed, the iModule® transport protecon must be open.
An aempt to start up the printer when the transport protecon is closed, results in the follow-
ing message
VACUUM DOESN’T INCREASE, Check iModule transport protecon and turn ink on
In such a case clear the alarm with the CLEAR
ALARM buon, open the iModule® transport protecon
and start ink ow in the printhead by pressing the icon in the funcon idencaon icon
window or the INK
ON/OFF buon on the main panel.
OFF
ON
COLOUR
EBS-6600
OFF
ON
INK
ON / OFF
READY
CLEAR
ALARM
ERROR
PRINT
ON / OFF
Enter
Delete Par
Shift
Space
Alt Alt
Shift
Caps
Esc
Insert
Ctrl
Enter
F5
F4
F3
F2
F6
F1
BOLTMARK
®II
COLOUR
EBS-6600
OFF
ON
INK
ON / OFF
READY
CLEAR
ALARM
ERROR
PRINT
ON / OFF
Enter
Delete Par
Shift
Space
Alt Alt
Shift
Caps
Esc
Insert
Ctrl
Enter
F5
F4
F3
F2
F6
F1
BOLTMARK
®II
COLOUR
EBS-6600 OFF
ON
INK
ON / OFF
READY
CLEAR
ALARM
ERROR
PRINT
ON / OFF
Enter
Delete Par
Shift
Space
Alt Alt
Shift
Caps
Esc
Insert
Ctrl
Enter
F5
F4
F3
F2
F6
F1
BOLTMARK®II
COLOUR
EBS-6600 OFF
ON
INK
ON / OFF
READY
CLEAR
ALARM
ERROR
PRINT
ON / OFF
Enter
Delete Par
Shift
Space
Alt Alt
Shift
Caps
Esc
Insert
Ctrl
Enter
F5
F4
F3
F2
F6
F1
BOLTMARK®II
POWER „|”
2OFF
ON
Time required to com-
plete the procedure.
Progress bar.

The BOLTMARK®II‑series PrinTers
Basic OPeraTing insTrucTiOns
142018/02/27#2.0EN
Shutting the Printer down
Printer in standby mode.
The procedure for shung the printer
down follows.
Press once and hold
down over 1s.
Hold down.
Turn the power o,
if need be.
or
On shung the printer down in emergency shutdown mode, wash the printhead interior (espe-
cially the guer area) with solvent.
• emeRgency shutdoWn mode (foR up to 1 houR)
• RegulaR mode (foR up to 1 Week)
2
COLOUR
EBS-6600
OFF
ON
INK
ON / OFF
READY
CLEAR
ALARM
ERROR
PRINT
ON / OFF
Enter
Delete Par
Shift
Space
Alt Alt
Shift
Caps
Esc
Insert
Ctrl
Enter
F5
F4
F3
F2
F6
F1
BOLTMARK®II
COLOUR
EBS-6600
OFF
ON
INK
ON / OFF
READY
CLEAR
ALARM
ERROR
PRINT
ON / OFF
Enter
Delete Par
Shift
Space
Alt Alt
Shift
Caps
Esc
Insert
Ctrl
Enter
F5
F4
F3
F2
F6
F1
BOLTMARK
®II
111s
COLOUR
EBS-6600
OFF
ON
INK
ON / OFF
READY
CLEAR
ALARM
ERROR
PRINT
ON / OFF
Enter
Delete Par
Shift
Space
Alt Alt
Shift
Caps
Esc
Insert
Ctrl
Enter
F5
F4
F3
F2
F6
F1
BOLTMARK®II
CLEAR
ALARM
1
OFF
2
SWITCH THE POWER OFF
ARE YOU SURE (Y,N)?
(Y=ENTER, N=ESC)
SWITCHING THE PRINTER OFF
.....
Press ENTER...
The printer can be shut down in
emergency shutdown mode only
when a clear failure of the print-
er occurs and a few minutes'
shung down in regular mode
could cause further damage
(e.g. ink spill).
POWER „O”
3
POWER „O”
1
Time required to complete the procedure.
Progress bar.

The BOLTMARK®II‑series PrinTers
Basic OPeraTing insTrucTiOns
15 2018/02/27#2.0EN
logging in
• logging in
To gain access to a greater number of funcons described further in this document, the user
should log in as:
• ADVANCED OPERATOR ,
• SERVICEMAN .
• opeRatoR
When the BOLTMARK®II-series printer starts up, the following funcons available to
OPERATOR can be used, as standard:
to select a text for prinng/the acve text,
to start/stop prinng a selected text,
to log in/log out OPERATOR /ADVANCED OPERATOR /SERVICEMAN ,
to stop/start ink ow,
to clear an alarm,
to shut the printer down.
1
• The default password of ADVANCED OPERATOR is ebs.
• If the a/m password is not dened, ADVANCED OPERATOR is logged in when the print-
er starts up.
2 Type in a text via the keyboard.
3

The BOLTMARK®II‑series PrinTers
Basic OPeraTing insTrucTiOns
162018/02/27#2.0EN
• keyboaRd
• touch panel
Types of menu icons:
• funcons, e.g. ,
• funcon folders - the funcons are marked with , e.g. .
Addional navigaon icons:
to return to the previous menu level in working window
to go to the main screen on funcon idencaon icon
bar
to return to the recently used menu level (from the
main screen)
on funcon idencaon icon
bar
The working window is divided into 9 secons.
Every secon is associated with a keyboard digit;
the digit works as a hot key.
to open folder ,
no response - no funcon or folder in secon 8,
to move among secons, to highlight a selected secon,
Enter to perform an operaon in the highlighted secon,
Esc to return to the previous level.
navigation menu
COLOUR
EBS-6600 OFF
ON
INK
ON / OFF
READY
CLEAR
ALARM
ERROR
PRINT
ON / OFF
Enter
Delete Par
Shift
Space
Alt Alt
Shift
Caps
Esc
Insert
Ctrl
Enter
F5
F4
F3
F2
F6
F1
BOLTMARK®II
1 2
64
8
3
7
5
9

The BOLTMARK®II‑series PrinTers
Basic OPeraTing insTrucTiOns
17 2018/02/27#2.0EN
creating anew text
1
All printer operaon stages are described based on an example:
The text consists of 4 subtexts:
1Text. Stac text.
2Special register Date+os. Dynamic text. Current date + the value of the Oset
prinng parameter.
3Text. Stac text.
4Special register Time Dynamic text. Current me.
Possibilies for creang a new text.
Text contents:
• special registers: the me, the date, the expiraon date, object counters, etc,
• bar codes: standard and 2D "Data Matrix" codes,
• graphics: built-in/created by a user (with a graphics editor).
Text proles:
• texts can be edited more easily because they are adjusted to a required conguraon,
• print quality and prinng speed are opmized.
Open folder .
21
43

The BOLTMARK®II‑series PrinTers
Basic OPeraTing insTrucTiOns
182018/02/27#2.0EN
2
3
4
Type in a text name.
Up to 8 characters - capital/small
liers, digits and characters excluding
. , / \ ; : * < > | [ ] { } = +, e.g. DATE.
Select a text prole.
The highlighted prole 2 lines x 7
dots is opmal in this case.
2
1
Conrm by pressing .
Conrm by pressing .
Select .
creating anew text

The BOLTMARK®II‑series PrinTers
Basic OPeraTing insTrucTiOns
19 2018/02/27#2.0EN
creating anew text
5
6
7
Type : Tex t
Char. set : Lan 7x5
Typeface : Normal
Chr. width : Proporonal
Distance : 2
Rotaon : None
Spec. reg. : None
Front dist : 0
Back dist : 0
Set parameters for subtext 1.
Create subtext 2to the
right of the previous one.
Create subtext 3below
the previous one.
Editor ‑ a new empty window.
Type in a text via the keyboard.
Date+os. Use the special register creator to set up subtext 2as
a Date+os. ( ) special register.
The other parameters of
subtext 2 - as for subtext 1.
The expiry date (the Date+os.
special register) is printed
correctly when the Oset
and Oset interv prinng param-
eters are set.

The BOLTMARK®II‑series PrinTers
Basic OPeraTing insTrucTiOns
202018/02/27#2.0EN
creating anew text
To conrm the end of text eding (the text is saved to text library).
The above example contains only certain opon out of those available in the text editor.
8
9
10
Set parameters for subtext 3the same as
for subtext 1.
Create subtext 4to the
right of the previous one.
Type in a text via the keyboard.
In the subtexts where special registers ( 2and 4) are used, leers typed in for
the date and digits typed in for the me are replaced with values during prinng
(e.g. DA - tens and units of the 2-digit day number in month, MO – tens and units
of the 2-digit month number in year, YE – tens and units of the 2-digit year number).
Time Use the special register creator to set up subtext 4as
a Time ( ) special register.
The other parameters of
subtext 4 - as for subtext 2.
This manual suits for next models
1
Table of contents
Other EBS Printer manuals