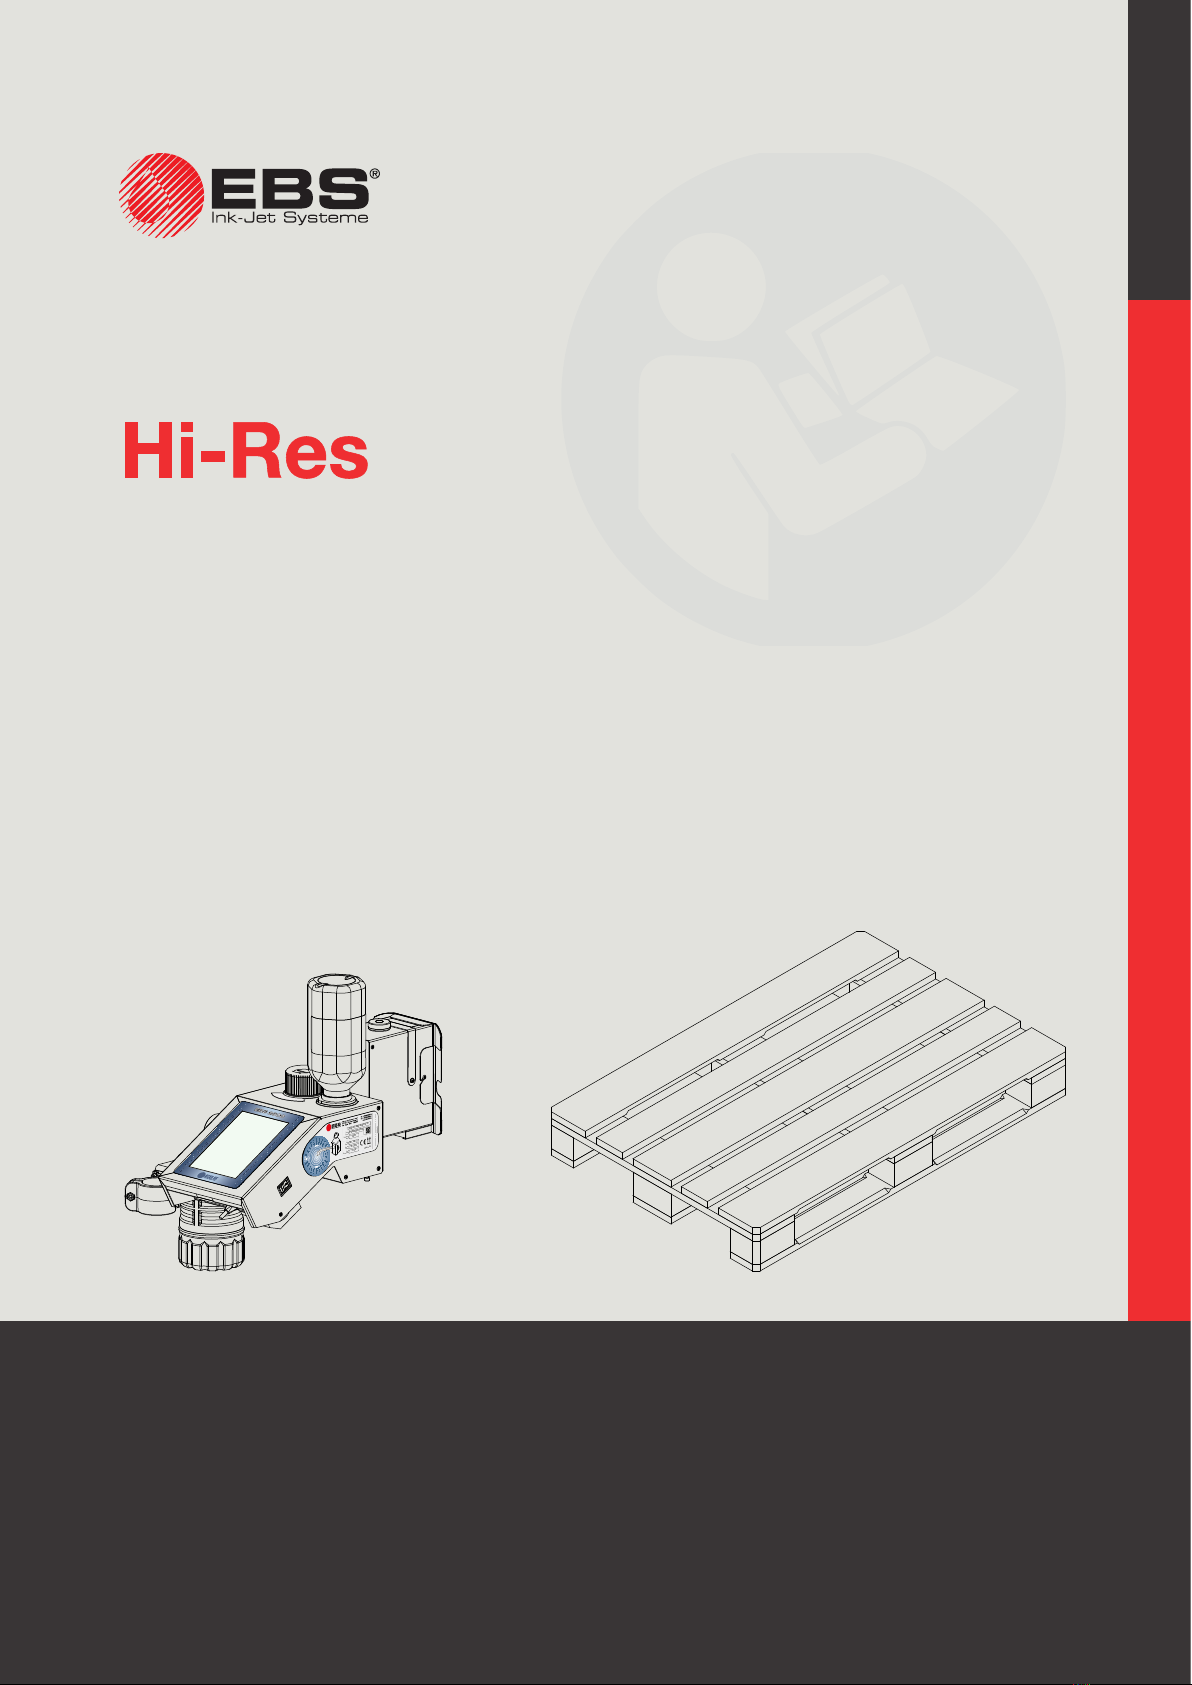
EBS EBS 2600 User manual

2023.05.16
EBS‑2600 USER
MANUAL
Industrial DROP ON DEMAND Printers
Original Instructions
G2023/04/26_1EN
INK-JET EBS-2600/510/72
P120425000-101234
2022
Type
Typ
Number
Nummer
Manufactured
Baujahr
Madein EU
50 - 60 Hz
< 0.5 A
100 – 240 V
Voltage
Spannung
Frequency
Frequenz
Current
Stromaufnahme
Part 1 of 3

3 of 184
EN EBS‑2600 User Manual
G2023/04/26_1EN2023.05.16
Part 1 of 3
1. General InformatIon 10
1.1. applIcatIon 11
2. DescrIptIon 13
2.1. overvIew 13
2.2. prInter structure 13
2.2.1. front vIew 14
2.2.2. Back vIew 16
2.2.3. external connectIons 17
2.2.4. Ink Bottle connectIon 22
2.2.5. consumaBles 22
2.2.5.1. Ink Bottle 22
2.3. InstallInG the prInter 23
2.3.1. aDDItIonal InformatIon 30
2.3.2. electrIcal connectIons 35
2.3.3. hyDraulIc connectIons 36
2.3.4. InstallInG accessorIes 37
2.3.4.1. StatuS Beacon 37
2.3.4.2. encoder 38
2.3.4.3. external photodetector 39
2.3.5. laBelInG euro-pallets 40
2.3.5.1. uSe of one photodetector ‑ prIntS not SynchronIzed wIth euro‑palletS 41
2.3.5.2. uSe of two photodetectora ‑ prIntS SynchronIzed wIth euro‑palletS 43
2.4. startInG the prInter up for the fIrst tIme 45
2.4.1. test prInts 45
2.5. user traInInG 46
3. user Interface 48
3.1. maIn screen 48
3.1.1. status Bar 49
3.1.2. project wInDow 51
3.1.3. menu Bar 52
3.2. rules for usInG the user Interface 54

4 of 184
EN EBS‑2600 User Manual
G2023/04/26_1EN 2023.05.16
3.2.1. navIGatIon 54
3.2.2. DIaloG Boxes 55
3.2.3. vIrtual keyBoarD 56
3.3. types of prIvIleGes/users 58
3.3.1. chanGInG auser 59
3.4. remote control 60
3.4.1. eBs weB user Interface (wuI) 60
3.4.2. offlIne eBs weB user Interface (offlIne wuI) 62
4. operatIon 64
4.1. startInG the prInter up 64
4.2. shuttInG the prInter Down 64
4.2.1. shuttInG Down In reGular moDe 64
4.2.2. shuttInG Down In emerGency shutDown moDe 65
4.2.3. restartInG the prInter 65
4.3. prIntInG 66
4.3.1. openInG aproject for prIntInG 66
4.3.2. startInG prIntInG 67
4.3.3. pausInG prIntInG 67
4.4. prevIewInG aproject 68
4.5. usInG an Ink Bottle 69
4.5.1. replacInG the Ink Bottle 70
4.6. emptyInG the waste Bottle 72
Part 2 of 3
5. eDItInG projects anD project parameters 76
5.1. project eDItor 76
5.1.1. aDDInG an oBject 78
5.1.2. eDItInG the selecteD oBject 78
5.1.3. chanGInG the posItIon of an oBject In aproject 78
5.1.4. chanGInG the sIze of the oBject frame 79
5.1.5. usInG the oBject manaGer 80

5 of 184
EN EBS‑2600 User Manual
G2023/04/26_1EN2023.05.16
5.1.6. DeletInG an oBject 81
5.1.6.1. reStorIng adeleted oBject 82
5.1.7. copyInG oBjects 82
5.2. types anD parameters of oBjects 83
5.2.1. common parameters of all oBjects 84
5.3. eDItInG aproject 85
5.4. creatInG aproject 86
5.4.1. project parameters 86
5.4.2. creatInG/eDItInG atext oBject 95
5.4.2.1. common parameterS of text oBjectS 95
5.4.2.2. creatIng/edItIng anormal text‑type text oBject 97
5.4.2.3. creatIng/edItIng aDate/tIme‑type text oBject 97
5.4.2.4. creatIng/edItIng acounter‑type text oBject 101
5.4.2.5. creatIng/edItIng acommunIcatIons port‑type text oBject 103
5.4.2.6. creatIng/edItIng atext fIle‑type text oBject 107
5.4.3. creatInG/eDItInG ashape 109
5.4.3.1. creatIng/edItIng alIne‑type Shape 109
5.4.3.2. creatIng/edItIng arectanGle‑type Shape 109
5.4.3.3. creatIng/edItIng aellIpse‑Shape 110
5.4.4. creatInG/eDItInG the other oBjects 111
5.4.4.1. creatIng/edItIng aBarcoDe‑type oBject 111
5.4.4.2. creatIng/edItIng an ImaGe‑type oBject 113
5.4.4.3. creatIng/edItIng alIne DIvIDer‑type oBject 113
5.4.4.4. creatIng/edItIng aspacer‑type oBject 114
5.4.4.5. creatIng/edItIng an IntensIfIer‑type oBject 114
5.5. savInG aproject 116
5.6. project recovery 116
5.7. chanGInG aproject name 117
5.8. DeletInG aproject 118
5.9. manaGInG projects 119
6. InformatIon 122
6.1. messaGe hIstory 122
6.2. statIstIcs 123

6 of 184
EN EBS‑2600 User Manual
G2023/04/26_1EN 2023.05.16
6.3. prInter InformatIon 123
6.4. Ink Bottle InformatIon 124
6.5. DetermInInG factory conveyor parameters 125
Part 3 of 3
7. prInter confIGuratIon 132
7.1. General settInGs 132
7.1.1. maxImum prIntInG speeD 133
7.2. local settInGs 134
7.3. settInG the current Date anD tIme 135
7.3.1. confIGurInG the DIsplay 135
7.3.2. sounD sIGnal settInGs 136
7.4. confIGurInG communIcatIons Interfaces 137
7.4.1. ethernet 137
7.4.2. rs-232/rs-485 138
7.5. confIGurInG users 139
7.5.1. chanGInG the user passworD 139
7.5.2. aDDInG auser 139
7.5.3. DeletInG auser 140
7.5.4. chanGInG an access level 140
7.5.5. chanGInG the user name 141
7.5.6. selectInG auser for automatIc loGGInG In 141
7.6. GloBal Data 142
7.6.1. ImaGes 142
7.6.2. text fIles 142
7.6.3. scrIpts 143
7.6.4. fonts 143
7.7. exchanGInG Data vIa ausB port 144
7.7.1. exportInG/ImportInG projects 145
7.7.2. upDatInG software 146

7 of 184
EN EBS‑2600 User Manual
G2023/04/26_1EN2023.05.16
8. perIoDIc maIntenance 149
8.1. purGInG/ventInG the prIntheaD 149
8.2. replacInG the aIr fIlter 152
8.3. storInG anD transportInG 154
8.3.1. storInG the prInter 154
8.3.1.1. InStallIng aSealIng cover 156
8.3.2. transportInG the prInter 157
9. trouBleshootInG 160
9.1. messaGe hanDlInG 160
9.1.1. error messaGes 160
9.1.2. warnInG messaGes 161
9.1.3. InformatIonal messaGes 162
9.2. DIaGnostIc 163
9.2.1. prelImInary checks 163
9.2.1.1. vISual InSpectIon 163
9.2.1.2. verIfIcatIon of meSSageS, InformatIon and SettIngS 164
9.2.2. proBlem solvInG DIaGram 165
9.3. servIcInG 169
9.3.1. cleanInG the nozzle plate 169
9.3.2. cleanInG the DrIp raIl anD Ink fIlter 170
9.3.3. releasInG protectIons 172
9.3.3.1. enterIng ServIce mode 173
9.3.4. restorInG the Default settInGs 174
10. technIcal specIfIcatIons 176
11. versIon control 182

9 of 184
EN EBS‑2600 User Manual
G2023/04/26_1EN2023.05.16
Dear User,
Before using the printer, please read carefully the documents
aached to the printer, especially the Safety Manual and the material safety data
sheets (MSDSs) of consumables in use.
This User Manual should be easily accessible and ready to use whenever the need to do so arises.
This version of the document includes most of the modicaons implemented to the EBS printers
(manufactured by EBS Ink Jet Systeme GmbH) up to version 1.03.21 of the system and the descripons
contained herein correspond to the printers on which the system in this version is installed.
The scope of delivery depends on the order, therefore it may happen that the actual equipment
and funcons of your prinng system dier slightly from some descripons or illustraons. As we need
to keep pace with connual technical advancement and our customers’ individual requirements we
have to reserve the right to introduce changes in the design, system version and technical soluons.
Therefore, no data, illustraons and descripons contained in this User Manual shall make grounds for
any claims. Should your printer be provided with the details of the equipment or soware that are not
illustrated or described in this User Manual or should you have addional queries aer having read this
Manual, please contact an authorized representave of EBS Ink Jet Systeme GmbH for more informa-
on.
The manufacturer shall not be liable for any damage caused to the printer by improper handling or op-
eraon, that is the failure to follow this User Manual, and by the consequences of editorial or publishing
errors in the Manual.
The applicaon and use of products are beyond our control and thus you apply and use the products
exclusively on your own responsibility.
Original Instrucons.
The User Manual in the Polish and English languages are the original instrucons. In case of disputes,
these language versions shall prevail. The instrucons in other languages are translaon of the original
instrucons.

10 of 184
EN EBS‑2600 User Manual
G2023/04/26_1EN 2023.05.16
1. GENERAL INFORMATION
The following symbols are used in the manual:
Addional informaon on a given subject. A supplement or a reference to the text where more details can
be found.
An important note, p, piece of informaon on safety.
It is advisable to strictly follow the ps.
A list of tools, accessories and spare parts necessary for carrying out a given maintenance or service proce-
dure.
This User Manual applies to the printer.
Regardless of the language version of the Manual, examples of printer screen dumps are presented in
English.
Addional characteriscs (bold face, italics, changed color) are applied to the document to highlight such
items as:
- the printer name, access level or any other important informaon (e.g. ),
- a part number in drawings (e.g. 3),
- a message available in the printer interface (e.g. an error message),
- a reference to another secon or drawing (e.g. see “1.1. Applicaon”),
- ‑ to press an icon or a funcon key,
- ‑ to wait before a successive operaon can be carried out.

11 of 184
EN EBS‑2600 User Manual
G2023/04/26_1EN2023.05.16
1.1. APPLICATION
The printers make rm and clear prints on:
– paper and cardboard,
– plascs,
– fabric,
– leather and leatheree,
– wood and wood‑like products, e.g. Euro‑pallets,
– glass and ceramic products,
– metal surfaces of any type.
The printers print in black oil‑based ink.

13 of 184
EN EBS‑2600 User Manual
G2023/04/26_1EN2023.05.16
2. DESCRIPTION
2.1. OVERVIEW
The printer is an industrial ink‑jet DOD (Drop‑on‑Demand) printer for touchless
labeling of objects moving (traveling, rotang) in front of staonary printhead 2(see Fig. 1 on page
14).
The printhead is equipped with 510 nozzles, which generate 32 or 80 pl drops, depending on the vari-
ant.
The distance between the centers of neighboring nozzles is 0.1411 mm (1/180 inch). Owing to that,
print resoluon in the vercal direcon is 180 dpi (180 dot/inch), that is about 7086 dot/m.
The distance between the centers of the outermost nozzles is 71.82 mm (2.83 inch). Owing to that,
a maximum print height is about 71.8 mm (2.83 inch).
2.2. PRINTER STRUCTURE
This printer is designed to be user‑friendly and to provide the user with easy access to the parts that
are needed for daily use and roune maintenance. The other parts, to which access is necessary for
carrying out maintenance operaons, are protected and are accessible only by instructed or skilled per-
sons.

14 of 184
EN EBS‑2600 User Manual
G2023/04/26_1EN 2023.05.16
2.2.1. FRONT VIEW
Fig. 1.
1
1d
4
3a
1c
3c
1b
1h
2a
1i
1e
1f
1j
1g
5
2c
2c
2
3
2b
2b
3b
3d
5
6
6
1Printer control unit with ink system.
1b Socket for ng bole 4.
1c Plug for securing bole socket.
1d Ink system valve with air lter 1e.
1e Air lter upstream of ink system.
1f Holder for removed socket plug 1c.
1g Control unit holder.
1h RS-232/RS-485 connector.
1i Status beacon output.
1j Conveyor stoppage output.
2Printhead.
2a Plate with nozzles ‑ face of printhead (ink outlet).
2b Level.
2c Internal photodetector.
3Waste system.

15 of 184
EN EBS‑2600 User Manual
G2023/04/26_1EN2023.05.16
3a Transparent waste bole.
3b Drip rail.
3c Air lter.
3d Drip system holder.
4Bole of ink (the printer comes with a 0.25 l starter bole).
5Printhead slide1).
6Photodetector holder2).
1) ‑ the use of a slide is mandatory; the slide should be selected for the user's applicaon; the slide
shown in Fig. 1 on page 14 is designed to label “so” objects such as cardboard packages;
for more informaon about slides see “2.3.1. Addional Informaon”.
2) ‑ the photodetector holder should be selected for the slide applied; the holder shown in Fig. 1 on
page 14 is intended for one photodetector and for labeling objects moving in front of the prin-
thead face from the le; for more informaon about photodetector holders see “2.3.1. Addional
Informaon”.
For informaon about customized accessories contact an authorized representave
of EBS Ink Jet Systeme GmbH.

16 of 184
EN EBS‑2600 User Manual
G2023/04/26_1EN 2023.05.16
2.2.2. BACK VIEW
INK-JET EBS-2600/510/72
P120425000-101234
2022
Type
Typ
Number
Nummer
Manufactured
Baujahr
Made in EU
50 - 60 Hz
< 0.5 A
100 – 240 V
Voltage
Spannung
Frequency
Frequenz
Current
Stromaufnahme
1e
2b
3a
Fig. 2.
1
1a
1b
1d
1g
1k
1l
2
3d
4
6
5
5b 5c
1u
USB
1t
1n 1o 1p 1s
1r
1m
7
7a
5a
1Printer control unit with ink system.
1a LCD control panel ‑ 5.7’’/144.8 mm LCD display.
1b Socket for ng bole 4.
1d Ink system valve with air lter 1e.
1e Air lter upstream of ink system.
1g Control unit holder.
1k Printer ON/OFF buon.
1l Transponder reader for ink boles.
1m Connector socket guard on back panel.
1n Power socket (inlet) to connect power cord 7.
1o USB connector.
1p Connector for external photodetector.
1r Input for rotaonal speed sensor (encoder).
1s Ethernet connector.
1t Shield connecons for encoder and external photodetector.
1u Nameplate.

17 of 184
EN EBS‑2600 User Manual
G2023/04/26_1EN2023.05.16
2Printhead.
2b Level.
3a Transparent waste bole.
3d Drip system holder.
4Bole of ink (the printer comes with a 0.25 l starter bole).
5Printhead slide1).
5a Standard sealing cover (one‑sided item).
5b Oponal sealing cover (accessory; double‑sided item).
5c Oponal drip molding (accessory; double‑sided item).
6Photodetector holder2).
7Disconnectable power cord with plug 7a3).
1) ‑ the use of a slide is mandatory; the slide should be selected for the user's applicaon; the slide
shown in Fig. 2 on page 16 is designed to label “so” objects such as cardboard packages;
for more informaon about slides see “2.3.1. Addional Informaon”.
2) ‑ the photodetector holder should be selected for the slide applied; the holder shown in Fig. 2 on
page 16 is intended for one photodetector and for labeling objects moving in front of the prin-
thead face from the le; for more informaon about photodetector holders see “2.3.1. Addional
Informaon”.
3) ‑ depending on a given country, power plug 7a may dier from that shown in Fig. 2 on page 16.
For informaon about customized accessories contact an authorized representave
of EBS Ink Jet Systeme GmbH.
2.2.3. EXTERNAL CONNECTIONS
USB connector
An appropriate USB memory device connected to the USB port (1o; see Fig. 2 on page 16) can be
used to:
– Import/export data to/from the printer,
– Update the printer soware.
For more informaon see “7.7. Exchanging Data via a USB Port”.
The current eciency of the USB connector is 500 mA. The printer may not recognize a USB mem-
ory device whose power consumpon is higher.
A USB memory device connected to the USB port will be recognized by the printer if the memory is
formaed with the FAT or FAT32 le system.
External photodetector input
The photodetector is intended for detecng an object to be labeled and thereby for triggering print-
ing at an appropriate moment.
The printers are provided with internal photodetector 2c (see Fig. 1 on page
14), as standard. If such a photodetector cannot be applied (e.g. when the user's photodetector is
used or a photodetector with a longer cable is needed), an external photodetector can be applied.

18 of 184
EN EBS‑2600 User Manual
G2023/04/26_1EN 2023.05.16
The external photodetector is connected to input 1p (see Fig. 3).
Two photodetectors can be used at the same me. The funcon can be used for synchronizing
printouts while Euro‑pallets are labeled, for example.
For more informaon see “2.3.4.3. External photodetector” and “2.3.5. Labeling Euro-pallets”.
A descripon of 6‑pin female connector 1p (see Fig. 3) of the photodetector is given in the following
table.
6
5
4
3
2
1
Fig. 3.
1p
1Not used.
2GND (ground).
3Input for photodetector pulses.
4+24 VDC (power supply).
5Not used.
6Not used.
Fig. 3 shows a view of the connector from the outside of the printer.
The printer is provided with the following by default: NPN N/C (N/C Normally
Closed) photodetectors with an RJ12 connector, a separate shield lead and two cables whose
lengths are:
– 1 m / 39.4 inch (Part No. P390094),
– 5 m / 196.8 inch (Part No. P390058).
Photodetectors of other types can also be applied.
NOTE: Shielding must be connected!
The separate shield lead that the above‑menoned photodetectors are provided with must be con-
nected to one out of two connecons 1t (see Fig. 2 on page 16) on the printer.
Set triggering parameters of your project for correct operaon of the photodetector; for more details
see “5.4.1. Project Parameters”.
Rotaonal speed sensor (encoder) input
A rotaonal speed sensor (encoder) is designed to measure the speed at which objects to be labeled
move on a factory conveyor. With it, the prinng speed can be adjusted to a variable speed of ob-
jects on the conveyor belt. The encoder is connected to input 1r (see Fig. 4 on page 19).
If the conveyor belt travels at a constant speed, there is no need for using an encoder.

19 of 184
EN EBS‑2600 User Manual
G2023/04/26_1EN2023.05.16
A descripon of 6‑pin female connector 1r (see Fig. 4) of the rotaonal speed sensor is given in
the following table.
6
5
4
3
2
1
Fig. 4.
1r
1Encoder pulse input (prinng direcon signal).
2GND (ground).
3Not used.
4+24 VDC (power supply).
5Not used.
6Encoder pulse input (ming signal).
Fig. 4 shows a view of the connector from the outside of the printer.
The printer is provided with a programmable encoder with an RJ12
5 m / 196.8 inch cable (Part No. P320437) and a separate shield lead by default. The encoder is pre-
programmed to generate 63779 pulses/rotaon; if the circumference of the roll is 250 mm, the en-
coder constant is 255116 pulses/meter.
Encoders of other types can also be applied.
Moreover, if one encoder is to support two printers, the encoder signal can be distributed with
an appropriate signal splier.
NOTE: Shielding must be connected!
The separate shield lead that the above‑menoned encoder is provided with must be connected to
one out of two connecons 1t (see Fig. 2 on page 16) on the printer.
The encoder constant and an external source of ming pulses need to be set for correct operaon of
the encoder. For more details see “7.1. General Sengs” and “5.4.1. Project Parameters”.
An example of an applicaon with two printers and an encoder signal splier is shown in “2.3.5.
Labeling Euro-pallets”.
Ethernet connector
The Ethernet standard is used for linking the printer into an Ethernet network
or direct to a computer. Owing to that, the printer or a network of printers can
be controlled remotely. Ethernet can also be used for transferring data that can
be printed using a Communicaons port‑type object . The Ethernet con-
nector (1s) is an RJ45 connector (see Fig. 5). Fig. 5.
1s
For the descripon of how to congure Ethernet see “7.4.1. Ethernet”.
The printer is designed to be connected to a computer via an Ethernet 5 me-
ter / 196.8 inch crossover cable (Part No. 2870005) by default. The cable is part of the installaon

20 of 184
EN EBS‑2600 User Manual
G2023/04/26_1EN 2023.05.16
kit.
NOTE: The power cord must be disconnected!
An Ethernet cable can be connected to connector 1s in control unit 1 only when the control unit is
detached from mains electricity!
RS-232/RS-485 connector
The RS-232 standard is designed to transfer data to the printer from external devices such as a bar/
matrix code reader, scales. The data can be printed using a Communicaons port‑type object .
An external device can be connected to connector 1h (see Fig. 6).
A descripon of 12‑pin female connector 1h (see Fig. 6) of the RS-232/RS-485 is given in the fol-
lowing table.
J
KA
M
C
B
H
L
G
F
E
D
Fig. 6.
1h
ARXD (Received Data) input.
BUART+.
CTXD (Transmied Data) output.
DNot used.
ERTS (Request to Send) output.
FNot used.
GCTS (Clear to Send) input.
HInterface switch (between RS-232 and RS-485).
JGND (ground).
KUART-.
LNot used.
MNot used.
Fig. 6 shows a view of the connector from the outside of the printer.
The RS-232 interface is acvated on connector 1h by default. To acvate the RS-485 interface, you
need to connect pin H, that is the interface switch, to ground.
For the descripon of how to congure the RS-232 see “7.4.2. RS-232/RS-485”.
Status beacon output
The status beacon is an external signaler of printer status that can be seen from a greater distance.
The status beacon is connected to output 1i (see Fig. 7 on page 21).
A descripon of 5‑pin female connector 1i (see Fig. 7 on page 21) of the status beacon is given in
Other manuals for EBS 2600
1
Table of contents
Other EBS Printer manuals

EBS
EBS HANDJET -260 User manual

EBS
EBS EBS-260 User manual

EBS
EBS HandJet 250 User manual

EBS
EBS 2500 Instruction sheet

EBS
EBS EBS-6500 Installation guide

EBS
EBS HandJet 250 User manual

EBS
EBS EBS 2600 User manual

EBS
EBS EBS-6100 User manual

EBS
EBS 6600 Technical specifications

EBS
EBS HANDJET -260 User manual