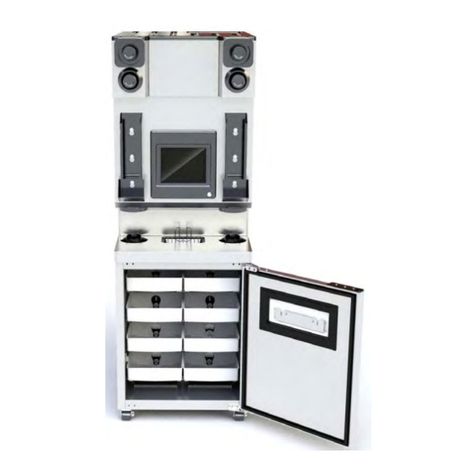
Ecolab Aquanomic Owner's manual

2
Contents
1.0 Operation…………………………………………………………………………….……….………....3
1.1 General Information………………………………………………………….….3
1.1.1 Definitions and Conventions
1.1.2 Icon Descriptions
1.1.2.1 Idle Screen Icons
1.1.2.2 Error Icons
1.1.2.3 Soft Key Icons
1.1.2.4 Programming Icons
1.1.3 Controller Components
1.2 Customer Screens………………………………………………………………8
1.3 System Alarms…………………………………………………………………16
2.0 Programming……………………………………………………………………………..……..……17
2.1 Submenu #1.0 Account Menu………………………………….……………..18
2.2 Submenu #2.0 Quick Setup:…………………………………………………..21
2.3 Submenu #3.0 System Menu:…………………………………………….…..25
2.4 Submenu #4.0 Formula Menu…………………………………………….…..35
2.5 Submenu #5.0 Prime Pump- for optional liquids…….……………….…..…41
2.6 Submenu #6.0 Calibration- for optional liquids…….………………….….…43
2.7 Submenu #7.0 View System Info…………………………………….….……42
2.8 Submenu #8.0 Diagnostics…………………………………………….……...52
3.0 Start-Up and Operation………………………………………………………………………….…..57
3.1 Product Wash/Signal Check…………………………………………………..57
3.2 Hydraulics Check…………………………...……………………………...…..57
3.3 Product Dispense Check.………..……………………………………………57
3.4 Customer Operation…….……………………………………………………..58
4.0 Troubleshooting…………………………………………………………………….…….……….…59
5.0 Wiring Diagrams…………………………………………………………………….……………..…62
5.1 MSI Wiring Diagram…………………………………………………..….……62
5.2 IO Board Wiring………………………………………………………………...63
5.3 Pump Cabinet wiring……………………………………………………..…....64
6.0 Maintaining and Servicing the System…………………………………………..………………65
6.1 Pump and Outlet Manifold Replacement Procedure……..…………..……65
6.2 Electrical components behind I/O Board enclosure………………….….…65
7.0 Operating Instructions for Account Personnel…………………………………………………66
7.1 Introduction to AQUANOMIC EU…………………………………….…...….66
7.2 Selecting a Wash Formula………………………………………………..…..67
7.3 System Alarms…………………………………………………………….……72
7.4 Viewing Load Counts…………………………………………………….…….74
7.5 Replacing Empty Products………………….…………………………………75
8.0 Replacement Parts…………………………………………………………………………….……..76

3
1. Operation
1.1 General Information
This manual has been written and illustrated to present the basic operations and programming
instructions of the Aquanomic EU dispenser. This manual applies to current units. Future versions
may have additional features; check unit packing for the latest revision.
Guidelines will be suggested in reference to the preferred method of installation. However, the variety
of equipment and the surrounding environment will dictate the actual operation of the Aquanomic EU
unit.
These installation, operation and servicing instructions are for use by qualified personnel only. The SCLS system is intended
to be installed by an experienced, qualified technician. The installation must be made in accordance with all applicable and
local plumbing and electrical codes. The dispenser must be properly plumbed to a laundry washer / extractor. The washer
extractor must have a properly installed drain system or overflow protection system.
The remarks WARNING, CAUTION and NOTICE have the following meanings in this manual.
This heading refers to a hazard or unsafe practice which can result in severe personal injury or death.
This heading refers to a hazard or unsafe practice which can result in personal injury or product or property damage.
This heading is used when a particular piece of information needs to be highlighted.
The information provided here will take you step-by-step through the programming of the Condor Laundry Controller.
1.1.1 Definitions and Conventions
•Idle Screen or Customer’s Screen –Screens that display laundry icons and soft keys when the Controller is in
idle mode.
•Menu –A selection of action choices presented on the graphical LCD display.
•Scroll –To move through menu selections by pressing the Up arrow or Down arrow keys.
•Select –To press the center <Enter> key on the keypad. This action advances the user to the next sub-
menu.
•Programming –The action of setting up the values, operating methods, and messages that are available for
change.
•Default –Factory programmed values.
•Parameters –Values and limits set during programming.
•Standard Mode (Normal Operation) –The dispenser will dose as it receives chemical supply signals from
the washer. The user needs to select a formula on either the Condor controller, or on the optional Formula
Select module.
•MicroMode (Automatic Formula Selection Mode) –The dispenser will automatically select a formula based
on the time duration of the washer supply signal. To use this mode of operation, the MicroMode signal
from the washer is wired into the MSI signal #1 (with black wire). Once triggered, the dispenser will

4
automatically select a formula and start dosing the product(s) that were programmed for MSI Signal #1 (or
Step #1).
•Program Mode –Mode in which password-protected menus are available. These menus allow the setup of
wash formulae and reviewing/editing of all operating parameters on the controller.
•Auto Key Repeat –A feature that allows you to press and hold keys instead of repeating key strokes.
1.1.2 Icon Descriptions
The controller is capable of displaying some graphics information, as well as text information. The display
will include icons to minimize language concerns. Icons are populated at the bottom of the controller
display to indicate which soft keys (SK) are active.
1.1.2.1 Idle Screen Icons
Home screen is the only screen that allows you to get access to the password screen. It also
allows you to select each washer for additional information/status.
Laundry load counts
Status or more information is offered
F00
Washer and formula selection (Washer #1 - no formula selected)
F01
Washer and formula selection (Washer #1 - Formula #1 selected)
Select a formula from main idle screen. Note the use of the arrow.
Modify a formula: Cancel or activate/deactivate Note the use of the pencil.
System Queue
1.1.2.2 Error Icons
Formula Not Finished Alarm
Machine Signal Interface (MSI) communication error (with a red display)
Formula Select communication error (with a red display)

5
Main IO circuit board communication error
Main power reset (to entire system)
Empty product container
Disable (an audio alarm or a step)
1.1.2.3 Soft Key Icons
Home - SK#1
Go to the main idle screen (or Ready screen) to select a washer or go to the password
protected screen for programming the system
Laundry load counts
Status or more information is offered
Select a formula from main idle screen. Note the use of the arrow.
Modify a formula: Cancel or activate/deactivate. Note the use of the pencil.
Status of Machine Signal Interface (MSI) module
Time Period: to allow for specifying reporting time period parameters (washer load
counts, error logs, etc.)
Delete/Clear log
Prime function - SK #4
Set up in programming mode to allow for customer (or user) to prime product pumps to
washer when an empty container is replaced.
System Queue
More Information
1.1.2.4 Programming Icons
Use Left or Right Arrow keys to adjust a programming item
Use Up or Down Arrow keys to scroll through sub-menus displayed in screen
Save to memory

6
Back to previous screen (usually assigned to SK #1)
Exit out of programming mode, back to main idle screen (customer’s screen)
Edit mode (note the use of a pencil)
Copy mode
Test a component (Formula Select or MSI or IO module for their revision of installed
software)
Edit a step (note the use of a pencil)
Summary: list the information (in a formula)
More: more information is available
Edit product. (note the use of a pencil)
Reset this selection ONLY
Reset all (back to new factory settings)
No (to confirm a selection)
Yes (to confirm a selection)
Disable (an audio alarm)
Pump
On: activate a component (pump or valve)
Off: de-activate a component (pump or valve)
Test the integrity of the pick-up probe and its wiring in a full container. The float switch
inside the probe should be in the up position.
Test the integrity of the pick-up probe and its wiring in an empty container (or outside of
a container). The float switch inside the probe should be in the down position.

7
1.1.3 Controller Components
Upon power up, the Condor will perform an initialization sequence (1-2 minutes) before displaying the main idle
screen.
1. DISPLAY:
Idle screen: Washer status and access to load counts or formula selection.
Program mode: Data entry request/menu/settings display.
2. KEY PAD:
These keys provide a means for selecting/reviewing/programming the controller:
Idle Screen Keypad Functions
Key
Function
Center <Enter>
-Access to password protected settings
-Access to individual washer status, or to manually
select/cancel a formula based on soft key offerings
Up Arrow
No function
Down Arrow
No function
Left Arrow
-Move between washer icons (use <Enter> to access
user options for wash formulae)
Right Arrow
-Move between washer icons (use <Enter> to access
user options for wash formulae)
Programming Screen Keypad Functions
Key
Function
Center <Enter>
Menu selection
Up Arrow
-Scroll options for sub-menus
-Increment a parameter
Down Arrow
-Scroll options for sub-menus
-Decrement a parameter
Left Arrow
Increment a parameter
Right Arrow
Decrement a parameter

8
Soft Keys #1 - #4 (at bottom of display):
These soft keys offer dynamic functions based on the sub-menus selected.
Idle screen: - allow access to washer load counts
- allow access to washer info (status)
- allow access to user options for wash formulae
Programming Mode: - various functions based on sub-menu selection
1.2 Customer Screens
This section describes the screens available to the customer and/or operator (non-programming mode). The screens
depicted in the following sections are snap-shots of the optional Formula Select Module (FS) and Condor Controller.
It should be noted that each FS module is set at a unique communication address and displays information specific to
the washer assigned to it. In some cases it will also display total system information.
-Normal Operation Idle Screens (non-MicroMode)
Formula Select module
F00 No Program is displayed:
- Use the Up/Down key on the FS module to scroll through the formulae.
- Use the center <Enter> key to select a formula.
- Use BOTH Up + Down keys to cancel a formula.
Condor Controller
Idle screen for a 3-washer account:
Time, account name, and date are displayed, as well as the status of each of the 3 washers. In this case, all
machines are idle (F00 no formula selected).

9
Choosing SK#2 System Queue will show all of the dispenser’s chemical requests in the order that they will
be dosed.
Choosing SK#3 Load Counts will list production load counts for all, or each, of the washers.
Use the Left/Right arrows on the keypad to highlight/select any of the washers. This will update the soft
key options.
For example, Washer 1 is highlighted using the Left/Right arrow keys. Four soft keys are now made
available.
Choosing…
SK #1: Home –navigates back to the main idle screen
SK #2: Select a Formula –prompts user to select a formula for Washer 1
SK #3: Load Counts –displays load counts for Washer 1
SK #4: Info –displays more information for Washer 1
When a machine is being actively serviced, the Condor will indicate this by displaying this icon above the
active washer

10
Select Formula (SK#2)
Selecting SK#2 opens a list of the pre-programmed formulae available.
Use the Up/Down arrow to highlight a formula.
Press center <Enter> to select the formula.
If Formula F03 Healthcare Linen is selected, the controller will momentarily display the screen below while
the command is processed.
If the formula selection is successfully processed, the Formula Select module for Washer 1 (if
installed) will update to show F03 Healthcare Linen.
The Condor Controller will then display F03 underneath Washer 1 on the main idle screen.

11
With Washer 1 still highlighted, the existing options for soft keys SK#1, #3 and #4 are again available.
However, SK#2 has changed to “Modify Formula”. Note the use of a pencil pictogram (rather than an arrow
for “Select Formula”).
Selecting SK#2 will give you the option of cancelling the current formula:
Press SK#2 <Yes> or SK#3 <No> to confirm your selection.
Press SK#1 <Back> to cancel.
If the formula is cancelled, the selected formula (F03) for this selected washer will be reset and all
doses will be removed from the system queue. The main idle screen on the Condor and the
Formula Select will display F00 No Program.
Select a Formula Screen: Formula Selection Error
If the formula selection cannot be successfully processed (caused by a communication failure or a delay in
system communication due to system synchronization), an error message will appear:

12
Select a Formula Screen: MicroMode
If the washing machine is utilizing MicroMode, the select formula screen will be offered. However, a
formula cannot be selected using the manual keypad. The Center <Enter> key is now disabled.
Additionally, if the washer is in MicroMode, the corresponding Formula Select screen will display
“Automatic Mode” on the top line.
Load Counts (SK#3)
SK #3 will display the production load counts of each formula of the selected washer. The production
volume of dry linen is displayed in the ‘lb’ column. These numbers are calculated based on the washer
capacity and the number of cycle counts.

13
Use the Up/Down key to browse through all load counts for all formulae.
Press SK#1 <Back> to return to the previous screen.
More Information (SK#4)
If a formula is active for the selected washer (in this example, F03 Heathcare Linen) and SK#4 is selected,
the following screens will be displayed.
If no step in the formula has been dosed yet:
If a wash step has been dosed:

14
More Information (SK#4) →Queue (SK#2)
If SK#2 Queue is selected from the More Information screen, the status of every activity as the system
services the selected washer’s request will be displayed (if a washer signal is active). The amount of run
time remaining for each step and the status (on/off) is shown.
More Information (SK#4) →Signal Module (SK#3)
Selecting SK#3 Signal Module will show the detailed status of the active washer signal that is being serviced.

15
Line #1: Active Pocket No. (Pocket #1)
Line #2: Amount to Dispense (Grams) (17.00)
Line #3: Dispensed Amount (Grams) (0.00)
Line #4: Temperature (°F) (120.00)
Line #5: Conductivity (uS) (300.00)

16
1.3 System Alarms
Alarms screens are typically displayed on the Condor with a red background. The images below are
displayed on the Formula Select and Condor controller when the system detects an operating parameter
outside of its designed specifications.
Error Displayed
Error Definition
To Clear Error on…
Formula Select
Condor Controller
Formula Not Finished (incomplete formula)
Occurs when the Condor does not receive all signals
programmed into a wash formula or a product is not fully
delivered (out of product, etc.)
Causes:
-Washer has been forwarded (chemical request
signals skipped)
-Chemical request signals not properly programmed
on washer
-Operator opens washer door and leaves for
day/shift/break (washer times out)
-Solid or liquid product is empty (or nearly empty)
-System is plugged downstream of sump screen
-Wash step has been deleted from queue
Press Any Key
MSI Communication Error
Occurs when communication is lost to an MSI module.
Causes:
-Poor/broken communication cable connection
-Faulty MSI Module
-MSI Module(s) are improperly addressed
Effect: Service is lost to any washer in the daisy chain
after the point of failure. System operation will be
adversely affected.
Press Any Key
Contact Ecolab Service Personnel
Formula Select Communication Error
Occurs when communication is lost to a Formula Select
module.
Causes:
-Poor/broken communication cable connection
-Faulty Formula Select Module
-Formula Select Module(s) are improperly addressed
-Optional Formula Select configuration not properly
set up in System Settings
Effect: Service is lost to any washer in the daisy chain
after the point of failure. System operation will be
adversely affected.
Contact Ecolab Service Personnel
Press Any Key

17
IO Board Communication Error
Occurs when communication is lost to the IO board.
Causes:
-Poor/broken communication cable connection
-Faulty IO board
Effect: System will not operate.
Contact Ecolab Service Personnel
NA
Alarm can’t
be cleared.
Service
required.
Product Empty for Pocket X (solid product)
Occurs when conductivity reading does not reach
expected level.
Causes:
-Empty product container
-System plug at or downstream of sump screen
Effects:
-Product X will not dose
-Formula Not Finished alarm will occur at end of wash
formula
Press Any Key
Product Empty for Pump X (liquid product)
Occurs when liquid product level sensor triggers out of
product.
Causes:
-Liquid product container is empty.
-Liquid product level sensor is faulty or disconnected.
Effects:
-Liquid product pump for triggered product will not
pump.
-Formula Not Finished alarm will occur at end of wash
formula
Press Any Key
2. Programming
To enter the programming mode, press and hold the Center <Enter> key for 4+ seconds from the main screen. The controller
should prompt the user for a password.

18
Enter the controller password by pressing <Up>/<Down>/<Left>/<Right>.
Once the password has been entered correctly, the Program Menu will appear.
Program Menu
1. Account Menu
2. Quick Setup
3. System Menu
4. Formula Menu
5. Prime Pump
6. Calibration
7. View System Info
8. Diagnostics
1. ACCOUNT MENU
Notes:
•Program Mode menus and settings can also be accessed by Ecolab applications for mobile devices.
•Press and hold arrow keys to use the “auto key repeat” feature for faster scrolling.
•If there are no keys pressed for 5 minutes, the system will exit the password-protected programming
mode and display the main idle screen. The password must be re-entered to access the Program Mode
menus again.
2.1 Submenu #1.0 Account Menu
Most account menus and sub-menus are available for viewing-only on the Condor. Their setup will need to be done
on Ecolab tablets or mobile devices and downloaded via the Ethernet port on the front of the controller.
Account Menu #1.0
1. Language
2. Account Name
3. Account Number
4. TM Name
5. Dispenser ID
6. New Password
7. Date & Time
1. LANGUAGE
NOTE: Use the Up/Down arrow
to move the cursor bar to each
sub-menu, then press center
<Enter> key to select.
NOTE: Soft Keys SK#1 - #4.

19
2.1.1 Submenu #1.1 Account Menu>Language:
Account Menu>Language #1.1
1. PRIMARY CUSTOMER LANGUAGE
2. Secondary Customer Language
3. TM Language
Primary Customer Language #1.1.1
1. ENGLISH
2. Spanish
3. French
4. German
5. Dutch
6. Italian
7. Portuguese
...
Account Menu #1.0
1. Language
2. Account Name
3. Account Number
4. TM Name
5. Dispenser ID
6. New Password
7. Date & Time
Secondary Customer Language #1.1.2
1. NONE
2. English
3. Spanish
4. French
5. German
6. Dutch
7. Italian
8. Portuguese
...
1. LANGUAGE
1. PRIMARY CUSTOMER LANGUAGE
Account Menu>Language #1.1
1. Primary Customer Language
2. SECONDARY CUSTOMER LANGUAGE
3. TM Language
2. SECONDARY CUSTOMER LANGUAGE
Account Menu>Language #1.1
1. Primary Customer Language
2. Secondary Customer Language
3. TM LANGUAGE
3. TM LANGUAGE
1. ENGLISH
1. NONE
TM Language #1.1.3
1. English
2. Spanish
3. French
4. German
5. Dutch
6. Italian
7. Portuguese
...
1. ENGLISH
Screen
Description
1.0
Account Menu
This submenu is used to set various account parameters including language, account name, TM
name and other important information. Many of these parameters can only be set using an
Ecolab tablet or mobile device.
<ENTER>
Proceed to setup Language
1.1
Language
The Controller can be set up with three different languages –Primary Customer Language,
Secondary Customer Language, and TM Language.
Primary Customer Language –Select a language to display system information to the customer in
the main idle screens.
Secondary Customer Language –Select a language to display system information to the customer
in the main idle screens.
TM Language –Select a language to display the system program information to the TM servicing
the account.
<ENTER>
Proceed to select language for highlighted selection
1.1.1
1.1.2
1.1.3
Select Language
Select a language from the options available.
Save language

20
2.1.2 Submenu #1.2 Account Menu>Account Name:
In this menu, the account name can be viewed. The Account Name can only be set up using an Ecolab tablet or mobile
device.
Account Menu #1.0
1. Language
2. Account Name
3. Account Number
4. TM Name
5. Dispenser ID
6. New Password
7. Date & Time
Account Menu>Account Name #1.2
CUSTOMER’S Name
2. ACCOUNT NAME
2.1.3 Submenu #1.3 Account Menu>Account Number:
In this menu, the account number can be viewed. The Account Number (8-digit) can only be set up using an Ecolab
tablet or mobile device.
Account Menu #1.0
1. Language
2. Account Name
3. Account Number
4. TM Name
5. Dispenser ID
6. New Password
7. Date & Time
Account Menu>Account Number #1.3
12345678
3. ACCOUNT NUMBER
2.1.4 Submenu #1.4 Account Menu>TM Name:
In this menu, the TM name and phone number can be viewed. The TM name and phone number can only be set up
using an Ecolab tablet or mobile device.
Account Menu #1.0
1. Language
2. Account Name
3. Account Number
4. TM Name
5. Dispenser ID
6. New Password
7. Date & Time
Account Menu>TM Name #1.4
TM Name
012-345-6789
4. TM NAME
2.1.5 Submenu #1.5 Account Menu> Dispenser ID:
In this menu, the Dispenser ID can be viewed. The Dispenser ID can only be set up using an Ecolab tablet or mobile
device.
Account Menu #1.0
1. Language
2. Account Name
3. Account Number
4. TM Name
5. Dispenser ID
6. New Password
7. Date & Time
Account Menu>Account Dispenser ID #1.5
Dispenser ID: 0123456789
5. DISPENSER ID
Other manuals for Aquanomic
1
Table of contents
Other Ecolab Dispenser manuals
Popular Dispenser manuals by other brands
Hagleitner
Hagleitner XIBU 2WIPE hybrid manual
lancer
lancer 2308 Series Installation sheet

Stoelting
Stoelting Optima SO328 owner's manual
Vollrath
Vollrath LidSaver LS02MS18B Operator's manual

American Changer
American Changer AC107 Installation, operation and service manual
DEMA
DEMA 301B installation instructions

