manuals.online logo
Brands
  1. Home
  2. •
  3. Brands
  4. •
  5. Elecom
  6. •
  7. Mouse
  8. •
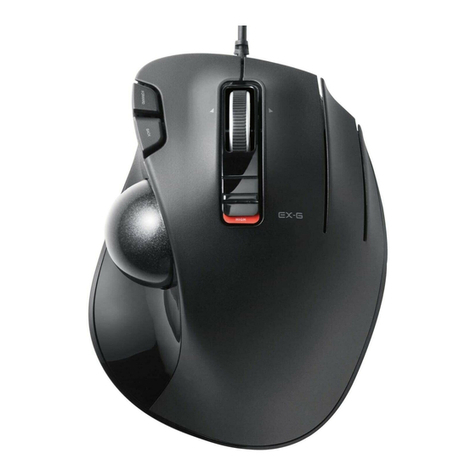
  9. Elecom M-XT1DR User manual

Elecom M-XT1DR User manual

Switches the counts per inch (the pointer speed)
(750 dpi)/ (1500 dpi)



 

English






1.




1
2
3
4
5
6
7
8
910
11
12
13
14
15
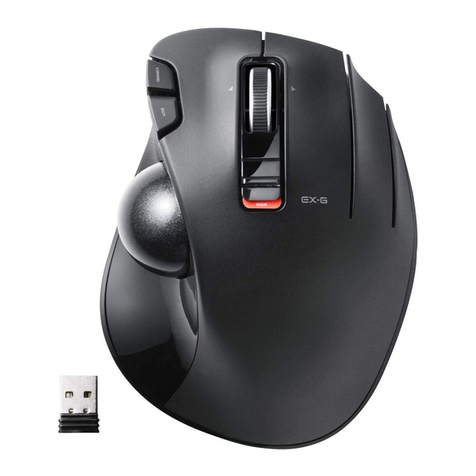
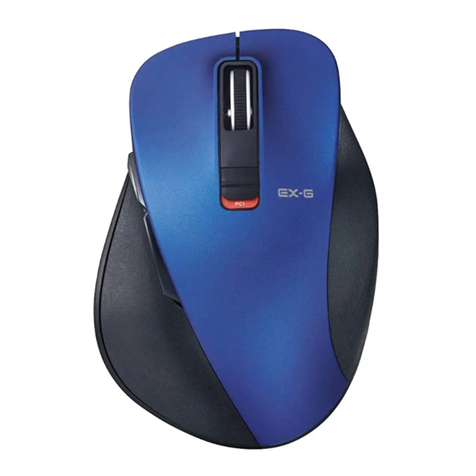
EX-G
Wireless Trackball
Manual
Package Contents
Trackball x 1
Receiver unit x 1
AA alkaline battery for checking product operation x 1
Manual x 1
Safety precautions x 1
Compliance with regulations x 1
Basic Specications
Left button
2. Right button
3. Tilt wheel/remaining battery power indicator
Names and Functions of Each Part
4. "Back" button
Can perform the "Back" operation in a web browser
5. "Forward" button
Can perform the "Forward" operation in a web browser
6. "Pointer" speed reduction switch
The pointer movement speed decreases when this
switch is pressed during operation.

7. "Pointer" speed change switch
8. Trackball
9. Operation mode switch
(power off)
(low-energy mode)
(high-speed mode)
10.Ball removal hole
11.Optical sensor (under the ball)
12.Receiver unit storage compartment
13.Battery cover
14.Battery storage compartment
15.USB connector (male)
Trackball During maintenance,
remove the ball.
Receiver unit
Inserting the Battery
Remove the battery cover.
Insert the battery.
Ensure that the battery is inserted with its positive ( )
and negative ( ) ends oriented correctly.
Attach the battery cover.
Turning the Power On
Slide the operation mode selection switch to the H
(high-speed mode) or L (low-energy mode) position.
In high-speed mode, high-speed ball movements are translated
more accurately, but the battery charge will drain faster.
Power saving mode
When a xed period of time elapses with the power switch on
and with no operations performed, the trackball will
automatically switch to power saving mode.
Move the trackball to return from power saving mode.
The area around the tilt wheel will turn on in red for a xed period of time.
* When the remaining battery charge is low, this area will blink in red for
a xed period of time.
Connecting to a PC
Insert the receiver unit here.
USB port
Receiver unit
Start the PC.
Start the PC, and then wait for it to be ready to perform operations.
Insert the receiver unit into the PC's USB port.
Be sure to sufciently check the connector orientation
and the insertion location.
The driver will be automatically installed, and you will
then be able to use the trackball.
Download "ELECOM Mouse Assistant" from the ELECOM website
to use its button assignment and high-speed scrolling functions.
http://www.elecom.co.jp/global/download/utility/
mouse_assistant/
Resolution750/1500 dpi (switchable)
InterfaceUSB
Radio frequency 2.4 GHz band
Radio wave method GFSK
Operationdistance
Non-magnetic surface (e.g. wooden desk) approx. 10 m
Magnetic surface (e.g. steel desk) approx. 3 m
* These values were obtained in ELECOM's test
environment and are not guaranteed.
Dimensions
(W ×D × H)
Trackball:94.7 mm ×124.4 mm×47.9 mm
Receiver unit:13.1 mm ×18.2 mm × 5.0 mm
Operating temperature/humidity
5°C to 40°C/90%RH or less (without condensation)
Storage temperature/humidity
-10°C to 60°C/90%RH orless (without condensation)
Supported battery AA alkaline battery, AA manganesebattery,
AA nickel-metal hydride rechargeable battery
Operating time Guidelines when using an alkaline battery
Low-energy mode
Continuous operating time: approx. 125 hours
Continuous standby time: approx. 694 days
Estimated usage time: approx. 273 days
High-speedmode
Continuous operating time: approx. 76 hours
Continuous standby time: approx. 694 days
Estimated usage time: approx. 176 days
(When the computer is used for eight hours a day,
with 5%of that time spent operating the trackball)
카운트 수(마우스 커서 속도)를 변경합니다.
(750카운트)/ (1500카운트)



 

한국어






1.




1
2
3
4
5
6
7
8
910
11
12
13
14
15
EX-G
무선 트랙볼
취급설명서
패키지 내용 확인
트랙볼 본체 1대
리시버 유닛 1대
동작 확인용 AA 알칼리 건전지 1개
취급설명서 x 1
안전 조치 x 1
규칙 준수 x 1
기본 사양
좌 버튼
2. 우 버튼
3. 틸트휠/건전지 잔량 표시 램프
각 부분의 명칭 및 기능
4. 「뒤로」버튼
Web 브라우저에서 「뒤로」 조작이 가능합니다.
5. 「앞으로」버튼
Web 브라우저에서 「앞으로」 조작이 가능합니다.
6. 감속 스위치
조작 중에는 누르고 있는 동안만 포인터 이동 속도가
느려집니다.

7. 포인터 속도 변경 스위치
8. 트랙볼
9. 동작 모드 선택 스위치
(전원 OFF )
(저에너지 모드)
(하이스피드 모드)
10.볼 분리 구멍
11.광학식 센서(볼 안쪽)
12.리시버 유닛 수납부
13.전지 커버
14.전지 수납부
15.USB 커넥터(수컷)
트랙볼 본체 관리 시 볼을 꺼냄
리시버 유닛
전지 삽입
전지 커버를 분리한다.
전지를 삽입한다.
전지의 +극( )과 -극( ) 방향을 올바르게 삽입하십시오.
전지 커버를 원래대로 부착한다.
전원 켜기
동작 모드 선택 스위치를 H(하이스피드 모드) 또는 L(저에너지
모드) 위치에 슬라이드시킵니다.
하이스피드 모드는 볼을 빠르게 움직일 때의 추종성이 높아지지만,
건전지 수명이 짧아집니다.
절전 모드에 대해
전원 스위치는 ON 상태에서 조작 없이 일정 시간이 지나면,
자동으로 절전 모드로 이행합니다.
트랙볼을 움직이면 절전 모드에서 복귀합니다.
틸트휠 주위가 일정 시간 적색 점등합니다.
※ 건전지 잔량이 적을 때, 일정 시간 적색 점멸합니다.
컴퓨터 접속
이 부분에 삽입합니다.
USB 포트
리시버 유닛
컴퓨터를 기동합니다.
컴퓨터를 기동하고 조작 가능한 상태가 될 때까지 기다리십시오.
리시버 유닛을 컴퓨터 USB 포트에 삽입합니다.
커넥터 방향과 삽입 장소를 충분히 확인하십시오.
드라이버가 자동으로 설치되며, 트랙볼이 사용 가능하게 됩니다.
엘레컴 웹사이트에서 「엘레컴 마우스 어시스턴트」를 다운로드하여
설치하면 버튼 할당이나 고속 스크롤 기능을 사용할 수 있습니다.
http://www.elecom.co.jp/global/download/utility/
mouse_assistant/
切换 DPI(鼠标光标的速度)
(750 DPI)/ (1500 DPI)



 

中文·简体






1.




1
2
3
4
5
6
7
8
910
11
12
13
14
15
EX-G
无线 轨迹球
使用说明书
确认包装内容
轨迹球本体 x 1
接收器 x 1
确认动作用 5 号碱性干电池 x 1
使用说明书 x 1
安全注意事项 x 1
法规标示 x 1
基本规格
左键
2. 右键
3. 倾斜滚轮 / 电池余量指示灯
各部分的名称及其作用
4.
“返回”键
可在网页浏览器上进行“返回”操作
5.
“前进”键
可在网页浏览器上进行“前进”操作
6. 减速键
操作中,只在按住期间指针移动速度会减慢。

7. 指针速度切换开关
8. 轨迹球
9. 动作模式选择开关
(关闭电源)
(低能耗模式)
(高速模式)
10.滚球取出孔
11.光学传感器(滚球内侧)
12.接收器收纳部
13.电池盖
14.电池存放部
15.USB 连接器(公)
轨迹球本体
维护时取出滚球
接收器
放入电池
拆下电池盖。
放入电池。
请正确插入电池正极 和负极 的方向。
装回电池盖。
打开电源
将动作模式选择开关滑到 H(高速模式)或者 L(低能耗模式)
的位置。
在高速模式时,快速移动滚球时的跟踪性会提升,但电池寿命
变短。
关于节电模式
若在打开电源状态下时隔一段时间不进行操作,自动进入省电
模式。
移动轨迹轮,即可从省电模式恢复工作。
倾斜滚轮周围会点亮红灯片刻。
※电池余量较少时,点亮红灯片刻。
连接到计算机
插入到此部位。
USB 端口
接收器
启动计算机。
启动计算机,在进入可操作状态前,请稍等。
将接收器插入计算机 USB 端口。
请仔细确认连接器的方向和插入部位。
驱动程序将自动安装,自此即可进行使用轨迹球。
从本公司官网下载并安装“ELECOM Mouse Assistant”后,即可使用
自定义按键、高速滚动功能。
http://www.elecom.co.jp/global/download/utility/
mouse_assistant/
카운트 수 750/1500 카운트 ( 전환 가능 )
대응 인터페이스 USB
전파 주파수 2.4GHz 대
전파 방식 GFSK 방식
전파 도달 거리 비자성체(나무판 등 ): 약 10m
자성체(철판 등 ): 약 3m
※폐사 환경에서의 테스트 값이며 보증 값은 아닙니다 .
외형 치수 트랙볼 본체
W94.7 mm × D124.4 mm × H47.9 mm
리시버 유닛
W13.1 mm × D18.2 mm × H5.0 mm
동작 온도/습도 5℃∼ 40℃ / ∼ 90% RH( 단 , 결로가 없을 때 )
보존 온도/습도 -10℃∼ 60℃ / ∼ 90% RH( 단 , 결로가 없을 때 )
대응 전지 AA 알칼리 건전지 , AA 망간 건전지 ,
AA 니켈수소 2 차 전지
동작 시간 알칼리 건전지 사용 시 기준
저에너지 모드
연속 동작 시간 : 약 125 시간
연속 대기 시간 : 약 694 일
예상 사용 가능 시간 : 약 273 일
하이스피드 모드
연속 동작 시간 : 약 76 시간
연속 대기 시간 : 약 694 일
예상 사용 가능 시간 : 약 176 일
(1 일 8 시간 컴퓨터 조작 중 5% 를 트랙볼 조작에
할당한 경우 )
分辨率 )换切可( IPD 0051/057
支持接口 USB
电波频率 2.4GHz 频段
电波方式 GFSK 方式
电波传播距离 非磁性物体(木桌等):约 10 m
磁性物体(铁桌等):约 3 m
※ 这是在本公司环境下的测试值,并非保证值。
外观尺寸 轨迹球本体
W94.7 mm × D124.4 mm × H47.9 mm
接收器
W13.1 mm × D18.2 mm × H5.0 mm
工作温度/湿度 5℃~ 40℃ ,相对湿度最高 90%(但无结露)
存放温度/湿度 -10℃~ 60℃,相对湿度最高 90%(但无结露)
适用电池 5 号碱性干电池、5 号锰干电池、5 号镍氢充电电池
工作时间 使用碱性干电池时的大致时间
低能耗模式
 连续工作时间 :约 125 小时
 连续待机时间 :约 694 天
 估计可用时间 :约 273 天
高速模式
 连续工作时间 :约 76 小时
 连续待机时间 :约 694 天
 估计可用时间 :约 176 天
(假设1天使用电脑8小时,其中5%的时间在操作
轨迹球)
Product number: M-XT1DR
اﺬﻫ ﲆﻋ ﻂﻐﻀﻟا ﻢﺘﻳ ﺎﻣﺪﻨﻋ ﴍﺆﳌا ﺔﻛﺮﺣ ﺔﻋﴎ ﺾﻔﺨﻨﺗ
.ﻞﻴﻐﺸﺘﻟا ءﺎﻨﺛأ حﺎﺘﻔﳌا
(ﺔﺻﻮﺑ ﻞﻜﻟ ﺔﻄﻘﻧ 750) ﺾﻔﺨﻨﻣ
(ﺔﺻﻮﺑ ﻞﻜﻟ ﺔﻄﻘﻧ 1500) ﻊﻔﺗﺮﻣ
(ﻞﻴﻐﺸﺘﻟا فﺎﻘﻳإ)
(ﺔﻀﻔﺨﻨﳌا ﺔﻗﺎﻄﻟا ﻊﺿو)
(ﺔﻌﻔﺗﺮﳌا ﺔﻋﴪﻟا ﻊﺿو)
ةﺮﻜﻟا تﺎﻛﺮﺣ ﺔﻤﺟﺮﺗ ﻢﺘﺗ ﺔﻌﻔﺗﺮﳌا ﺔﻋﴪﻟا ﻊﺿو ﰲ
فﺰﻨﺘﺴُﻳ فﻮﺳ ﻦﻜﻟ ،ًﺔﻗد ﻛأ ٍﻞﻜﺸﺑ ﺔﻋﴪﻟا ﺔﻴﻟﺎﻋ
.عﴎأ ٍةرﻮﺼﺑ ﺔﻳرﺎﻄﺒﻟا ﻦﺤﺷ
ﺮﻤﺣﻷا نﻮﻠﻟﺎﺑ ﺔﻟﺎﻣﻹا ﺔﻠﺠﻌﺑ ﺔﻄﻴﺤﳌا ﺔﻘﻄﻨﳌا ءﴤﺘﺳ
.ﻦﻣﺰﻟا ﻦﻣ ةدﺪﺤﻣ ةﱰﻔﻟ
،ﺎ ً
ﻀﻔﺨﻨﻣ ﺔﻳرﺎﻄﺒﻟﺎﺑ ﻲﻘﺒﺘﳌا ﻦﺤﺸﻟا نﻮﻜﻳ ﺎﻣﺪﻨﻋ*
ةدﺪﺤﻣ ةﱰﻔﻟ ﺮﻤﺣﻷا نﻮﻠﻟﺎﺑ ﺔﻘﻄﻨﳌا هﺬﻫ ﺾﻣﻮﺘﺳ
.ﻦﻣﺰﻟا ﻦﻣ
.ﺎﻨﻫ لﺎﺒﻘﺘﺳﻻا ةﺪﺣو ﻞﺧدأ
هﺮﻈﺘﻧا ﻚﻟذ ﺪﻌﺑو ،ﴢﺨﺸﻟا ﺮﺗﻮﻴﺒﻤﻜﻟا ﻞﻴﻐﺸﺗ أﺪﺑا
.تﺎﻴﻠﻤﻌﻟا ﺬﻴﻔﻨﺘﻟ اًﺰﻫﺎﺟ ﺢﺒﺼﻳ ﻰﺘﺣ
切換解析度(滑鼠游標速度)。
(750dpi)/ (1500dpi)



 

中文•繁體






1.




1
2
3
4
5
6
7
8
910
11
12
13
14
15
EX-G
無線 軌跡球
使用說明書
確認包裝內容
軌跡球本體 x 1
接收器 x 1
確認操作用三號鹼性乾電池 x 1
使用說明書 x 1
安全注意事項 x 1
遵守規則 x 1
基本規格
左鍵
2. 右鍵
3. 傾斜滾輪/電池殘餘量顯示燈
各部位名稱及功能
4. 「上一頁」鍵
可在網頁瀏覽器操作「上一頁」
5. 「下一頁」鍵
可在網頁瀏覽器操作「下一頁」
6. 減速鍵
操作中按下的時間內,游標移動速度會減緩。

7. 游標速度變更鍵
8. 軌跡球
9. 操作模式選擇鍵
(關閉電源)
(低耗能模式)
(高速模式)
10.滾球拆卸孔
11.光學式感應器(滾球內側)
12.接收器收納部位
13.電池蓋
14.電池收納部位
15.USB連接器(公)
軌跡球本體
維修時取出滾球
接收器
放入電池
拆下電池蓋
放入電池。
請正確對準電池正 負 方向。
重新蓋回電池蓋。
打開電源
將操作模式選擇鍵滑向 H(高速)或 L(低耗能模式)的位置。
在高速模式時,快速移動滾球時的追隨速度會提昇,但會縮短
電池壽命。
省電模式
在打開電源的狀態下如果有一段時間沒有操作,就會自動進入
省電模式。
再度移動軌跡球,就會從省電模式恢復運作。
傾斜滾球周圍會閃爍一陣子紅燈。
*電池殘餘量變少時,會閃爍一陣子紅燈。
連結電腦
插入這個部位。
USB埠
接收器
開啟電腦。
電腦開機後,請等到可操作的狀態。
將接收器插入電腦 USB 埠。
請確認連接器方向與插入部位。
驅動器自動安裝後,即可使用軌跡球。
在本公司網站下載並安裝「ELECOM Mouse Assistant」,即可使用按
鍵配置及高速捲動等功能。
http://www.elecom.co.jp/global/download/utility/
mouse_assistant/
(750dpi)
(1500dpi)
1
2
3
4
5
6
7
8
910
11
12
13
14
15
1. 








電源をオンにする

パソコンに接続する


コネクターの向きと挿入場所を十
分に確認してください。

日本語 取扱説明書 EX-G
ワイヤレストラックボール
各部の名称とはたらき
トラックボール本体
レシーバーユニット
メンテナンス時にボール
を取り出す
左ボタン
2. 右ボタン
3. チルトホイール /
電池残量表示ランプ
4.「戻る」ボタン
5.「進む」ボタン
6. 減速スイッチ
操作中は、押している間だけポインターの
移動速度が遅くなります。
7. ポインター速度変更スイッチ
8. トラックボール
ボール取り外し穴
10.
9. 動作モード選択スイッチ
(電源オフ )
(ローエナジーモード )
(ハイスピードモード )
光学式センサー(ボールの裏側)
11.
レシーバーユニット収納部
12.
電池カバー
13.
電池収納部
14.
USBコネクター(オス)
15.
USBポート
電池を入れる
電池カバーを取り外す。
電池を入れる。
電池カバーを元通りに取り付ける。
動作モード選択スイッチを H(ハ
イスピードモード)または L(ロー
エナジーモード)の位置にスラ
イドさせます。
ハイスピードモードは、ボール
を速く動かした際の追従性が高
くなりますが、電池寿命が短く
なります。
チルトホイールの周囲が一定時間
赤色に点灯します。
※電池残量が少ないときは、一定
時間赤色に点滅します。
この部分に挿入します。
レシーバーユニット
パソコンを起動します。
パソコンを起動し、操作可能な状
態になるまでお待ちください。
レシーバーユニットをパソコン
の USBポートに挿入します。
ドライバが自動的にインストー
ルされ、トラックボールが使用
できるようになります。
弊社 Webサイトより「エレコムマウスアシス
タント」をダウンロードしてインストールする
と、ボタン割り当てや高速スクロール機能が使
用できます。
http://www.elecom.co.jp/global/dow
nload/utility/mouse_assistant/
BAJO (750 dpi)
ALTO (1500 dpi)
1
2
3
4
5
6
7
8
910
11
12
13
14
15
1. 








Asegúrese de que la batería se
encuentre colocada con sus
extremos positivo ( ) y negativo
( ) de la forma correcta.
Enciendalaenergía

ConectandoaunaPC


Asegúrese de revisar la
orientación del conector y la
ubicación de colocación.

Español Manual EX-G inalámbrico
Bola rastreadora
Nombres y funciones de cada parte
Bola rastreadora
Unidad receptora
Durante el mantenimiento,
retire la bola.
Botón izquierdo
2. Botón derecho
3. Rueda inclinable/indicador de
batería restante
4. Botón "Atrás"
5. Botón "Adelante"
6. Interruptor de reducción de la
velocidad del "Puntero"
La velocidad de movimiento del puntero
disminuye cuando se presiona el interruptor
durante el funcionamiento.
7. Interruptor de cambio de la
velocidad del "Puntero"
8. Bola rastreadora
Agujero para retirar la bola
10.
9. Interruptor del modo de
funcionamiento
(apagado)
(modo de baja energía)
(modo de alta velocidad)
Sensor óptico (debajo de la bola)
11.
Compartimiento de guardado
de la unidad de recepción
12.
Tapa de la batería
13.
Compartimiento para la batería
14.
Conector USB (macho)
15.
Puerto USB
Colocación de la batería
Retire la tapa de la batería.
Coloque la batería
Coloque la tapa de la batería.
Deslice el interruptor de selección
del modo de funcionamiento a la
posición H (modo de alta
velocidad) o L (modo de baja
energía).
En el modo de alta velocidad, los
movimientos de alta velocidad de
la bola se trasladan con mayor
precisión, pero la batería se
descargará más rápido.
El área alrededor de la rueda inclinable
se encenderá en color rojo durante un
período determinado de tiempo.
* Cuando la carga de batería
restante sea baja, este área se
encenderá en color rojo durante un
período determinado de tiempo.
Coloque aquí la unidad receptora.
Unidad receptora
Inicie la PC.
Inicie la PC y espere a que esté lista
para realizar las operaciones.
Coloque la unidad receptora
en el puerto USB de la PC.
El controlador se instalará de
forma automática y luego
podrá usar la bola rastreadora.
Descargue "Asistente de mouse ELECOM"
del sitio web de ELECOM para usar la
asignación del botón y las funciones de
desplazamiento de alta velocidad.
http://www.elecom.co.jp/global/dow
nload/utility/mouse_assistant/
RENDAH (750 dpi)
TINGGI (1500 dpi)
Bahasa Indonesia
1
2
3
4
5
6
7
8
910
11
12
13
14
15
1. 








NyalakanDaya.

MenyambungkankePC


Pastikan untuk memeriksa arah
konektor dan letak penyisipan.

Manual Trackball Nirkabel
EX-G
Nama dan Fungsi dari Setiap Bagian
Trackball
Unit penerima
Selama perawatan,
lepas bola.
Tombol kiri
2. Tombol kanan
3. Roda kemiringan/indikator daya
sisa baterai
4. Tombol "kembali"
5. Tombol "maju"
6. Sakelar pengurang kecepatan
"penunjuk"
Kecepatan gerak penunjuk dikurangi ketika
sakelar ini ditekan selama pengoperasian.
7. Sakelar pengubah kecepatan
"penunjuk"
8. Trackball
Lubang pelepasan bola
10.
9. Sakelar modus pengoperasian
(daya mati)
(modus energi-rendah)
(modus kecepatan-tinggi)
Sensor optik (di bawah bola)
11.
Kompartemen penyimpanan
unit penerima
12.
Tutup baterai
13.
Kompartemen penyimpanan
baterai
14.
Konektor USB (jantan)
15.
Port USB
Menyisipkan Baterai
Lepas tutup baterai.
Sisipkan baterai.
Pasang tutup baterai.
Pastikan bahawa baterai disisipkan
dengan arah ujung positif ( ) dan
negatif ( ) dengan benar.
Geser sakelar pemilihan modus
operasi ke H (modus kecepatan
tinggi) atau L (modus energi
rendah).
Dalam modus kecepatan tinggi,
perpindahan bola kecepatan
tinggi dijabarkan lebih akurat.
Area di sekitar roda kemiringan akan
menyala merah untuk jangka waktu
tertentu.
* Saat sisa pengisian baterai lemah,
area ini akan berkedip merah untuk
jangka waktu tertentu.
Sisipkan unit penerima di sini.
Unit penerima
Nyalakan PC.
Nyalakan PC, lalu tunggulah hingga
siap untuk beroperasi.
Sisipkan unit penerima ke
dalam port USB PC.
Driver akan secara otomatis
dipasang, anda akan dapat
menggunakan trackball.
Unduh "Asistem Mouse ELECOM" dari situs
web ELECOM untuk menggunakan fungsi
penugasan tombol dan gulir kecepatan
tinggi.
http://www.elecom.co.jp/global/dow
nload/utility/mouse_assistant/
1
2
3
4
5
6
7
8
910
11
12
13
14
15
.1












.2
.3
.4
.5
.6
.7
.8
.10
.9
.11
.12
.13
.14
.15
http://www.elecom.co.jp/global/dow
nload/utility/mouse_assistant/
解析度 )換切可( ipd 0051/057
適用介面 USB
電波頻率 2.4GHz 頻段
電波方式 GFSK 方式
電波距離 非磁性物體(木桌等):約 10m
磁性物體(鐵桌等):約 3m
*這是本公司環境下的測試值,並非保證。
外型尺寸 軌跡球本體
W94.7 mm × D124.4 mm × H47.9 mm
接收器
W13.1 mm × D18.2 mm × H5.0 mm
動作溫度/濕度 )結凝氣水無須必( HR%09 ∼ / ℃04 ∼℃5
存放溫度/濕度 )結凝氣水無須必( HR%09 ∼ /℃06 ∼℃01-
適用電池 三號鹼性乾電池、三號碳氫乾電池、
三號鎳氫充電電池
動作時間 使用鹼性乾電池時的時間
低耗能模式
 連續動作時間:約 125 小時
 連續待機時間:約 694 天
 預期可使用時間:約 273 天
高速模式
 連續動作時間:約 76 小時
 連續待機時間:約 694 天
 預期可使用時間:約 176 天
(假設1天使用8小時電腦,其中5%時間使用軌跡
球)
電池のプラスとマイナス
の向きを正しく入れてください。
ﺔﻴﺑﺮﻌﻟا
ﻞﻴﻐﺸﺘﻟا ﻞﻴﻟد
ﺐﻘﻌﺘﻟا ةﺮﻛ زﺎﻬﺟ
EX-G ﻠﺳﻼﻟا
ءﺰﺟ ﻞﻛ ﻒﺋﺎﻇوو ءﺳأ
ﺐﻘﻌﺘﻟا ةﺮﻛ زﺎﻬﺟ
لﺎﺒﻘﺘﺳﻻا ةﺪﺣو
.ﺔﻧﺎﻴﺼﻟا لﻼﺧ ةﺮﻜﻟا عﺰﻨﺑ ﻢﻗ
ﴪﻳﻷا رﺰﻟا
ﻦﻷا رﺰﻟا
"عﻮﺟﺮﻟا" رز
"مﺎﻣﻷا" رز
"ﴍﺆﳌا" ﺔﻋﴎ ﺾﻴﻔﺨﺗ حﺎﺘﻔﻣ
"ﴍﺆﳌا" ﺔﻋﴎ ﻞﻳﺪﺒﺗ حﺎﺘﻔﻣ
ﺔﻳرﺎﻄﺒﻟا ﰲ ﺔﻴﻘﺒﺘﳌا ﺔﻗﺎﻄﻟا ﴍﺆﻣ/ﺔﻟﺎﻣﻹا ﺔﻠﺠﻋ
ﺐﻘﻌﺘﻟا ةﺮﻛ زﺎﻬﺟ
ﻞﻴﻐﺸﺘﻟا ﻊﺿو حﺎﺘﻔﻣ
ةﺮﻜﻟا ﺔﻟازإ ﺔﺤﺘﻓ
(ةﺮﻜﻟا ﺖﺤﺗ) يﴫﺑ ﺮﻌﺸﺘﺴﻣ
لﺎﺳرﻹا ةﺪﺣو ﻦﻳﺰﺨﺗ ةﺠﺣ
ﺔﻳرﺎﻄﺒﻟا ءﺎﻄﻏ
ﺔﻳرﺎﻄﺒﻟا ﻦﻳﺰﺨﺗ ةﺠﺣ
(لﺎﺧدإ) USB ﻞﺻﻮﻣ
ﺔﻳرﺎﻄﺒﻟا لﺎﺧدإ
.ﺔﻳرﺎﻄﺒﻟا ﻞﺧدأ
.ﺔﻳرﺎﻄﺒﻟا ءﺎﻄﻏ عﺰﻧا
ﺎﻫﺎﻓﺮﻃ نﻮﻜﻳ ﺚﻴﺤﺑ ﺔﻳرﺎﻄﺒﻟا لﺎﺧدإ ﻦﻣ ﺪﻛﺄﺗ
ٍﻞﻜﺸﺑ نﺎﻬﺠﺘﻣ ( ) ﺐﻟﺎﺴﻟاو ( ) ﺐﺟﻮﳌا
.ﺢﻴﺤﺻ
.ﺔﻳرﺎﻄﺒﻟا ءﺎﻄﻏ ﺐّﻛر
ﲆﻋ ﻞﻴﻐﺸﺘﻟا ﻊﺿو رﺎﻴﺘﺧا حﺎﺘﻔﻣ ﺔﺣازﺈﺑ ﻢﻗ
ﲆﻋ وأ (ﺔﻴﻟﺎﻌﻟا ﺔﻋﴪﻟا ﻊﺿو) H ﺔﻴﻌﺿو
.(ﺔﻀﻔﺨﻨﳌا ﺔﻗﺎﻄﻟا ﻊﺿو) L ﺔﻴﻌﺿو
ﺔﻗﺎﻄﻟا ﻞﻴﻐﺸﺗ
.ﴢﺨﺸﻟا ﺮﺗﻮﻴﺒﻤﻜﻟا ﻞﻴﻐﺸﺗ أﺪﺑا
ﰲ USB ﺬﻔﻨﻣ ﰲ لﺎﺒﻘﺘﺳﻻا ةﺪﺣو ﻞﺧدأ
.ﴢﺨﺸﻟا ﺮﺗﻮﻴﺒﻤﻜﻟا
ﺎﻫﺪﻌﺑو ﺎًﻴﺋﺎﻘﻠﺗ ﻞﻴﻐﺸﺘﻟا ﺞﻣﺎﻧﺮﺑ ﺖﻴﺒﺜﺗ ﻢﺘﻴﺳ
.ﺐﻘﻌﺘﻟا ةﺮﻛ زﺎﻬﺟ ماﺪﺨﺘﺳا ﻦﻣ ﻦﻜﻤﺘﺘﺳ
ﴢﺨﺷ ﺮﺗﻮﻴﺒﻤﻛ ﻊﻣ ﻞﻴﺻﻮﺘﻟا
USB ﺬﻔﻨﻣ
لﺎﺒﻘﺘﺳﻻا ةﺪﺣو
ﻞﺻﻮﳌا هﺎﺠﺗا ﻦﻣ ٍ
فﺎﻛ ٍﻞﻜﺸﺑ ﻖﻘﺤﺘﻟا ﲆﻋ صﺮﺣا
.لﺎﺧدﻹا ﻊﻗﻮﻣو
ﺪﻋﺎﺴﻣ) "ELECOM Mouse Assistant" ﺞﻣﺎﻧﺮﺑ ﻞﻳﺰﻨﺘﺑ ﻢﻗ
ﲆﻋ ELECOM ﻊﻗﻮﻣ ﻦﻣ (ELECOM ﻦﻣ سوﺎﳌا زﺎﻬﺟ
ﱄﺎﻋ ﺮﻳﺮﻤﺘﻟاو رﺰﻟا ﻴﻌﺘﺑ ﺔﺻﺎﺨﻟا ﻪﻔﺋﺎﻇو ماﺪﺨﺘﺳﻻ ﺐﻳﻮﻟا
.ﺔﻋﴪﻟا
ML-M-XT1DR ver.1
1st edition, November 20, 2014 ©2014 ELECOM Co., Ltd. All Rights Reserved.
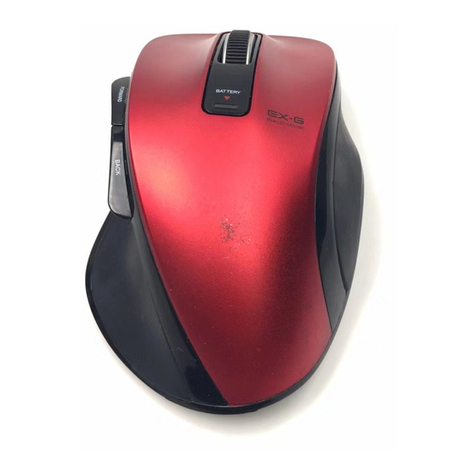
Other Elecom Mouse manuals

Elecom oppopet M-NE2DR Series User manual

Elecom

Elecom oppopet M-NE2DR Series User manual

Elecom M-XG4UB User manual

Elecom

Elecom M-XG4UB User manual

Elecom M-PGDL Series User manual

Elecom

Elecom M-PGDL Series User manual

Elecom M-SODL Series User manual

Elecom

Elecom M-SODL Series User manual

Elecom M-SH20BB Series User manual

Elecom

Elecom M-SH20BB Series User manual

Elecom M-CCP1BB User manual

Elecom

Elecom M-CCP1BB User manual

Elecom M-SH10DB Series User manual

Elecom

Elecom M-SH10DB Series User manual

Elecom M-SH20DBS User manual

Elecom

Elecom M-SH20DBS User manual

Elecom M-DY10DR Series User manual

Elecom

Elecom M-DY10DR Series User manual

Elecom Kasane M-NE3DL Series User manual

Elecom

Elecom Kasane M-NE3DL Series User manual

Elecom M-BY10BR User manual

Elecom

Elecom M-BY10BR User manual

Elecom M-XG1DB User manual

Elecom

Elecom M-XG1DB User manual

Elecom M-BT5BL Series User manual

Elecom

Elecom M-BT5BL Series User manual

Elecom M-SN1UL Series User manual

Elecom

Elecom M-SN1UL Series User manual

Elecom M-XGS10DB User manual

Elecom

Elecom M-XGS10DB User manual

Elecom M-XG2DB User manual

Elecom

Elecom M-XG2DB User manual

Elecom M-XG4DB User manual

Elecom

Elecom M-XG4DB User manual

Elecom M-XG2UB User manual

Elecom

Elecom M-XG2UB User manual

Elecom M-XG1UB User manual

Elecom

Elecom M-XG1UB User manual

Elecom M-M9UR Series User manual

Elecom

Elecom M-M9UR Series User manual

Elecom M-DWS01DB User manual

Elecom

Elecom M-DWS01DB User manual

Elecom M-XGS10BB User manual

Elecom

Elecom M-XGS10BB User manual

Elecom M-XGS10UB User manual

Elecom

Elecom M-XGS10UB User manual

Elecom M-PG3DL series User manual

Elecom

Elecom M-PG3DL series User manual

Popular Mouse manuals by other brands

Connect IT CMO-2500-BK user manual

Connect IT

Connect IT CMO-2500-BK user manual

Gearhead LM3500WU user manual

Gearhead

Gearhead LM3500WU user manual

A4Tech G9-200F user guide

A4Tech

A4Tech G9-200F user guide

A4Tech BatteryFREE NB-72D user guide

A4Tech

A4Tech BatteryFREE NB-72D user guide

Silvercrest SFMT 2.4 A1 quick start guide

Silvercrest

Silvercrest SFMT 2.4 A1 quick start guide

Rocket Fish RF-LTRMS user guide

Rocket Fish

Rocket Fish RF-LTRMS user guide

Intertech Eterno KM-206 Series manual

Intertech

Intertech Eterno KM-206 Series manual

Gearhead MS-148OR user manual

Gearhead

Gearhead MS-148OR user manual

Gearhead OM4000W user manual

Gearhead

Gearhead OM4000W user manual

Rocket Fish RF-MSE12 user guide

Rocket Fish

Rocket Fish RF-MSE12 user guide

A4Tech G6-70MD user guide

A4Tech

A4Tech G6-70MD user guide

Speed Link SL-6180 user guide

Speed Link

Speed Link SL-6180 user guide

Silvercrest SGM 4000 A1 Operation and safety notes

Silvercrest

Silvercrest SGM 4000 A1 Operation and safety notes

Gearhead OM5000WR user manual

Gearhead

Gearhead OM5000WR user manual

A4Tech G7-540 user manual

A4Tech

A4Tech G7-540 user manual

Gearhead MS-358BT4 user manual

Gearhead

Gearhead MS-358BT4 user manual

Corsair SABRE RGB PRO WIRELESS CHAMPION Series user manual

Corsair

Corsair SABRE RGB PRO WIRELESS CHAMPION Series user manual

Corsair Dark Core RGB Pro manual

Corsair

Corsair Dark Core RGB Pro manual

manuals.online logo
manuals.online logoBrands
  • About & Mission
  • Contact us
  • Privacy Policy
  • Terms and Conditions

Copyright 2025 Manuals.Online. All Rights Reserved.