Elgento E19004 User manual

Imported & Distributed throughout the U.K.
By PFD. ST4 2NL | www.elgento-products.co.uk INSTRUCTION MANUAL E19004
Mini CupCake Maker
E19004_IM.indd 2-3 10/08/2011 11:00:30

This product is guaranteed for 12 months from the date of the original purchase.
If any defect arises due to faulty materials or workmanship the faulty products must be returned
to the place of purchase. Refunds or replacement is at the discretion of the store.
The following conditions apply:
The product must be returned to the retailer with the original proof of purchase.
The product must be installed and used in accordance with the instructions contained in this
instruction guide.
It must be used only for domestic purposes.
It does not cover wear and tear, damage, misuse or consumable parts.
PFD has no responsibility for incidental or consequential loss or damage.
Valid in the UK and Eire only.
Technical Specication.
Guarantee.
Product Code E19004
Fty Art No.:TXS-103
AC: 220V~ 230V 50Hz
Power1000W
Sutton House,
Berryhill Road,
Fenton
Stoke on Trent
Staffordshire,
ST4 2NL.
1. Power light
2. Ready light
3. Front foot
4.Top baking plate
5. Bottom baking plate
6. Bottom cover
7.Top cover
8. Handle
Parts Identication
Safety Information
Please read these operating instructions thoroughly before rst operating the appliance
and keep them in a safe place.
If you pass this appliance on to a third party, these operating instructions must also be handed over.
with the appliance
This appliance is for household use only
Incorrect operation and handling can lead to malfunction of the appliance and injures to user.
This appiance is not designed for use in damp or wet enviroments such as outside.
Before inserting the plug into the mains socket, please check that the current and power supply
comply with the specications on the appliance rate plate.
switch off at the wall socket and remove the plug from the wall socket when the appliance
is not in use and before cleaning.
Parts of the appliance become hot during use. please take care when removing cooked items
The appliance must only be held by the handle.when in use or whilst cooling.
Do not immerse the appliance or the mains plug in water or other liquids.
this appliance is not intended for use by children or the inrm without adequate supervision
or training by the person responciable for thir safety.
Do not use the appliance if the mains cable or plug show signs of damage, if the appliance has
damaged do not use and have the appliance checked and repaired by a quailed person
Ensure that the mains cable is not hung over sharp edges and keep it away from sources of heat.
Ensure that the mains cable is not pressed between the baking plates or touches the baking
plate edge in normal use
Place the appliance on a stable, level surface away from combustable materials such as curtains
and tea cloths never
Never use metal or sharp utencills to remove the cupcakes as this may damage the non stick
coating of the appliance.
Never leave the appliance unattended during use. or whilst cooling
The temperature of accessible surfaces may be high when the appliance is operating.
Children and pets must be supervised at all times whilst the appliance is in operation. .
The appliances is not intended to be operated by means of an external timer or separate
remote-control system.
this appliance containes no user servicable componants all repairs must be carried
out by a sutiably quaied person
1&2
7
4
5
63
8
8
E19004_IM.indd 4-5 10/08/2011 11:00:31

Electrical Safety
The wires in the mains lead are coloured in accordance with the following code:
GREEN/YELLOW: EARTH (E)
BLUE: NEUTRAL (N)
BROWN: LIVE (L)
As the colours of the wires in the mains lead of this appliance may not correspond with the
coloured markings identifying the terminals in your plug, proceed as follows:
The wire which is coloured GREEN &YELLOW must be connected to the terminal in the plug
which is marked with the letter “E” or by the earth symbol
The wire which is coloured BLUE must be connected to the terminal which is marked with the
letter “N” or coloured BLACK.
The wire which is coloured BROWN must be connected to the terminal which is marked with
the letter “L” or coloured RED
Always ensure that the Mains Cord is xed into the plug through the Cord Guard or Cable
Clamp, (plug wiring diagram above), and that the Cord Guard screws are tightened to clamp
the Cord (outer sheath and inner coloured wires) into position in the plug.
Make sure that plug top is also tted securely.
This appliance must be protected by a 13 Amp fuse in a 13 Amp type (BS1363) plug. Should you
need to replace the fuse, use only a 13Amp ASTA approved BS1362 fuse (13A).
15mm O All
6mm Bare
35mm O All
6mm Bare
41mm O All
6mm Bare
HOW TO MAKE CUPCAKES
Before Using for the rst time
When using for the rst time, wipe the surface of the plates with a soft damp lint free cloth.
Then lightly grease the cooking plates with butter or oil..
Fit the plug into the wall socket.
There are two lamps RED: Lights on while appliance is heating and GREEN:When the appliance
is ready.
Heat the cup cake maker with the lid open for approx 5 minutes then unplug and allow to cool.
Once cool wipe off any excess butter and oil.Your cup cake maker is now ready to use!
When you are ready to use the cup cake maker again you can if required insert mini cup cake
cases into the moulds, if not grease the moulds with butter or oil and plug in to heat up.
When the Cupcake maker is ready after a few minutes the Green light will come on.
Fully open the Cupcake maker. Fill the moulds with your pre-made dough mixture.
CAUTION, The heating plates are very Hot! Take care when lling the moulds
Close the cover.
Your Cupcakes will be made in approximately in 3-5 minutes (depending on the recipe used).
Open the Cupcake maker and remove baked Cupcakes using plastic or wooden utensils.
Never use metal knife as this may damage the non-stick coating.
Close the lid to preserve the heat if you plan to bake another batch of Cupcakes.
Allow the Cupcake to cool before handling.
Cleaning & Care
Once you nished using the unit unplug and allow to cool before cleaning.
Once sufciently cooled use a damp soft cloth to wipe down the plates.
Never immerse the unit in water or any other liquids.
Should any lling be difcult to remove, pour a little cooking oil onto the platen and wipe off
after 5 minutes when the lling is softened.
Do not use harsh or abrasive cleaner or detergents on this product.
E19004_IM.indd 6-7 10/08/2011 11:00:31

Like to nd out more? Visit www.GrownGreen.info
Responsible Transport:
This product was made in China. Most things are. But when
we brought it over here, we shipped it on a container ship,
along with 10,000 containers of other things. It may not be
fast, it takes about 4 weeks, but it’s the greenest way of doing
it.
100% Recyclable:
All the cardboard in this packaging is 100% recyclable. If you
can’t think of a good use for the box as it is, please fold it at
and put it out with your other recycling. If you don’t have
regular collections, it can be taken to any cardboard recycling
area or even used in your composter. Now you can play your
part!
Paperless Design:
We started thinking about how to make this packaging
“Green” from the very beginning,
and thought that using as little paper as possible would be
a good idea. So the whole design process was carried out
online.We didn’t post anything, kept printouts to a minimum
and let technology take the strain.
Sustainable Packaging:
The trees used to make the card board for this box all come
from sensitively managed forests. Since 2006, the people that
made the cardboard for this box have planted over 700,000
acres of trees. On top of that, the whole manufacturing
process is ISO14001 approved.
Recipes :Vanilla Cupcakes:
Ingredients:
100g Castor Sugar 100g Self Raising Flour 100g Margarine
2 Medium Eggs
For Vanilla Butter Cream Icing
1 Teaspoon of Vanilla extract 150g Icing Sugar 75g Butter (softened)
2 Tablespoons of Milk
Too change the colour of the icing simply add some food colouring
For Chocolate Icing
75g Icing Sugar 100g Plain Chocolate 40g Unsalted Butter 2 Tablespoons of Water
Method:
Use a food processor to lightly mix together the margarine and sugar until it is light and uffy.
One at a time add the eggs with a little our each time until the mixture is mixed thoroughly.
Add the rest of the our little by little with the food processor on medium speed.
Spoon the Cupcake mixture into the moulds (or cases) and cook in your cupcake maker for
approx 3-5 minutes
Chocolate Chip Mufns
Ingredients
170g Chocolate Chips
150g Butter (softened)
1 ¼ Cup Flour
½ Cup Sugar
2 Eggs
30ml Milk
¼ Teaspoon Salt
½ Teaspoon Vanilla Extract
½ Tablespoon Baking Powder
Method
Beat the butter and vanilla extract together to form a light uffy mixture.
Add the eggs one at a time and beat gently.
After each egg is added add the sugar in equal parts and carry on mixing thoroughly.
Add the baking powder and salt to the mix and then add this to the main mixture.
The Chocolate chips and our can now also be added to the mixture.
Once a batter has been formed put mufn cases into the moulds and spoon the batter into he
mufn cases and bake in the cup cake maker for 3-5 minutes
Cup Cake Decorating Ideas
The icing recipes given will help you decorate your cup cakes. Just use the Vanilla Cup cakes
as a base, choose you’re icing type and then be creative.You can use Jelly Tots, Chocolate
Sprinkles, Hundreds & Thousands, Jelly Beans, Marshmallows, Mini Eggs, Sugared Flowers, Sugar
Sprinkles or any other small edible confectionary.The only limit is your imagination.
E19004_IM.indd 8-9 10/08/2011 11:00:32
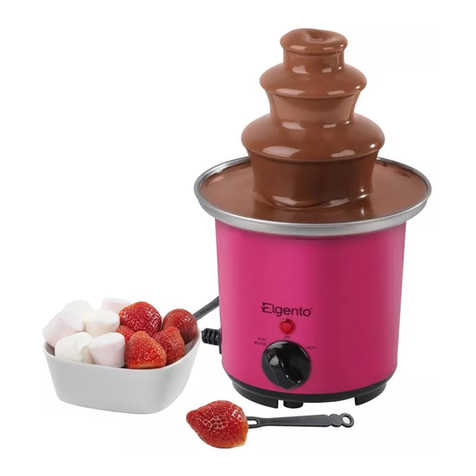
Other Elgento Kitchen Appliance manuals

Elgento
Elgento E19022 User manual

Elgento
Elgento E27002 User manual

Elgento
Elgento E14018N Mounting instructions

Elgento
Elgento E27009 Mounting instructions

Elgento
Elgento E19019N User manual

Elgento
Elgento E14018 User manual

Elgento
Elgento E011/MO User manual

Elgento
Elgento E14024 User manual

Elgento
Elgento E27002 User manual

Elgento
Elgento E010 Mounting instructions