Elgento E21002 Mounting instructions

www.elgento.co
400W
2 TIER STEAMER
MODEL E21002
YOUR SAFETY &
INSTRUCTION MANUAL
PLEASE READ CAREFULLY

2
CUSTOMER SUPPORT TEAM: +44 (0) 333 220 6057
TECHNICAL DATA
Description: 2 Tier Steamer
Model: E21002
Rated Voltage: 230V
Frequency: ~ 50Hz
Power consumption: 400W
DOCUMENTATION
We declare that this product conforms to the following product legislation in accordance with the
following directive(s):
2014/30/EU Electromagnetic Compatibility Directive.
2014/35/EU Low Voltage Directive.
2011/65/EU Restriction of Hazardous Substances Directive.
1935/2004/EC Materials & Articles in Contact With Food (LFGB section 30 & 31).
RK Wholesale LTD Quality Assurance, United Kingdom
WARRANTY
This product is guaranteed for 12 months from the date of original purchase. If any defect arises due
to faulty materials of workmanship, the faulty products must be returned to the place of purchase.
Refund or replacement is at the discretion of the retailer.
The following conditions apply:
• The product must be returned to the retailer with proof of purchase.
• The product must be installed and used in accordance with the instructions contained in this
instruction guide.
• It must be used only for domestic purposes.
• It does not cover wear and tear, damage, misuse or consumable parts.
• RK Wholesale LTD has limited liability for incidental or consequential loss or damage.
• This guarantee is only Valid in the UK and Eire Only.
An extended warranty is available for this appliance.
See back page for details.

3
www.elgento.co
WARNING:
This Appliance MUST be Earthed
WIRING SAFETY FOR UK USE ONLY
IMPORTANT
As the colours in the mains lead of this appliance
may not correspond with the coloured markings
identifying the terminals in your plug, please
proceed as follows:
The wires in the mains lead are labelled in
accordance with the following code:
Blue neutral [N] Brown live [L]
Green/Yellow [EARTH]
Plug Fitting Details (Where Applicable). The
wire labelled blue is the neutral and must be
connected to the terminal marked [N].
The wire labelled brown is the live wire and must
be connected to the terminal marked [L].
The wire labelled green/yellow must be
connected to the terminal marked with the letter
[E].
On no account must either the brown or the blue
wire be connected to the [EARTH] terminal.
Always ensure that the cord grip is fastened
correctly.
The plug must be tted with a fuse of the same
rating already tted and conforming to BS 1362
and be ASTA approved.
If in doubt consult a qualied electrician who will
be pleased to do this for you.
Non-Rewireable Mains Plug
If your appliance is supplied with a non-
rewireable plug tted to the mains lead and
should the fuse need replacing, you must use an
ASTA approved one (conforming to BS 1362 of
the same rating).
If in doubt, consult a qualied electrician who will
be pleased to do this for you.
If you need to remove the plug - disconnect it
from the mains - then cut it o of the mains lead
and immediately dispose of it in a safe manner.
Never attempt to reuse the plug or insert it into a
socket outlet as there is a danger of an electric
shock.
FUSE
Earth
(Green/Yellow)
Fuse
Neutral
(Blue)
Live
(Brown)

4
CUSTOMER SUPPORT TEAM: +44 (0) 333 220 6057
PRODUCT SAFETY
When using any electrical appliance, basic safety precautions should
always be followed including the following:
• Check that the voltage of the
main circuit corresponds with
the rating of the appliance
before operating.
• Please ensure that the
appliance is used on a
stable, level, and heat
resistant surface.
• DO NOT immerse cords,
plugs or any part of the
appliance in water or any
other liquid.
• DO NOT leave the appliance
unattended while it is
operating.
• Close supervision is
necessary when any
appliance is used by or near
children.
• Take care when any
appliance is used near pets.
• This appliance can ONLY
be used by children aged
from 8 years and above
and persons with reduced
physical, sensory or mental
capabilities or lack of
experience and knowledge
only if they have been given
supervision or instruction
concerning use of the
appliance in a safe way and
understand the hazards
involved.
• Children should not play with
the appliance.
• Cleaning and user
maintenance should not
be undertaken by children
without supervision.
• Switch o at the wall socket
then remove the plug from
the socket when not in use
or before cleaning.
• If the supply cord or
appliance is damaged,
stop using the appliance
immediately and seek advice
from the manufacturer, its
service agent or a similarly
qualied person.
• DO NOT let the cord hang
over the edge of a table
or counter or let it come
into contact with any hot
surfaces.
• The use of accessory
attachments is not
recommended by the
appliance manufacturer
apart from those supplied
with this product. DO NOT
use extension cords with the
appliance.
• DO NOT pull the plug out by
the cord as this may damage
the plug and/or the cable.

5
www.elgento.co
• DO NOT use this product
for anything other than its
intended use.
• This appliance is for
household use only.
• DO NOT carry the appliance
by the power cord.
• DO NOT use any extension
cord with this appliance.
• DO NOT use the appliance
outdoors.
• This appliance has a short
supply cord to reduce the
risk resulting from becoming
entangled in or tripping over
a long cord.
• Don not use foil or paper to
line the baskets as this will
block the steam holes.
• DO NOT use near or under
shelves or plug sockets.
• WARNING: During use
DO NOT touch the base,
steamer bowls, or lid as they
get very hot.
• This product will get hot
during use care must be
taken when handling.
• Always use oven mitts when
handling the steamer.
• Don’t ll over the max mark
or the water might overow
and cause damage to the
element.
• In the unlikely event the
appliance develops a fault,
stop using it immediately
and seek advice from the
Customer Support Team.
HIGH VOLTAGE HOT SURFACE

6
CUSTOMER SUPPORT TEAM: +44 (0) 333 220 6057
WHAT’S IN THE BOX
Instruction manual
Rice Bowl
1. Steamer lid
2. Steamer bowls
3. Steamer base unit and
water reservoir
4. Power indicator
5. Timer dial
1
45
2
3
BEFORE YOUR FIRST USE:
1. Before using the steamer for the rst time, carefully clean the steamer and all accessories.
2. Do not use any aggressive detergents, brushes with metal or nylon bristles or sharp objects
such as knives or spatulas to clean the steamer. Wipe with a sponge or cloth dampened in
warm water to avoid damage.
3. Dispose of packaging in a responsible manner.
Dispose of the packaging in a responsible manner.

7
www.elgento.co
USING YOUR APPLIANCE
1. Place the appliance on a stable, level
surface away from walls and overhanging
cupboards.
2. Pour cold tap water into the water
reservoir. Fill to the min or max ll. See
the Water Reservoir section for more
information.
3. Fit the required steaming bowl(s) and
cover with lid.
4. Plug the steamer into a wall outlet. Do
not operate the appliance without the
Steaming Bowl and lid in place.
5. Set the timer for the recommended time.
The red indicator light will come on to
show that the power is on. Steaming will
begin in less than a minute. Condensation
during steaming is normal.
Note: The manual timer operates regardless of
whether the unit is plugged into the electrical
outlet or not. Be sure the indicator light is on
when setting the timer.
6. When steaming is complete, the timer will
turn the steamer OFF automatically.
7. When you have nished using the
appliance, unplug it from the wall socket
and leave to cool completely before
removing any parts.
8. Do not attempt to operate the steamer
without water.
Water Reservoir:
Fill Levels:
The minimum and maximum ll levels are
indicated by raised lines inside the water
reservoir.
Max Fill: Fill the reservoir to the max level for
any foods requiring 13 to 60 minutes
steaming time.
Min Fill: Fill to the min level for any foods
that require less than 13 minutes
steaming time.
Refer to the Steaming Charts or Recipes
sections in this manual for recommended
cooking times.
If the appliance stops producing steam, or
there is a noticeable reduction in steam before
food is ready, add extra water to the reservoir.
Note: Do not add any herbs, wine, stock or
any liquid other than tap water to the water
reservoir.
Using the Steaming Bowls:
• Always place the largest pieces of food
with the longest cooking time in the large
bowl.
• Position the large bowl on the base and
then place the small bowl on top.
• You may place dierent foods in the small
and large bowl, but as condensation
will drip from the small bowl be sure the
avours complement each other.
• If steaming meat or poultry and
vegetables, always place the meat or
poultry in the large bowl so that juices
from raw or partially cooked meat cannot
drip onto other foods.
• Steaming times for food in the small bowl
are usually slightly longer. Allow an extra 5
minutes when using this bowl.
• If foods with dierent cooking times are
being steamed, start the food with the
longest cooking time in the large bowl.

8
CUSTOMER SUPPORT TEAM: +44 (0) 333 220 6057
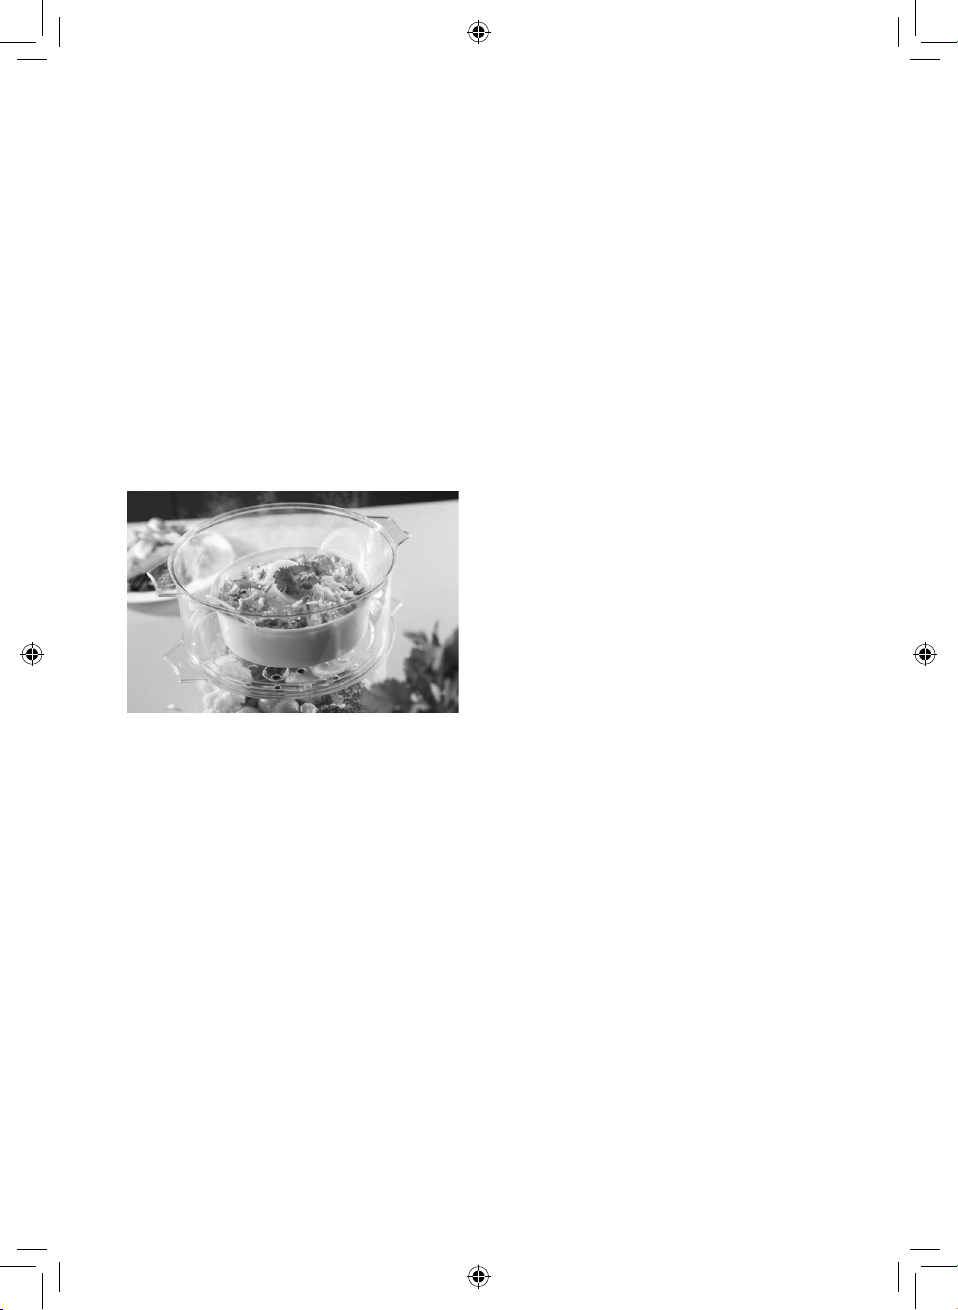
Using the Rice Bowl:
• When cooking rice, add rice to the rice
bowl, ensuring it is no more than half
full. Add water to the rice, as per packet
cooking instructions. Make sure you also
add water to the water reservoir.
• Put the rice bowl in the top steaming
basket.
• If the rice bowl is placed underneath other
foods, the additional liquid and juices can
aect the texture and taste of the rice.
• Steam rice for approximately 15-20
minutes, depending on quantity and
personal taste.
Steaming tips:
• For high altitude cooking, steaming times
may need to be increased. Exact times vary
according to the location of the food.
• Steaming times stated in the charts and
recipes are only a guide. Times may vary
depending on the size of food pieces,
spacing of the food in the steamer bowl,
freshness of food, and personal preference.
Adjust cooking times to suit your
preference as you become familiar with the
steamer.
• For best results, ensure pieces of food are
similar in size. If pieces vary in size and
layering is required, place smaller pieces
on top.
• Do not crowd food in the steaming bowl.
Arrange the food with spaces between
pieces to allow for maximum steam ow.
• When steaming large quantities of food,
remove the lid about halfway through the
steaming process and turn the pieces
using a long handled utensil, protecting
your hands from the steam with oven mitts.
• Do not add salt and seasoning to the
steaming bowl until after cooking is done.
This is to avoid possible damage to the
heating element located in the Water
Reservoir.
• Never steam frozen meat or poultry. Always
thaw it completely rst.
• All the times stated in the ‘Steaming
Charts’ and Recipes section are based
on the use of cold water in the Water
Reservoir.
Cooking Tips:
• When selecting fruit or vegetables
to steam, always select ones with
unblemished skins and good colour.
Steaming will only accentuate the taste in
any ‘old’ or bruised fruit and vegetables.
• Put meats, sh and juicy foods in the large
bowl so that they cannot drip onto foods
below.
• Do not put frozen meat in the steamer.
Defrost rst.
• Allow foods cooked in the small bowl an
extra ve minutes cooking time, as they are
further away from the steam.
• Ensure the ingredients are not immersed in
water in the steamer.
• Since all vegetables cook at dierent
paces, it is recommended to cook dierent
types separately.

9
www.elgento.co
Reference Guides:
The below tables are for reference only. Diering
quantities, water levels and temperature can all
aect the end results.
Vegetables
• Steam leafy green vegetables for the
shortest possible time as they lose colour
easily.
• Salt and season vegetables after steaming
for best results.
• Frozen vegetables should not be thawed
before steaming, as cooking times will vary
from those in the chart below.
FOOD QUANTITY WATER LEVEL STEAMING TIME
Asparagus 450g Max 12 – 15 min
Broccoli 225g Min 08 – 11 min
Cabbage 225g Max 10 – 13 min
Sliced Carrots 225g Min 10 – 12 min
Cauliower 1 head Max 13 – 16 min
Chicken Breasts 2 pieces Max 30 – 40 min
Clams 450g Min 10 – 15 min
Maize 3 ears Max 20 – 23 min
Crab 2 Max 40 – 45 min
Hard-Boiled Egg 6 Max 15 – 25 min
Fish Fillets 225g Max 20 – 40 min
Peas 280g Max 15 – 17 min
Sliced Potatoes 225g Min 10 – 12 min
Sausages 5 Max 20 – 25 min
Prawns 450g Max 11 – 14 min
Dim Sums 450g Max 15 – 20 min

10
CUSTOMER SUPPORT TEAM: +44 (0) 333 220 6057
Meat and poultry
• Steaming has the advantage of allowing all
the fat to drip away during cooking. Due
to the gentle heat only choose tender, lean
cuts of meat and trim o all fat. Steam in
the steam bowl for best results.
• Serve steamed meat and poultry with the
sauce of your choice to avour or marinate
before steaming.
• Thoroughly cook all food before serving.
Pierce with a knife or skewer to check that
the centre is cooked and juices run clear.
• Sausage must be completely cooked
before steaming.
FOOD TYPE QUANTITY WATER
LEVEL STEAMING TIME
Beef ½ inch slices of rump,
sirloin or llet steak. ½ lb Min 8 – 10 min
Chicken
Boneless breast 4 pieces - 4 oz
each Max 12 – 15 min
Drumsticks 4 pieces Max 20 – 25 min
Lamb
Chops with or without
bones
4 chops
(3/4 inch thick) Max 10 – 15 min
Loin cut into pieces 1 lb Max 10 – 15 min
Pork Tenderloin, llet, loin steaks
or loin chops
1 lb or 4 pieces
(1/2 inch thick) Min 5 – 10 min
Sausages
Frankfurts 1 lb Min 11 – 13 min
Knockwurst 1 lb Max 16 – 18 min

11
www.elgento.co
Fish and seafood
• Fish is done cooking when it is opaque and
akes easily with a fork.
• Frozen sh may be steamed without
defrosting if it is separated before steaming
and the cooking time is extended.
• Add lemon wedges and herbs while
steaming to improve avour.
FOOD TYPE QUANTITY WATER
LEVEL STEAMING TIME
Fish, Fillets
Sole ½ lb Min 9 – 13 min
Cod, Haddock, Trout ½ lb Min 5 – 10 min
Fish, ¾ inch
thick steaks Cod, Salmon 4 steaks Max 15 – 18 min
Lobster, Tails
Fresh meat will be opaque
when done. Cook longer if
necessary.
1 or 2 tails Max 16 – 19 min
Mussels
Fresh steaming is done
when the shells are
completely open.
1 lb Min 6 – 12 min
Oysters
Fresh steaming is done
when the shells are
completely open.
6 Max 10 – 16 min
Scallops
Fresh
Stir halfway through the
steaming time. Meat will
be opaque and aky when
done.
½ lb Min 10 – 13 min
Shrimps
Fresh
Meat will be opaque when
done. Cook longer if
necessary.
½ lb Max 10 – 15 min
Eggs
• Always ensure you prick the eggshell with
a pin before steaming, as this allows the
steam to release during cooking.
FOOD TYPE QUANTITY WATER
LEVEL STEAMING TIME
Eggs Large, Hard Cooked 1 – 12 Max 25-30 min

12
CUSTOMER SUPPORT TEAM: +44 (0) 333 220 6057
CLEANING & CARE
The steaming bowls and lid are dishwasher
safe.
Wash the rice bowl in warm, soapy water.
Remove the plug from the mains socket
and allow the appliance to cool down before
cleaning.
Do not immerse the base unit of the appliance
in water and ensure no water enters the
appliance.
Clean the base unit by wiping it with a damp
cloth. A little detergent can be added if needed.
Do not use scouring pads, steel wool, any form
of strong solvents or abrasive cleaning agents
to clean the appliance, as they may damage
the outside surfaces.
Do not use any scouring pads, steel wool, any
strong solvents or abrasive cleaning agents
when cleaning the accessories.
Empty the water basin and change the water
after each use.
Do not immerse the Water Reservoir in water.
Fill it with warm, soapy water, then rinse
thoroughly. Wipe dry with a soft cloth.
Descaling the Water Reservoir
IMPORTANT! Failure to descale the water
reservoir may invalidate your guarantee.
• After 2-3 months of consistent usage,
chemical deposits may build up in the
Water Reservoir and heating element
inside your Food Steamer. This is a
normal process and the build-up will
depend on the degree of water hardness
in your area. It is essential that the
appliance is descaled regularly to maintain
steam production and extend the life of
the unit.
• Fill the Water Reservoir to the Max level
with approximately 3 cups of clear vinegar
(not brown vinegar).
IMPORTANT! Do not use any other chemical
or a proprietary descaling agent.
• Plug the unit into a wall socket. The
steamer bowl and lid should be in place
during this procedure.
• Set the timer for 20-25 minutes to begin
steaming.
WARNING: If vinegar begins to boil over the
edge of the base, unplug the unit and switch
the timer o. Reduce the quantity of vinegar
slightly.
• When the unit stops after 20-25 minutes,
unplug from the wall socket and allow
it to cool completely before pouring out
vinegars.
• Rinse the water reservoir several times
with cold water. Do not immerse the base
in any liquid. Clean other steamer parts as
directed below.
IMPORTANT! After cleaning, allow the unit to
dry fully before using it again.
Do not use the appliance if damp. Ensure the
appliance is completely clean and dry before
storing.
WARNING:
NEVER IMMERSE THE BASE, CORD, OR PLUG IN WATER OR ANY OTHER LIQUID.

13
www.elgento.co
STORAGE:
To store your appliance:
1. Unplug the power cord from the power
outlet and clean as detailed above.
2. Allow the appliance to dry fully.
3. Store on a at, dry level surface out of
reach of children.
TROUBLESHOOTING:
DISPOSAL OF THE UNIT
Appliances bearing the symbol shown here may not be disposed of in domestic rubbish.
You are required to dispose of old electrical and electronic appliances like this separately.
Please visit www.recycle-more.co.uk or www.recyclenow.co.uk for access to information about
the recycling of electrical items.
Please visit www.weeeireland.ie for access to information about the recycling of electrical items
purchased in Ireland.
The WEEE directive, introduced in August 2006, states that all electrical items must be recycled,
rather than taken to landll.
Please arrange to take this appliance to your local Civic Amenity site for recycling, once it has
reached the end of its life.
Questions Answers
Can you use one
basket at a time? Yes, you can use one or two tiers at once.
Can the steamer run
without water? No, the steamer should not be operated without any water in the reservoir.
Can I steam frozen
vegetables?
Yes, frozen vegetables can be cooked using the steamer. When cooking
frozen meat or poultry, defrost them before putting in the steamer.
What is the capacity
of the steamer? The 2 tier steamer has 2 x 2.4L steaming bowls.
Why is my food
taking too long to
steam?
You may have put the incorrect amount of water into the water reservoir.
Always ensure the water is past the minimum ll line. Use the steaming
guides included in this manual for reference.
Filling the water reservoir to the max level should give you 60 minutes of
steaming time.

14
CUSTOMER SUPPORT TEAM: +44 (0) 333 220 6057
NOTES

15
www.elgento.co
NOTES

We hope you enjoy your appliance for many years.
As a thank you for purchasing one of our fantastic products,
we are oering you an extra 1 year peace of mind.
*To receive your extra guarantee period, register your appliance online
within 28 days of purchase by visiting:
www.elgento.co
Make sure to retain your original receipt.
Should you have a problem
with your appliance or need any spare parts please call our
Service Department on:
+44 (0) 333 220 6057
Distributed throughout the UK by RK Wholesale LTD
0819.V4
Table of contents
Other Elgento Kitchen Appliance manuals

Elgento
Elgento E27009 Mounting instructions

Elgento
Elgento E19004 User manual

Elgento
Elgento E27002 User manual

Elgento
Elgento E14018 User manual

Elgento
Elgento E14024 User manual

Elgento
Elgento E459 User manual

Elgento
Elgento E19022 User manual

Elgento
Elgento E26015 User manual

Elgento
Elgento E14018N Mounting instructions

Elgento
Elgento E19019N User manual