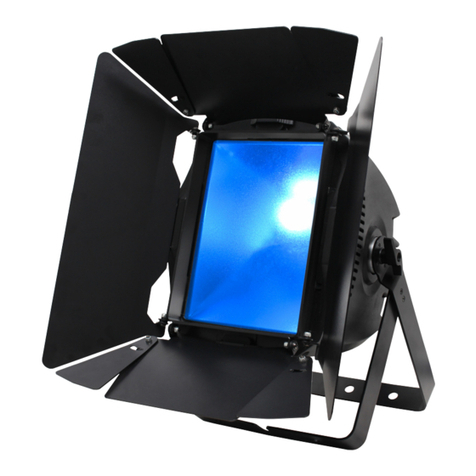
Elumen8 COB Tri 4 Pixel Batten User manual

Order code: ELUM081
COB Tri 4 Pixel Batten
User Manual

www.prolight.co.uk COB Tri 4 PIxel Batten User Manual 2
Safety advice
WARNING
FOR YOUR OWN SAFETY, PLEASE READ THIS USER MANUAL
CAREFULLY BEFORE YOUR INITIAL START-UP!
• Beforeyourinitialstart-up,pleasemakesurethatthereisnodamagecausedduringtransportation.
• Shouldtherebeanydamage,consultyourdealeranddonotusetheequipment.
• Tomaintaintheequipmentingoodworkingconditionandtoensuresafeoperation,itisnecessary
fortheusertofollowthesafetyinstructionsandwarningnoteswritteninthismanual.
• Pleasenotethatdamagescausedbyusermodicationstothisequipmentarenotsubjecttowarranty.
IMPORTANT:
The manufacturer will not accept liability for any resulting damages caused by the non-observance
of this manual or any unauthorised modication to the equipment.
OPERATING DETERMINATIONS
Ifthisequipmentisoperatedinanyotherway,thanthosedescribedinthismanual,theproductmaysufferdamageand
thewarrantybecomesvoid.Incorrectoperationmayleadtodangere.g:short-circuit,burnsandelectricshocksetc.
Donotendangeryourownsafetyandthesafetyofothers!
Incorrectinstallationorusecancauseseriousdamagetopeopleand/orproperty.
CAUTION!
KEEP THIS EQUIPMENT
AWAY FROM RAIN,
MOISTURE AND LIQUIDS
CAUTION!
TAKE CARE USING
THIS EQUIPMENT!
HIGH VOLTAGE-RISK
OF ELECTRIC SHOCK!!
• Neverletthepowercablecomeintocontactwithother
cables.Handlethepowercableandallmainsvoltage
connectionswithparticularcaution!
• Neverremovewarningorinformativelabelsfromtheunit.
• Donotopentheequipmentanddonotmodifytheunit.
• Donotconnectthisequipmenttoadimmerpack.
• Donotswitchtheequipmentonandoffinshortintervals,
asthiswillreducethesystem’slife.
• Onlyusetheequipmentindoors.
• Donotexposetoammablesources,liquidsorgases.
• Alwaysdisconnectthepowerfromthemainswhen
equipmentisnotinuseorbeforecleaning!Onlyhandle
thepower-cablebytheplug.Neverpullouttheplugby
pullingthepower-cable.
• Makesurethattheavailablemainssupplyvoltageis
between100~240VAC,50/60Hz.
• Makesurethatthepowercableisnevercrimpedor
damaged.Checktheequipmentandthepowercable
periodically.
• Iftheequipmentisdroppedordamaged,disconnectthe
mainspowersupplyimmediatelyandhaveaqualied
engineerinspecttheequipmentbeforeoperatingagain.
• Iftheequipmenthasbeenexposedtodrastic
temperatureuctuation(e.g.aftertransportation),
donotconnectpowerorswitchitonimmediately.
Thearisingcondensationmightdamagetheequipment.
Leavetheequipmentswitchedoffuntilithasreached
roomtemperature.
• Ifyourproductfailstofunctioncorrectly,stopuse
immediately.Packtheunitsecurely(preferablyinthe
originalpackingmaterial),andreturnittoyourProLight
dealerforservice.
• Onlyusefusesofsametypeandrating.
• Repairs,servicingandpowerconnectionmustonlybe
carriedoutbyaqualiedtechnician.THISUNITCONTAINS
NOUSERSERVICEABLEPARTS.
• Thislightingxtureisforprofessionaluseonly-itis
notdesignedfororsuitableforhouseholduse.The
productmustbeinstalledbyaqualiedtechnicianin
accordancewithlocalterritoryregulations.Thesafetyof
theinstallationistheresponsibilityoftheinstaller.The
xturepresentsrisksofsevereinjuryordeathduetore
hazards,electricshockandfalls.
• Warning!RiskGroup2LEDproductaccordingto
EN62471.Donotviewthelightoutputwithoptical
instrumentsoranydevicethatmayconcentratethebeam.
• WARRANTY:Twoyearsfromdateofpurchase.

www.prolight.co.uk COB Tri 4 PIxel Batten User Manual 3
Product overview & technical specications
FeaturingCOB(chip-on-board)technologytheeLumen8COBTri8PixelBattenisloadedwith4x30Windividually
addressabletri-colourLEDswhichareeachhousedin60°reectors.Controloftheunitisfacilitatedviathe
4pushbuttonmenuandLCDdisplay.
•4x30Wtri-colourCOBLEDs(RGB)
•Beamangle:60°
•1.1kHzrefreshrate
•IndividuallyaddressableLEDs
•DMXchannels:3/4/5/12or15
selectable
•Soundactive,autoandmaster/slave
modes
•0-100%dimmingandvariablestrobe
•Bracketallowsformultiplerigging
oroorstandingapplications
•4pushbuttonmenu
withLCDdisplay
•PowerCONinput/output
•3-PinXLRinput/output
•5-PinXLRinput/output
COB Tri 4 Pixel Batten
Specications
Powerconsumption 160W
Powersupply 100~240V,50/60Hz
Dimensions 220x440x150mm
Weight 4kg
Ordercode ELUM081
60° - Lux
TRI 4
TRI 8
5060
7880
1904
2981
895
1386
428
883
243
561
0m 1m 2m 3m 4m 5m
60°
440mm
220mm
150mm
MIC
TRI 4 PIXEL BATTEN
SAFETY EYE
MODE ENTER UP DOWN
www.prolight.co.uk
POWER OUTPUT
5-PIN
DMX OUTPUT
3-PIN
DMX OUTPUT
1
2
3
4
5
FUSE:
F2A
250V
POWER INPUT:
100-240V~50/60Hz
5-PIN
DMX INPUT
3-PIN
DMX INPUT
1
2
3
4
5
01 11
09
07
04 05
06
12
0802 0310
01-Fuse:T3.15A250V
02-PowerCONinput
03-PowerCONoutput
04-3-PinDMXinput
05-3-PinDMXoutput
06-5-PinDMXinput
07-5-PinDMXoutput
08-LCDdisplay
09-Functionbuttons
10-Microphone
11-Safetyeye
12-Earthpoint
Inthebox:1 x xture,
1 x 13A powerCON
mains cable &
1 x user manual

www.prolight.co.uk COB Tri 4 PIxel Batten User Manual 4
DMX mode:
OperatinginaDMXcontrolmodeenvironmentgivestheuser
thegreatestexibilitywhenitcomestocustomisingorcreating
ashow.Inthismodeyouwillbeabletocontroleachindividual
traitofthextureandeachxtureindependently.
ToaccesstheDMXmode,pressthe“MODE”buttonontherear
oftheunittoshow“DMX MODE”ontheLCDdisplay.Nowpress
the“ENTER”buttonandusethe“UP”and“DOWN”buttonsto
settherequiredDMXaddress.Pressthe“ENTER”buttonagain
andusethe“UP”and“DOWN”buttonstochoosetheDMX
channelmoderequired3/4/5/12/15.Pressthe“ENTER”button
toconrmthesetting.
Toexitoutofanyoftheaboveoptions,pressthe“MODE”button.
Operating instructions
3 channel mode:
Channel Value Function
CH1 000-255 Red(0-100%)
CH2 000-255 Green(0-100%)
CH3 000-255 Blue(0-100%)
5 channel mode:
Channel Value Function
CH1 000-255 Red(0-100%)
CH2 000-255 Green(0-100%)
CH3 000-255 Blue(0-100%)
CH4 000-255 Masterdimmer(0-100%)
CH5
000 Nofunction
001-005 Soundactive(7colours)
006-010 Nofunction
011-255 Strobe(slow-fast)
4 channel mode:
Channel Value Function
CH1
000-015 Nofunction
016-023 R
024-031 G
032-039 B
040-047 RG
048-055 GB
056-063 RB
064-071 RGB
072-079 Colour1
080-087 Colour2
088-095 Colour3
096-103 Colour4
104-111 Colour5
112-119 Colour6
120-127 Colour7
128-135 Colour8
136-143 Dream
144-151 Meteor
152-159 Fade
160-167 Change
168-175 Flow1
176-183 Flow2
184-191 Flow3
192-199 Flow4
200-207 Flow5
208-215 Flow6
216-223 Flow7
224-231 Flow8
232-239 Flow9
240-255 Soundactve
CH2
000-255
Speed(slow-fast)
(whenCH1is
000-239)
000-255
Sensitivity
(low-high)
(whenCH1is
240-255)
CH3 000-255 Masterdimmer
(0-100%)
CH4 000-239 Strobe(slow-fast)
240-255 Nofunction
12 channel mode:
CH1 CH2 CH3 CH4 CH5 CH6
R1
(0-255)
G1
(0-255)
B1
(0-255)
R2
(0-255)
G2
(0-255)
B2
(0-255)
CH7 CH8 CH9 CH10 CH11 CH12
R3
(0-255)
G3
(0-255)
B3
(0-255)
R4
(0-255)
G4
(0-255)
B4
(0-255)

www.prolight.co.uk COB Tri 4 PIxel Batten User Manual 5
Operating instructions
15 channel mode:
Channel Value Function
CH1
000-015 Nofunction
016-023 R
024-031 G
032-039 B
040-047 RG
048-055 GB
056-063 RB
064-071 RGB
072-079 Colour1
080-087 Colour2
088-095 Colour3
096-103 Colour4
104-111 Colour5
112-119 Colour6
120-127 Colour7
128-135 Colour8
136-143 Dream
144-151 Meteor
152-159 Fade
160-167 Change
168-175 Flow1
176-183 Flow2
184-191 Flow3
192-199 Flow4
200-207 Flow5
208-215 Flow6
216-223 Flow7
224-231 Flow8
232-239 Flow9
240-255 Soundactve
CH2
000-255
Masterdimmer
(0-100%)(when
CH1is000-135)
000-255
Speed(slow-fast)
(whenCH1is
136-239)
000-255
Sensitivity
(low-high)
(whenCH1is
240-255)
Channel Value Function
CH3 000-255 Flash(slow-fast)
CH4 000-015 Red1(0-100%)
016-223 Nofunction
224-239 Colourselect
240-255 Nofunction
CH5 000-015 Green1(0-100%)
016-223 Nofunction
224-239 Colourselect
240-255 Nofunction
CH6 000-015 Blue1(0-100%)
016-255 Nofunction
CH7 000-015 Red2(0-100%)
016-255 Nofunction
CH8 000-015 Green2(0-100%)
016-255 Nofunction
CH9 000-015 Blue2(0-100%)
016-255 Nofunction
CH10 000-015 Red3(0-100%)
016-255 Nofunction
CH11 000-015 Green3(0-100%)
016-255 Nofunction
CH12 000-015 Blue3(0-100%)
016-255 Nofunction
CH13 000-015 Red4(0-100%)
016-255 Nofunction
CH14 000-015 Green4(0-100%)
016-255 Nofunction
CH15 000-015 Blue4(0-100%)
016-255 Nofunction

www.prolight.co.uk COB Tri 4 PIxel Batten User Manual 6
Sound active mode:
Toselectthesoundactivemode,pressthe“MODE”buttontoshow“SOUND MODE”ontheLCDdisplay.
Nowpressthe“ENTER”buttonandusethe“UP” and“DOWN”buttonstoadjustthesound
sensitivitylevel(SENS00-31)andpressthe“ENTER”buttonagaintoadjustthefrequencylevel
(FQN01-99).Pressthe“ENTER”buttontoconrmyoursetting.
Toexitoutofanyoftheaboveoptions,pressthe“MODE”button.
Auto mode:
ToselecttheAutorunmode,pressthe“MODE”buttontoshow“AUTO RUN”ontheLCDdisplay.
Nowpressthe“ENTER” buttontoadjustthefrequencylevel(FQN01-99).
Pressthe“ENTER”buttontoconrmyoursetting.
Theunitwillnowrunall14built-inprogrammesoneafteranother.
Toexitoutofanyoftheaboveoptions,pressthe“MODE”button.
Slave mode:
Toselectslavemode,rstlinktheunitstogethervia3-Pinor5-PinXLRcable(s),pressthe“MODE”
buttontoshow“SLAVE MODE”onalloftheslaveunits.Nowtheslaveunitswillfollowinconjunctionwith
themasterunit.Pressthe“ENTER”buttontoconrmyoursetting.
Toexitoutofanyoftheaboveoptions,pressthe“MODE”button.
Built-in programs:
Toaccessthebuilt-inprogram,pressthe“MODE” buttontoshow“01.STATIC”ontheLCDdisplay.
Nowpressthe“ENTER”buttonandusethe“UP” and“DOWN”buttonstochooseoneofthe
14built-inprograms(01-14)(seetableoverleaf).
Tochooseoneofthesevencoloursinthe“STATIC”mode,pressthepressthe“ENTER”buttonanduse
the“UP” and“DOWN”buttonstochooseoneofthefollowing15colours.
Toadjustthespeedlevelintheremaining13built-inprograms,pressthe“ENTER”buttonanduse
the“UP” and“DOWN”buttonstosetthedesiredspeedlevel(00-99).Toadjusttheashspeedpress
the“ENTER”buttonandusethe“UP” and“DOWN” buttonstosetthedesiredashspeedlevel(00-99).
Pressthe“ENTER”buttontoconrmyoursetting.
Toexitoutofanyoftheaboveoptions,pressthe“MODE”button.
Setting ow invert:
Tosettheowinvert,pressthe“MODE”buttontoshow“FLOW INVERT”ontheLCDdisplay.Nowpress
the“ENTER”buttonandusethe“UP” and“DOWN”buttonstosettheowinverttoonoroff.
Pressthe“ENTER”buttontoconrmyoursetting.
Toexitoutofanyoftheaboveoptions,pressthe“MODE”button.
NOTE:Thefrequencylevel(FQN01-99)adjustshowmanytimestheprogramrepeatsbeforemovingtothenextprogram.

www.prolight.co.uk COB Tri 4 PIxel Batten User Manual 7
RGB colour mixing:
ToselecttheRGBcolourmixingmode,
pressthe“MODE”buttontoshow
“PIX 001”ontheLCDdisplay.Nowpress
the“ENTER”buttonandusethe“UP” and
“DOWN”buttonstoselecttheLEDyou
wanttochangethecolourof(PIX001-004)
andpressthe“ENTER”buttonagainto
adjusttheRed(000-255),repeatthis
processforGreenandBlue.Pressthe
“ENTER”buttontoconrmyoursetting.
Toexitoutofanyoftheaboveoptions,
pressthe“MODE”button.
Built-in programs:
Value Function
Staticcolour
CL:BLAC-RGB
Flash:00-99
Blackout,Red,Yellow,Green,
Cyan,Blue,Purple,White
Flashspeedadjustable
Dream
Speed:00-99
Flash00-99
7colourdream
Speed&ashajustable
Meteor
Speed:00-99
Flash00-99
7colourow
Speed&ashajustable
Fade
Speed:00-99
Flash00-99
7colourfade
Speed&ashajustable
Change
Speed:00-99
Flash00-99
7colourchange
Speed&ashajustable
Flow1
Speed:00-99
Flash00-99
7colourchase
Speed&ashajustable
Flow2
Speed:00-99
Flash00-99
7colourchase
Speed&ashajustable
Flow3
Speed:00-99
Flash00-99
7colourchase
Speed&ashajustable
Flow4
Speed:00-99
Flash00-99
7colourchase
Speed&ashajustable
Flow5
Speed:00-99
Flash00-99
7colourchase
Speed&ashajustable
Flow6
Speed:00-99
Flash00-99
7colourchase
Speed&ashajustable
Flow7
Speed:00-99
Flash00-99
7colourchase
Speed&ashajustable
Flow8
Speed:00-99
Flash00-99
7colourchase
Speed&ashajustable
Flow9
Speed:00-99
Flash00-99
7colourchase
Speed&ashajustable

www.prolight.co.uk COB Tri 4 PIxel Batten User Manual 8
Setting the DMX address:
TheDMXmodeenablestheuseofauniversalDMXcontroller.Eachxturerequiresa“startaddress”
from1-511.Axturerequiringoneormorechannelsforcontrolbeginstoreadthedataonthechannel
indicatedbythestartaddress.Forexample,axturethatoccupiesoruses7channelsofDMXandwas
addressedtostartonDMXchannel100,wouldreaddatafromchannels:100,101,102,103,104,105
and106.Chooseastartaddresssothatthechannelsuseddonotoverlap.E.g.thenextunitinthe
chainstartsat107.
DMX 512:
DMX(DigitalMultiplex)isauniversalprotocolusedasaformofcommunicationbetweenintelligent
xturesandcontrollers.ADMXcontrollersendsDMXdatainstructionsformthecontrollertothexture.
DMXdataissentasserialdatathattravelsfromxturetoxtureviatheDATA“IN”andDATA“OUT”
XLRterminalslocatedonallDMXxtures(mostcontrollersonlyhaveadata“out”terminal).
DMX linking:
DMXisalanguageallowingallmakesandmodelsofdifferentmanufacturestobelinkedtogether
andoperatefromasinglecontroller,aslongasallxturesandthecontrollerareDMXcompliant.
ToensureproperDMXdatatransmission,whenusingseveralDMXxturestrytousetheshortest
cablepathpossible.TheorderinwhichxturesareconnectedinaDMXlinedoesnotinuencethe
DMXaddressing.Forexample;axtureassignedtoaDMXaddressof1maybeplacedanywherein
aDMXline,atthebeginning,attheend,oranywhereinthemiddle.Whenaxtureisassigneda
DMXaddressof1,theDMXcontrollerknowstosendDATAassignedtoaddress1tothatunit,
nomatterwhereitislocatedintheDMXchain.
DATA cable (DMX cable) requirements (for DMX operation):
ThisxturecanbecontrolledviaDMX-512protocol.TheDMXaddressissetonthebackoftheunit.
YourunitandyourDMXcontrollerrequireastandard3-pinXLRconnectorfordatainput/output,
seeimagebelow.
Note: DMX cable must be daisy chained and cannot be split.
DMX setup
FurtherDMXcablescanbe
purchasedfromallgoodsound
andlightingsuppliersor
ProLightConceptsdealers.
Pleasequote:
CABL10 – 2m
CABL11 – 5m
CABL12 – 10m

www.prolight.co.uk COB Tri 4 PIxel Batten User Manual 9
Notice:
Besuretofollowthediagramsbelowwhenmakingyourowncables.Donotconnectthecables
shieldconductortothegroundlugorallowtheshieldconductortocomeincontactwiththeXLRs
outercasing.Groundingtheshieldcouldcauseashortcircuitanderraticbehaviour.
Special note:
Line termination:
Whenlongerrunsofcableareused,
youmayneedtouseaterminatoron
thelastunittoavoiderraticbehaviour.
Using a cable terminator will decrease
the possibilities of erratic behaviour.
(3-pin - Order ref: CABL90, 5-pin - Order ref: CABL89)
5-pin XLR DMX connectors:
Somemanufacturesuse5-pinXLRconnectorsfordatatransmissioninplaceof3-pin.5-pinXLRxtures
maybeimplementedina3-pinXLRDMXline.Wheninsertingstandard5-pinXLRconnectorsintoa
3-pinlineacableadaptormustbeused.Thediagrambelowdetailsthecorrectcableconversion.
Terminationreducessignaltransmission
problemsandinterference.Itisalways
advisabletoconnectaDMXterminal,
(resistance120Ohm1/4W)betweenpin2
(DMX-)andpin3(DMX+)ofthelastxture.
5-pin XLR (socket)
Pin 1: GND (screen)
Pin 2: Signal (-)
Pin 3: Signal (+)
Pin 4: N/C
Pin 5: N/C
3-pin XLR (socket)
Pin 1: GND (screen)
Pin 2: Signal (-)
Pin 3: Signal (+)
3-pin XLR (socket)
Pin 1: GND (screen)
Pin 2: Signal (-)
Pin 3: Signal (+)
5-pin XLR (socket)
Pin 1: GND (screen)
Pin 2: Signal (-)
Pin 3: Signal (+)
Pin 4: N/C
Pin 5: N/C
DMX setup

www.prolight.co.uk COB Tri 4 PIxel Batten User Manual 10
WEEE notice
Correct Disposal of this Product
(Waste Electrical & Electronic Equipment)
(Applicable in the European Union and other European countries
with separate collection systems)
Thismarkingshownontheproductoritsliterature,indicatesthatitshouldnotbedisposed
withotherhouseholdwastesattheendofitsworkinglife.Topreventpossibleharmtothe
environmentorhumanhealthfromuncontrolledwastedisposal,pleaseseparatethisfromother
typesofwastesandrecycleitresponsiblytopromotethesustainablereuseofmaterialresources.
Householdusersshouldcontacteithertheretailerwheretheypurchasedthisproduct,ortheir
localgovernmentofce,fordetailsofwhereandhowtheycantakethisitemforenvironmentally
saferecycling.
Businessusersshouldcontacttheirsupplierandcheckthetermsandconditionsofthe
purchasecontract.Thisproductshouldnotbemixedwithothercommercialwastesfordisposal.

www.prolight.co.uk COB Tri 4 PIxel Batten User Manual 11

www.prolight.co.uk COB Tri 4 PIxel Batten User Manual 12
This manual suits for next models
1
Table of contents
Other Elumen8 Lighting Equipment manuals

Elumen8
Elumen8 TZ 350 LED User manual

Elumen8
Elumen8 ELUM043 User manual

Elumen8
Elumen8 TZ 250F User manual

Elumen8
Elumen8 CYC600 User manual

Elumen8
Elumen8 Alu Quad Par 64 MKII User manual

Elumen8
Elumen8 Meteor 150 RGBW IP Pixel Batten User manual

Elumen8
Elumen8 ELUM094 User manual

Elumen8
Elumen8 Liberty 1T36 Battery Uplighter User manual

Elumen8
Elumen8 Kudos 250ZS User manual

Elumen8
Elumen8 GB-1 User manual