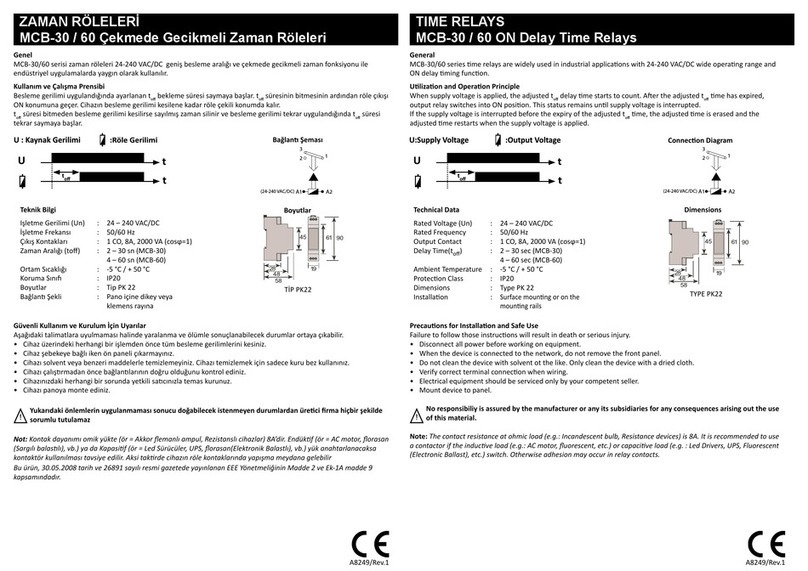
Entes DG-10 User manual

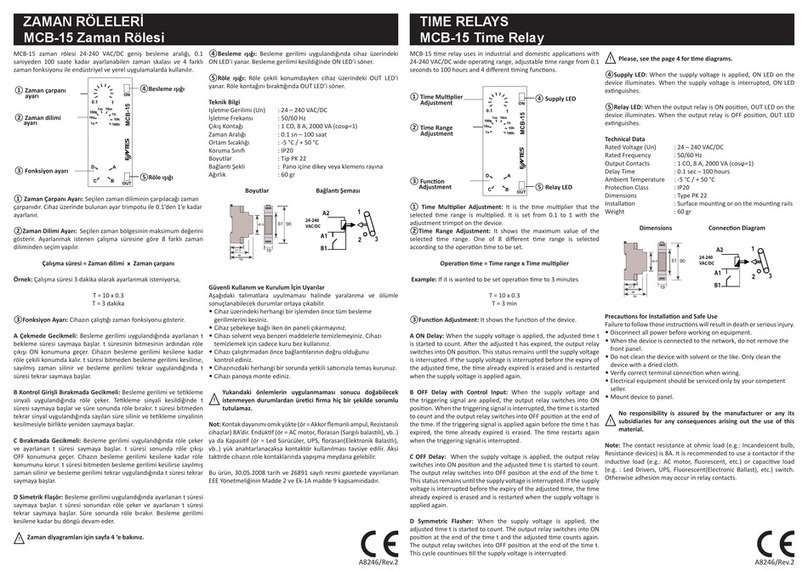
Genel
DG-10/60 düşmede gecikmeli zaman röleleri otel odalarındaki banyoların havalandırma fanlarının veya kartlı sistem ile
çalışan aydınlatmaların çalışma süresinin hesaplanmasında ve elektrik motorlarının frenleme süresinin ayarlanması gibi
endüstriyel uygulamalarda kullanılır.
Kullanım ve Çalışma Prensibi
İşletme gerilimi uygulandığında röle kontağını çeker. Cihaz şarj olmaya başlar ve şarj olurken cihazın Şarj (Charge) LED’i
yanar. Cihaz şarj olduğunda Şarj (Charge) LED’i söner ve hazır olduğunu gösteren Hazır(Ready) LED’i yanar. Cihaz hazır
konumundayken cihazın enerjisi kesildiğinde röle ayarlanan to süresi boyunca daha çekili konumda kalır. Ayarlanan süre
sonunda röle kontağını bırakır.
NOT
1) Cihazın kullanıma hazır olması için sarı “Charge (Şarj)” ışığının sönmesi gerekmektedir.
2) Cihazın Şarj (Charge) konumundan hazır (Ready) konumuna geçmesi için gereken maksimum süre 90 sn’dir.
3) Ayarlamanın uygulanması için gerilimin kesilip tekrar verilmesi gerekmektedir.
Güvenli Kullanım ve Kurulum İçin Uyarılar
Aşağıdaki talimatlara uyulmaması halinde yaralanma ve ölümle sonuçlanabilecek durumlar ortaya çıkabilir.
• Cihaz üzerindeki herhangi bir işlemden önce tüm besleme gerilimlerini kesiniz.
• Cihaz şebekeye bağlı iken ön paneli çıkarmayınız.
• Cihazı solvent veya benzeri maddelerle temizlemeyiniz. Cihazı temizlemek için sadece kuru bez kullanınız.
• Cihazı çalışrmadan önce bağlanlarının doğru olduğunu kontrol ediniz.
• Cihazınızdaki herhangi bir sorunda yetkili sacınızla temas kurunuz.
• Cihazı panoya monte ediniz.
Not: Kontak dayanımı omik yükte (ör = Akkor emanlı ampul, Rezistanslı cihazlar) 16A’dir. Endükf (ör = AC motor, oras-
an (Sargılı balaslı), vb..) ya da Kapasif (ör = Led Sürücüler, UPS, orasan(Elektronik Balastlı), vb..) yük anahtarlanacak-
sa kontaktör kullanılması tavsiye edilir. Aksi takrde cihazın röle kontaklarında yapışma meydana gelebilir.
General
DG-10/60 power OFF delay me relays are used in industrial applicaons such as adjusng the operang me of the ven-
laon fans of the bathroom or card-based lightning of the hotel rooms and adjusng the braking me on electric motors.
Ulizaon and Operaon Principle
When operang voltage is applied, the relay contact is closed. The relay starts to get charged and Charge LED illuminates.
When the device gets charged, Charge LED turns o and Ready LED, which shows the device is ready to use, illuminates.
When the relay is in ready and the supply voltage is interrupted, the relay remains ON posion ll at the end of to me.
The relay is closed at end of the adjusted me
NOTE
1) When the “Charge” LED is turned o, the device is ready for usage.
2) The maximum required me for the device to change its posion from Charge to Ready posion is 90 seconds.
3) To apply the new conguraon, supply voltage must be disconnected and applied again.
Precauons for Installaon and Safe Use
Failure to follow those instrucons will result in death or serious injury.
• Disconnect all power before working on equipment.
• When the device is connected to the network, do not remove the front panel.
• Do not try to clean the device with solvent or the like. Only clean the device with a dried cloth.
• Verify correct terminal connecons when wiring.
• Electrical equipment should be serviced only by your competent seller.
• Mount device to panel.
Note: The contact resistance at ohmic load (e.g.: Incandescent bulb, Resistance devices) is 16A. It is recommended to use
a contactor if the inducve load e.g.: AC motor, uorescent, etc.) or capacive load (e.g. : Led Drivers, UPS, Fluorescent
(Electronic Ballast), etc.) switch. Otherwise adhesion may occur in relay contacts.
ZAMAN RÖLELERİ
DG-10 / 60 Düşmede Gecikmeli Zaman Röleleri
TIME RELAYS
DG-10 / 60 Power OFF Delay Time Relays
!!
Yukarıdaki önlemlerin uygulanmaması sonucu doğabilecek istenmeyen durumlardan üreci rma hiç
bir şekilde sorumlu tutulamaz.
No responsibility is assured by the manufacturer or any of its subsidiaries for any consequences arising
out of the use of this material.
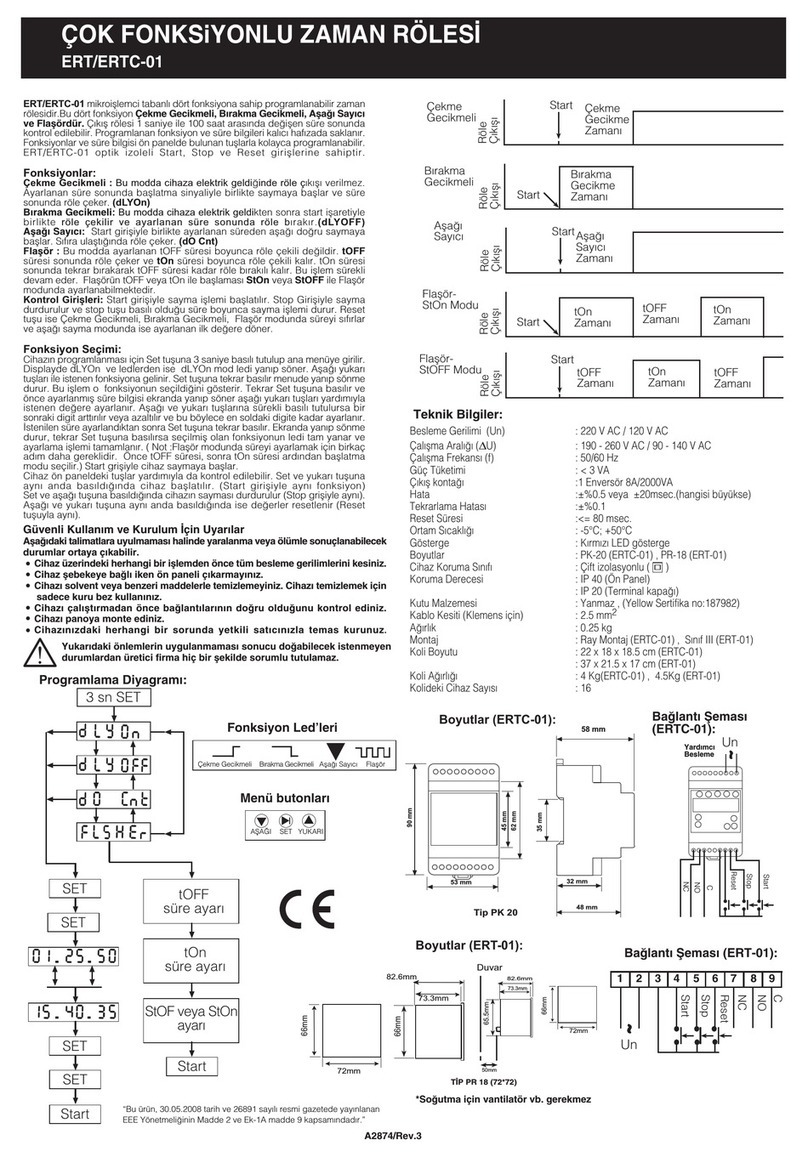
Teknik Bilgi
Işletme Gerilimi (Un)
İşletme Aralığı (U)
İşletme Frekansı
Çıkış Kontakları
Gecikme Zamanı (to)
Ortam Sıcaklığı
Koruma Sını
Boyutlar
Boyutlar
:
:
:
:
:
:
:
:
:
:
220/230 VAC
(0.8- 1.2 ) x Un
50/60 Hz
1 CO, 16 A, 4000 VA
0.6 sn – 10 dk (DG-10)
1 sn – 60 dk (DG-60)
-5 °C / + 50 °C
IP20
Tip PK 28
Pano içine dikey veya
klemens rayına
ON Charge Ready LED Işıklarının Anlamları
Şarj Oluyor
Kullanıma Hazır
: Işık Yanık : Işık Sönük
A1
VAC
A2
220-230
Boyutlar
Bağlan Şeması
to = t1 x t2
Technical Data
Rated Voltage (Un)
Operang Range (U)
Rated Frequency
Output Contacts
Delay Time (to)
Ambient Temperature
Protecon Class
Dimensions
I n s t a l l a o n
:
:
:
:
:
:
:
:
:
:
220/230 VAC
(0.8- 1.2 ) x Un
50/60 Hz
1 CO, 16 A, 4000 VA
0.6 sec – 10 min (DG-10)
1 sec – 60 min (DG-60)
-5 °C / + 50 °C
IP20
Type PK 28
Surface mounng or on the
mounng rails
A1
VAC
A2
220-230
TYPE
ON Charge Ready Meanings of LEDs
Charging
Ready to use
: LED is ON : LED is OFF
Dimensions
Connecon Diagram
to = t1 x t2

A4747/Rev.5
01.01.2020
ZEITRELAIS
DG-10/60 Abschaltung Verzögern Zeitrelais
Allgemein
Die Abschaltung verzögern zeitrelais DG-10/60 werden in Industrieanwendungen, bspw. bei Anpassung der Betriebszeit
von Venlatoren in Badezimmern, zimmerkartenbasierter Beleuchtung von Hotelräumen oder bei der Einstellung der
Bremszeit von Elektromotoren verwendet.
Anwendung und Betriebsprinzip
Wenn Betriebsspannung anliegt, ist der Relaiskontakt geschlossen. Das Relais wird aufgeladen und die Lade-LED leuchtet.
Wenn das Gerät aufgeladen wird, schaltet sich die Lade-LED aus und die Bereit-LED leuchtet auf, was anzeigt, dass das
Gerät einsatzbereit ist. Wenn das Relais bereit ist und die Versorgungsspannung unterbrochen wird, bleibt das Relais bis
zum Ende der to-Zeit in der Ein-Posion. Das Relais schl ießt nach Ablauf der Einstellzeit.
HINWEIS
1) Wenn die „Charge“-LED erloschen ist, ist das Gerät einsatzbereit.
2) Die maximale Zeit, die das Gerät benögt, um seine Posion von Lade- auf Bereitposion zu ändern, beträgt 90
Sekunden.
3) Zur Anwendung der neuen Konguraon muss die Versorgungsspannung unterbrochen und dann erneut angeschlos-
sen werden.
Warnhinweise zu Installaon und Sicherer Benutzung
Bei Nichtbeachtung dieser Anweisungen drohen ernsthae oder sogar tödliche Verletzungen.
• Trennen Sie die gesamte Stromversorgung vor Arbeiten am Gerät
• Während das Gerät mit dem Netzwerk verbunden ist, dürfen Sie die Frontplae nicht enernen.
• Versuchen Sie nich, das Gerät mit Lösungsmiel oder dergleichen zu reinigen. Reinigen Sie das Gerät nur mit einem
weichen Tuch.
• Achten Sie beim Anschlieβen auf die Ausführung korrekter Verbindungen.
• Elektrische Geräte sollten nur vom jeweiligen Händler gewartet werden.
• Moneren Sie das Gerät auf die Hutschiene in der Schalafel.
Hinweis: Der Kontaktwiderstand bei ohmscher Last (z. B. Glühlampe, Widerstände) beträgt 16A. Sie sollten einen
Schütz verwenden, wenn die indukve Last (z. B. Wechselstrommotor, Leuchtstoampe usw.) oder kapazive Last (z.
B. LED-Treiber, USV, Leuchtstoampe (elektronisches Vorschalgerät) usw.) wechselt. Andernfalls kann eine Adhäsion in
Relaiskontakten aureten.
!Der Hersteller und seine Vertriebspartner übernehmen keinerlei Haung für Vorfälle jeglicher Art in
Zusammenhang mit diesem Material.
Technische Daten
Betriebsspannung (Un)
B e t r i e b s b e r e i c h ( U )
B e t r i e b sf r e q u e n z
A u s g a n g s ko n t a k t e
Verzögerungszeit (t
o
)
Umgebungstemperatur
Schutzklasse
Ab m e s sung e n
I n s t a l l a o n
:
:
:
:
:
:
:
:
:
:
220/230 VAC
(0.8- 1.2 ) x Un
50/60 Hz
1 Wechsler , 16 A, 4000 VA
0.6 s – 10 min (DG-10)
1 s – 6 0 m i n ( D G - 6 0 )
5 bis +50 °C
IP20
Typ PK 28
Oberächenmontage oder
a n M o n t a g e s c h i e n e n
A1
VAC
A2
220-230
TYP
ON Charge Ready Meanings of LEDs
Charging
Ready to use
: LED ist eingeschaltet : LED ist ausgeschaltet
Abmessungen
Anschlussdiagram
to = t1 x t2
ENTES Elektronik Cihazlar Imalat ve Ticaret A.S.
Adr : Dudullu OSB, 1. Cadde, No:23, 34776
Umraniye- Istanbul / TURKEY
Tel : +90 (216) 313 01 10 Fax : +90 (216) 314 16 15
E-mail : ile[email protected].tr - contact@entes.eu
Web : www.entes.com.tr - www.entes.eu
Other Entes Relay manuals
Popular Relay manuals by other brands

Pontec
Pontec PondoSwitch operating instructions

Schweitzer Engineering Laboratories
Schweitzer Engineering Laboratories SEL-421-4 instruction manual

Deditec
Deditec MOD-REL8 10A Hardware description

Sel
Sel SEL-300G Quick start installation guide
MULTISPAN
MULTISPAN MI-632-24 instruction manual

Federal Signal Corporation
Federal Signal Corporation 300TAR instruction sheet
