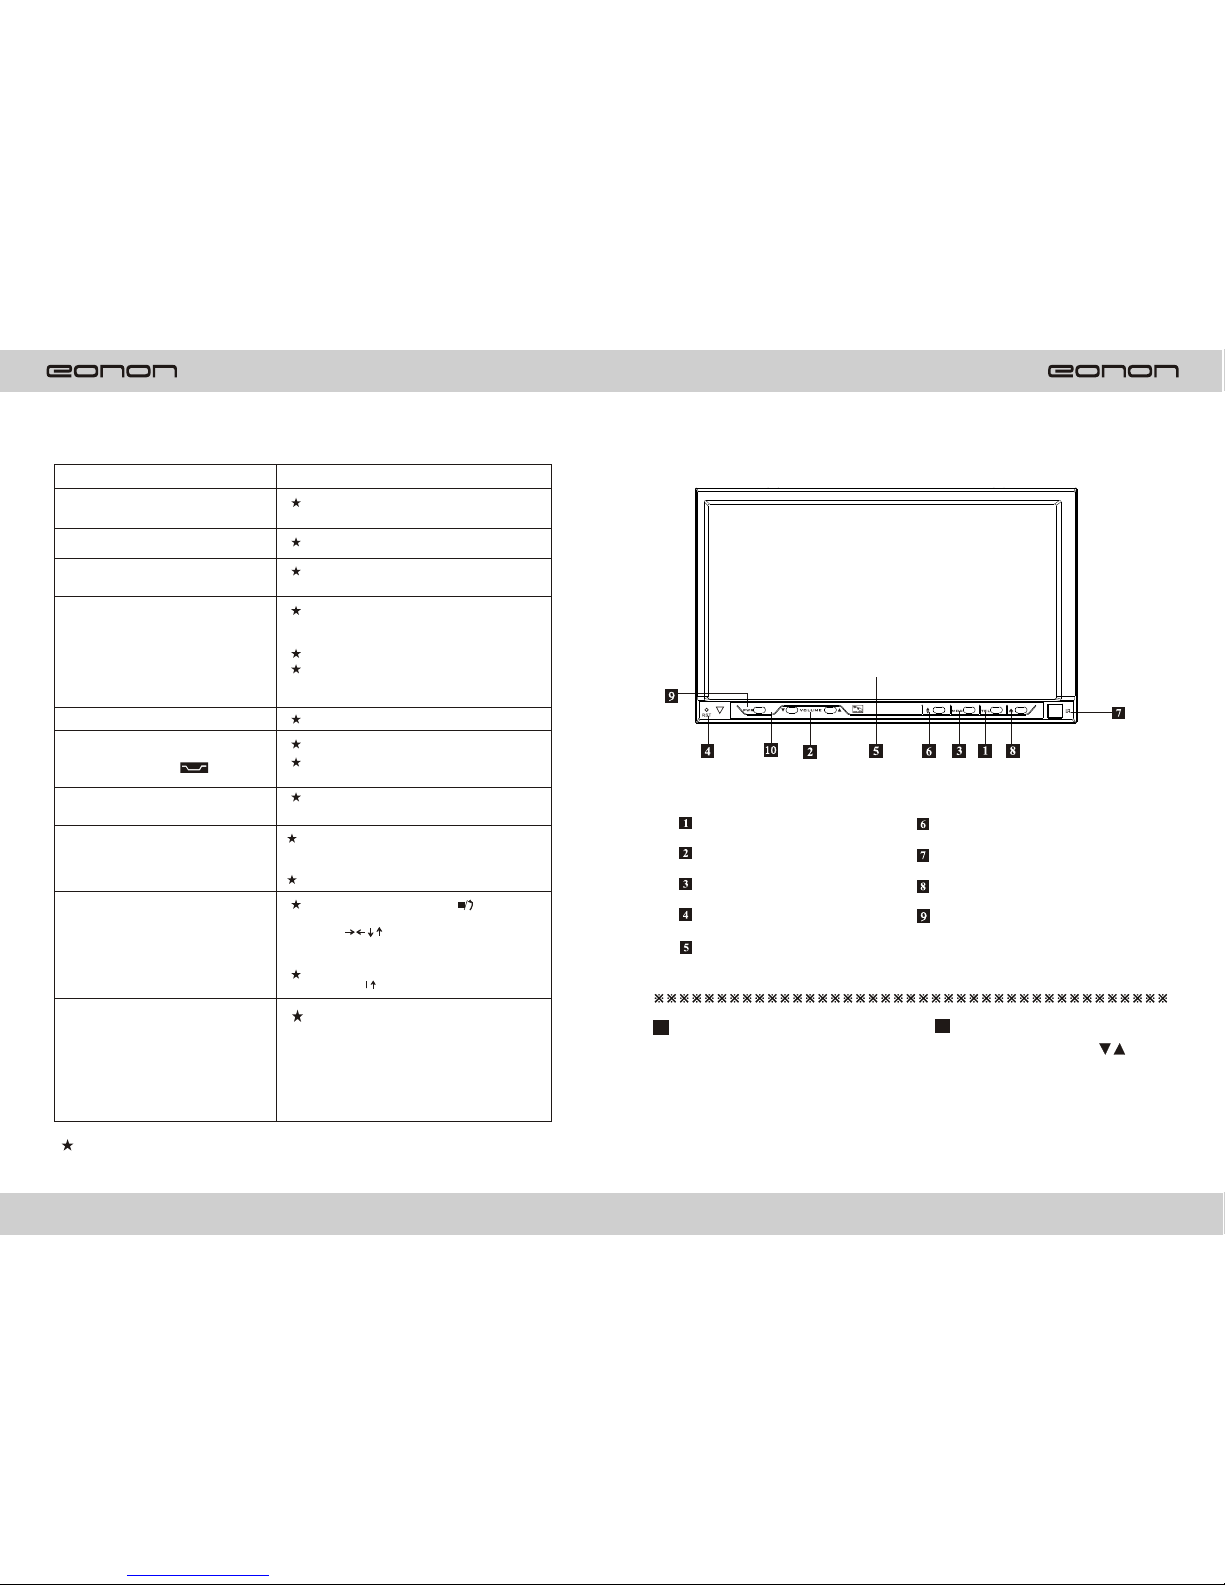
Panel illustration
Mode button
Press it to select source in the
following order:
Reset button
Operating the unitfor the first time or
after replacing thecar battery, you
must reset theunit. Press this button
with a pointedobject (such as a
ballpoint pen) toset the unit to initial
status.
Note: When errorsoccur on the LCD
display ,you canalso press RESET
button to clearthe error, It will erase
the clock settingand some
memorized functions.
Touch screen
Press any place on the touch screen,
the corresponding touch menu will
display on the screen under different
Mode, pleas refer to corresponding
Chapter below for operation in
details.
Angle button
Press it toadjust the angle of the front
panel, and thereare totally four
angles optional.
Remote control sensor
Sensor for the card remote commander.
(For remote control version only)
Note: This window is used with remote
control function. Without this
function,you should ignore the
operation contents aboutremote
control function.
Eject button
A. When there isno disc in the unit,
press it andthe front panel will
flip down toshown the disc slit in
the main unit,Insert the discinto
the CD slot,and the mechanism
wills automatically playback the
Disc.
B. When there isa disc in the unit,
press it, the front panel will
automatically flip downand eject
the disc, ifyou don t take the
disc away within 5 seconds, the
mechanism will automatically slot
in the disc,lock the front panel and
select radio mode.
Power button
A. Under sleepingmode, press it to
turn the unit on, and the unit will
automatically select radio mode.
B. Under workingmode, press it to
turn the unit off .
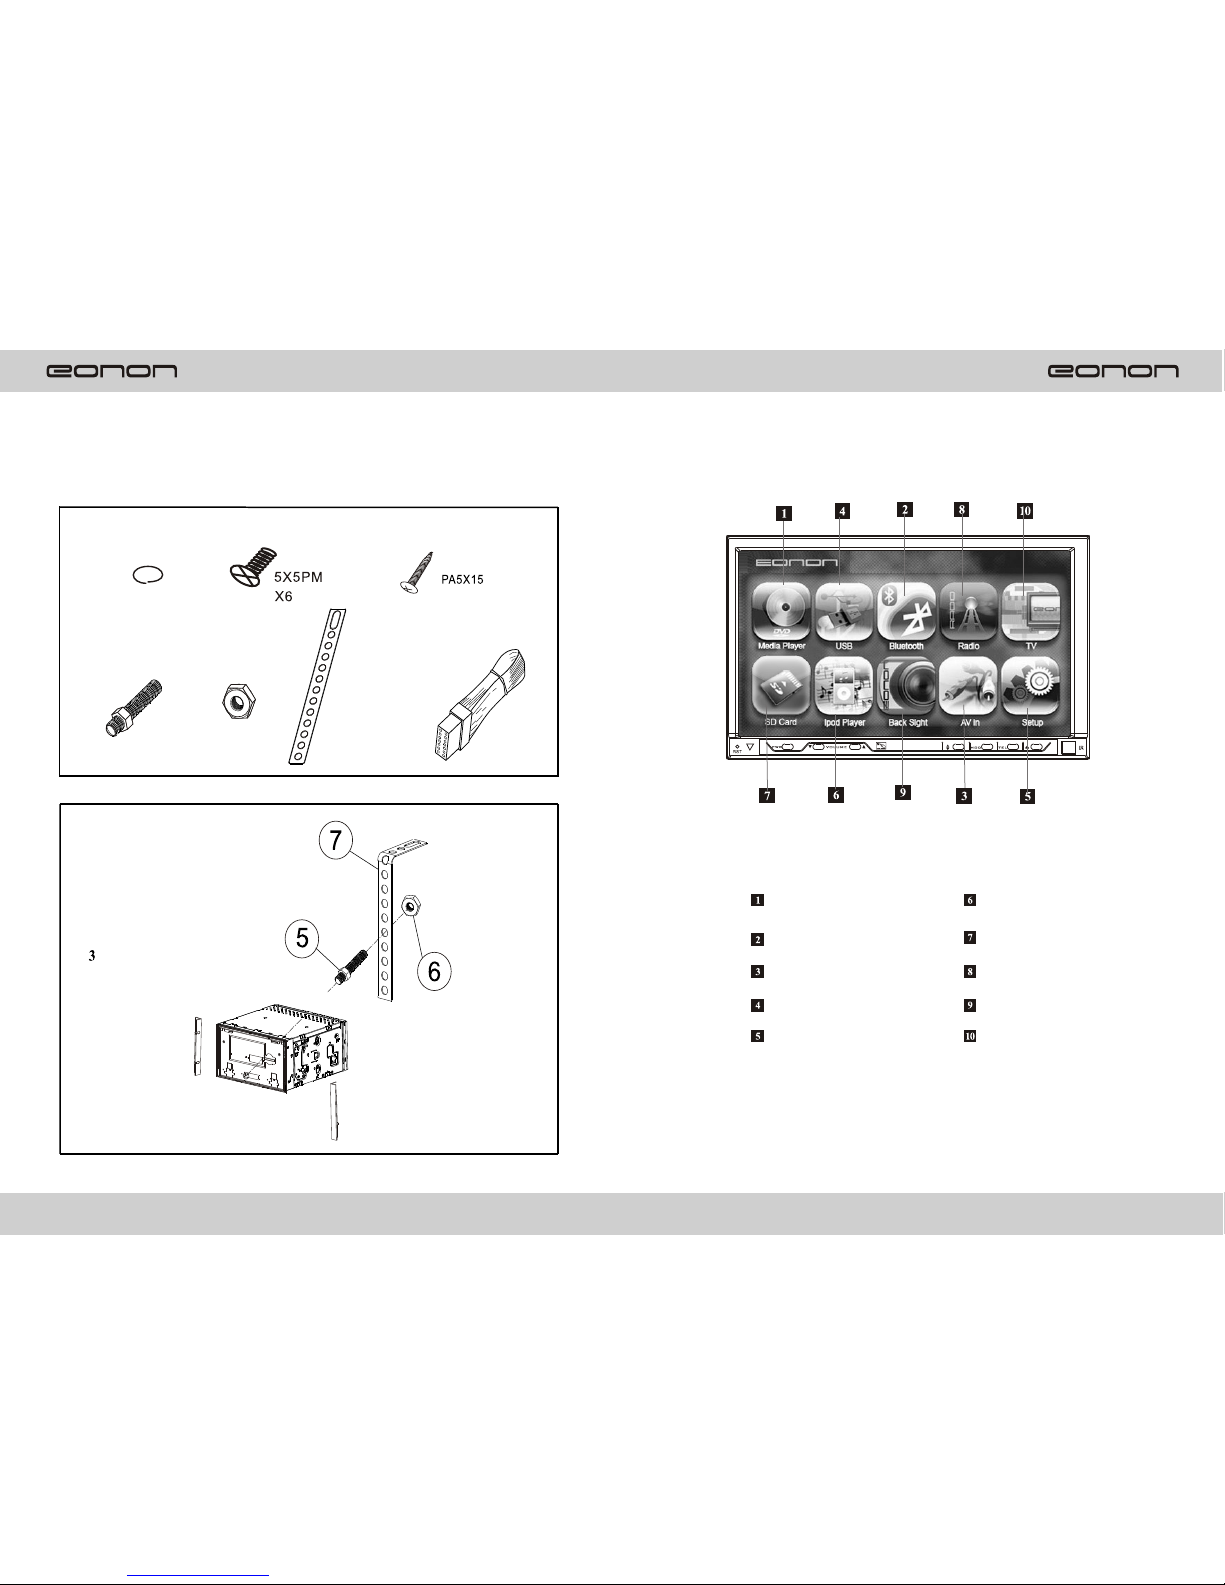
INSTALLATION
Mounting Example
Installing the front panel
Detaching the front panel
Precautions
This mounting methodis used for Japanese cars.
The actual mountingmethod should depend on
the types ofthe cars.
Notes: 1.Store smallarticles that are not accessible
to children.
2.Install only withthe supplied screws.
3.Installation varies dependingon the
type of cars and unit installed by
qualified technician.
Bracket
Existing parts supplied
with your car
Be sure topress before
detaching the frontpanel. To
detach panel, pressthe latch
shown n theleft.
Do not touchthe front panel connection
on the unitbody, sincethis may result in poor
electrical contact. Ifdirt or dust get on the
contacts, wipe themwith c clean ,dry cloth.
25
4