manuals.online logo
Brands
  1. Home
  2. •
  3. Brands
  4. •
  5. Ercol
  6. •
  7. Indoor Furnishing
  8. •
  9. Ercol Teramo 2687 User manual

Ercol Teramo 2687 User manual

ercol
Thank you for purchasing this teramo 3 door wardrobe. Please read the instructions carefully before use to en-
sure safe and satisfactory operation of this product.
Pre-assembly preparation
Please ensure instructions are read in full before attempting to assemble this product
Necessary Tools
This item is HEAVY
Please check the pack contents before attempting to assemble this product. A full checklist of components
is given in this leaflet. If any components are missing, please contact the retailer from whom you bought
this product.
This product is HEAVY, it should be assembled as near as possible to the point of use. TAKE CARE
WHEN LIFTING to avoid personal injury and (or) damage to the product.
This product takes approximately 40 MINUTES to assemble with 2 PEOPLE.
The fittings pack contains SMALL ITEMS which should be KEPT AWAY FROM YOUNG
CHILDREN.
teramo 2687 3 door wardrobe
Fittings and parts checklist
A
Top panel x 1
J
L/R hanging rails x 2
B
LH side panel x 1
K
Middle hanging rail x 1
C
RH side panel x 1
L & M
Allen bolts x 22
Allen key x 1
D
Left & Right doors x 2
N
30mm Screws x 2
E
Bottom panel x 1
O
16mm round head
Screws x 40
F
Support leg x 1
P
Shelf pins x 8
G
Middle section x 1
Q
16mm screws x 8
H
Back panels x 2
R
Brackets x 2
Strap x 1
I
Shelves x 2
S
Wedges x 2
Step by step assembly instructions
1. First turn the support leg F onto the bottom of panel E as shown below.
2. Using 6 of the allen bolts attach the side panels B & C to the bottom panel E.
3. Take the two drawers out of the middle section, G.
4. Using 6 of the allen key bolts L attach the middle section to the base of the wardrobe (E) as shown.
5. Using 10 allen bolts, L, fix the top panel to the the wardrobe as shown.
6. Using 40 of the 16mm round head screws O, attach the two back panels H onto the back of the
wardrobe.
7. Using the 2x 30mm screws, N, attach the top panel to the sides through the pre drilled holes inside
the wardrobe.Attach the bottom of the middle section to the bottom of the wardrobe as shown below.
Then attach the L/R doors onto their hinges.
8. Sit the hanging rails J and K into their brackets in the wardrobe. Put the drawers back into the middle
section. Choose where you would like the two shelves to sit and put the 8 shelf hooks into the pre
drilled holes accordingly, as shown. Rest the shelves on the hooks and using the 16mm screws, Q, screw
them up through the shelf hooks and into the bottom of the shelves to hold them securely in place.
Attach the door panels onto the side panels as shown below.
Wall fixing - if in doubt seek professional advice
Wood
If fixing to wood
make sure that it
isn’t chipboard as
screws can easily pull
away from the core
structure
Brick or Masonry
Use an appropriate
wall plug provided you
are sure your wall is
sound
Cavity wall
Special toggle
wall plugs are
needed. Seek
expert advice
9. Screw one of the brackets onto the top of the wardrobe in the middle of the back, see below.
Position the wardrobe against the wall where you want it to go, place the second bracket
onto the wall above the one fixed to the wardrobe and mark where the hole come on the wall. Move
the wardrobe away from the wall.
10. Attach the wall bracket using screws suitable for your type of wall, see Wall fixings above.
11. Place the wardrobe back against the wall so the two brackets match up and tie them together with
the plastic strap provided. The plates need not match exactly, but the plastic tie must go through
each plate. Close the strap, but do not over tighten it. See diagrams below.
12. If the wardrobe is not level on your floor, use the wedges provided. Snap them off so they do not
protrude out from the wardrobes legs. You can also snap them lengthways.
13. Check that the doors are aligned correctly. If necessary adjust the door hinges as shown below
PLEASE KEEP THESE INSTRUCTIONS FOR FUTURE REFERENCE
Ercol Furniture Ltd, Summerleys Road, Princes Risborough, Buckinghamshire. HP27 9PX www.ercol.com

Other Ercol Indoor Furnishing manuals

Ercol Teramo 2686 User manual

Ercol

Ercol Teramo 2686 User manual

Ercol Novoli 4358 User manual

Ercol

Ercol Novoli 4358 User manual

Ercol Siena 4530 User manual

Ercol

Ercol Siena 4530 User manual

Ercol HARTWELL 2 DOOR WARDROBE User manual

Ercol

Ercol HARTWELL 2 DOOR WARDROBE User manual

Ercol Teramo 2610 User manual

Ercol

Ercol Teramo 2610 User manual
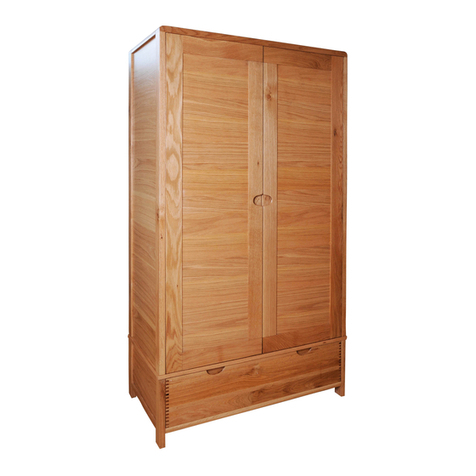
Ercol Ballatta Desk 2202 User manual

Ercol

Ercol Ballatta Desk 2202 User manual

Ercol Shalstone User manual

Ercol

Ercol Shalstone User manual

Ercol MONDELLO 1870 User manual

Ercol

Ercol MONDELLO 1870 User manual

Ercol Capena 3573 User manual

Ercol

Ercol Capena 3573 User manual

Ercol Ella Small Extending Dining Table 4240 User manual

Ercol

Ercol Ella Small Extending Dining Table 4240 User manual

Ercol Bosco 1380 User manual

Ercol

Ercol Bosco 1380 User manual

Ercol Novoli 4350 User manual

Ercol

Ercol Novoli 4350 User manual

Ercol Rimini 3280 User manual

Ercol

Ercol Rimini 3280 User manual

Ercol Pero 2360 User manual

Ercol

Ercol Pero 2360 User manual
Ercol Monza 4061 User manual

Ercol

Ercol Monza 4061 User manual

Ercol Cantilever 2645 User manual

Ercol

Ercol Cantilever 2645 User manual

Ercol Salina 3890 User manual

Ercol

Ercol Salina 3890 User manual

Ercol TREVISO DESK 2334 User manual

Ercol

Ercol TREVISO DESK 2334 User manual

Ercol Teramo 2680 User manual

Ercol

Ercol Teramo 2680 User manual

Ercol Novoli 4354 User manual

Ercol

Ercol Novoli 4354 User manual

Ercol Rimini 3286 User manual

Ercol

Ercol Rimini 3286 User manual

Ercol Siena 4532 User manual

Ercol

Ercol Siena 4532 User manual

Ercol BALLATTA 2205 User manual

Ercol

Ercol BALLATTA 2205 User manual

Ercol Teramo 3661 User manual

Ercol

Ercol Teramo 3661 User manual

Popular Indoor Furnishing manuals by other brands

SEI CK1173203 Assembly

SEI

SEI CK1173203 Assembly

Forte MLKK311 Assembling Instruction

Forte

Forte MLKK311 Assembling Instruction

DURAVIT LM 7846 Mounting instructions

DURAVIT

DURAVIT LM 7846 Mounting instructions

fantastic furniture COMO Assembly instructions

fantastic furniture

fantastic furniture COMO Assembly instructions

Lightolier Lighting Systems Silhouette SE Specification sheet

Lightolier

Lightolier Lighting Systems Silhouette SE Specification sheet

Whittier Wood 3496AFGAC Assembly instructions

Whittier Wood

Whittier Wood 3496AFGAC Assembly instructions

GALA MEBLE VISBY S2D2S Assembly manual

GALA MEBLE

GALA MEBLE VISBY S2D2S Assembly manual

IKEA MAGEBO manual

IKEA

IKEA MAGEBO manual

Knight Eko Cupboard 900H Assembly instructions

Knight

Knight Eko Cupboard 900H Assembly instructions

Winners Only GA166F Assembly instructions

Winners Only

Winners Only GA166F Assembly instructions

Forma Ideale UNIVERSAL 2K1F Assembling Instruction

Forma Ideale

Forma Ideale UNIVERSAL 2K1F Assembling Instruction

Office Star Products AVE-SIX CURVES CVS51 manual

Office Star Products

Office Star Products AVE-SIX CURVES CVS51 manual

VEDUM 508918 manual

VEDUM

VEDUM 508918 manual

Keter plus shelf 80/5 Assembly instructions

Keter

Keter plus shelf 80/5 Assembly instructions

U-Line H-8343 Assembly

U-Line

U-Line H-8343 Assembly

Bestar 120160-1117 quick start guide

Bestar

Bestar 120160-1117 quick start guide

Lightolier Lighting Systems A-10 Specification sheet

Lightolier

Lightolier Lighting Systems A-10 Specification sheet

Soho SD07 Assembly instructions

Soho

Soho SD07 Assembly instructions

manuals.online logo
manuals.online logoBrands
  • About & Mission
  • Contact us
  • Privacy Policy
  • Terms and Conditions

Copyright 2025 Manuals.Online. All Rights Reserved.