ODYSSEY OWNER’S MANUALODYSSEY OWNER’S MANUAL
8 9
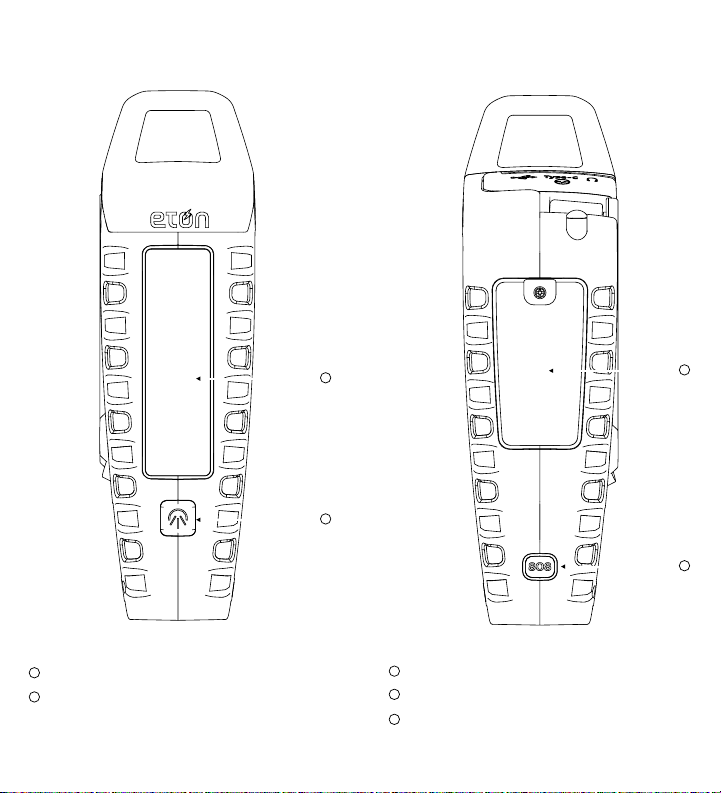
LED Light and SOS Beacon
Power Lock ON/OFF Switch
USB-A OUT for phone Charging
USB-C input Charging
Headphone Jack
16
17
18
15
19
16
17 18
15
19
NOTE: Radio performance may be degraded while
using the USB input or output charging feature.
The audio from weak radio stations may no longer
come in clearly.
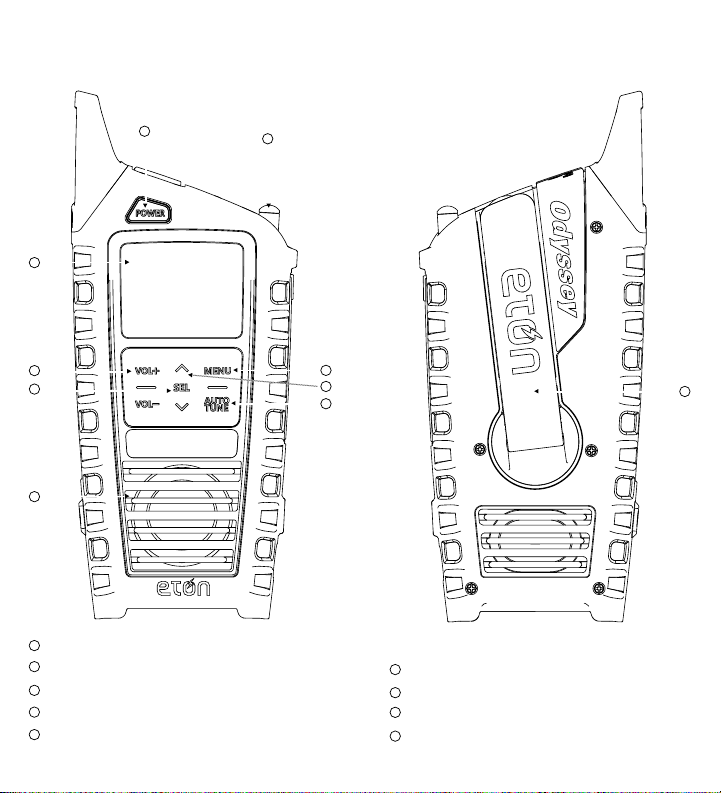
POWERING DEVICE
1. Open the rubber tab on top of the device and
slide switch to turn the on position. On initial
usage, crank the handle to wake up the device.
2. Press the POWER button to turn on/off device.
When powering off device, the display will show
the time in standby mode.
3. When storing or stowing the device, turn the
switch off to shut down all power to the device.
SELECTING RADIO BAND
1. With Radio On, press MENU to switch between
FM /AM / SW / WB /ALERT / Bluetooth
2. Press or to select the station, long press for
auto searching.
3. Press AUTO TUNE for auto searching, press
again within 3 seconds for current station.
4. To automatically have stations stored. Press
AUTO TUNE for auto searching from FM 76 to
108, this will automatically store the stations as
P01, P02, P03 and so on (20 total slots). After the
fully automatic searching is done, press the SEL
button to select between the stored stations
one by one. Once the stations are programed, you
cannot delete them as the radio frequencies are
automatically stored.
NOTE: If you are traveling to a different
geographic location, your radio frequencies
WILL NOT be the same. To override your current
stored radio frequency, repeat #4 and this will
automatically overwrite the store stations to the
new frequencies in the area where you are located.
SETTING WEATHER BAND ALERT
Press and toggle the MENU button to switch to
WB mode, tune to WB for your location. Press and
toggle the MENU button to the ALERT mode.
‘Alert’ will appear in the display and the audio will
turn off. The radio will continue to monitor your
WB station and will activate the audio if an alert
is issued. Press and toggle the MENU button or
POWER button to turn off the Alert.
NOTE: NOAA does a test alert every Wednesday
between 10 am and noon, regardless of your
location.