Troubleshooting
Problems Solutions
RoboVac cannot be
activated.
•Make sure the main power switch is in the ON position.
•Make sure the battery is fully charged.
•Replace the batteries (2 AAA) in the remote control.
•Make sure the remote control is within range (16 ft/5 m) of
RoboVac.
•If you still have trouble, turn o the main power switch and
then turn it back on.
The remote control
does not work.
•Replace the batteries in the remote control.
•Make sure RoboVac is turned on and fully charged.
RoboVac stops
working suddenly.
•Check if RoboVac is trapped or stuck on an obstacle.
•Check if the battery level is too low.
•If you still have trouble, turn o the main power switch, wait
for 2 seconds, and then turn it back on.
You cannot schedule
cleanings.
•Make sure the main power switch on the bottom of RoboVac
is turned on.
•You can set the time of day and scheduled cleaning time via
the EufyHome app.
•Make sure the scheduled time has been set correctly.
•Check if RoboVac’s power is too low to start cleaning.
•Cleaning schedules are erased when RoboVac is powered o.
If RoboVac is powered on without Internet access, cleaning
schedules will not synchronize and must be reset via the app.
Suction power is
weak.
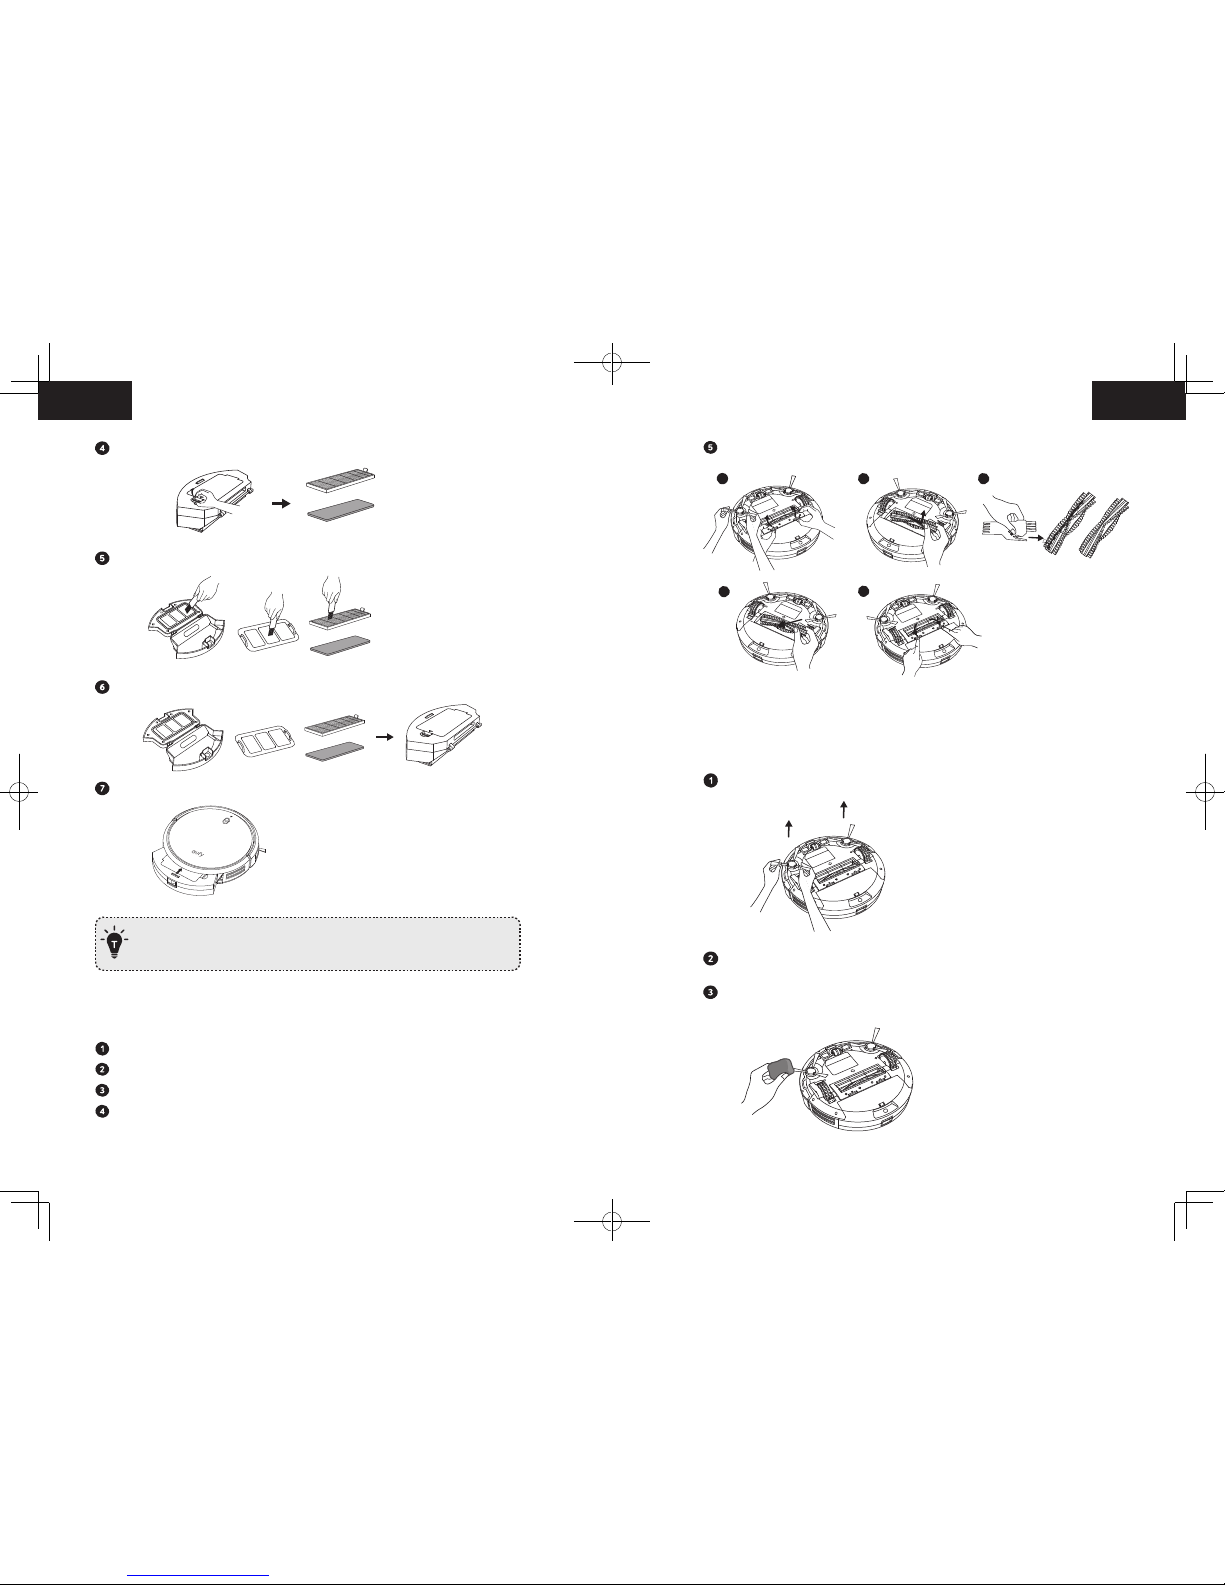
•Check if any obstructions are blocking the suction inlet.
•Empty the dust collector.
•Clean the filters with a vacuum cleaner or a cleaning brush.
•Check if the filters are wet due to water or other liquid on the
floor. Air-dry the filters completely before use.
RoboVac cannot be
charged.
•Check if the indicator on the Charging Base lights up. If
not, contact the eufy service center to repair or replace the
Charging Base.
•Dust o the charging contact pins with a dry cloth.
•Check if you can hear a beep when RoboVac is docked onto
the Charging Base. If not, contact the eufy service center to
repair or replace the Charging Base.
RoboVac cannot
return to the
Charging Base
.
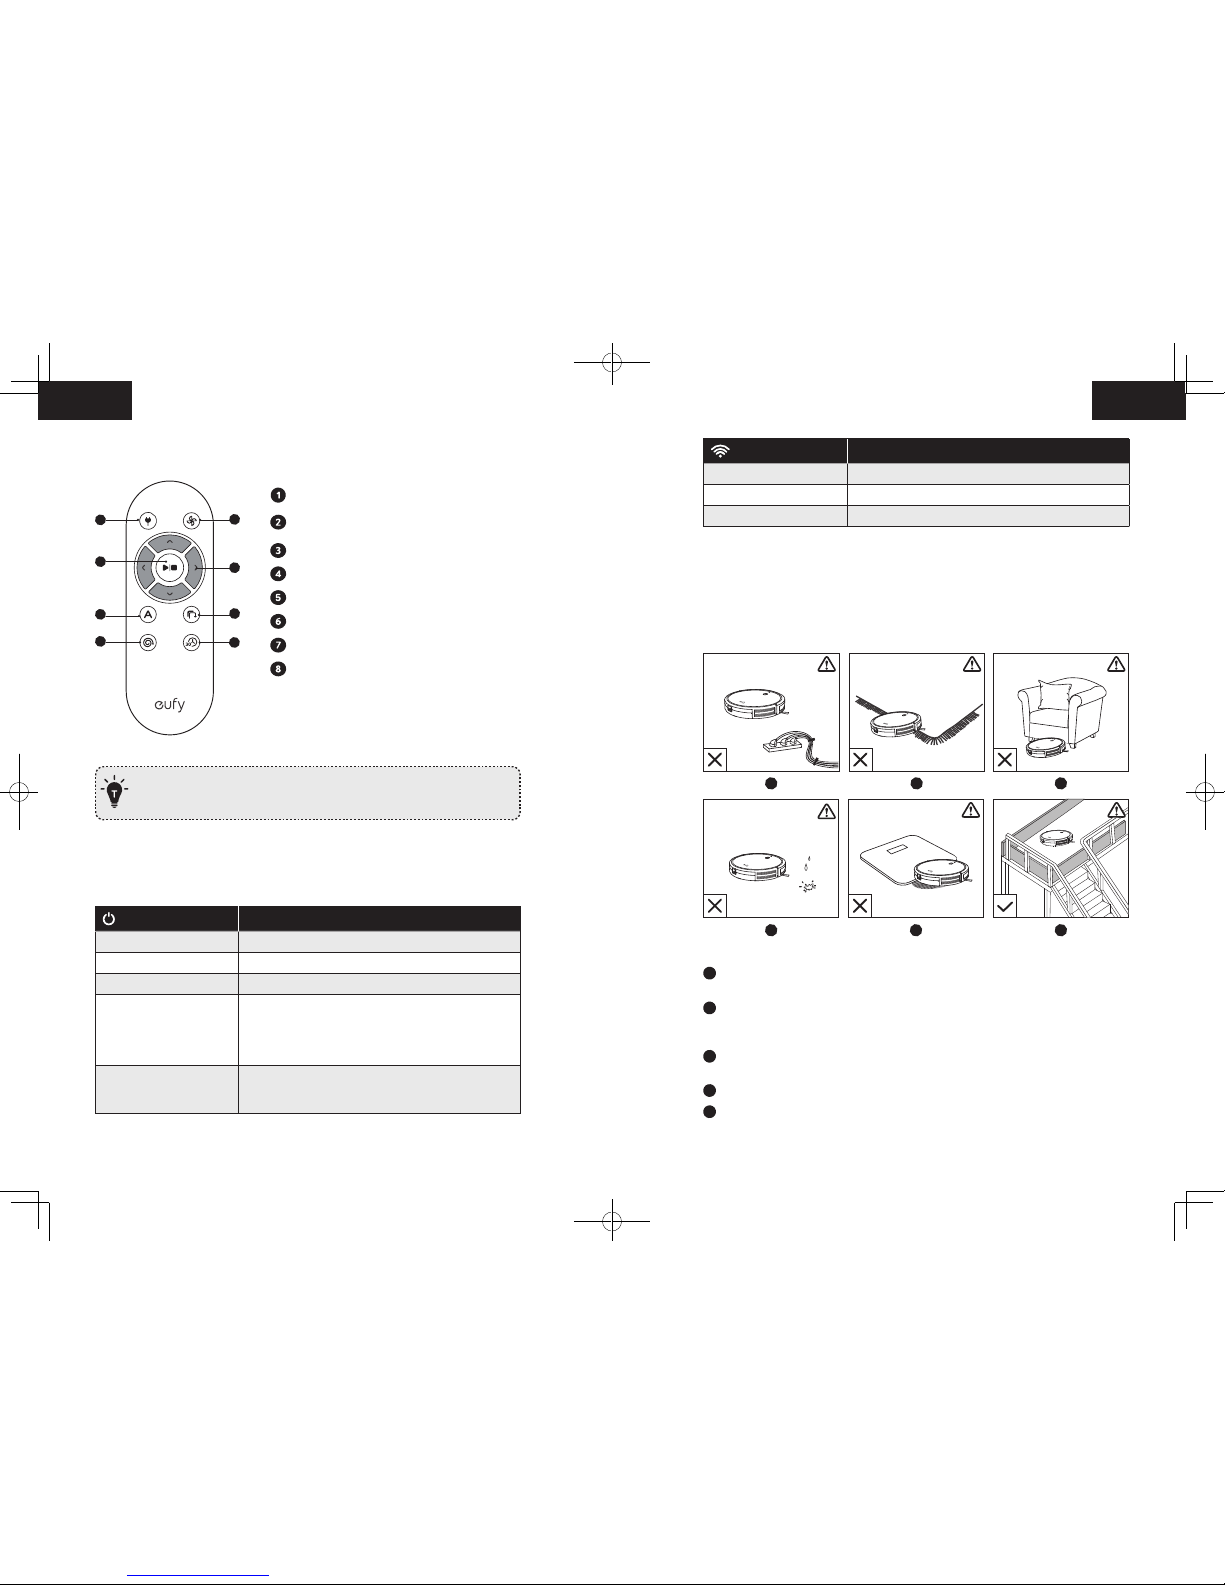
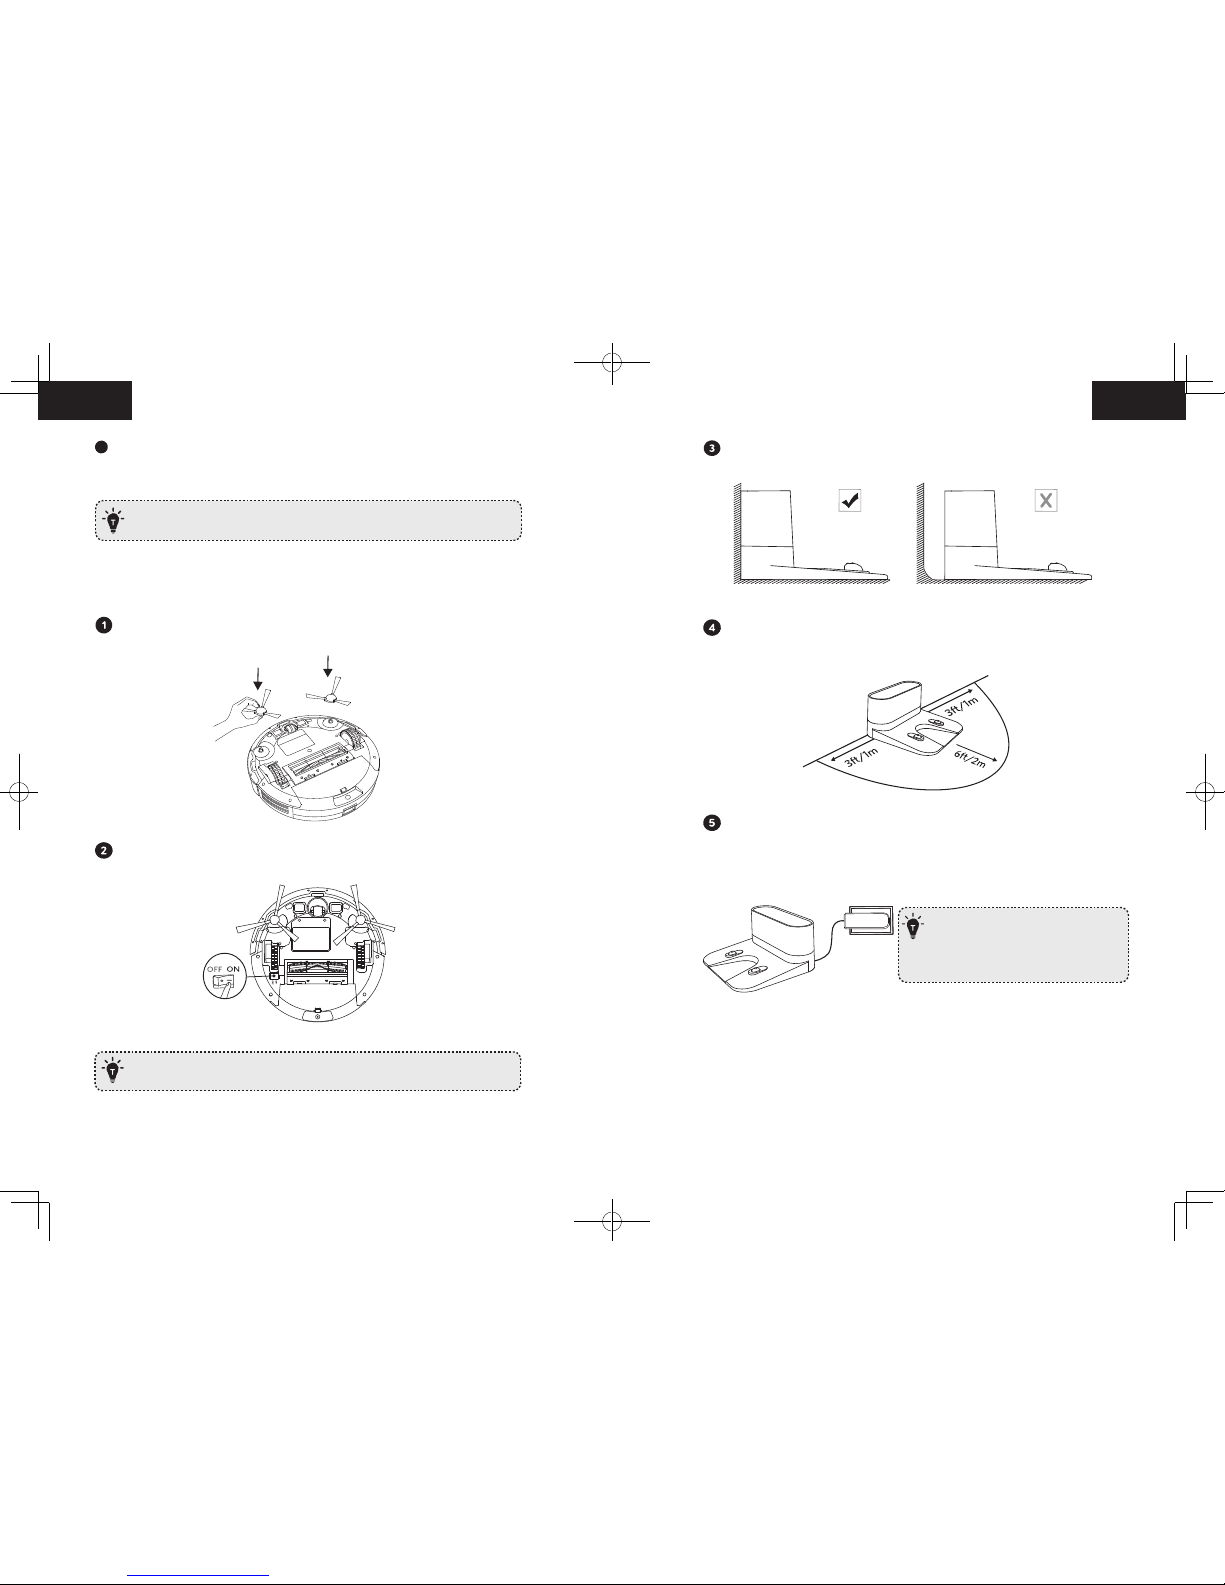
•Remove objects within 3 ft/1 m to the left and right side and
within 6 ft/2 m of the front of the Charging Base.
•When RoboVac is in the vicinity of the Charging Base, it will
return more quickly. However, if the Charging Base is located
far away, RoboVac will need more time to return. Please be
patient as it works its way back.
•Clean the charging contact pins.
Problems Solutions
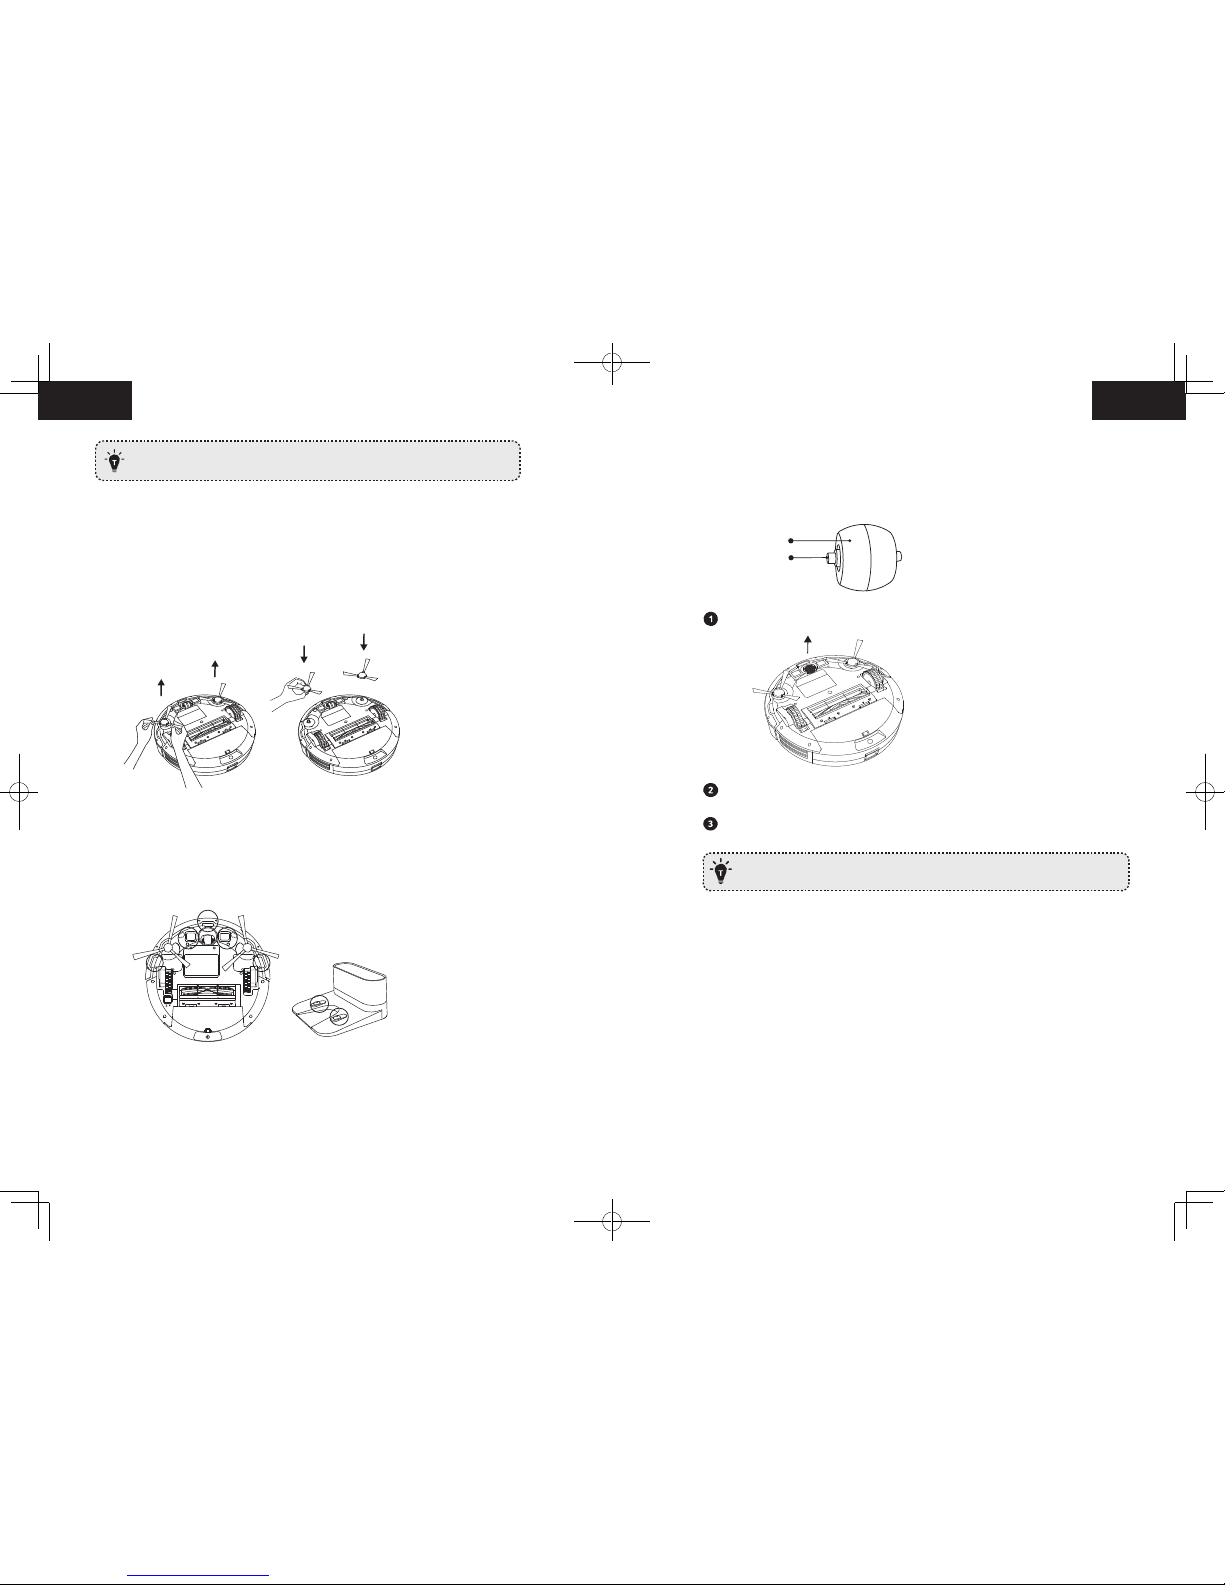
The rolling brush
does not rotate.
•Clean the rolling brush.
•Check if the rolling brush and brush guard have been installed
properly.
RoboVac’s
movements or travel
path are abnormal.
•Clean the sensors carefully with a dry cloth.
•Restart RoboVac by turning the power switch o and on.
RoboVac cannot
connect to a Wi-Fi
network.
•Make sure your Wi-Fi router supports the 2.4GHz and
802.11b/g/n bands; the 5GHz band is not supported. For
details, refer to the “Troubleshooting > Wi-Fi connection”
section in this manual.
You cannot control
RoboVac with
Amazon Alexa.
•Check if there are any Internet connection problems.
•Check whether you have installed the Amazon Alexa app
onto your smart device and enabled “EufyHome - RoboVac”
Skill in the Amazon Alexa app. For details, refer to the “Use
Your RoboVac with Amazon Alexa / the Google Assistant”
section in this manual.
•Make sure you have an EufyHome account.
•Make sure you are using correct Alexa voice-commands.
•The “EufyHome - RoboVac” Skill for Alexa is currently only
available in English.
You cannot control
RoboVac with the
Google Assistant.
•Check if there are any Internet connection problems.
•Check if you have installed the Google Home app onto your
smart device and initiated the “EufyHome” action in the
Google Home app. For details, refer to the “Use Your RoboVac
with Amazon Alexa / the Google Assistant” section in this
manual.
•Check if you are using the proper commands when talking to
the Google Assistant. When making your request, first say the
wake words “Ok Google”.
•Repeat your question. Speak clearly to the Google Assistant.
Error Tones
When RoboVac is in trouble, it will emit a series of short or long beeps and the red indicator
on RoboVac will be solid or flashing.
Flashing red indicator light
Error Tone Cause Solution
One beep
•RoboVac is stuck and one of the
wheels is not making contact with
the floor (hanging in mid-air).
•RoboVac may be in an extremely
large room and the bumper is not
registering obstacles.
Restart cleaning in a new location.
Two beeps RoboVac’s bumper is stuck. Tap RoboVac’s bumper several times
to dislodge any debris that may be
trapped underneath.


 User manual")


