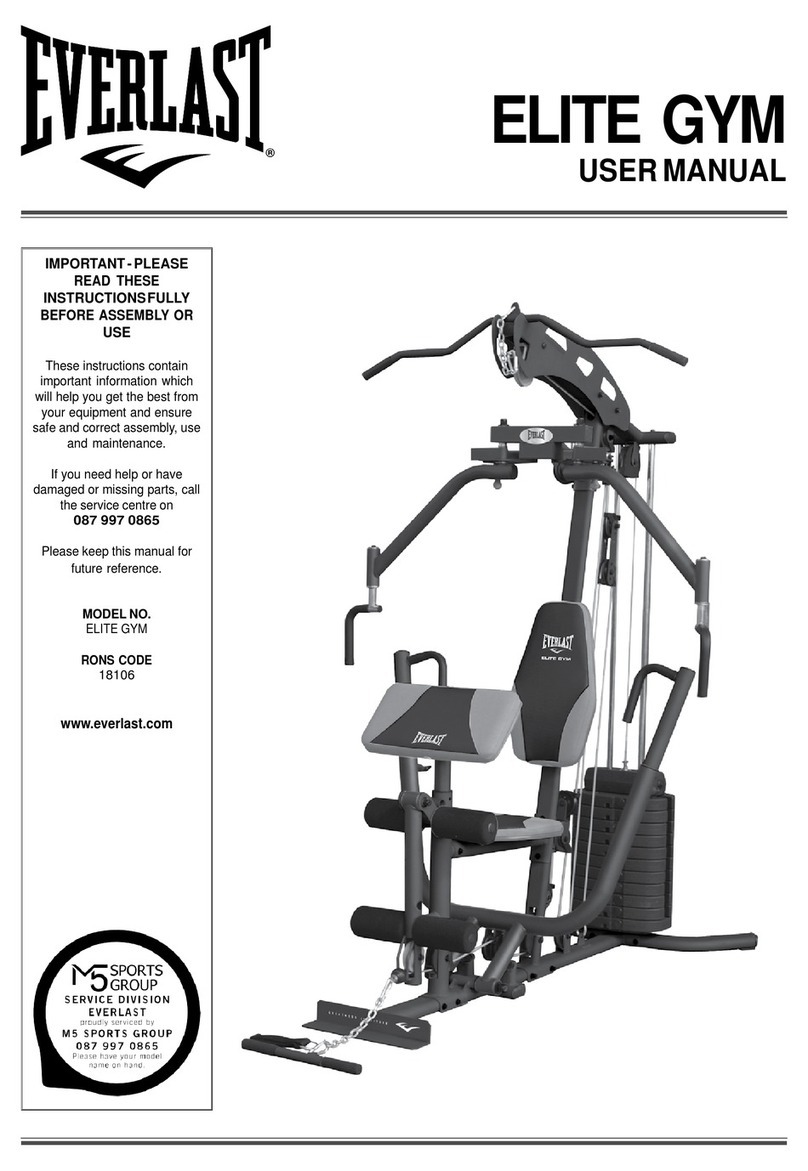
Everlast IRON MAN COMBO User manual

IMPORTANT - PLEASE
READ THESE
INSTRUCTIONS FULLY
BEFORE ASSEMBLY OR
USE
These instructions contain
important information which
will help you get the best from
your equipment and ensure
safe and correct assembly, use
and maintenance.
If you need help or have
damaged or missing parts, call
the service centre on
087 997 0865
Please keep this manual for
future reference.
MODEL NO.
IRON MAN COMBO
RONS CODE
18101
www.everlast.com
IRON MAN COMBO
USER MANUAL

2
For queries or additional product information, please call our Service Centre on:
087 997 0865
Please have your model name on hand.
www.everlast.com
TABLE OF CONTENTS
SAFETY INFORMATION 3
COMPONENTS PARTS 4-5
ASSEMBLY INSTRUCTIONS 6-10
EXERCISING INFORMATION 11-13
PRE AND POST STRETCHING EXERCISES 14-15
EXPLODED VIEW 16
PARTS LIST 17
SERVICE WARRANTY 18
SPECIFICATIONS FOR IRON MAN COMBO
EXERCISE FUNCTION Barbell bench press, Leg extension, Leg elevated press
EXERCISE PART Chest, Arms, Abdominal, and Leg
PRODUCT SIZE L 1487 X W 1300 X H 1017 mm
MAXIMUM USER WEIGHT 90 kgs
LOADING WEIGHT 50 kgs

3
For queries or additional product information, please call our Service Centre on:
087 997 0865
Please have your model name on hand.
www.everlast.com
SAFETY INFORMATION
ASSEMBLY
• Check you have all the components and tools listed,
bearing in mind that, for ease of assembly, some
components are pre-assembled.
• Keep children and animals away from the work
area, small parts could choke if swallowed.
• Make sure you have enough space to layout the
parts before starting.
• Assemble the item as close to its final position (in
the same room) as possible.
• Position the equipment on a clear, level surface.
• Dispose of all packaging carefully and responsibly.
• Only one person at a time should use the equipment.
• Keep hands away from all moving parts.
• Always wear appropriate workout clothing when
exercising. Do not wear loose or baggy clothing, since it
may get caught in the equipment. Wear athletic shoes
to protect your feet while exercising.
• Do not place any sharp objects around the
equipment.
• Disabled persons should not use the equipment
without a qualified person or doctor in attendance.
• Max user weight 90kgs.
• This product conforms to: (BS EN957) - PARTS 1
and 2 class (H) - Home Use - Class (C).
• This exercise product has been designed and
manufactured to comply with the latest (BS EN 957)
British and European Safety Standards.
USE
• It is the responsibility of the owner to ensure that all
users of this product are properly informed as to how
to use this product safely.
• This product is intended for domestic use only. Do
not use in any commercial, rental, or institutional
setting.
• Before using the equipment to exercise, always do
stretching exercises to properly warm up.
• If the user experiences dizziness, nausea, chest
pain, or other abnormal symptoms stop the workout
and seek immediate medical attention.
IMPORTANT - PLEASE READ FULLY BEFORE ASSEMBLY OR USE
TO REDUCE THE RISK OF SERIOUS INJURY, READ THE ENTIRE MANUAL BEFORE YOU ASSEMBLE OR
OPERATE THE EVERLAST POWER GYM. IN PARTICULAR, NOTE THE FOLLOWING SAFETY PRECAUTIONS:
WARNING: Before beginning any exercise program, consult your Doctor. This is especially important for
persons over the age of 35 or persons with pre-existing health problems. You MUST read all instructions before
using any fitness equipment. The manufacturer and its associates and partners assumes no responsibility for
personal injury or property damage sustained by or through the use of this product.
PHYSICIAN WARNING: Not all exercise equipment and training programs are suitable for everybody.It
is recommended that you consult your physician before using this equipment or beginning this or any other
training program.
4
For queries or additional product information, please call our Service Centre on:
087 997 0865
Please have your model name on hand.
www.everlast.com
COMPONENTS - PARTS
NOTE: if you have damaged or missing components, call the service division on 087 997 0865
IMPORTANT - PLEASE CHECK YOU HAVE ALL THE PARTS LISTED BELOW
NOTE: SOME OF THE SMALLER PARTS MAY BE PRE- FITTED TO LARGER COMPONENTS. PLEASE CHECK
CAREFULLY BEFORE CONTACTING US REGARDING ANY MISSING PARTS.
1
Rear Upright Tube x 2pcs
2
Connect Tube x 1pc
3
Back Rest Adjustable Rod x 1pc
4
Main Cross Tube x 1pc
5
Front Upright Tube x 1pc
6
Support Plate x 1pc
7
Back Cushion Tube x 2pcs
8
Leg Curl Tube x 1pc
10
Back Cushion x 1pc
11
Seat Cushion x 1pc
12
Foam x 4pc
9
Foam Tube x 2pcs
13
Clip x 1pc

5
For queries or additional product information, please call our Service Centre on:
087 997 0865
Please have your model name on hand.
www.everlast.com
COMPONENTS - PARTS
NOTE: if you have damaged or missing components, call the service division on 087 997 0865
IMPORTANT - PLEASE CHECK YOU HAVE ALL THE PARTS LISTED BELOW
NOTE: SOME OF THE SMALLER PARTS MAY BE PRE- FITTED TO LARGER COMPONENTS. PLEASE CHECK
CAREFULLY BEFORE CONTACTING US REGARDING ANY MISSING PARTS.
14
Hex Bolt (M10 x 155 mm) x 1pc
15
Hex Bolt (M10 x 65 mm) x 1pc
16
Hex Bolt (M10 x 55 mm) x 6pcs
17
Hex Bolt (M10 x 20 mm) x 1pc
18
Hex Bolt (M8 x 40 mm) x 4pcs
19
Hex Bolt (M8 x 20 mm) x 4pcs
20
Washer (ø10) x 17psc
21
Washer (ø8) x 10pcs
22
Nylon Lock Nut (M10) x 8pcs
23
Nylon Lock Nut (M8) x 2pcs
24
Right Safe Hook x 1pc
25
Left Safe Hook x 1pc
26
Square Inner Cap (☐38mm) x 4pcs
27
Square Inner Cap (☐32mm) x 4pcs
28
Square Inner Cap (☐25mm) x 4pcs
29
Round Inner Cap (ø25) x 1pc
30
Round Inner Cap (ø19) x 6pcs
31
Round End Cap (ø25) x 1pc
32
Middle Weight Bar x 1pc
33
End Weight Bar x 2pcs
34
Weight Plate (5KG) x 2pcs
35
Weight Plate (2.5KG) x 2pcs
36
Weight Plate (1.6KG) x 2pcs
37
Screw Collar x 2pcs

6
For queries or additional product information, please call our Service Centre on:
087 997 0865
Please have your model name on hand.
www.everlast.com
ASSEMBLY INSTRUCTIONS
IMPORTANT - ASSEMBLE WITH ALL NUTS AND BOLTS LOOSE AT FIRST, ONLY TIGHTEN AFTER
COMPLETING ALL ASSEMBLY STEPS.
1. UNPACK THE CARTON AND PLACE ALL PARTS ON THE FLOOR.
2. CAREFULLY REMOVE ALL PACKING MATERIAL AND CHECK EACH PART WITH THE MANUAL FIRST.
3. REMEMBER SOME PARTS ARE PRE-FITTED TO LARGER COMPONENTS.
STEP 1
1. Attach the Connect Tube (2) to the Rear Upright Tube (1) using 4pcs x Hex Bolt (16), 8pcs x Washer (20)
and 4pcs x Nylon Lock Nut (22).
2. Slide the Back Rest Adjustable Rod (3) into the Rear Upright Tube (1).
3. Attach Right Safe Hook (24) and Left Safe Hook (25) to the Rear Upright Tube (1) using 2pcs x Washer
(21) and 2pcs x Nylon Lock Nut (23). No. Description Qty
16 Hex Bolt (M10 x 55 mm) 4
20 Washer (ø10) 8
21 Washer (ø8) 2
22 Nylon Lock Nut (M10) 4
23 Nylon Lock Nut (M8) 2

7
For queries or additional product information, please call our Service Centre on:
087 997 0865
Please have your model name on hand.
www.everlast.com
ASSEMBLY INSTRUCTIONS
No. Description Qty
16 Hex Bolt (M10 x 55 mm) 2
17 Hex Bolt (M10 x 20 mm) 1
19 Hex Bolt (M8 x 20 mm) 2
20 Washer (ø10) 5
21 Washer (ø8) 2
22 Nylon Lock Nut (M10) 2
STEP 2
1. Attach the Main Cross Tube (4) to the Connect Tube (2) using 2pcs x Hex Bolt (16), 4pcs x Washer (20)
and 2pcs x Nylon Lock Nut (22).
2. Attach the Front UprightTube (5) to the Main Cross (4) using one Hex Bolt (17) and one Washer (20).
3. Attach the Main Cross (4) to the Front UprightTube (5) with the Support Plate (6), using 2pcs x Hex Bolt
(19) and 2pcs x Washer (21).

11 10344
ASSEMBLY STEPS
STEP 3: SEAT AND BACKREST ASSEMBLY
• Attach the two Back Cushion Tubes (7) to the Main Cross Tube (4) using one Hex Bolt (14), two
Washers (20) and one Nylon Lock Nut (22).
• Attach the Back Cushion (10) to the two Back Cushion Tubes (7) using four Hex Bolts (18) and four
Washers (21).
• Attach Seat Cushion (11) to Main Cross Tube (4) using two Hex Bolts (19) and two Washers (21).
3
8
For queries or additional product information, please call our Service Centre on:
087 997 0865
Please have your model name on hand.
www.everlast.com
ASSEMBLY INSTRUCTIONS
STEP 3
1. Attach the two Back Cushion Tubes (7) to the Main Cross Tube (4) using one Hex Bolt (14), 2pcs x Washer
(20) and one Nylon Lock Nut (22).
2. Attach the Back Cushion (10) to the two Back Cushion Tubes (7) using 4pcs x Hex Bolt (18) and 4pcs x
Washer (21).
3. Attach Seat Cushion (11) to Main Cross Tube (4) using 2pcs x Hex Bolt (19) and 2pcs x Washer (21).
No. Description Qty
14 Hex Bolt (M10 x 155 mm) 1
18 Hex Bolt (M8 x 40 mm) 4
19 Hex Bolt (M8 x 20 mm) 2
20 Washer (ø10) 2
21 Washer (ø8) 6
22 Nylon Lock Nut (M10) 1

9
For queries or additional product information, please call our Service Centre on:
087 997 0865
Please have your model name on hand.
www.everlast.com
ASSEMBLY INSTRUCTIONS
STEP 4
1. Attach the Leg Curl Tube (8) to Main Cross Tube (4) using one Hex Bolt (15), 2pcs x Washer (20) and one
Nylon Lock Nut (22).
2. Slide the two Foam Tubes (9) in through the holes on the Leg Curl Tube (8) and place the four Foams (12)
on to the Foam Tube (8).
3. Slide the Clip (13) on the Leg Curl Tube (8).
No. Description Qty
15 Hex Bolt (M10 x 65 mm) 1
20 Washer (ø10) 2
22 Nylon Lock Nut (M10) 1

10
For queries or additional product information, please call our Service Centre on:
087 997 0865
Please have your model name on hand.
www.everlast.com
ASSEMBLY INSTRUCTIONS
STEP 5
1. Take the Middle Weight Bar (32) and attach the two End Weight Bars (33) in to the Middle Weight Bar (32).
2. Attach the two 5kg Weight Plates (34), two 2.5 kg Weight Plates (35) and two 1.6 kg Weight Plates (36) to the
End Weight Bar (33) and tighten the two Screw Collars (37).
3. Place the Barbell Set on to the Rear Upright Tube (1).

11
For queries or additional product information, please call our Service Centre on:
087 997 0865
Please have your model name on hand.
www.everlast.com
EXERCISING INFORMATION
THE FOUR BASIC TYPES OF WORKOUTS
MUSCLE BUILDING
To increase the size and strength of your muscles, push them close to their maximum capacity. Your muscles
will adapt and grow as you progressively increase the intensity of your exercise. You can adjust the intensity
level of an individual exercise in two ways:
• By changing the amount of resistance used
• By changing the number of repetitions or sets performed. (A“repetition” is one complete cycle of an exer-
cise, such as one sit-up. A“set” is a series of repetitions.)
The proper amount of resistance for each exercise depends upon the individual user. You must gauge your
limits and select the amount of resistance that is right for you. Begin with 3 sets of 8 repetitions for each ex-
ercise you perform. Rest for 3 minutes after each set. When you can complete 3 sets of 12 repetitions without
difficulty, increase the amount of resistance.
TONING
You can tone your muscles by pushing them to a moderate percentage of their capacity. Select a moderate
amount of resistance and increase the number of repetitions in each set. Complete as many sets of 15 to 20
repetitions as possible without discomfort. Rest for 1 minute after each set. Work your muscles by completing
more sets rather than by using high amounts of resistance.
WEIGHT LOSS
To lose weight, use a low amount of resistance and increase the number of repetitions in each set. Exercise for
20 to 30 minutes, resting for a maximum of 30 seconds between sets.
CROSS TRAINING
Cross training is an efficient way to get a complete and well-balanced fitness program. An example of a bal-
anced program is:
• Plan strength training workouts on Monday, Wednesday, and Friday.
• Plan 20 to 30 minutes of aerobic exercise, such as running on a treadmill or riding on an elliptical or exer-
cise bike, on Tuesday and Thursday.
• Rest from both stregnth training and aerobic exercise for atleast one full day each week to give your body
time to regenerate.
The combination of strenght training and aerobic exercise will reshape and strengthen your body, plus develop
your heart and lungs.

12
For queries or additional product information, please call our Service Centre on:
087 997 0865
Please have your model name on hand.
www.everlast.com
EXERCISING INFORMATION
CUSTOMISE YOUR EXERCISE PROGRAM
Determining the exact length of time for each workout, as well as the number of repetitions or sets completed,
is an individual matter. It is important to avoid overdoing it during the first few months of your exercise pro-
gram. You should progress at your own pace and be sensitive to your body’s signals. If you experience pain or
dizziness at any time while exercising, stop immediately and begin cooling down. Find out what is wrong be-
fore continuing. Remember that adequate rest and a proper diet are important factors in any exercise program.
WARMING UP
Begin each workout with 5 to 10 minutes of stretching and light exercise to warm up. Warming up prepares
your body for more strenuous exercise by increasing circulation, raising your body temperature and delivering
more oxygen to your muscles.
WORKING OUT
Each workout should include 6 to 10 different exercises. Select exercises for every major muscle group, em-
phasizing areas that you want to develop most. To give balance and variety to your workouts, vary the exercises
from session to session.
Schedule your workouts for the time of day when your energy level is the highest. Each workout should be fol-
lowed by at least one day of rest. Once you find the schedule that is right for you, stick with it.
EXERCISE FORM
Maintaining proper form is an essential part of an effective exercise program. This requires moving through the
full range of motion for each exercise, and moving only the appropriate parts of the body. Exercising in an un-
controlled manner will leave you feeling exhausted. The repetitions in each set should be performed smoothly
and without pausing. The exertion stage of each repetition should last about half as long as the return stage.
Proper breathing is important. Exhale during the exertion stage of each repetition and inhale during the return
stroke. Never hold your breath.Rest for a short period of time after each set. The ideal resting periods are:
• Rest for three minutes after each set for a muscle building workout.
• Rest for one minute after each set for a toning workout.
• Rest for 30 seconds after each set for a weight loss workout.
Plan to spend the first couple of weeks familiarizing yourself with the equipmentand learning the proper your-
self with the equipmentand learning the proper form for each exercise.
COOLING DOWN
End each workout with 5 to 10 minutes of stretching. Include stretches for both your arms and legs. Move
slowly as you stretch and do not bounce. Ease into each stretch gradually and go only as far as you can without
strain. Stretching at the end of each workout is an effective way to increase flexibility.

13
For queries or additional product information, please call our Service Centre on:
087 997 0865
Please have your model name on hand.
www.everlast.com
EXERCISING INFORMATION
STAYING MOTIVATED
For motivation, keep a record of each workout.List the date, the exercises performed, the resistance used, and
the numbers of sets and repetitions completed. Record your weight and key body measurements at the end of
every month. Remember, the key to achieving the greatest results is to make exercise a regular and enjoyable
part of your everyday life.
HEART RATE CHART
YOUR AGE TARGET RANGE HR 50-85% MAX HEART RATE
20 100-170 BEATS PER MINUTE 200 BEATS PER MINUTE
25 98-166 BEATS PER MINUTE 195 BEATS PER MINUTE
30 95-162 BEATS PER MINUTE 190 BEATS PER MINUTE
35 93-157 BEATS PER MINUTE 185 BEATS PER MINUTE
40 90-153 BEATS PER MINUTE 180 BEATS PER MINUTE
45 88-149 BEATS PER MINUTE 175 BEATS PER MINUTE
50 85-145 BEATS PER MINUTE 170 BEATS PER MINUTE
55 83-140 BEATS PER MINUTE 165 BEATS PER MINUTE
60 80-136 BEATS PER MINUTE 160 BEATS PER MINUTE
EXAMPLE OF HEART RATE ZONES

14
For queries or additional product information, please call our Service Centre on:
087 997 0865
Please have your model name on hand.
www.everlast.com
PRE & POST STRETCHING EXERCISES
SHOULDERS
Clasp hands behind back.
Push chest forwards.
Soft knees.
TRICEPS
Place one hand down the centre of the spine.
Gently pull the elbow backwards.
Feel the stretch down the back of your upper arm.
UPPER BACK
Soften knees and tuck bottom under.
Clasp hands and push forwards.
Spread shoulder blades apart. Chest (addition).
Forearm raised slightly on fixed object. Lunge stance.
Move body forward beyond elbow. Lats (addition).
Relaxed elbow. Lean slightly over away from arm.
Pull elbow towards lean.
CALVES
Feet pointing straight ahead.
Push back heel down to the ground.
Straighten back knee.
QUADS
Keep the body straight.
Hips and shoulders in line.
Pull the heel towards bottom.
For advanced stretch extend the hip backwards.
HAMSTRINGS
Pull legs towards vertical.
Straighten knee.Hold for 15 seconds.
Slowly release.
GLUTEUS MAX
Sit upright.
Keep hand supporting hand close to bottom.
Rotate torso towards knee.

15
For queries or additional product information, please call our Service Centre on:
087 997 0865
Please have your model name on hand.
www.everlast.com
PRE & POST STRETCHING EXERCISES
GLUTEUS MED & MIN
Cross legs while spine.
Pull supporting leg in.
Feel stretch the side of bottom.
LOWER BACK & GLUTES
Reach behind knees.
Lift bottom.
Pull knees right into chest.
KNEE ROLLS
Keep knees and feet close together.
Gently roll to one side, hold.
Repeat on the other side.
ABDUCTORS
Seated position.
Soles of feet together.
Downward pressure on knees with elbows.
THE KNOWLEDGE
• Ease into the stretch
• Hold for 15 seconds to maintain flexibility
• Hold for longer development
• Always stretch when fully warmed up
• Stretch every muscle group

16
For queries or additional product information, please call our Service Centre on:
087 997 0865
Please have your model name on hand.
www.everlast.com
EXPLODED VIEW

17
For queries or additional product information, please call our Service Centre on:
087 997 0865
Please have your model name on hand.
www.everlast.com
PARTS LIST
The parts mentioned above are all the parts you need to assemble this equipment. Before you start to
assemble, please check the hardware packing to make sure all parts are included. Basic tools, such as
spanners will be required for assembly.
No. Description Qty No. Description Qty
1 Rear Upright Tube 2 20 Washer (ø10) 17
2 Connect Tube 1 21 Washer (ø8) 10
3 Back Rest Adjustable Rod 1 22 Nylon Lock Nut (M10) 8
4 Main Cross Tube 1 23 Nylon Lock Nut (M8) 2
5 Front Upright Tube 1 24 Right Safe Hook 1
6 Support Plate 1 25 Left Safe Hook 1
7 Back Cushion Tube 2 26 Square Inner Cap (☐38mm) 4
8 Leg Curl Tube 1 27 Square Inner Cap (☐32) 4
9 Foam Tube 2 28 Square Inner Cap (☐25) 4
10 Back Cushion 1 29 Round Inner Cap (ø25) 1
11 Seat Cushion 1 30 Round Inner Cap (ø19) 6
12 Foam 4 31 Round End Cap (ø25) 1
13 Clip 1 32 Middle Weight Bar 1
14 Hex Bolt (M10 x 155 mm) 1 33 End Weight Bar 2
15 Hex Bolt (M10 x 65 mm) 1 34 Weight Plate (5 KG) 2
16 Hex Bolt (M10 x 55 mm) 6 35 Weight Plate (2.5 KG) 2
17 Hex Bolt (M10 x 20 mm) 1 36 Weight Plate (1.6 KG) 2
18 Hex Bolt (M8 x 40 mm) 4 37 Screw Collar 2
19 Hex Bolt (M8 x 20 mm) 4

18
For queries or additional product information, please call our Service Centre on:
087 997 0865
Please have your model name on hand.
www.everlast.com
SERVICE WARRANTY
EVERLAST 2 YEAR LIMITED WARRANTY
The Manufacturer hereby provides a warranty to the original purchaser of this product (‘the Consumer’) that
this product will be free of manufacturing defects in materials and workmanship which under normal, person-
al, family or household use (commercial use expressly excluded) manifest themselves within the first year from
the date of purchase.
EXCLUSIONS
The warranty does not include and will not be construed to cover products damaged as a result of disaster;
misuse; commercial use; use not in accordance within the written instructions included with the product;
abuse and/or any non-authorized modification of the product, incorrect installation of the product or normal
wear and tear.
WAIVER
The warranty and the obligations of the manufacturer provided herein are in lieu of, and the consumer,waives
all other warranties, guarantees, conditions or liabilities, express or implied, arising by law or otherwise, in-
cluding without limitation, any obligation of the manufacturer in respect of any injury, loss or damage (direct,
indirect or consequential) arising out of the use of, or inability to use this product and whether or not occa-
sioned by the manufacturer’s negligence or any act or omission on its part.
During the warranty period the product may only be serviced and/or repaired by the manufacturer’s duly au-
thorized agent(s).
This manual suits for next models
1
Table of contents
Other Everlast Fitness Equipment manuals

Everlast
Everlast P00001266 User manual

Everlast
Everlast ev-90 User manual

Everlast
Everlast 20KG ADJUSTABLE DUMBBELL SET User manual

Everlast
Everlast ELITE GYM User manual

Everlast
Everlast 16205981000 User manual

Everlast
Everlast EV200 User manual

Everlast
Everlast F.I.T. X-BIKE User manual

Everlast
Everlast 612/7712 Owner's manual

Everlast
Everlast MMA4812B User manual

Everlast
Everlast 16516626 User manual