manuals.online logo
Brands
  1. Home
  2. •
  3. Brands
  4. •
  5. Evonicfires
  6. •
  7. Indoor Fireplace
  8. •
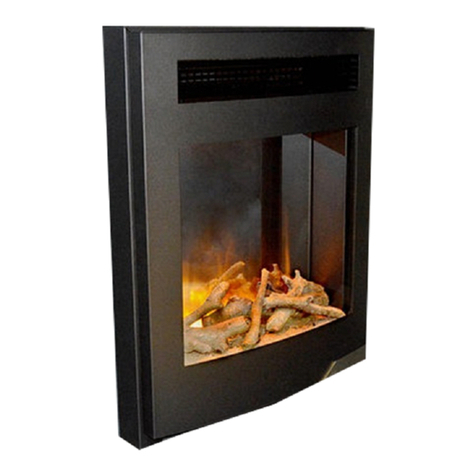
  9. Evonicfires VOLANTE Series User manual

Evonicfires VOLANTE Series User manual

E-LECTRA / VOLANTEE-LECTRA / VOLANTE
INSTRUCTION MANUALINSTRUCTION MANUAL
EnglishEnglish
1
EVONIC - 104 INSTRUCTION MANUAL TEMPLATE ISS. 1EVONIC - 104 INSTRUCTION MANUAL TEMPLATE ISS. 1 ELECTRA ISS. 2ELECTRA ISS. 2
E-lectra 1800
E-lectra 1500
E-lectra 1250
E-lectra 1030
E-lectra 800
E-lectra - S 1350
E-lectra - S 1500
Volante 1800
Volante 1500
Volante 1250
Volante 1030
Volante 800
CONTENTS
2EVONIC - 104 INSTRUCTION MANUAL TEMPLATE ISS. 1EVONIC - 104 INSTRUCTION MANUAL TEMPLATE ISS. 1 ELECTRA ISS. 2ELECTRA ISS. 2
EU Directives and UKCA Standards.......................................................................3
Important Information and Health & Safety............................................................4
Components for Electra range.............................................................................. 5
Built-In Installation............................................................................................... .6
Side glass installation...........................................................................................15
Front glass installation......................................................................................... 17
Suite Installation...................................................................................................19
Log Layouts..........................................................................................................24
Troubleshooting....................................................................................................26
Warranty...............................................................................................................28
Glass & Screens
Vermiculite
Log fuel effects
Electrical components -
Fans, heater elements,
PCB’s, Power pack’s,
LED’s
Metal -
Steel or cast iron
Can be taken to a local recycling centre for reuse to reduce waste going to landfill
Can be taken to a local recycling centre for reuse to reduce waste going to landfill.
Non hazardous material. Vermiculite can be crushed up and used for plant bedding and ash used for
composting or disposed of at a local recycling centre for reuse to reduce waste going to landfill.
Dispose at a local recycling centre In accordance with latest WEEE directive.
These logs contain refractory ceramic fibre materials which requires disposal in accordance with
WEEE legislation.
Natural Wood Can be taken to a local recycling centre for reuse to reduce waste going to landfill
The following materials and components should be disposed of in accordance with the
below table.
3
EVONIC - 104 INSTRUCTION MANUAL TEMPLATE ISS. 1EVONIC - 104 INSTRUCTION MANUAL TEMPLATE ISS. 1 ELECTRA ISS. 2ELECTRA ISS. 2
All Evonic Fires products are in conformity with the relevant UK Statutory InstrumentsAll Evonic Fires products are in conformity with the relevant UK Statutory Instruments
(and their amendments).(and their amendments).
2016 No. 1101 The Electrical Equipment (Safety) Regulations 20162016 No. 1101 The Electrical Equipment (Safety) Regulations 2016
2016 No. 1091 The Electromagnetic Compatibility Regulations 20162016 No. 1091 The Electromagnetic Compatibility Regulations 2016
2012 No. 3032 The Restriction Of Use Of Certain Hazardous Substances In2012 No. 3032 The Restriction Of Use Of Certain Hazardous Substances In
Electrical And Electronic Equipment Regulations 2012Electrical And Electronic Equipment Regulations 2012
EU DIRECTIVES
All Evonic Fires products meet the requirements of the EC Directives.All Evonic Fires products meet the requirements of the EC Directives.
These directives have been met by compliance with the following standards:These directives have been met by compliance with the following standards:
EU 2011-65/EU 2015/863 Restriction of Hazardous Substances.EU 2011-65/EU 2015/863 Restriction of Hazardous Substances.
References to the relevant designated standards used:References to the relevant designated standards used:
EN 55014-1:2006 + A1:2009 + A2:2011 Electromagnetic Compatibility.EN 55014-1:2006 + A1:2009 + A2:2011 Electromagnetic Compatibility.
EN 55014-2:2015 Electromagnetic Compatibility.EN 55014-2:2015 Electromagnetic Compatibility.
EN 61000-3-2:2014 Electromagnetic Compatibility (EMC). Limits. Limits forEN 61000-3-2:2014 Electromagnetic Compatibility (EMC). Limits. Limits for
Harmonic Current Emissions.Harmonic Current Emissions.
EN 61000-3-3:2013 Electromagnetic Compatibility (EMC). Limits. Limitation ofEN 61000-3-3:2013 Electromagnetic Compatibility (EMC). Limits. Limitation of
Voltage Changes, Voltage Fluctuations and Flicker.Voltage Changes, Voltage Fluctuations and Flicker.
EN 60335-1:2012 + A11:2014 Household and similar electrical appliances - SafetyEN 60335-1:2012 + A11:2014 Household and similar electrical appliances - Safety
EN 60335-2-30:2009+A11:2012 Household and similar electrical appliances. Safety.EN 60335-2-30:2009+A11:2012 Household and similar electrical appliances. Safety.
Particular requirements for room heatersParticular requirements for room heaters
UKCA STANDARDS
4EVONIC - 104 INSTRUCTION MANUAL TEMPLATE ISS. 1EVONIC - 104 INSTRUCTION MANUAL TEMPLATE ISS. 1
IMPORTANT INFORMATION AND HEALTH & SAFETY
When using electrical appliances, basic precautions should always be followed to reduce
the risk of fire, electric shock, and injury to persons, including the following:
• Read all of the instructions carefully before using the appliance, only use this appliance
as described in this manual. Any other use not recommended by the manufacturer mayAny other use not recommended by the manufacturer may
cause injury to persons, or damage to the appliance.cause injury to persons, or damage to the appliance.
• Remove all packaging and dispose of it at an appropriate recycling facility.
•• When transporting or storing the appliance and power lead, keep in a dry place, awayWhen transporting or storing the appliance and power lead, keep in a dry place, away
from excessive vibration and store so as to avoid damage.from excessive vibration and store so as to avoid damage.
• This fireplace is hot when in use. To avoid burns, do not let bare skin touch hot
surfaces. The trim around the heater outlet becomes hot during heater operation.
DANGER: High temperatures may be generated under certain abnormal conditions.
• Do not install this appliance immediately in front of a fixed socket outlet.
• Do not install this appliance in the immediate surroundings of a bath, shower,
swimming pool or any other area where the appliance could come into contact with
water or humidity, e.g. a bathroom.
•• Do not use in areas where gasoline, paint, or any flammable liquids are used or stored.Do not use in areas where gasoline, paint, or any flammable liquids are used or stored.
• This appliance is only suitable for indoor use, do not use outdoors.
• Do not cover the appliance, or let the air inlet/outlet to be obstructed in any way as it
may overheat.
• Keep the power lead away from hot surfaces and the heater outlet. Do not route the
power lead in front of the appliance, or under any carpets or rugs. Do not allow the
power lead to be coiled up once installed, as this can cause overheating.
• This appliance must be firmly fixed to or recessed into, a flat internal wall.
• A maintenance hatch must be installed into the surrounding installation to allow future
access.
• Always use a certified electrician should new circuits or outlets be required. And
always use properly grounded, fused and polarised outlets.
• Where the power lead passes through any masonry wall, stone surround etc. ensure
that suitable rubber bushes are fitted at any possible wear points.
• If the power lead is damaged do not use the appliance until it has been replaced.
• Do not use any external switching device, timers, or extension leads. Do not connect
the appliance to a circuit that is frequently switched on and off by the utility.
•• In the event of a malfunction, switch off the appliance, and disconnect it from theIn the event of a malfunction, switch off the appliance, and disconnect it from the
mains power supply. Have the appliance inspected by a certified electrician beforemains power supply. Have the appliance inspected by a certified electrician before
reusing.reusing.
• Do not use the appliance if it is damaged. In the event of any damage to the appliance,
please contact the retailer from whom the appliance was purchased.
• Any repairs must only be performed by a certified electrician.
• Extreme caution is necessary when any heater is used by, located near children or
people of reduced mobility, and whenever the unit is left operating and unattended.
• Young children should be supervised to ensure that they do not play with the appliance.
•• Disconnect from the power supply before performing any cleaning, maintenance orDisconnect from the power supply before performing any cleaning, maintenance or
relocation of the unit. Do not use steam cleaners, or aerosols near the appliance.relocation of the unit. Do not use steam cleaners, or aerosols near the appliance.
• Do not burn wood or anything else in this appliance.
• Do not strike the glass. The glass used is toughened safety glass, if broken it will
shatter into small chunks which are less likely to cause injury.
• Do not drill or screw any new holes into the appliance.
ELECTRA ISS. 2ELECTRA ISS. 2
5
EVONIC - 104 INSTRUCTION MANUAL TEMPLATE ISS. 1EVONIC - 104 INSTRUCTION MANUAL TEMPLATE ISS. 1 ELECTRA ISS. 2ELECTRA ISS. 2
INSTALLATIONINSTALLATION
6EVONIC - 104 INSTRUCTION MANUAL TEMPLATE ISS. 1EVONIC - 104 INSTRUCTION MANUAL TEMPLATE ISS. 1 ELECTRA ISS. 2ELECTRA ISS. 2
MODEL DIMENSIONS
A- Width excl. plaster kit
B- Width incl. plaster kit
C- Opening height
D- Depth excl. plaster kit
E- Height
A
B
C
D
E
For detailed
specication
drawings
please scan
the QR code
MODEL A B C D E
E-lectra 1800 1753mm 1785mm 414mm 300mm 587mm
Volante 1800 1753mm 1785mm 414mm 300mm 587mm
E-lectra 1500 1503mm 1535mm 414mm 300mm 587mm
Volante 1500 1503mm 1535mm 414mm 300mm 587mm
E-lectra 1250 1253mm 1285mm 414mm 300mm 587mm
Volante 1250 1253mm 1285mm 414mm 300mm 587mm
E-lectra 1030 1002mm 1034mm 414mm 300mm 587mm
Volante 1030 1002mm 1034mm 414mm 300mm 587mm
E-lectra 800 804mm 836mm 587mm 300mm 762mm
Volante 800 804mm 836mm 587mm 300mm 762mm
Electra-S 1350 1300mm 1300mm 414mm 325mm 636mm
Electra-S 1500 1500mm 1500mm 414mm 355mm 636mm
7
EVONIC - 104 INSTRUCTION MANUAL TEMPLATE ISS. 1EVONIC - 104 INSTRUCTION MANUAL TEMPLATE ISS. 1 ELECTRA ISS. 2ELECTRA ISS. 2
CONVERTING TO GF / GF2 / GF3
The appliance is shipped in the GF3 configuration, however all models can be converted
to be GF or GF2 depending on your preference.
GF Configuration
Glass Fronted
A single glass panel at the front of the
appliance.
GF2 Configuration
Glass Fronted 2
A glass panel at the front and one side piece of
glass. The glass can be either side.
GF3 Configuration
Glass Fronted 3
The standard configuration.
A glass panel at the front and both side pieces
of glass.
8EVONIC - 104 INSTRUCTION MANUAL TEMPLATE ISS. 1EVONIC - 104 INSTRUCTION MANUAL TEMPLATE ISS. 1 ELECTRA ISS. 2ELECTRA ISS. 2
INSTALLING THE SIDE PANELS / CONVERTING TO GF / GF2
1Unscrew and remove the plaster kits from the side/s of the appliance.
2Screw in the side panel/s, on one or both sides.
9
EVONIC - 104 INSTRUCTION MANUAL TEMPLATE ISS. 1EVONIC - 104 INSTRUCTION MANUAL TEMPLATE ISS. 1 ELECTRA ISS. 2ELECTRA ISS. 2
Before installing the appliance please read and take into account the following important
requirements;
• Consult a qualified professional to check the structure of the installation site.
• These appliances have been designed to be installed into either a stud and
plasterboard wall, or an existing chimney breast. (Please note that Open, GF2, and GF3
models are not suitable for existing chimney breast installations.)
• If installing into an existing chimney, make sure to adequately block off the flue.
• The appliance must never be installed in front of an electrical socket.
• The appliance must not be installed anywhere that it may come into contact with water,
i.e. a bathroom.
• Do not wet plaster directly onto the appliance.
INSTALLATION REQUIREMENTS
INSTALLATION
10 EVONIC - 104 INSTRUCTION MANUAL TEMPLATE ISS. 1EVONIC - 104 INSTRUCTION MANUAL TEMPLATE ISS. 1 ELECTRA ISS. 2ELECTRA ISS. 2
CHECKS BEFORE INSTALLATION
We recommend turning on the appliance before installation, connect the appliance to a
power source using the provided electrical lead, and depress the right side of the rocker
switch.
Remove the electrical lead from the wall and continue with the installation.
11
EVONIC - 104 INSTRUCTION MANUAL TEMPLATE ISS. 1EVONIC - 104 INSTRUCTION MANUAL TEMPLATE ISS. 1 ELECTRA ISS. 2ELECTRA ISS. 2
INSTALLATION STEPS
1Remove the bottom transit brackets, and side brace bars. Then screw on the
top mounted brackets, and the IEC Clip on the back right.
12 EVONIC - 104 INSTRUCTION MANUAL TEMPLATE ISS. 1EVONIC - 104 INSTRUCTION MANUAL TEMPLATE ISS. 1 ELECTRA ISS. 2ELECTRA ISS. 2
2Screw the two top mounted brackets to the wall.
3You can now construct your stud wall/s around the appliance in the design of
your choosing.
When constructing the studwork,
remember that the vents on the underside
of the appliance need a minimum of 50mm
clearance beneath them.
Ensure that the appliance isn’t supporting
the weight of the studwork.
Before plasterboarding in the appliance
it is recommended that you create a
maintenance hatch for future access.
Do not use silicones, adhesives, or wet
plaster to seal in the appliance.
13
EVONIC - 104 INSTRUCTION MANUAL TEMPLATE ISS. 1EVONIC - 104 INSTRUCTION MANUAL TEMPLATE ISS. 1 ELECTRA ISS. 2ELECTRA ISS. 2
4Your plasterboard can now line up with the plaster kits on the edge of the
appliance.
5Alternatively, the optional chrome side panels can be attached to the case with
the magnets as shown below.
Ensure that the magnets are positioned
with the short side touching the case.
14 EVONIC - 104 INSTRUCTION MANUAL TEMPLATE ISS. 1EVONIC - 104 INSTRUCTION MANUAL TEMPLATE ISS. 1
INSTALLING THE SIDEINSTALLING THE SIDE
GLASS PANELSGLASS PANELS
ELECTRA ISS. 2ELECTRA ISS. 2
15
EVONIC - 104 INSTRUCTION MANUAL TEMPLATE ISS. 1EVONIC - 104 INSTRUCTION MANUAL TEMPLATE ISS. 1 ELECTRA ISS. 2ELECTRA ISS. 2
INSTALLING THE SIDE GLASS PANELS
1Unscrew and remove the top and bottom glass retainer panels.
2Slide in the side glass pieces.
16 EVONIC - 104 INSTRUCTION MANUAL TEMPLATE ISS. 1EVONIC - 104 INSTRUCTION MANUAL TEMPLATE ISS. 1
INSTALLING THE FRONTINSTALLING THE FRONT
GLASS PANELGLASS PANEL
ELECTRA ISS. 2ELECTRA ISS. 2
Please Note: The glass suction pad comes with models
Volante 1800 and e-lectra 1800. On all other
models, the glass suction pad is an optional extra.
17
EVONIC - 104 INSTRUCTION MANUAL TEMPLATE ISS. 1EVONIC - 104 INSTRUCTION MANUAL TEMPLATE ISS. 1 ELECTRA ISS. 2ELECTRA ISS. 2

INSTALLING THE FRONT GLASS PANEL
If using a glass sucker, apply the Suction Lifter to the glass and position the bottom edge
of the glass first, then pivot the glass into the appliance. If not using a glass sucker,
carefully hold the glass on either end and follow the same process. 2 people may be
required for this to ensure the glass is carefully supported at all times.
Then replace the top and bottom glass retainers.
Warning
The Suction Lifter is provided to assist
in moving the glass NEVER as the sole
support of the glass. Always support
the glass throughout the entire process
until the glass is fully fitted. The glass is
toughened safety glass and if broken will
shatter into many small chunks.
18 EVONIC - 104 INSTRUCTION MANUAL TEMPLATE ISS. 1EVONIC - 104 INSTRUCTION MANUAL TEMPLATE ISS. 1
INSTALLATIONINSTALLATION
E-LECTRA S-1350
E-LECTRA S-1500
ELECTRA ISS. 2ELECTRA ISS. 2
19
EVONIC - 104 INSTRUCTION MANUAL TEMPLATE ISS. 1EVONIC - 104 INSTRUCTION MANUAL TEMPLATE ISS. 1 ELECTRA ISS. 2ELECTRA ISS. 2
Before installing the appliance please read and take into account the following important
requirements;
• The appliance must never be installed in front of an electrical socket.
• The appliance must not be installed anywhere that it may come into contact with water,
i.e. a bathroom.
• The minimum height above the finished floor level is 300mm.
INSTALLATION REQUIREMENTS
CHECKS BEFORE INSTALLATION
We recommend turning on the appliance before installation, connect the appliance to a
power source using the provided electrical lead, and depress the right side of the rocker
switch.
Power socket
Rocker switch
20 EVONIC - 104 INSTRUCTION MANUAL TEMPLATE ISS. 1EVONIC - 104 INSTRUCTION MANUAL TEMPLATE ISS. 1 ELECTRA ISS. 2ELECTRA ISS. 2
TOOLS REQUIRED
• Tape Measure
• Pencil
• Spirit Level
• Screwdriver
• PZ2 Screw Bit
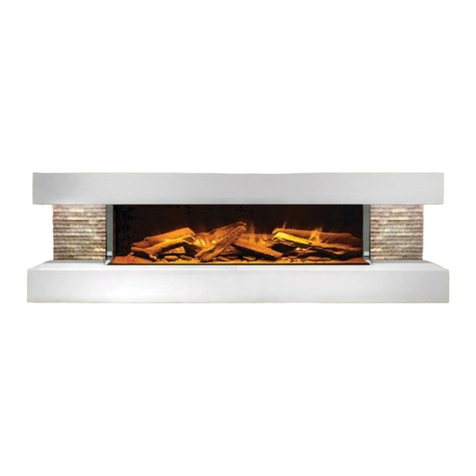
The appliance is supplied with a wall bracket, shown above.
INSTALLATION STEPS
• Drill Bit
• Wall Plugs (Masonry type supplied)
• Wall Screws (Masonry type supplied)
• Stud Detector (For plasterboard
installations only)
• Wall Anchors (For plasterboard
installations only. Not supplied)
1Remove the bottom mounted transit brackets, you won’t need these for
installation. Then screw on the IEC Clip to the bottom back of the case, with
the two provided screws.

This manual suits for next models

13

Other Evonicfires Indoor Fireplace manuals

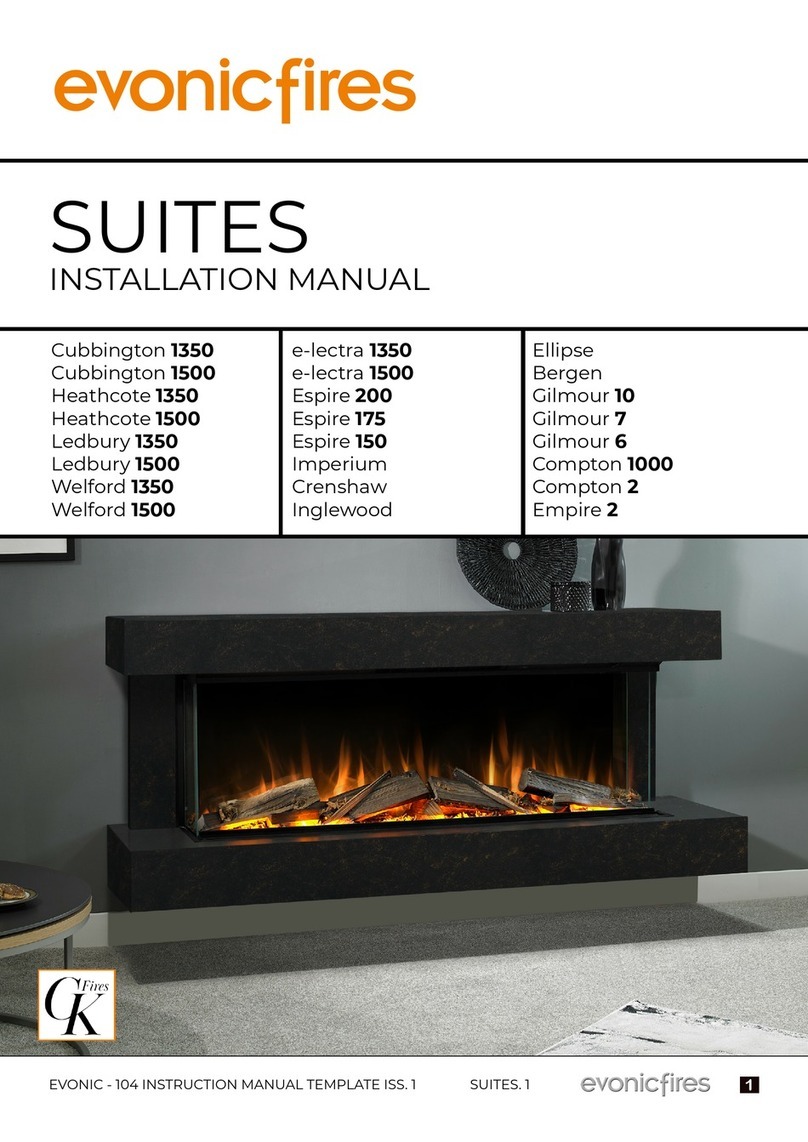
Evonicfires SUITES 180 User manual

Evonicfires

Evonicfires SUITES 180 User manual

Evonicfires COLORADO Manual

Evonicfires

Evonicfires COLORADO Manual

Evonicfires e1800 User manual

Evonicfires

Evonicfires e1800 User manual

Evonicfires NEWTON User manual

Evonicfires

Evonicfires NEWTON User manual

Evonicfires EVOFLAME E810 DS User manual

Evonicfires

Evonicfires EVOFLAME E810 DS User manual

Evonicfires SIGMA Configuration guide

Evonicfires

Evonicfires SIGMA Configuration guide

Evonicfires E800T User manual

Evonicfires

Evonicfires E800T User manual

Evonicfires e500 User manual

Evonicfires

Evonicfires e500 User manual

Evonicfires E1030ds Manual

Evonicfires

Evonicfires E1030ds Manual

Evonicfires e1800 User manual

Evonicfires

Evonicfires e1800 User manual

Evonicfires E-LLUSION Sirus EVONIC - 104 User manual

Evonicfires

Evonicfires E-LLUSION Sirus EVONIC - 104 User manual

Evonicfires Amathus User manual

Evonicfires

Evonicfires Amathus User manual

Evonicfires Kepler 22 User manual

Evonicfires

Evonicfires Kepler 22 User manual

Evonicfires COSINA User manual

Evonicfires

Evonicfires COSINA User manual

Evonicfires SUITES 180 User manual

Evonicfires

Evonicfires SUITES 180 User manual

Evonicfires EVOFLAME User manual

Evonicfires

Evonicfires EVOFLAME User manual

Evonicfires E Series User manual

Evonicfires

Evonicfires E Series User manual

Evonicfires Amathus User manual

Evonicfires

Evonicfires Amathus User manual

Evonicfires Evoflame E32H Manual

Evonicfires

Evonicfires Evoflame E32H Manual

Evonicfires COLORADO Assembly Instructions

Evonicfires

Evonicfires COLORADO Assembly Instructions

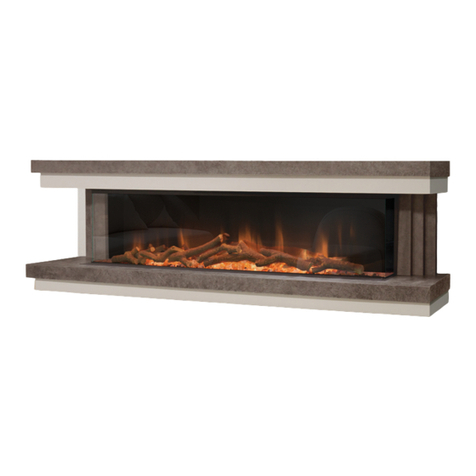
Evonicfires Cubbington 1350 User manual

Evonicfires

Evonicfires Cubbington 1350 User manual

Evonicfires ELECTRA Series User manual

Evonicfires

Evonicfires ELECTRA Series User manual

Evonicfires EVOFLAME User manual

Evonicfires

Evonicfires EVOFLAME User manual

Evonicfires SUITES 180 User manual

Evonicfires

Evonicfires SUITES 180 User manual

Popular Indoor Fireplace manuals by other brands

Majestic JASPER30IN owner's manual

Majestic

Majestic JASPER30IN owner's manual

Dimplex COMPACT FIREPLACE Practical user's guide

Dimplex

Dimplex COMPACT FIREPLACE Practical user's guide

Dimplex Revillusion SWD20-AU instruction manual

Dimplex

Dimplex Revillusion SWD20-AU instruction manual

RAIS Visio 70 F manual

RAIS

RAIS Visio 70 F manual

StyleWell GRANTLEY 23WM90383-PT01 Use and care guide

StyleWell

StyleWell GRANTLEY 23WM90383-PT01 Use and care guide

Kingsman Marquis Capri IDV34 installation instructions

Kingsman

Kingsman Marquis Capri IDV34 installation instructions

Napoleon Woodland NEFI18H Installation and operating instructions

Napoleon

Napoleon Woodland NEFI18H Installation and operating instructions

Twin-Star International 23MM705 instruction manual

Twin-Star International

Twin-Star International 23MM705 instruction manual

kozy heat ROOSEVELT 34 BAK Installation and operation manual

kozy heat

kozy heat ROOSEVELT 34 BAK Installation and operation manual

Quadra-Fire QFI30FB owner's manual

Quadra-Fire

Quadra-Fire QFI30FB owner's manual

Travis Industries 864 TRV GSR2 installation manual

Travis Industries

Travis Industries 864 TRV GSR2 installation manual

kozy heat BAY-36-G Installation and operation manual

kozy heat

kozy heat BAY-36-G Installation and operation manual

SimpliFire SF-ALLP50-BK owner's manual

SimpliFire

SimpliFire SF-ALLP50-BK owner's manual

Amantii SYM-B Series How To Fix

Amantii

Amantii SYM-B Series How To Fix

Olympia muria user manual

Olympia

Olympia muria user manual

TDC USA WS-Q-03 owner's manual

TDC USA

TDC USA WS-Q-03 owner's manual

Rona EL1229D manual

Rona

Rona EL1229D manual

Keystone visage installation instructions

Keystone

Keystone visage installation instructions

manuals.online logo
manuals.online logoBrands
  • About & Mission
  • Contact us
  • Privacy Policy
  • Terms and Conditions

Copyright 2025 Manuals.Online. All Rights Reserved.