Excel E-Smart User manual

User Manual
Excel E-Smart / E-Smart +

© 2018 Excel, part of Van Os Medical B.V.
Koperslagerij 3 | 4651 SK Steenbergen | The Netherlands | T: +31 (0)167-573020 | E: [email protected] | W: www.vanosmedical.nl
© 2018 Excel, part of Van Os Medical B.V.
Koperslagerij 3 | 4651 SK Steenbergen | The Netherlands | T: +31 (0)167-573020 | E: [email protected] | W: www.vanosmedical.nl
2
User Manual | Excel E-Smart / E-Smart +
Table of contents
Introduction 4
1. Identication 6
2. General information 7
2.1 Components and setup of your electric wheelchair 7
2.2 General explanation of your electric wheelchair 7
3. Safety regulations 8
3.1 General safety 8
3.2 Warnings for safe use 8
4. Instructions for use 10
4.1 Balance 10
4.1.1 Getting in and out 10
4.2 Bending and/or reaching 10
4.2.1 Bending and/or reaching forward 10
4.2.2 Bending and/or reaching sideways 11
4.2.3 Bending and/or reaching backwards 11
4.3 Going up or down inclines or kerbs 11
4.3.1 Going up an incline or kerb 11
4.3.2 Going down an incline or kerb 12
4.4 Controls 12
4.4.1 Controlling the wheelchair in dierent situations 12
4.5 EMI / RFI 13
4.5.1 EMI / RFI recommendations 13
5. Specications 14
6. Components of the Excel E-Smart / E-Smart +
6.1 The joystick 15
6.2 The armrests 16
6.3 The battery pack 17
6.3.1 Removing the battery pack 17
6.4 The freewheel lever 18
6.5 The high-low system 18
6.6 The footplate 19
6.7 The anti-tip wheels 19
6.8 The seat 20
6.9 The wheels 20

© 2018 Excel, part of Van Os Medical B.V.
Koperslagerij 3 | 4651 SK Steenbergen | The Netherlands | T: +31 (0)167-573020 | E: [email protected] | W: www.vanosmedical.nl
3
User Manual | Excel E-Smart / E-Smart + User Manual | Excel E-Smart / E-Smart +
6.9.1 The front wheels 20
6.9.2 The rear wheels 20
7. Transporting your electric wheelchair 21
7.1 Disassembling the electric wheelchair 21
7.2 Assembling the electric wheelchair 21
8. Maintenance 22
8.1 The tyres 22
8.1.1 PU tyres 22
8.2 The frame 22
8.3 The castors and front forks 23
8.4 The upholstery 23
8.5 Cleaning the electric wheelchair 23
8.6 Periodic maintenance 24
8.7 Service checklist 25
9. Problemanalysis and solutions 26
10. Warranty 27
10.1 Warranty application 27
10.2 Warranty terms and conditions 27

© 2018 Excel, part of Van Os Medical B.V.
Koperslagerij 3 | 4651 SK Steenbergen | The Netherlands | T: +31 (0)167-573020 | E: [email protected] | W: www.vanosmedical.nl
© 2018 Excel, part of Van Os Medical B.V.
Koperslagerij 3 | 4651 SK Steenbergen | The Netherlands | T: +31 (0)167-573020 | E: [email protected] | W: www.vanosmedical.nl
4
User Manual | Excel E-Smart / E-Smart +
Introduction
Before you use your new Excel E-Smart, you and your attendant must fully read and understand this user manual.
Also, as you have this user manual, you agree to the conditions mentioned within.
We want to thank you for the condence in our Excel ® products.
The policy of Van Os Medical is to focus on continuously improving the quality and reliability of our products. We
therefore reserve the right without further notice to make any changes to this user manual.
It is important you read this user manual very carefully, before you use your wheelchair. This user manual contains
important information about the safe use and maintenance. We recommend you keep this user manual because it
is also your proof of warranty.
The safety instructions within are general guidelines, which must be seen as overall guidelines. It is possible that
you will develop your own way to make common movements. However, we advise you to consult a professional
for assistance in developing safe and eective techniques, regarding your daily activities within your physical
capabilities.
Your new wheelchair requires frequent maintenance, much of which you can do yourself. We advise you to take
your wheelchair to a professional for a check at least once a year. You will nd a maintenance schedule further on
in this user manual.
Attention!
In this user manual you will nd tips and warnings. These are clearly identied by the symbols and display of the
text, like you can see below.
Warning
The warnings mentioned in this user manual must always be followed, in order to prevent damage to the Excel
E-Smart wheelchair or injury to yourself.
Tip
The tips mentioned in this user manual are meant to help you make better use of your Excel E-smart wheelchair.

© 2018 Excel, part of Van Os Medical B.V.
Koperslagerij 3 | 4651 SK Steenbergen | The Netherlands | T: +31 (0)167-573020 | E: [email protected] | W: www.vanosmedical.nl
5
User Manual | Excel E-Smart / E-Smart + User Manual | Excel E-Smart / E-Smart +
Enter the information of your authorised dealer:
Company: ……………………………………………………………………………………………………………………………………
Address: ……………………………………………………………………………………………………………………………………
Phone number: ……………………………………………………………………………………………………………………………………
Fax number: ……………………………………………………………………………………………………………………………………
Email address: ……………………………………………………………………………………………………………………………………
Website: ……………………………………………………………………………………………………………………………………

© 2018 Excel, part of Van Os Medical B.V.
Koperslagerij 3 | 4651 SK Steenbergen | The Netherlands | T: +31 (0)167-573020 | E: [email protected] | W: www.vanosmedical.nl
© 2018 Excel, part of Van Os Medical B.V.
Koperslagerij 3 | 4651 SK Steenbergen | The Netherlands | T: +31 (0)167-573020 | E: [email protected] | W: www.vanosmedical.nl
6
User Manual | Excel E-Smart / E-Smart +
1. Identication
Your electric wheelchair is equipped with a unique serial number. You will nd this number on the frame of your
wheelchair. Below, you can see an example of the frame label, where you can nd the identication number.
Furthermore, you will nd the explanation of the various data stored on the frame label listed below.
1. Production date
The date of manufacture.
2. Serial number
Every wheelchair has its own unique serial number. You need this number if you have any technical questions or if
you want to order any warranty parts for the wheelchair.
3. Maximum weight
The maximum user weight allowed on the wheelchair.
4. Model name
The model name of your wheelchair starts with the brand name Excel. The brand name Excel, followed by the
additional model description forms the model name of the wheelchair. You need the model name if you have any
technical questions or if you want to order any parts for the wheelchair, in this case the Excel E-Smart or E-Smart +.
5. Description
The intended use of your wheelchair is described here.
1
2
3
4
5

© 2018 Excel, part of Van Os Medical B.V.
Koperslagerij 3 | 4651 SK Steenbergen | The Netherlands | T: +31 (0)167-573020 | E: [email protected] | W: www.vanosmedical.nl
7
User Manual | Excel E-Smart / E-Smart + User Manual | Excel E-Smart / E-Smart +
2. General information
2.1. Components and setup of your electric wheelchair
1. Backrest
2. Armrests
3. Joystick
4. Basket
5. Battery pack
6. Rear wheels
7. Front castors
8. Footplate
9. Anti-tip wheels
10. High-low system
Your electric wheelchair is consists of many dierent components. Get to know these before you study this manual
further. Designs and specications may change without further notice.
2.2 General explanation of your electric wheelchair
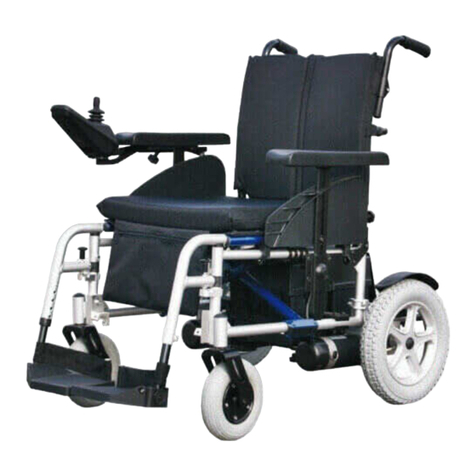
Your new Excel E-Smart is a comfortable electric wheelchair, suitable for both indoor and outdoor use. Thanks to its
compact size and small turning radius, the E-Smart is ideal for getting around in the house.
1
2
3
5
7
6
8
4
9
10

© 2018 Excel, part of Van Os Medical B.V.
Koperslagerij 3 | 4651 SK Steenbergen | The Netherlands | T: +31 (0)167-573020 | E: [email protected] | W: www.vanosmedical.nl
© 2018 Excel, part of Van Os Medical B.V.
Koperslagerij 3 | 4651 SK Steenbergen | The Netherlands | T: +31 (0)167-573020 | E: [email protected] | W: www.vanosmedical.nl
8
User Manual | Excel E-Smart / E-Smart +
3. Safety regulations
Van Os Medical specically disclaims responsibility for anybody’s injuries or property damage which occur when the
recommendations and warnings described in this user manual are not followed.
The Excel E-Smart / E-Smart + is a very safe and stable product when used correctly, it is possible if you use the
wheelchair incorrectly that dangerous situations may occur.
3.1 General safety
Protect your wheelchair by checking it regularly. When a part of your Excel E-Smart doesn’t function correctly, a
dangerous situation could occur. Therefore, you must keep your wheelchair in perfect condition, to ensure safe
use. Periodical inspection, correct adjustment and replacement of broken or worn parts by a qualied Excel dealer
in quick time will result in use for years without any problems.
3.2. Warnings for safe use
To prevent any damage to your property, the wheelchair or the user of the wheelchair, you must read the following
warnings. Van Os Medical is not responsible for any damage, provided that the warnings are heeded. After reading
the warnings, you agree with the regulations, mentioned in this user manual.
• When you get your wheelchair, always check if all components are present and if there is any damage. If
components are missing if there is any damage, you must contact your supplier immediately;
• Never use the electric wheelchair on uneven terrain like sand or gravel, or wet terrain where the wheelchair
will not have enough traction;
• Never negotiate an incline on an angle. Only go straight up or down the incline;
• Never take passengers on your electric wheelchair. It is designed for one occupant only;
• When reaching forward in the electric wheelchair, make sure to sit as far back in the chair as possible, to
prevent losing balance and falling forward;
• Never stand on the footplate. This could cause the electric wheelchair to tip forward;
• When getting in or out of the wheelchair, always make sure it is parked on a at and level surface;
• When driving the E-Smart, make sure the footplate always has at least 7 cm ground clearance;
• Always turn o the power when the electric wheelchair is in an elevator or on an electric wheelchair lift;
• Transporting the electric wheelchair in any vehicle is always at your own risk. Van Os Medical B.V. cannot be
held responsible for any damage or injuries caused during transport of the wheelchair in a vehicle;
• When transporting the electric wheelchair, do not sit in it, as if it were any chair in a motorvehicle;
• Do not use the wheelchair if anything is damaged or not functioning correctly;
• Do not stand on the seat of the electric wheelchair, or any other part;
• The maximum user weight capacity has been indicated on your frame label. Do not exceed it;
• Do not make sudden changes of direction, as this may cause the wheelchair to tip over;
• Never use the electric wheelchair when under the inuence of any mind altering substance like heavy
medication or alcohol;
• When making structural changes to the wheelchair, not in accordance with or described in this manual, the
warranty is voided.
© 2018 Excel, part of Van Os Medical B.V.
Koperslagerij 3 | 4651 SK Steenbergen | The Netherlands | T: +31 (0)167-573020 | E: [email protected] | W: www.vanosmedical.nl
9
User Manual | Excel E-Smart / E-Smart + User Manual | Excel E-Smart / E-Smart +
Warning
When making structural changes to the wheelchair, not in accordance with or described in this manual, the
warranty is voided.
© 2018 Excel, part of Van Os Medical B.V.
Koperslagerij 3 | 4651 SK Steenbergen | The Netherlands | T: +31 (0)167-573020 | E: [email protected] | W: www.vanosmedical.nl
© 2018 Excel, part of Van Os Medical B.V.
Koperslagerij 3 | 4651 SK Steenbergen | The Netherlands | T: +31 (0)167-573020 | E: [email protected] | W: www.vanosmedical.nl
10
User Manual | Excel E-Smart / E-Smart +
4. Instructions for use
It is very important that you teach yourself the correct user instructions. Therefore, you need to know all the
components of the wheelchair as described in this user manual. Always check with an expert about developing safe
methods regarding your physical abilities to use your wheelchair.
4.1 Balance
Daily operations such as getting in and out of the wheelchair, reaching and bending in the wheelchair will cause
change to the weight distribution and the centre of gravity of you and your wheelchair. You will need to perform
these movements and techniques as shown below.
4.1.1 Getting in and out
Getting in and out of the wheelchair is a common operation. The diculties of getting in and out depend on your
physical capabilities. In this user manual, we describe the actions that must be followed when you want to get in or
out of the wheelchair without help. When you can’t do it independently any longer, we recommend that you make
an appointment with an occupational therapist to discuss your options and to determine how you can best get in
and out of the wheelchair.
Before you get in or out of your electric wheelchair, you must make sure the wheelchair is on a at surface. The
wheelchair needs to be in drive mode (not freewheel) when getting in or out. That way, the motorbrake keeps
the wheelchair from moving. Always make sure the wheelchair is turned o when getting in or out. The electric
wheelchair is turned o when all of the LEDs on the controller are o. This prevents the chance of accidentily
moving the joystick and thus moving the wheelchair when getting in our out. When getting in or out of the
wheelchair, be sure to ip the armrests and footplate up. When seated, fasten the seatbelt, ip down the armrests
and footplate and you are ready to go. To get out, turn o the wheelchair, unfasten the seatbelt, ip up the
footplate and one or two of the armrests.
4.2 Bending and/or reaching
It may occur when you are in your wheelchair that you need to reach for something. To avoid tipping over, you must
follow the steps below.
• Make sure that you are as close as possible to the object;
• Make sure the front wheels are in forward driving position. If not, go forwards and then backwards to turn the
wheels in the correct position;
• Turn o the electric wheelchair;
• You can now bend and reach for the target more safely.
4.3 Going up or down inclines or kerbs
It may occur that you have to go up or down a kerb or with your wheelchair. In this user manual we will describe
how to do this independently and safely.
Warning
If the wheelchair is going faster than you are comfortable with when descending, the speed can be adjusted without
stopping fully.

© 2018 Excel, part of Van Os Medical B.V.
Koperslagerij 3 | 4651 SK Steenbergen | The Netherlands | T: +31 (0)167-573020 | E: [email protected] | W: www.vanosmedical.nl
11
User Manual | Excel E-Smart / E-Smart + User Manual | Excel E-Smart / E-Smart +
4.3.1 Going up an inclcine or kerb
If you want to go up a kerb or threshold you have to do so in a forward motion. Be extra careful when going up the
incline or kerb. This does not mean driving as slow as possible, but with reasonable speed. Keep the wheelchair
driving and do not stop when still on the incline. Should you still accidentily come to a stop on the incline, slowly
and carefully increase speed again. It is possible that the electric wheelchair rolls back a little bit before continuing
forward when restarting after a stop. This is normal.
The anti-tip wheels of the Excel E-Smart and E-Smart+ provide extra safety when going up a kerb or incline. It is also
important to not add any extra weight (e.g. bags) to the wheelchair.
4.3.2 Going down an incline or kerb
When going down an incine or kerb, always do so in a forward motion. You should go straight down the incline,
never on an angle. Otherwise the wheelchair can fall over. Never go down a kerb or incline too fast.
4.4 Controls
The most important skill with an electric wheelchair is controlling it. Below is a description on how to use the
controller in a safe manner in dierent situations.
Your electric wheelchair is made to increase mobility. When driving the wheelchair you will encounter dierent
situations. To control the wheelchair in these situations, we describe a few examples below, and how to control the
E-Smart safely. By following instructions below, you can prevent dangerous situations to occur.
Controlling the wheelchair in small spaces
• Make the wheelchair come to a full stop;
• Put the E-Smart on the lowest speed setting;
• Steer into the desired direction.
Uneven surfaces
• Your electric wheelchair performs best on at surfaces. But it is also possible to use it on uneven surfaces like
grass or gravel. However we do recommend to avoid slippery surfaces like ice and snow;
• It is important to go slow but not to come to a full stop on the aforementioned surfaces.
Tip
Carefully inspect an incline or kerb before going up or down. That way you make sure you know what to expect, and
you can continue safely.
Warning
Never go up or down an incline or kerb that is covered in snow, ice, grass or any other possible slippery surface.

© 2018 Excel, part of Van Os Medical B.V.
Koperslagerij 3 | 4651 SK Steenbergen | The Netherlands | T: +31 (0)167-573020 | E: [email protected] | W: www.vanosmedical.nl
© 2018 Excel, part of Van Os Medical B.V.
Koperslagerij 3 | 4651 SK Steenbergen | The Netherlands | T: +31 (0)167-573020 | E: [email protected] | W: www.vanosmedical.nl
12
User Manual | Excel E-Smart / E-Smart +
4.5 EMI / RFI
The fast development of electronics, especially for the purpose of communication, has drenched our surroundings
with electromagnetic radiation. This is mainly transmitted by television stations, mobile phones, radios, laptops,
microwaves and pacemakers. These electromagnetic waves are invisible but grow stronger the closer one gets to
the source. This radiation could cause electrical appliances to stop functioning correctly or even stop functioning at
all. This phenomenon is called Electromagnetic Interference (EMI) or Radio Frequency Interference (RFI).
All electric vehicles, including electric wheelchairs, are susceptible to Electromagnetic Interference / Radio
Frequency Interference (RFI). This can result in abnormal or unexpected behaviour of the electric wheelchair.
Should any unexpected behaviour occur, please turn o the wheelchair immediately. The FDA has ruled that every
electric wheelchair should be able to withstand EMI / RFI up to a certain level, indicated by volts per meter (V/m).
The minimum level of resistance for electric wheelchairs should be 20 V/m. This product has been tested and found
to have a resistance of 20 V/m.
4.5.1 EMI / RFI recommendations
• Do not use personal electronic communication devices, like a cellular phone, when using the electric
wheelchair;
• Be extra aware of the behaviour of your electric wheelchair when you are near transmission towers for radio,
telephone or television;
• Turn o the electric wheelchair when stationary for longer periods of time.

© 2018 Excel, part of Van Os Medical B.V.
Koperslagerij 3 | 4651 SK Steenbergen | The Netherlands | T: +31 (0)167-573020 | E: [email protected] | W: www.vanosmedical.nl
13
User Manual | Excel E-Smart / E-Smart + User Manual | Excel E-Smart / E-Smart +
5. Specications
Below you nd the technical specications of the Excel E-Smart / E-Smart +.
Technical specications of the Excel E-Smart
Total length 94 cm (incl. footplate and anti-tip wheels)
Total width 57 cm
Total height 89 ↔ 103 cm (only adjustable on the Excel E-Smart +)
Total weight 69,5 kg
Max. user weight 136 kg
Turning radius 66 cm
Seat width 44 cm
Seat depth 43 cm
Seat height 58 ↔ 72 cm (only adjustable on the Excel E-Smart +)
Back height 40 cm
Controller VR2-50A
Ground clearance 3,4 cm
Max. speed 8 km/h
Range 17,7 km
Battery pack 32 Ah or 50 Ah
Charger 5 Ah

© 2018 Excel, part of Van Os Medical B.V.
Koperslagerij 3 | 4651 SK Steenbergen | The Netherlands | T: +31 (0)167-573020 | E: [email protected] | W: www.vanosmedical.nl
© 2018 Excel, part of Van Os Medical B.V.
Koperslagerij 3 | 4651 SK Steenbergen | The Netherlands | T: +31 (0)167-573020 | E: [email protected] | W: www.vanosmedical.nl
14
User Manual | Excel E-Smart / E-Smart +
6. Components of the Excel E-Smart
In this chapter the dierent components of the Excel E-Smart are described. On the wheelchair are a number
of components present which are adjustable. If you want to add or remove any of its components, make any
adjustments of replace components, you should always follow the instructions described in this user manual.
6.1 The controller
Your electric wheelchair is equipped with a joystick as displayed on photo 1. The joystick can be adjusted in depth.
This can be done by loosening the black screw button on the bottom of the armrest (photo 2). Next, slide the tube
with the joystick backwards or forwards as desired. When the joystick is in the desired position, tighten the black
screw button.
1. On/o button
To turn the electic wheelchair on or o, press the on/o button. On the controller you will nd a number of LEDs.
These lights will ash once. Then, depending on the battery level, a number of them will light up and stay lit. To turn
the electric wheelchair o, press the on/o button once more. When the E-Smart is turned o, none of the LEDs will
be on.
On the joystick are ten LEDs; three green LEDs, four oranje LEDs and three red LEDs. If all LEDs are on, the battery
level is 100%. Using the wheelchair will discharge the battery, causing the LEDs to go o one by one, to indicate the
declining battery level. If there are only a few of the red LEDs lit, the battery needs to be charged.
2. Sound signal
This button can be used to warn people that are in your way or otherwise unaware of your approach. Pressing this
button will trigger a beeping noise
3. Speed adjustment
With this button you can adjust the speed as desired. The button on the right increases speed, as indicated with
the higher number of bars on the button. The left button has less bars printed on it, indicating that this button
decreases speed. The LEDs show the current speed setting, showing the lowest speed as 1 LED and the highest
speed setting as 5 LEDs lighting up.
EXCEL E-SMART | FOTO 1 EXCEL E-SMART | FOTO 2
1
2
3
4

© 2018 Excel, part of Van Os Medical B.V.
Koperslagerij 3 | 4651 SK Steenbergen | The Netherlands | T: +31 (0)167-573020 | E: [email protected] | W: www.vanosmedical.nl
15
User Manual | Excel E-Smart / E-Smart + User Manual | Excel E-Smart / E-Smart +
4. Joystick
With the joystick the direction and to an extent the speed of the wheelchair can be controlled. When released
the joystick will automatically return to neutral position. This activates the motorbrake which in turn will bring the
electric wheelchair to a smooth stop.
The controller that contains the joystick, other control buttons and LEDs is also designed to indicate if there is a
problem with your wheelchair. The LEDs will ash in a specic coded pattern, a fault code. These fault codes and
their meanings can be found in the chapter called Problem analysis and solutions.
6.2 The armrests
The armrests of the Excel E-Smart can be ipped upwards. To do this, follow the steps below.
• On photo 3 you see the armrests of the Excel E-Smart;
• To ip the armrest up, simply lift from the front of the armrest;
• The armrest cannot go further than the position shown on photo 4.
The armrests of the Excel E-Smart can also be adjusted in height and removed completely. To adjust the height of
the armrests, loosen the black screw button on the back of the armrest. You can now lift or lower the armrest to the
desired height. Tighten the screw button to lock the armrest in place.
EXCEL E-SMART | FOTO 5
EXCEL E-SMART | FOTO 3 EXCEL E-SMART | FOTO 4
EXCEL E-SMART | FOTO 6 EXCEL E-SMART | FOTO 7 EXCEL E-SMART | FOTO 8

© 2018 Excel, part of Van Os Medical B.V.
Koperslagerij 3 | 4651 SK Steenbergen | The Netherlands | T: +31 (0)167-573020 | E: [email protected] | W: www.vanosmedical.nl
© 2018 Excel, part of Van Os Medical B.V.
Koperslagerij 3 | 4651 SK Steenbergen | The Netherlands | T: +31 (0)167-573020 | E: [email protected] | W: www.vanosmedical.nl
16
User Manual | Excel E-Smart / E-Smart +
By loosening the black screw button just under the seat (photo 6), the width of the armrests can be adjusted or
the armrests can be removed fully. Note: the controller is attached to the armrest. In case you want to remove the
whole armrest, rst disconnect the cable of the controller. Photos 7 and 8 show how to disconnect the two yellow
connectors of the cable.
6.3 The battery pack
The Excel E-Smart is equipped with a closed battery pack (2x 12V). Van Os Medical B.V. advises to fully charge the
battery pack for at least 12 uninterrupted hours before rst use.
To increase the lifespan of the battery pack, charge it as follows;
• Park your electric wheelchair as close to the outlet as possible;
• Switch o the controller;
• Plug in the charger at the charging point on the front of the controller. Daarnaast is er op de accu ook een
oplaadpunt; mogelijkheid om de plug hierop aan te sluiten;
• Plug de andere kant van de oplader in het stopcontact;
• Ontkoppel de oplader van het stopcontact zodra de accu’s volledig opgeladen zijn.
6.3.1 Removing the battery pack
The battery pack (photo 9) of the Excel E-Smart can be removed. Below the handle of the batterypack is a button
that says ‘Push’. By pressing this button and simultaneously pulling the handle, the batterypack can be lifted out and
removed (photo 10). This way you can charge the battery pack wherever you like, separated from the wheelchair,
taking up less space. The battery charge port is shown on photo 12.
EXCEL E-SMART | FOTO 9 EXCEL E-SMART | FOTO 10
Warning
Only use the charger provided by Van Os Medical B.V. Using any other charger will void warranty. An incorrect
charger may even damage the battery pack or electric wheelchair.
EXCEL E-SMART | FOTO 11 EXCEL E-SMART | FOTO 12

© 2018 Excel, part of Van Os Medical B.V.
Koperslagerij 3 | 4651 SK Steenbergen | The Netherlands | T: +31 (0)167-573020 | E: [email protected] | W: www.vanosmedical.nl
17
User Manual | Excel E-Smart / E-Smart + User Manual | Excel E-Smart / E-Smart +
6.4 The freewheel levers
The Excel E-Smart has two settings, namely ‘neutral’ and ‘drive’ (photo 13). The sticker next to the freewheel levers
indicate these two settings with a D for drive and an N for neutral. When you want to use the electric wheelchair,
these levers should always be set to the drive setting. The neutral or freewheel setting makes it possible to move
the wheelchair when the controller is o. When pushing the wheelchair forward in neutral, the motor will act as a
generator. To put the wheelchair into freewheel mode, push both levers up. To put it back into drive, push both
levers back down. This re-engages the electromagnetic brakes, making it impossible to move the wheelchair unless
it is turned on and controlled as normal.
6.5 The high-low system
The Excel E-Smart + is tted with a high-low system. This is an electrical system that makes it easier to access higher
objects like kitchen cabinets. On photo 15 you can see the Excel E-Smart + in the lowest position. By pressing the
button underneath the left side of the seat (photo 16). Photo 17 shows the highest position of the E-Smart +. You
can only drive the wheelchair when the seat is in the lowest position.
EXCEL E-SMART | FOTO 13 EXCEL E-SMART | FOTO 14
EXCEL E-SMART | FOTO 15 EXCEL E-SMART | FOTO 16 EXCEL E-SMART | FOTO 17
Warning
Note: the E-Smart + can only drive when the chair is in its lowest position.

© 2018 Excel, part of Van Os Medical B.V.
Koperslagerij 3 | 4651 SK Steenbergen | The Netherlands | T: +31 (0)167-573020 | E: [email protected] | W: www.vanosmedical.nl
© 2018 Excel, part of Van Os Medical B.V.
Koperslagerij 3 | 4651 SK Steenbergen | The Netherlands | T: +31 (0)167-573020 | E: [email protected] | W: www.vanosmedical.nl
18
User Manual | Excel E-Smart / E-Smart +
6.6 The footplate
The Excel E-Smart is tted with a footplate that can be ipped up. To ip the footplate up, follow the steps below;
• On photo 18 you can see what the electic wheelchair looks like with the footplate down;
• You can ip up the footplate by simply pulling it up from the front, as shown on photo 19.
The footplate can also be adjusted in height. You can do this by loosening the black nuts and bolts and removing
them. Now you can move the footplate to the desired height. To lock the footplate into place, put the black nuts and
bolts back and tighten them.
6.7 The anti-tip wheels
The Excel E-Smart is equiped with anti-tip wheels. These are attached to the back of the electric wheelchair. The
anti-tip wheels move with the surface of any obstacles you may encounter and provide a smoother and safer ride.
EXCEL E-SMART | FOTO 18 EXCEL E-SMART | FOTO 19
EXCEL E-SMART | FOTO 21
EXCEL E-SMART | FOTO 20

© 2018 Excel, part of Van Os Medical B.V.
Koperslagerij 3 | 4651 SK Steenbergen | The Netherlands | T: +31 (0)167-573020 | E: [email protected] | W: www.vanosmedical.nl
19
User Manual | Excel E-Smart / E-Smart + User Manual | Excel E-Smart / E-Smart +
6.8 The seat
The seat of the electric wheelchair (photo 22) is made with comfortable foam and PU? material. This makes it
suitable to sit in the electric wheelchair for longer amounts of time. The upholstery of the chair cannot be removed.
The seat comes with a seatbelt as standard, and can be folded. Furthermore the seat can be rmoved fully. How to
do this is described in paragraph 7.1.
6.9 The wheels
The Excel E-Smart has four wheels (excluding the anti-tip wheels). You should regularly check these for signs of
wear and tear.
6.9.1 The front wheels
The front wheels of the electric wheelchair are 6” in diameter and attached to the frame through a front fork (photo
23). The front wheels are important in steering the wheelchair. When they don’t rotate or move smoothly or if they
vibrate, they are not netuned correctly.
6.9.2 The rear wheels
The rear wheels of the electric wheelchair are 9” in diameter and have PU tyres (photo 24). These tyres are
leakproof and do not need to be (re)inated.

EXCEL E-SMART | FOTO 22
EXCEL E-SMART | FOTO 23 EXCEL E-SMART | FOTO 24

© 2018 Excel, part of Van Os Medical B.V.
Koperslagerij 3 | 4651 SK Steenbergen | The Netherlands | T: +31 (0)167-573020 | E: [email protected] | W: www.vanosmedical.nl
© 2018 Excel, part of Van Os Medical B.V.
Koperslagerij 3 | 4651 SK Steenbergen | The Netherlands | T: +31 (0)167-573020 | E: [email protected] | W: www.vanosmedical.nl
20
User Manual | Excel E-Smart / E-Smart +
7 Transporting your electric wheelchair
In the developement of the Excel E-Smart we made sure it can be transported easily by car. The frame of the Excel
E-Smart can be disassembled. In addition, the armrests can be removed and the footplate can be ipped up.
7.1 Disassembling the electric wheelchair
To transport the electric wheelchair, follow the steps below;
• Before you can transport the electric wheelchair, the footplate should be ipped up. On photo 25 you can see
what the footplate looks like when ipped down, and photo 26 shows what it looks like when ipped up;
• For easy transport of the wheelchair, it is important to remove the armrests. You can do this by following the
steps described in paragraph 6.2 The armrests. Pay attention that the cable connecting the controller to the
battery pack needs to be disconnected. This is also described in paragraph 6.2;
• Fold the backrest forward;
• Now you can remove the chair of the electric wheelchair. You can do this by grabbing the chair on both sides
and lifting it upwards;
• Next you need to remove the battery pack. You can do this by following the steps in paragraph 6.3.1;
• The storage basket can be removed simply by lifting it up and o the wheelchair;
• You can now put the wheelchair, possible with the help of a ramp, in the car.
EXCEL E-SMART | FOTO 25 EXCEL E-SMART | FOTO 26
This manual suits for next models
1
Table of contents
Other Excel Wheelchair manuals

Excel
Excel G3 User manual

Excel
Excel X-power 10 User manual

Excel
Excel G6 Active User manual

Excel
Excel G-Lite User manual

Excel
Excel Quest User manual

Excel
Excel G-Explorer User manual

Excel
Excel G3 User manual

Excel
Excel Airide B-Ace User manual

Excel
Excel Globetraveller User manual

Excel
Excel Mobil User manual