Page 1 of 3
109-4364 Rev. A
Loose Parts
Note: Use the chart below to verify that all parts have been shipped.
Part # Description Qty Use
103-1309 Warranty Registration Form 1 Fill out and return to Exmark
103-8612 Literature Pack 1 Contains Deck specific material
109-0468 Manual, Operator & Parts 1 Read and view before operating machine
WARNING
POTENTIAL HAZARD
♦Operating a Navigator tractor without an
approved Exmark front mount attachment
increases the possibility of operator
entanglement in drive wheels or forward tip
over.
WHAT CAN HAPPEN
♦Entanglement or tip-over could cause serious
injury or death.
HOW TO AVOID THE HAZARD
♦When operating a Navigator tractor without an
approved Exmark front mount attachment,
observe the following:
9Keep feet and clothing away from tires.
9Limit operation to minimum required to
install a different front mount attachment.
9Minimize speed and use extreme caution.
9Only operate on a flat level surface.
9Do not operate up or down a trailer ramp.
9Avoid sudden acceleration or deceleration.
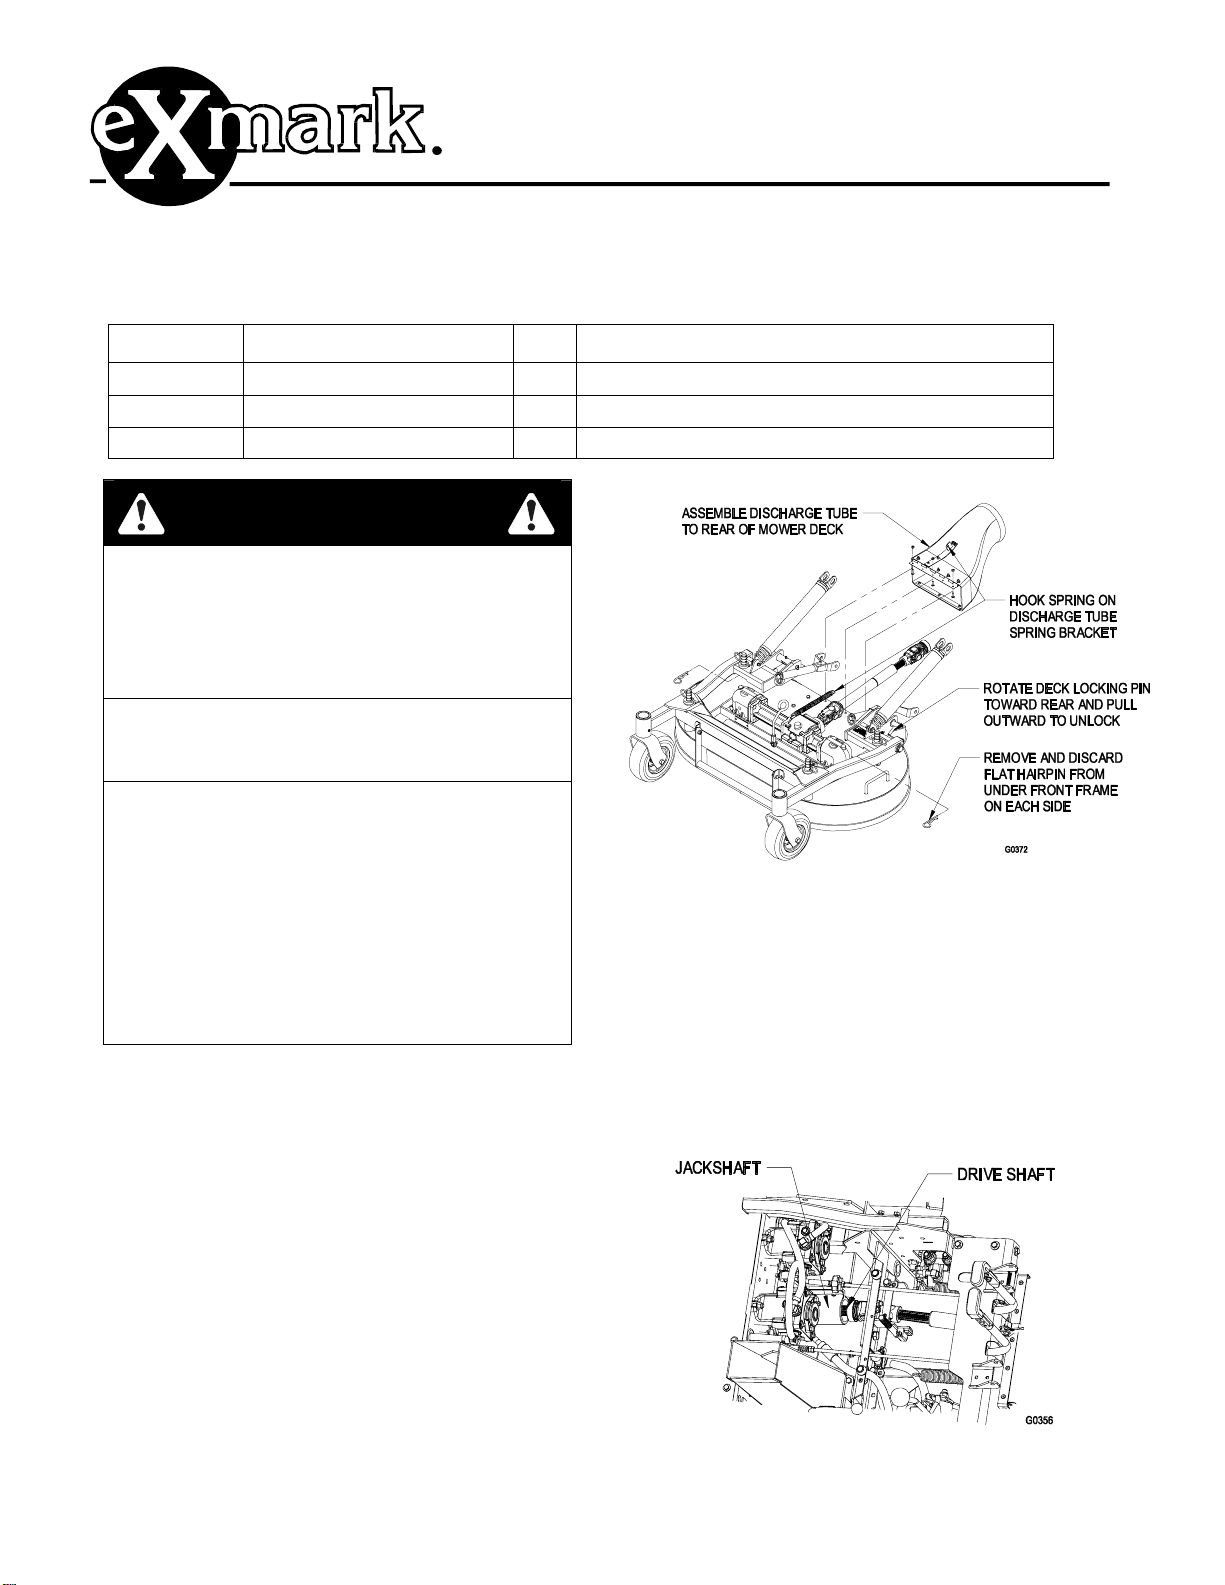
Uncrate Deck
1. Remove top and sides of crate from base.
2. Remove flat hairpins from under front frame and
discard (See Figure 1).
Assembling the Discharge Chute
1. Locate the 3 holes at the rear of the mower deck
shown in Figure 1 and remove the 3 #10-24 x 3/4
truss head screws and 3 #10-24 nyloc nuts.
2. Assemble the discharge tube to the mower deck
as shown using the hardware removed in Step 1,
with hinge positioned on top of mower deck.
3. Locate the discharge tube spring on the mower
deck and hook onto the discharge tube spring
bracket (See Figure 1).
Assembling the Deck
1. Release the deck locking pins on each side (See
Figure 1).
2. Roll the mower deck up to the Navigator tractor
with the discharge tube down, making sure the
deck springs are located above the drive wheel
and below the console on each side.
3. Raise seat and install drive shaft onto jackshaft
(See Figure 2).
NAVIGATOR
42” & 48” DECK
SETUP INSTRUCTIONS
For Serial Nos. 600,000 and Highe
FIGURE 1


