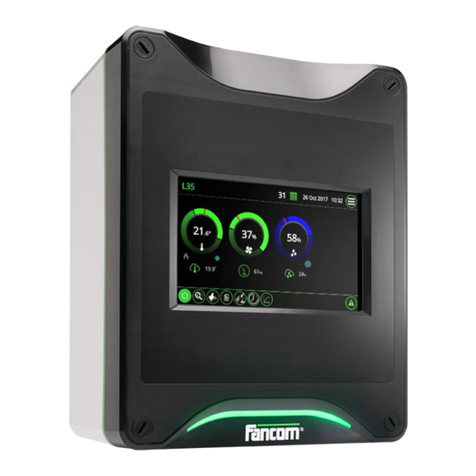
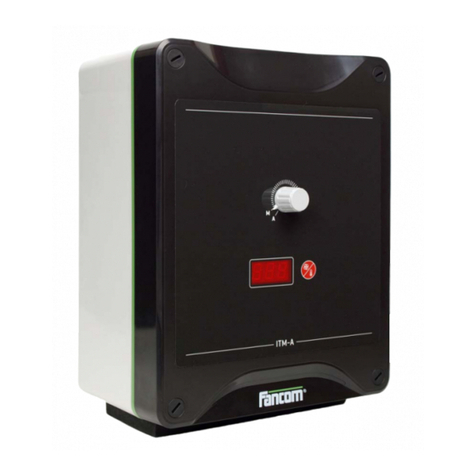
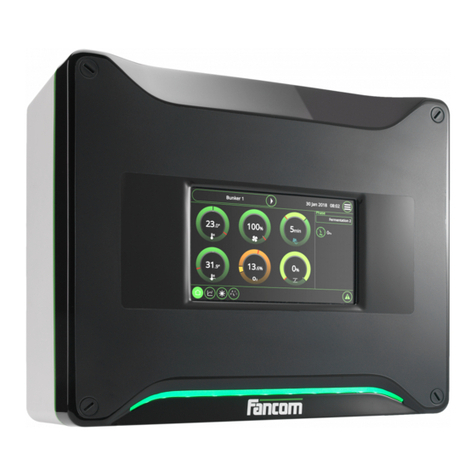
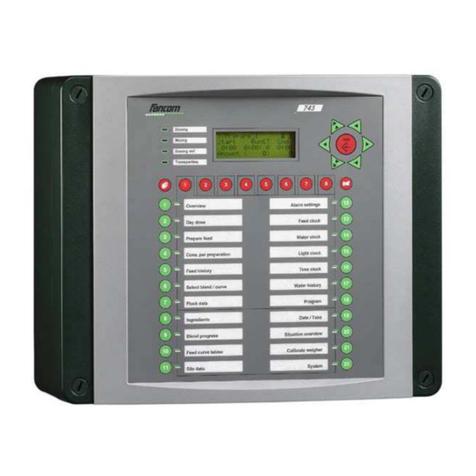
Fancom LUMINA 71 User manual

LUMINA 71
LUMINA 71
LUMINA 71 TOUCH
F71
USER MANUAL
VERSION D1
g

N.B.: The original, authentic version of this manual is the English version produced by Fancom B.V. or one of its
daughter companies (referred to further as Fancom). Any modifications introduced to this manual by third parties
have neitherbeen checked norapproved byFancom.Modifications are taken by Fancom toinclude translations into
languages other than English and the insertion and/or deletion of text and/or illustrations to/from the original
contents. Fancom cannot be held liable for any damages, injury, guarantee claims and other claims relating to this
type of modification, in as far as these modifications result in a content that differs from the original English version
of this manual produced by Fancom. For the latest information about product installation and operation, please
contact the customer service dept. and/or the technical service dept.of the Fancom company concerned. In spite of
the care taken when compilingthis manual, if you should discover any errors, please inform Fancom B.V. in writing.
Fancom B.V., PO Box 7131, 5980 AC Panningen (the Netherlands).
Copyright © 2013 Fancom B.V.
Panningen (the Netherlands)
All rights reserved. Nothing from this manual may be copied, distributed or translated into other languages, partly or
wholly, without express prior written permission from Fancom. Fancom reserves the right to modify this manual
without notice. Fancom can give no guarantee, neither implicit nor explicit, forthis manual. All risks are for the user.
This manual has been compiled with the utmost care. If, however, you should discover an error, please inform
Fancom B.V.
Art.Nr. 5911505
GB130715

Lumina 71 Table of contents
i
Table of contents
1. General introduction .................................................................................................................................. 1
1.1 Documentation with the control computer.......................................................................................1
1.2 How to use this manual..................................................................................................................1
1.3 Shortcuts ........................................................................................................................................2
1.4 Switch between sections and feed places......................................................................................2
1.5 Fancom helpdesk........................................................................................................................... 2
1.6 F-Central FarmManager™..............................................................................................................2
2. Overview...................................................................................................................................................... 3
3. Basic principles.......................................................................................................................................... 6
3.1 Feeding methods............................................................................................................................6
3.2 Feed curves....................................................................................................................................6
3.3 Feed cycles ....................................................................................................................................9
3.4 Recalculation after changing data ................................................................................................ 10
4. Control computer...................................................................................................................................... 11
4.1 Main menu.................................................................................................................................... 11
5. Process overview ..................................................................................................................................... 12
5.1 Overview....................................................................................................................................... 12
5.2 Weigher........................................................................................................................................ 12
5.3 Transport...................................................................................................................................... 13
5.4 Time clock .................................................................................................................................... 14
5.5 Manual.......................................................................................................................................... 14
5.6 Process......................................................................................................................................... 15
6. Feed feeding place ................................................................................................................................... 17
6.1 Overview....................................................................................................................................... 17
6.2 Curve FP ...................................................................................................................................... 17
6.3 Set FP........................................................................................................................................... 18
6.4 Dose %......................................................................................................................................... 20
6.5 Section.......................................................................................................................................... 20
6.6 Copy............................................................................................................................................. 22
7. Silo and Feed ............................................................................................................................................ 23
7.1 Silo overview ................................................................................................................................ 23
7.2 Ingredient overview....................................................................................................................... 24
7.3 Bulk............................................................................................................................................... 25
8. Time clock................................................................................................................................................. 26
8.1 Overview....................................................................................................................................... 26
9. Registration general................................................................................................................................. 27
9.1 Ingredient...................................................................................................................................... 27
9.2 Registration input.......................................................................................................................... 28
10. Set alarm ................................................................................................................................................... 29
10.1 Ingredient...................................................................................................................................... 29
10.2 FP Cons........................................................................................................................................ 29
10.3 External input................................................................................................................................ 30
11. Animals feed place................................................................................................................................... 31
11.1 Overview....................................................................................................................................... 31
11.2 FP................................................................................................................................................. 31
11.3 Set up........................................................................................................................................... 32
11.4 Mortality........................................................................................................................................ 33
11.5 Move............................................................................................................................................. 34
Lumina 71 Table of contents
ii
11.6Deliver .......................................................................................................................................... 35
12. Feed curve................................................................................................................................................. 36
12.1 Overview....................................................................................................................................... 36
12.2 Curve............................................................................................................................................ 36
12.3 Copy............................................................................................................................................. 38
13. Feeding cycles.......................................................................................................................................... 39
13.1 Overview feed cycles.................................................................................................................... 39
13.2 Time and date............................................................................................................................... 40
13.3 Start feed cycle............................................................................................................................. 41
14. Registration feed place............................................................................................................................ 42
14.1 Overview....................................................................................................................................... 42
14.2 Overview EV................................................................................................................................. 42
14.3 History % ...................................................................................................................................... 43
14.4 Section / FP.................................................................................................................................. 43
14.5 Ingredient...................................................................................................................................... 44
14.6 Animal........................................................................................................................................... 44
15. Alarm ......................................................................................................................................................... 46
15.1 Dealing with alarms...................................................................................................................... 46
15.2 Deactivating the alarm system...................................................................................................... 47
15.3 Testing the alarm system.............................................................................................................. 47
15.4 System alarms (ERROR nn)......................................................................................................... 47
15.5 Alarm overview............................................................................................................................. 48

Lumina 71 General introduction
1
1. General introduction
This manual has been compiled with the utmost care. If, however, you should discover an error, please inform
Fancom B.V..
1.1 Documentation with the control computer
The documentation consists of the following manuals:
•User's manual
The user's manual is intended for the end user. This manual supplies information about working with the control
computer after installation.
•Installer's manual
The installer's manual is intended for installers. This manual supplies information about connecting and
configuring the control computer.
•Operation and safety instructions
These subjects are covered in a separate manual. This manual also applies to other control computers in the
Fancom F2000-line. Always read the safety instructions and warnings carefully before using the control
computer.
Always keep this manual close to the control computer.
1.2 How to use this manual
The following symbols are used in this manual:
Tips and suggestions.
Note providing recommendations and additional information.
Warning indicating damage to the product if you do not follow procedures carefully.
Warning indicating danger to humans or animals.
Electrical shock hazard. Danger to humans and animals.
Example of a practical application of the described functionality.
Calculation example.
Describes the key combinations for arriving at a particular screen.
Decimals
The control computer and this manual use a decimal point in values. For example: a weight is shown as 1.5 kg (not
as 1,5 kg).

Lumina 71 General introduction
2
1.3 Shortcuts
Fancom uses the following action buttons in the software:
Starting actions
Option 1
1. Define settings
2. Confirm settings: press
3. Start action: press
Option 2
Use
Canceling actions
Use
1.4 Switch between sections and feed places
Change the index button down or up to switch between sections and feed places. It is e.g. used to set up animals
per section or per feed place.
1.5 Fancom helpdesk
For any questions and support, please contact the local Fancom Sales & Service Center.
1.6 F-Central FarmManager™
Virtually all Fancom equipment can be controlled and managed from a central location. This requires the F-Central
FarmManagersoftware package and a communication module. The screens in the control computers are also used
in F-Central FarmManager. This means you can start working immediately.

Lumina 71 Overview
3
2. Overview
The Lumina 71 is ideally suited for multi-phase feeding. The main objectives of multi-phase feeding are:
•Supplying the right amount of feed in the right composition at every feeding cycle. The composition and amount
are based on the animals’ life cycle.
•If the feed composition is changed, a gradually transition will take place from one type of feed to the next.
The figure below shows a feed installation with a transport route and circuit. The feed is placed on the route / circuit
from the weigher/blender and transported to the feed place. By opening the rightfeed valve,feed is released into the
relevant trough.
Figure 1: Example circuit system

Lumina 71 Overview
4
Figure 2: Example route dry-feeding system

Lumina 71 Overview
5
Figure 3: Example route system

Lumina 71 Basic principles
6
3. Basic principles
This chapter explains the basic principles and the terminology used in the Lumina 71. When setting up a group of
animals follow the following steps:
1. Determine the feeding method (see "Feeding methods" page 6)
2. Determine the feeding curve (see "Feed curves" page 6)
3. Determine the feeding cycles (see "Feed cycles" page 9)
3.1 Feeding methods
Feed can be supplied in the following ways:
•Dosing
Only one portion of feed is given during each feeding cycle. The size of the portion depends on the selected
feed curve.
•Registration (Ad libitum)
Feed is supplied when the trough is almost empty. In this situation, a sensor placed in the troughsends a signal
to the control computer. The size of the portion depends on the selected feed curve. During a feeding cycle the
control computer can supply repeated portions of feed, depending on the animals' eating speed.
•Dosing / registration
This method can be used if the amount to be dosed is greater than the trough capacity. Just like the ‘Dosing’
method a fixed amount of feed is supplied per feeding cycle. If this exceeds the trough capacity, the control
computer will regularly check if the trough sensor is uncovered. More feed can be supplied until the total feed
amount has been reached.
Select the required feeding method when setting up the animals. Set and change the feeding method per
feed place.
3.2 Feed curves
Curves allow you to enter the amount of feed an animal will be given per day during its lifecycle. You can create
curves for various purposes (breeds, feeding patterns etc.).
A feed curve is entered in the control computer based on bending points (represented by dots in the example). The
control computer calculates the feed amounts between two bending points, based on the amounts entered at the
bending points.
The feed data in a feed curve always applies per animal per day (i.e. 24-hour period). The days entered in the feed
curve are referred to as bending points. Enter the following data for each bending point:
•The curve day
•The theoretical weight per animal
•The amount of feed per animal
•The feed composition
•The feeding cycles to be used
The feed curves can be set in the control computer, see "Feed curve" page 36.

Lumina 71 Basic principles
7
3.2.1 Determining the curve for daily feed amount
The control computer first determines the curve for the daily amount per feed place based on the feed curve, curve
day, animal weight and the number of animals at the feed place. Curve daily amount = Number of animals * Curve
daily amount per animal.
Figure 4: Feed composition and amount
For example a feed curve has bending points on curve days 7, 14, 21, 28 etc.
Bending point
2 3
Curve day
7 8 9 10 11 12 13 14
Curve daily amount per animal
1.000 1.050 1.100 1.150 1.200 1.250 1.300 1.350
The control computer takes the feed amounts on days 7 and 14 from the feed curve and calculates the feed
amounts for the days between. The feed amount increase in steps. For a feed place with 10 animals the daily
amount in the curve is * 10.
The description is based on a feed curve based on a portion size. However feed curves can also be set based on the
energy value (EV). If the latter method is used changing the feed composition will result in a different portion size.

Lumina 71 Basic principles
8
3.2.2 Feed composition
The ideal feed amount and composition depend on the animals' weight and age. During the animal's life cycle the
system will gradually switch over from starter feed to transitional feed and then to finisher feed. The feed amount
also depends on the animals' age and weight. With multi-phase feeding a new feed composition (the ‘blend’) is
determined by the system every day. The transition from starter feed to transitional feed, for example, will take place
gradually. The starter feed will gradually be reduced and the transitional feed will gradually be increased. The
transition from transitional feed to finisher feed will also take place gradually. This ensures stable animal growth.
The transition from one feed type to the next is shown in the figure below:
Figure 5: The feed composition changes every day and is based on the animals’ age.
The above figure only concerns feed composition and not feed amount. The content of a certain feed type is
ndicated as a percentage. The feeding cycle starts with 100% starter feed. The blend starts to change on day 22:
the starter feed percentage is reduced and the transitional feed percentage is increased. During the transition from
starter feed to transitional feedthe system adjusts the feed composition from day to day. From day 40 onwards, only
transitional feed is supplied. The table below is based on the figure and shows the feed composition during the life
cycle:
Feeding days
Feed composition
1-21 100% starter feed.
22-40 A blend of starter feed and transitional feed.
The starter feed is gradually decreased, the transitional feed in increased.
41-67 100% transitional feed.
68-86 A blend of transitional feed and finisher feed.
The transitional feedis graduallydecreased,the finisher feed in increased.
87-103 100% finisher feed.
Example
The daily amount of feed to be given depends on the animals' life cycle. If the animals grow fast and consume
increasingly more feed, the feed amount will also quickly increase from day to day. When the animals are almost
fully grown, the feed amount increase is probably very small.
Only starter feed is given for the first 21 days (100%). However, the amount gradually increases: from 0.8 kg to 1.6
kg. The composition changes from day 22, when the system switches over to transitional feed. The total feed
amount keeps increasing. The following table shows the amounts for a number of days as examples.

Lumina 71 Basic principles
9
Day
Feed composition
Total amount
Amount per feed type
20 100% starter feed 1.6kg 1.6kg starter feed
30 50% starter feed
50% transitional feed 1.8kg 0.9kg starter feed
0.9kg transitional feed
77 50% transitional feed
50% finisher feed 2.8kg 1.4kg transitional feed
1.4kg finisher feed
To keep the examples easy to understand, only three feed types have been used. However, in practice the blend
can consist of several feed ingredients and additives:
•Feed ingredients are the main elements of the feed such as sow pellets and wheat.
•Additives are extras that are added in small amounts, such as medicines, minerals and vitamins.
The feed composition is entered in the control computer using feed curves.
3.3 Feed cycles
Feed is mixed, weighed, transported and supplied during the feeding cycles. A feeding cycle is a period of time
within which the animals at a certain feed place are fed. The start time per feeding cycle applies to all control
computer-controlled feed places. Cycles are entered within the clock as time blocks. The process is activated in
these time blocks. A maximum of 24 cycles can be entered.
Figure 6: Example graph of two cycles (6.30-11.00 h and 14.00-19.00 h) set in the clock. The dotted line indicates
the current time.
The control computerdetermines the calculated feedingcycle amount bydividing thecalculated daily amountby the
number of feeding cycles. Calculated feeding cycle amount = Calculated daily amount / Number of feeding cycles.
Number of animals at the feed place: 10. Amount per animal 0.8 kg. Total: 10 * 0.8 = 8 kg. If 2 feeding
cycles are used, 4kg will be supplied per feeding cycle.
The feeding cycles to be run are included in the feed curve. A new set of feeding cycles can be entered at each
bending point. For example. Start with one feeding cycle and switch over to two feeding cycles after 21 days.
The feed cycles can be set in the control computer, see "Feeding cycles" page 39.
3.3.1 Determining calculated daily amount
The feed amount can be changed by changing the dosing percentage. The animals are given more or less feed
during a number of days. The normal dosing percentage is 100%. If a different percentage is entered, the control
computer will recalculate the daily amount. This calculation is carried out immediately after the new data is saved.
A different dosing percentage is typically suitable for adjustments during a short period, e.g.a week. After the preset
period the control computer automatically returns the dosing percentage to 100%. Feedingwill take place based on
the feed curve again. Calculated daily amount = Curve daily amount * Dosing percentage.

Lumina 71 Basic principles
10
BioRhythm
Use a biorhythm to change the distribution of the portion during the day. This enables less feed to be supplied in the
morning and more in the evening, for example.
Carefully adjust the feed to suit the animals by changing the settings per feed place. A few examples:
•Adjusting the biorhythm
•Adjusting the dosing percentage
•Setting other feeding cycles
The dosing percentages can be changed in different ways, see "Feed feeding place" page 17.
3.4 Recalculation after changing data
The feed data of feed curves, feeding cycles and feed places can be changed. The control computer will often have
to recalculate the feeding cycle amount or composition. This calculation is carried out immediately after the new
data is saved. This applies inall situations where the controlcomputer must recalculate the feeding cycle amount or
composition. For example:
•A feed curve currently being used at a feed place is changed.
•The feed composition at the feed place is changed.
•The dosing percentage is changed as shown in the above example.
•The number of animals at the feed place is changed, e.g. by registering mortality.
•The biorhythm is changed.
The following situations can occur:
•Changing the feed data for the first feeding cycle
The control computer re-calculates all feeding cycles still to be run, including all feeding cycles on the current
day.
•Changing feed data between two feeding cycles
The control computer re-calculates all feeding cycles still to be run, including the remaining feeding cycles on
the current day. It does not take any portions already supplied into account.
•Changing the feed data after the last feeding cycle
The control computer recalculates the feeding cycles from the next feeding day. This applies in all situations
where the control computer must recalculate the feeding cycle amount or composition.

Lumina 71 Control computer
11
4. Control computer
4.1 Main menu
The Lumina 71 controller displays standard the main menu Overview Lumina 71. This screen is the starting point for
the operation via the Lumina 71 controller.
Process overview tab page Overview

Lumina 71 Process overview
12
5. Process overview
This screen shows the actual status of the feed process. The controller shows the information in different views.
5.1 Overview
This tab page shows the general progress. Depending on the number of set hoppers (maximal 4), they are
displayed under weigher/mixer.
Process overview tab page Overview
Silo Readout of the ingredient in the silo.
Weigher Readout of the feed place at which the blend would be dosed out.
Readout of the blend that is in the weigher.
Readout of the blend status (ON/OFF).
Readout of the amount of blend in the weigher (kg).
Hopper Readout of the feed place at which the blend is currently being dosed out.
Readout of the number of feed columns in the Circuit.
Active feed cycle Readout of the active feed cycle and the start time.
5.2 Weigher
This tab page shows the weigher/blender details.
Process overview tab page Weigher

Lumina 71 Process overview
13
Weigher content
Readout of the amount of blend actually dosed in. The required amount of the current
blend appears between brackets.
Make blend Readout of the blend currently being prepared (and using which curve).
Amount in weigher Readout of the amount of this ingredient actually dosed in. The required amount
appears between brackets.
Dose in
Readout of the name of the ingredient currently being fed. If the current ingredient is a
replacement ingredient, the name of the original ingredient appears between brackets.
From silo Readout of the silo from which feed is being supplied.
Dosing in status This function is only used by Fancom.
Dosing out status This function is only used by Fancom.
Number of feed columns
on the way This function is only used by Fancom.
Feed places in weigher This function is only used by Fancom.
5.3 Transport
Process overview tab page Transport
FP Nr This function is only used by Fancom.
Route This function is only used by Fancom.
Sections This function is only used by Fancom.

Lumina 71 Process overview
14
5.4 Time clock
This tab pageshows a time line. The time line showing the time period set per time clock. The vertical line shows the
current time.
Process overview tab page Time clock
Feedclk Readout of the name of the feed clock (left hand column).
Clock status Readout of the status of the feed clock (ON/OFF) (right hand column).
5.5 Manual
Process overview tab page Manual
Feed process Readout of the current feed process status: IS ACTIVE or IS NOT ACTIVE.
Feed process status Readout of the current status of the feed process (BLOCK, FREE and BLOCKED.
EMER.STOP.).
Manually feeding Setting if you want to feed a feed place or section.
Section / Feed place Setting of the feed place or section that you want to feed manually.

Lumina 71 Process overview
15
Status feed place Readout of the feed place status (value between the brackets):
•FREE: Feed place is free to use.
•BUSY
: Feed place is currently feeding, you have to wait till this feed place is free.
•BLOCK: Feed place may not be used.
And setting to manually set the feed place status:
•FREE: The control computer can run the cycle.
•BLOCKED: The control computer will skip the cycle.
•SKIP
: The control computer will skip the following cycle and then set the status of
this cycle to FREE. The amount intended to be given during this cycle will not be
supplied.
•1-TIME, 2-TIMES, 3-TIMES: The control computer will run the following cycle to
supply an amount. Then the status of this cycle will be set to BLOCK.
Make amount Setting of the feed amount that would be transported to the feed place.
5.6 Process
Process overview tab page Process
Feed process Readout of the current feed process status: IS ACTIVE or IS NOT ACTIVE.
Feed process status Readout of the current status of the feed process (BLOCK, FREE and BLOCKED.
EMER.STOP.).
Interrupt the feed process as follows:
Select one of the following options, depending on the feed process status:
End The active feed process will be stopped as soon as the current process is ready. The
weigher will be emptied and the feed dosed out to the hoppers. The control computer
will then stop the feed process and set the process status to ENDED.
When the current feeding cycle has finished, the control computer will set the process
status to FREE to enable the next feeding cycle to start as normal.
If the time for the current feeding cycle is still not finished, re-start the process using the
option Start.

Lumina 71 Process overview
16
Stop The active feed process will be stopped as soon as the current process is ready. The
weigher will be emptied and the feed dosed out to the hoppers. Then the control
computer will stop the feed process and set the process status to
BLOCKED(STOPPED).
The process will remain blocked until it is released using the option Continue.
Block The process is stopped. If the feed process is active, the running process will be
finished first. The weigher will be emptied and the feed dosed to the hoppers.
The process will remain blocked until it is released using the option Release.
Emergency stop The current process will be stopped immediately. Weighing, dosing in and dosing out
stop at once and the control computer gives a report. The process status will become
BLOCKED(EMERGENCY STOP).
Resume the feed process as follows:
After the feed process has been interrupted, it can be resumed.
Select one of the following options, depending on the feed process status:
Start If the process status is READY or ENDED.
Continue If the process status is EMERGENCY STOP or STOPPED.
Release If the process status is BLOCK.
Reset
After an emergency stopor if the feed process is notactive.Only use the reset optionin
emergencies.
Read the instructions on the display before finally carrying out the reset. Restarting the
system takes longer after a reset.
Before re-starting the process ensure the system is empty, as if no feeding
cycle had been run. The weigher/blender, hopper and the transport system
must be empty.
After Start, Continue and Release the control computer resumes the feed process as follows:
•If the time of the feeding cycle has not yet elapsed, the control computer will supply feed if the feeding cycle
permits this. If the feeding time has elapsed, the status will be automatically set to FREE so the next feeding
cycle can start as normal.
•If the next feeding time is already active, then the next feeding cycle will start at once.
This manual suits for next models
2
Table of contents
Other Fancom Control System manuals
Popular Control System manuals by other brands

WABCO
WABCO OptiTire System description

Extron electronics
Extron electronics TouchLink TLC Pro 526M Series user guide

Cisco
Cisco 1121 quick start guide

Mountz
Mountz E-DRIV MD-Series CALIBRATION PROCEDURE

Autonics
Autonics Aptivolt Firmware update guide

Techno CNC Systems
Techno CNC Systems BT1212 user manual