INSPECTION MANUAL
VERSION: 1.2:2012
©Ferno Australia 7
ARACHNIPOD DISASSEMBLY
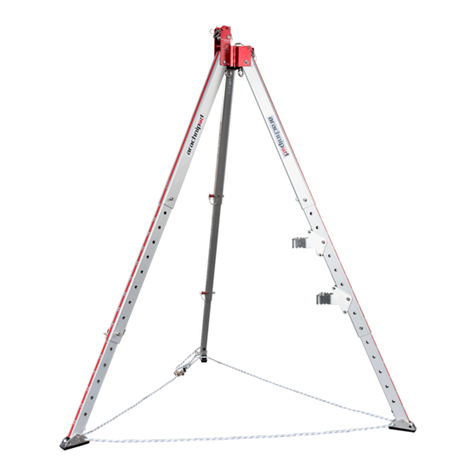
The disassembly and rigging process for the Arachnipod depends upon a
number of factors including:
• The type of Arachnipod kit
• The configuration that is used.
It is recommend that two or more people work together to disassemble the
Arachnipod components as follows:
Step 1: Preparation
• Establish a working area where the Arachnipod components can be laid
out
• A working area is a location that is safe, away from fall, slip and other
hazards that would impede the inspection process
• A clean tarp or work area is beneficial for the inspection process
Step 2: legs
• Remove the Arachnipod from the storage bag (if supplied)
• Lay the unit down on the work/ inspection area
• Remove the Qik-Link pins from each of the heads (Fig 3)
• Repeat this process for any other legs to ensure all the legs are
independent to each other
LEG INSPECTION
Extend and Inspection of Legs and Pins
1. Remove both leg pins from the legs and extend the legs to their maximum
extension. During the process of extending the legs, ensure the legs move
smoothly without any snagging.
2. When legs are at maximum extension, ensure the legs do not come apart
and are stopped by the internal leg stopper.
3. Inspect the legs for damage, deep gouging, deformation and straightness. If
there are any signs of bending, deformation or deep gouging the leg must
be replaced.
4. Check each leg pin hole on the leg (Fig 4), looking for lower deep
indentations on the pin area. If deep (more than 0.5mm) indents re evident,
this may be an indication that the leg has been subjected to overloading
and should be removed from service.
Leg Pin with Lynch Pin Assembly Inspection
1. Inspect the leg pin (Fig 5) and ensure there is no deformation, deep
gouging or obvious damage.
2. Inspect the lynch pin (Fig 5) and ensure the operation is smooth and check
the spring on the pin is operational.
3. Inspect the cable that attaches the leg pin and lynch pin to the leg. If the
cable is damaged, replace the cable accordingly.
CABLE, 150mm with rings #91-0004
ARACHNIPOD BALL LOCK LEG PIN #68-0054
Labels
Red labels are adhered to the outside face of each leg. The middle and lower
leg have alpha and numeric markings at each hole position to allow all legs
to be easily set to the same height (eg B-3). Check all labels are present and
legible. Replace any damaged labels.
IMPORTANT
If the stoppers are missing or do not
work, the leg sections can separate
completely from one another.
Any legs with missing or damaged
stoppers must be returned to Ferno
or an authorised repair agent for
repair.
ARACHNIPOD RED LEG LABELS
- set of 3 #51-0058
ARACHNIPOD LABEL -
Reflectve Silver #51-0050
Fig 3
Fig 4
Leg pin holes
Leg pin with
lynch pin security
DO NOT place fingers
into leg pin holes
Fig 5
