manuals.online logo
Brands
  1. Home
  2. •
  3. Brands
  4. •
  5. Ferplast
  6. •
  7. Aquarium
  8. •
  9. Ferplast Cayman Professional User manual

Ferplast Cayman Professional User manual

pump and heater
cayman professional
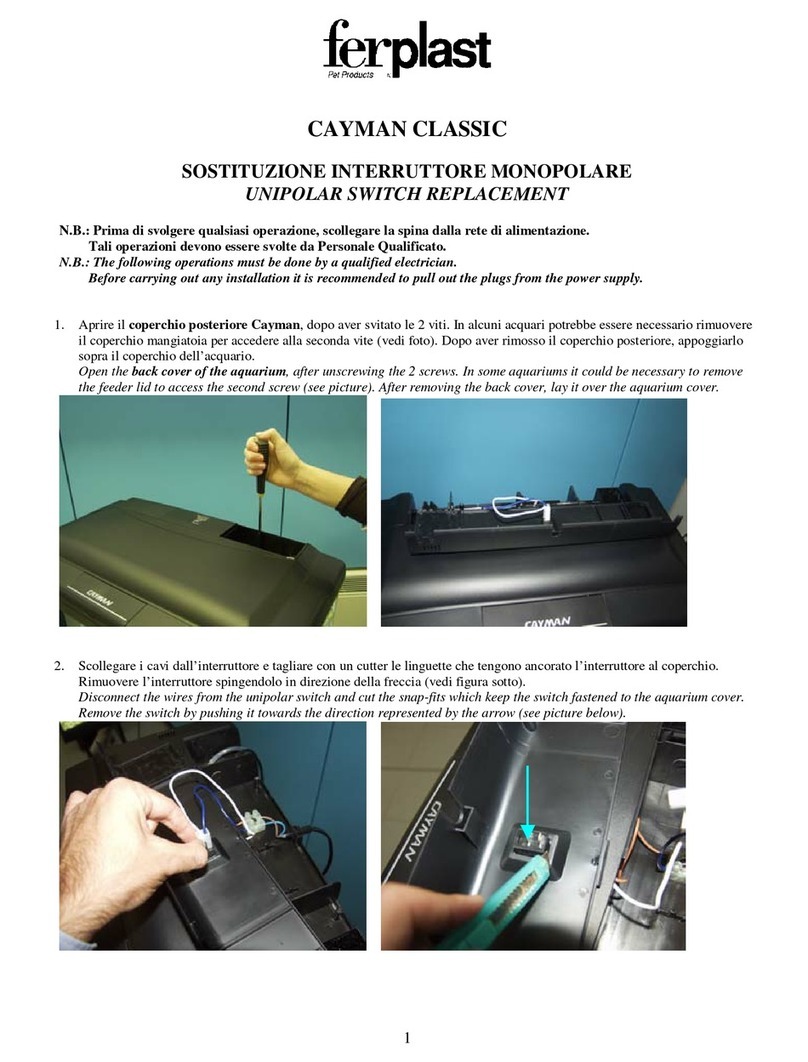
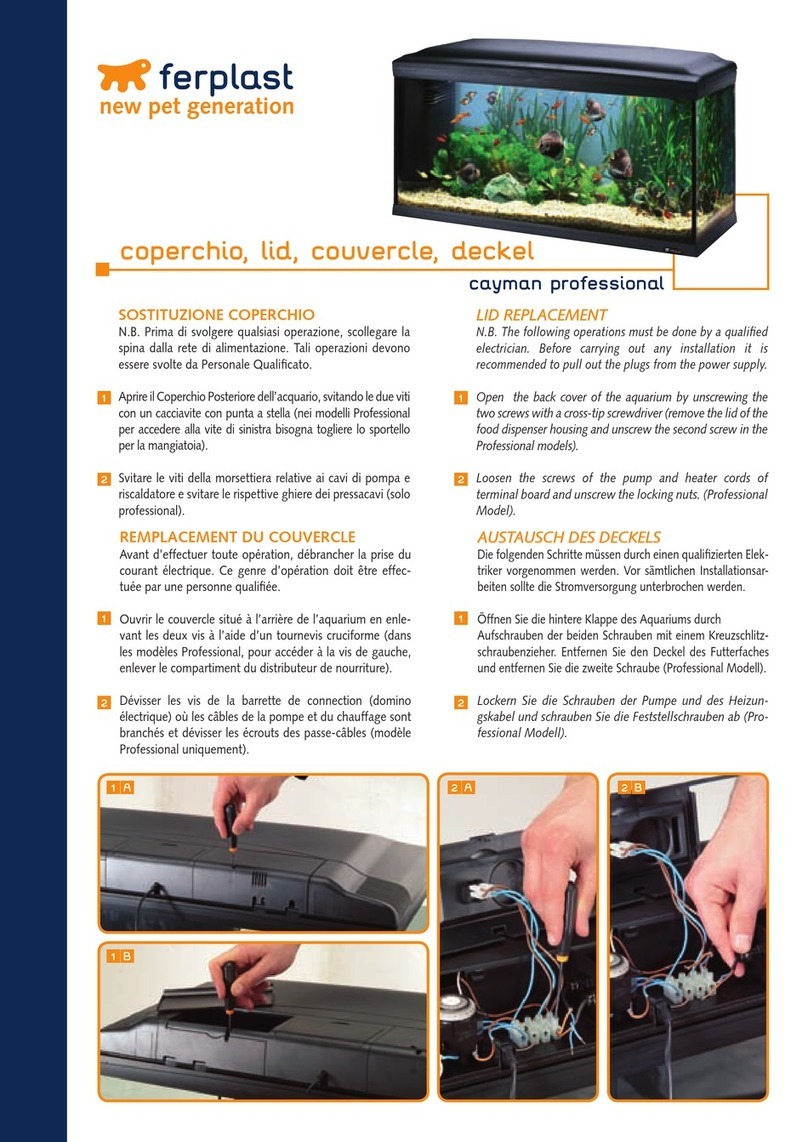
PUMP AND/OR HEATER REPLACEMENT
N.B. The following operations must be done by a qualified
electrician. Before carrying out any installation it is
recommended to pull out the plugs from the power supply.
Open the back cover of the aquarium by unscrewing the
two screws with a cross-tip screwdriver (remove the lid of the
food dispenser housing and unscrew the second screw in the
Professional models).
Loosen the screws of the pump and heater cords of
terminal board and unscrew the locking nuts. (Professional
Model).
SOSTITUZIONE DELLA POMPA E/O
RISCALDATORE
N.B. Prima di svolgere qualsiasi operazione, scollegare la
spina dalla rete di alimentazione. Tali operazioni devono
essere svolte da Personale Qualificato.
Aprire il Coperchio Posteriore dell’acquario, svitando le due viti
con un cacciavite con punta a stella (nei modelli Professional
per accedere alla vite di sinistra bisogna togliere lo sportello
per la mangiatoia).
Svitare le viti della morsettiera relative ai cavi di pompa e
riscaldatore e svitare le rispettive ghiere dei pressacavi (solo
professional).
1
2
1
2
AUSTAUSCH DER PUMPE BZW.HEIZUNG
Die folgenden Schritte müssen durch einen qualifizierten Elek--
triker vorgenommen werden. Vor sämtlichen Installationsar--
beiten sollte die Stromversorgung unterbrochen werden.
Öffnen Sie die hintere Klappe des Aquariums durch
Aufschrauben der beiden Schrauben mit einem Kreuzschlitz--
schraubenzieher. Entfernen Sie den Deckel des Futterfaches
und entfernen Sie die zweite Schraube (Professional Modell).
Lockern Sie die Schrauben der Pumpe und des Heizun--
gskabel und schrauben Sie die Feststellschrauben ab (Pro--
fessional Modell).
REMPLACEMENT DE LA POMPE ET/OU
DU CHAUFFAGE
Avant d’effectuer toute opération, débrancher la prise du
courant électrique. Ce genre d’opération doit être effec--
tuée par une personne qualifiée.
Ouvrir le couvercle situé à l’arrière de l’aquarium en enle--
vant les deux vis à l’aide d’un tournevis cruciforme (dans
les modèles Professional, pour accéder à la vis de gauche,
enlever le compartiment du distributeur de nourriture).
Dévisser les vis de la barrette de connection (domino
électrique) où les câbles de la pompe et du chauffage sont
branchés et dévisser les écrouts des passe-câbles (modèle
Professional uniquement).
1
2
1
2
1A
1B
2A2B
365119-1
Take the cables of the heater and the pump out
through the cable housing compartment.
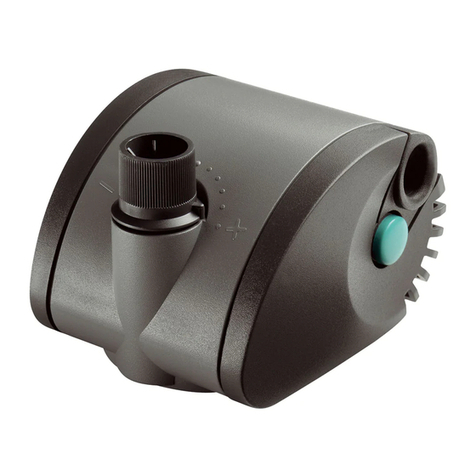
Replace the pump and/or the heater in the BluWave
filter. Cut off the plug (UK plug disconnect the
wires) and leave the wire ends as shown in
the picture 4A.
Connect the wires in the proper way (blue/blue,
brown/brown).
Ensure that the locking nuts are tight.
Close the back lid in the proper way and fix the
two screws.
Liberare i cavi di pompa e/o riscaldatore attraverso
il foro sul coperchio.
Sostituire la pompa e/o il riscaldatore, presenti nel
filtro. Nei modelli professional, va tagliata la spina
e lasciati i terminali come in figura 4A.
Collegare i cavi in modo analogo a come sono stati
liberati. IMP.: cavo blu con cavo blu; marrone con
marrone (solo professional).
Assicurarsi che le ghiere dei pressacavi siano ben
serrate (solo professional).
Richiudere il Coperchio Posteriore assicurandosi sia
inserito in modo corretto; fissarlo con le due viti.
3
4
3
4
Befreien Sie die Heizungs-und /oder Pumpen –kabel
im Kabelfach.
Setzen Sie die Pumpe bzw. die Heizung wieder in
den BluWave Filter ein. Schneiden Sie den Stecker
ab und lassen Sie die Endverschlüsse wie in Abbi--
ldung 4A beschrieben.
Verbinden Sie die Drähte korrekt wie am Anfang
(blau/blau, braun/braun).
Vergewissern Sie sich, daß die Feststellschrauben
fest angezogen sind (Professional Modell).
Schließen Sie die hintere Klappe korrekt und
schrauben Sie die beiden Schrauben wieder ein.
Débrancher les câbles de la pompe et/ou du chauffage.
Remplacer la pompe et/ou le chauffage dans le filtre.
Dans les modèles Professional, couper le fil électrique et
dénuder les conducteurs comme sur l’image 4A.
Rebrancher les câbles sur la barrette de connection.
Important: câble bleu avec câble bleu; marron avec
marron (modèle Professional uniquement).
Resserer les écrouts des passe-câbles (modèle
Professional uniquement).
Refermer le couvercle situé à l’arrière de l’aquarium et
s’assurer qu’il est correctement fermé; fixer le couvercle
avec les deux vis.
3
4
3
4
7
3 4
5
6
5
6
7
7
5
6
5
6
7
7
40mm 8mm
4B4C
4A

Other Ferplast Aquarium manuals

Ferplast CAYMAN SCENIC Series User manual

Ferplast

Ferplast CAYMAN SCENIC Series User manual

Ferplast Cayman Professional User manual

Ferplast

Ferplast Cayman Professional User manual

Ferplast Bluclima 50 User manual

Ferplast

Ferplast Bluclima 50 User manual

Ferplast Cayman professional Timer User manual

Ferplast

Ferplast Cayman professional Timer User manual

Ferplast BLUSKIMMER 250 User manual

Ferplast

Ferplast BLUSKIMMER 250 User manual

Ferplast Airfizz 50 User manual

Ferplast

Ferplast Airfizz 50 User manual

Ferplast BLUPOWER 250 User manual

Ferplast

Ferplast BLUPOWER 250 User manual

Ferplast Ferplast Dubai Corner 90 Black Operating and safety instructions

Ferplast

Ferplast Ferplast Dubai Corner 90 Black Operating and safety instructions

Ferplast bluflow 600 User manual

Ferplast

Ferplast bluflow 600 User manual

Ferplast cayman 40 classic User manual

Ferplast

Ferplast cayman 40 classic User manual

Ferplast cayman 40 plus User manual

Ferplast

Ferplast cayman 40 plus User manual

Ferplast CAPRI LED Series User manual

Ferplast

Ferplast CAPRI LED Series User manual

Ferplast STAR Series User manual

Ferplast

Ferplast STAR Series User manual

Popular Aquarium manuals by other brands

AQUAMAXX BioMaxx Standard manual

AQUAMAXX

AQUAMAXX BioMaxx Standard manual

Newa Mirabello young Instructions and warranty

Newa

Newa Mirabello young Instructions and warranty

Zolux EKAI Series manual

Zolux

Zolux EKAI Series manual

Smartreefs Tosta-PRO manual

Smartreefs

Smartreefs Tosta-PRO manual

ViaAqua LV Series quick start guide

ViaAqua

ViaAqua LV Series quick start guide

SuperFish Combi Clear 2000 user manual

SuperFish

SuperFish Combi Clear 2000 user manual

Fluval 10943 instruction manual

Fluval

Fluval 10943 instruction manual

Blue Marine reef 60 instruction manual

Blue Marine

Blue Marine reef 60 instruction manual

Blue Marine Reef 125 instruction manual

Blue Marine

Blue Marine Reef 125 instruction manual

Aqua Medic EVO 3000 Operation manual

Aqua Medic

Aqua Medic EVO 3000 Operation manual

Aqua Medic EVO 1001 Operation manual

Aqua Medic

Aqua Medic EVO 1001 Operation manual

Blue Marine Reef 350 instruction manual

Blue Marine

Blue Marine Reef 350 instruction manual

AQUA EL NANO REEF 20 instruction manual

AQUA EL

AQUA EL NANO REEF 20 instruction manual

Blue Marine MaxLed 85 instruction manual

Blue Marine

Blue Marine MaxLed 85 instruction manual

AQUA EL OXYPRO user manual

AQUA EL

AQUA EL OXYPRO user manual

Aqua One Regency 120 Assembly instructions

Aqua One

Aqua One Regency 120 Assembly instructions

Aqua Medic Refill System easy Operation manual

Aqua Medic

Aqua Medic Refill System easy Operation manual

Aqua Medic M-Ventil Standard Operation manual

Aqua Medic

Aqua Medic M-Ventil Standard Operation manual

manuals.online logo
manuals.online logoBrands
  • About & Mission
  • Contact us
  • Privacy Policy
  • Terms and Conditions

Copyright 2025 Manuals.Online. All Rights Reserved.