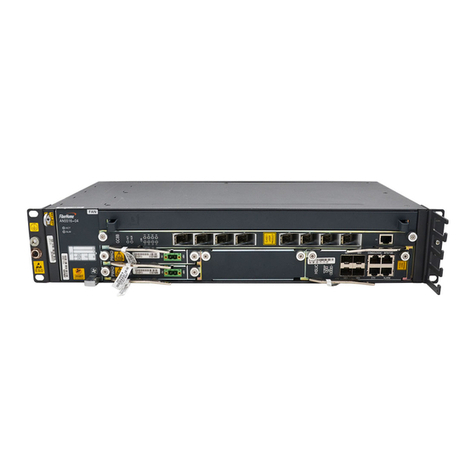
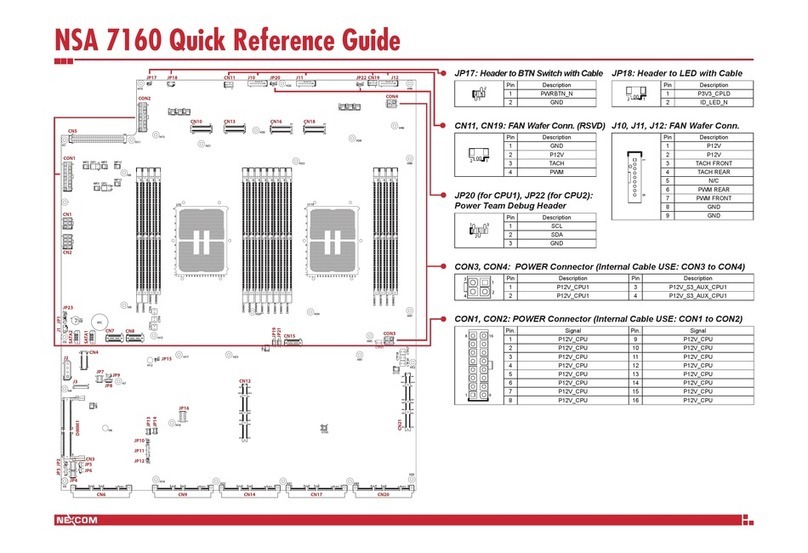
FiberHome AN5516-04 User manual

MN000003108
AN5516-04
Optical Line Terminal Equipment
[Version: D]
Quick Installation Guide


Preface
We appreciate your business. Your sa
you with comprehensive technical su
p
contact your local sales representativ
e
for any help needed at the contact inf
o
Contact us
Fiberho
m
Co., Ltd
.
Address:
Wuhan,
H
Zip code
Tel: +6 0
3
+91
+59
3
Fax: +86
Website:
No part of this document (including the
electronic version) may be reproduced or
transmitted in any form or by any means
without prior written permission from
FiberHome.
Information in this document is subject to
change without notice.
All rights
tisfaction is our goal. We will provide
p
port and afte
r
-sales service. Please
e
, service representative or distributor
o
rmation shown below.
m
e Telecommunication Technologies
.
No. 67, Guanggu Chuangye Jie,
H
ubei, China
: 430073
3
7960 0860/0884 (for Malaysia)
98 9985 5448 (for South Asia)
3
4 501 4529 (for South America)
27 8717 8521
http://www.fiberhomegroup.com
reserved


1Installation Procedure
Pages
2-5
Operation procedure
Reference information
Page
Page 6
Pages
6-11
Page 12
Subrack
overview
Installing and
securing subracks
Page 6
Pages
9-11
Equipment
layout
Pages
7-8
I
Preparation for
cable connection
Cabinet with
routed fibers and
cables
Connecting
cables
Connecting
fiber jumpers
Page 12
Pages
13-26
Page 13
Page 14
Pages
15-23
Pages
24-26
Page 27
1
Pages
27-28
1
Safety
precautions
Specifications and
precautions for
card operations
O
p
eration rules
Page 2
Page 4
Installation
preparations
Start
p
for plugging /
unplugging optical
modules
Page 5
Installing cards
Installing
subracks
Installing
cabinets
Connecting
cables
nstalling subrack
components
Checking the
connection and
layout of wires
and cables
Page 27
Installing the
fan unit
Page 12
Installing
cabinet doors
1
End
Post-installation
inspection Checking before
power-on
Power-on test
Page 28
Page 28

2Safety Precautions
Carpets or other materials that easily gene
ESD Protection
Caution
To prevent laser radiation from injuring eyes,
end face of the fiber or fiber connector direct
l
Laser Safety
Warning
Carpets
or
other
materials
that
easily
gene
of the equipment room.
Do not touch any component or wires on
c
measures should be taken if it is necessa
r
Before the equipment is powered on, the cabi
n
protection earth ground cable should be well g
resistance and ground resistance meet the sp
e
Grounding Requirements
Caution
Cables of different types on the installatio
n
separately. Please note that optical fibers
Exercise care if you must bend fibers. If
b
never be less than 20 d (d refers to the fi
b
Th bl b d i h d
Binding Cables
Caution
ESD protection gloves
2
2
Th
e ca
bl
es are
b
oun
d
w
i
t
h
proper an
d
eq
u
arranged in good order. The extra parts o
f
points.
Prior to equipment installation, please inspe
c
connection of cables (especially earth groun
d
that the conditions for installation are satisfa
c
documents. Please refer to the manual Insta
l
Inspection Prior to Installation
Caution
erate static electricity should not be used on the floor
do not look into the
l
y with naked eyes. Laser class
identifier
erate
static
electricity
should
not
be
used
on
the
floor
c
ards, or metal conductors in sockets. ESD protection
r
y to touch the card during maintenance.
n
et protection earth ground cable and subrack
rounded. Check and ensure that the insulation
e
cification.
n
site should be laid out independently and bound
should be bound with dedicated fiber binding straps.
b
ends are necessary, the fiber bending radius should
b
er diameter).
l i b h Th bl bi d
ESD protection wrist strap
2
2
u
a
l
spac
i
ng
b
e
t
ween
th
em.
Th
e ca
bl
e
bi
n
d
ers are
f
the binders are cut from the root without leaving sharp
c
t the equipment room, cabinet, power supply,
d
cable), and supporting facilities. After confirming
c
tory, start the work following the project designing
l
lation Reference for details.

3Installation Tools
Ladder Vacuum cleaner
Knife Claw hammer
Long tape Marker pen
Crimping pliers Sharp nose pliers
Combination wrench M6 to M12 socket wrench
3
Multimeter Optical power meter
ESD protection wrist strap
ESD protection gloves
Electric drill Drilling bit
Cross screwdriver Flat screwdriver
Spirit level File
Diagonal pliers Wire stripper
Torque wrench Fiber puller
3
Network cable tester Error detector
Insulating tape
Cable tie
Fiber binding strap

4Specifications and Precautions fo
r
Do not contact cards with bare hands. Al
w
wrist strap when operating on cards.
When holding a card, put your hands on i
t
cards, or metal conductors in sockets.
Caution
All vacant slots in the subrack should be i
n
a dummy panel, ensure that you will plug
Use care when plugging a card. The card
The cards are valuable and fragile. Users
Prevent the circuit surfaces of cards from
scratching.
If the unpacked card is a spare card, it wil
l
the card with its original ESD protection b
a
from sunlight and strong electromagnetic
r
4
4
r
Card Operations
w
ays wear ESD protection gloves or ESD protection
t
s panel, and do not touch any component or wires on
n
stalled with dummy panels. When you unplug
it back in five minutes.
cannot be inserted if not properly oriented.
should treat them with great care.
contacting each other, to avoid shorting or
l
not be installed immediately. Users can put
a
g in a dry and cool place, keeping it away
r
adiation sources.
4
4

5Operation Rules for Plugging / Un
5.1 Plugging the Optical Module
1
Material
number
Order
number
5.2 Unplugging the Optical Module
Rate
Transmission distance
Working wavelength
Material code of module part
Grab the pull ring of the optical module with th
e
tweezers end of the fiber puller, and draw it o
u
to detach the optical module from the EMI cag
e
1
5
5
While pulling the optical module, hold the fib
e
puller tightly so that the module will not fall d
o
Caution
plugging Optical Modules
Hold the optical module, and plug it into the card along
the EMI cage.
防
静
电
手
套
/
腕
带
ESD protection gloves /
wrist strap
e
u
t
e
.
Pulling the
optical module
Pulling the
o
p
tical fibe
r
(tweezers)
Fiber puller
5
5
e
r
o
wn.
p
ESD protection gloves /
wrist strap Fiber puller

6Installing Cabinets
Note
Cabinet Model Manual
D
19-inch cabinets (4102596 to
4102599)
Quick In
s
(410259
6
21-inch cabinets (4102589 to
4102592)
Quick In
s
(410258
9
The AN5516-04 can be installed in the follo
w
manuals for the procedures of installing the
No.
①
7Installing Subracks
7.1 Subrack Overview
1
Subrack Structure
21-inch cabinets (404000068 to
404000071)
Quick In
s
(404000
0
21-inch cabinets (404000337 to
404000340)
Quick In
s
(404000
3
②
③
④
⑤
⑥
⑦
2
357
6
4
6
Description
Subrack without mounting ears
Subrack with mounting ears for 19-inch cabinet
Subrack with mounting ears for 21-inch cabinet
Note 1:The size of depth does not include the siz
e
6
Subrack Dimensions
D
escription
s
tallation Guide for the 19-inch Cabinet (600 mm-deep)
6
to 4102599)
s
tallation Guide for the 21-inch Cabinet (300 mm-deep)
9
to 4102592)
w
ing cabinets. Please refer to the following
cabinets.
Description Functions
Mounting ear Secures the subrack in the
cabinet.
Earth ground point
Connects with the subrack
s
tallation Guide for the 21-inch Cabinet (300 mm-deep)
0
68 to 404000071)
s
tallation Guide for the 21-inch Cabinet (340 mm-deep)
3
37 to 404000340)
Earth
ground
point
on the subrack
Connects
with
the
subrack
earth ground cable.
ESD fastener Connects with the ESD
protection device.
Fiber puller hanger Holds the fiber puller.
Fan unit Facilitates air cooling of the
equipment.
Card area
Houses cards to implement
various functions of the
equipment.
Fiber passage unit Facilitates routing and
arranging of fibers and cables.
6
Dimensions (H ×W ×D) Note 1
88 mm ×443 mm ×239.5 mm
88 mm ×480 mm ×241.5 mm
88 mm ×530 mm ×241.5 mm
e
of fiber passage unit.
6

7.2 Equipment Layout
Rules for Arranging Subracks
When multiple AN5516-04 subracks are to be i
top down.
The AN5516-04 subrack supports both DC po
w
layouts in the two cases are different.
A cabinet can house three AN5516-04 subrac
k
The subracks are mounted on the front vertical
cabinets.
The distance between every three mounting h
o
cabinet is 1 U (44.45 mm).
The distance between every two mounting hol
e
cabinet is 1 SU (25 mm)
Note: 1U = 44.45 mm
Example of Arranging Subracks in a 19-inch Cabi
n
cabinet
is
1
SU
(25
mm)
.
Example of Arranging Subracks in a 19-inch Cabi
n
Note: 1U = 44.45 mm
7
7
nstalled in a cabinet, usually arrange them from the
w
er supply and AC power supply. The equipment
k
s at most.
mounting flanges in both 19-inch and 21-inch
o
les on the front vertical mounting flange in a 19-inch
e
s on the front vertical mounting flange in a 21-inch
n
et (AC Power Supply)
n
et (DC Power Supply)
7
7

Unit: mm
Example of Arranging Subracks in a 21-inch Cabi
n
ElfAiSbki21
ihCbi
Unit: mm
E
xamp
l
e o
f
A
rrang
i
ng
S
u
b
rac
k
s
i
n a
21
-
i
nc
h
C
a
bin
8
8
n
et (AC Power Supply)
t(DCP S l )
n
e
t
(DC
P
ower
S
upp
l
y
)
8
8

7.3 Installing Subrack in 19-inch Cabinet
Slide rails for 19-inch cabinets
Installing Components
Mark the positions for mounting the
subrack and slide rails on the vertical
mounting flanges of the cabinet. Then
install the floating nuts.
Push the subrack into the
cabinet along the slide rails.
Tighten the panel screws
clockwise to secure the subrack.
9
9
Install
i
(4102
5
Cross
screwdriver
M
6
Panel sc
r
Marker pen Flat
screwdriver
M6
Panel screw
Install the slide rails.
M6
Panel screw
9
9
i
ng subracks in 19-inch cabinets
5
96 to 4102599)
6
r
e
w

7.4 Installing Subrack in 21-inch Cabinet
Slide rails for 21-inch cabinets
Installing Components
Installation steps
Install the adapter mounting ears.
Mark the positions for mounting
the slide rails and subracks on the
vertical mounting flanges of the
cabinet. Install the floating nuts.
Installation
steps
12
4
3
Tip
When installing the adapter
mounting ears, install the panel
b t d t ti ht th
5
M6
Panel screw
9
1
0
screws
b
u
t
d
o no
t
ti
g
ht
en
th
em.
Cross
screwdriver
Marker pen Flat
screwdriver
M6
Panel screw
Adapter mounting ears
Push the subrack into the cabinet alon
g
the
Install the slide rails.
M6
Panel screw
g
slide rails.
Tighten the panel screws clockwise to
secure the subrack.
M6
Panel screw
9
0
Installing subracks in 21-inch cabinets
(404000068 to 404000071)

7.5 Mounting Subrack on the Wall
Note
To facilitate air cooling of the equipment and us
e
operation on the equipment, provide the require
d
installation spaces as indicated in the figure bel
o
this example, the front side of the subrack facin
g
downward) when mounting a subrack on the wa
AN5516-04
≥30
≥80≥80
Rear side of the
subrack
U
31.8
Determine the position and
direction of the subrack on
the wall, and mark the
mounting holes with a
marker pen.
Install the
bolt.
≥60
≥300
Front side of
the subrack
12
Install the wall mounting
ears.
M4
Screw
Unit: mm
3
1
1
1
Tighten the screws on the
mounting ears with a wrench
to secure the subrack.
4
e
rs’
d
o
w (in
g
ll.
Component
Wall mounting ears
Assembly of the
Expansion Bolt
U
nit: mm
(1)
(3)
(2)
(4)
(5)
Ф14.5
expansion
Electric drill
Marker pen
Long tape
(1) Hex machine screw M8x60
(2) Spring washer
(3) Flat washer
(4) Expansion sleeve
(5) Expansion nut
Unit: mm
≥60
Drilling bit
C
Vacuum
cleaner
Claw
hammer
M8
Expansion
bolt
1
1
Socket
wrench
M4
Screw
C
ross
screwdriver

8Installing Cards and Components
8.1 Installing Cards
Caution
Before installing a card, check the pin an
d
the backplane.
Follow the rules for installing cards.
If resistance is encountered when you are
out the card and check whether the card d
type are correct. Do not force in a card in
s
Apply dummy panels to the slots not holdi
n
procedures for installing the dummy panels
Open the latches, align the left
and right edges of the card with
the slide rails in the slot (with the
component side of the card
facing upward) and push the
card in along the slide rails
slowly.
Push
t
and cl
card’s
the fig
procedures
for
installing
the
dummy
panels
those for installing common cards.
1 2
8.2 Installing the Fan Unit
Caution
Do not operate forcefully; especially do
n
excessive force when installing the fan u
Do not touch the fan blades when the fa
n
running.
1
1
2
Hold the fan unit and align the slide rails on t
upper and lower sides of the fan unit with th
e
rail grooves for the fan unit on the subrack
respectively.
Push the fan unit slowly into the subrack unt
completely inserted and locked into the bac
k
socket of the subrack.
1
2
M3
Captive
screw
ESD protection gloves /
wrist strap
Cross
screwdriver
d
card connector on
plugging a card, pull
irection, slot, and card
s
uch a case.
n
g cards. The
sarethesameas
t
he card to its position,
ose and secure the
latches as shown in
ure below.
Tighten the
captive screws on
the card panel to
lock the card.
s
are
the
same
as
3
ESD protection gloves
wrist strap
n
ot exert
nit.
n
unit is
2
2
he
e
slide
il it is
k
plane

9Preparations for Cable Connectio
n
Internal cables are the wires and cables t
h
are usually connected before delivery. In
s
on site. The items to check include wheth
wires and cables are properly and neatly
a
whether incorrect insertion or poor inserti
o
The installers can choose the top access
according to the equipment room and the
access wiring mode as an example for d
e
The AN5516
04
can use the PDP296B (3
Note
Before laying out wires and cables, you n
e
limited for operations, remove the baffle
a
After you have completed layout of wires
original places.
The
AN5516
-
04
can
use
the
PDP296B
(3
specifications and pin definitions of the P
D
For a cabinet equipped with mouseproof
h
on the top fasten the mouseproof hop
po
Preparing Wiring Holes on the Cabinet
Tip
Note
L
M
R
on
the
top
,
fasten
the
mouseproof
hop
-
po
external wires and cables are led into the
well arranged.
For a cabinet equipped with cover plate o
or bottom of the cabinet, determine the p
o
and number of wiring holes according to t
plan. Pierce the cover plate with diagonal
holes. The following introduces how to m
a
Recommended areas and
sequence for making wiring holes
Caution
Prepare the holes from near to far in seq
u
Polish the raw edges of holes so that the
y
LMR
L
M
R
1
1
3
n
h
at are connected inside the cabinet. These cables
s
tallers should check the connection of internal cables
er the cable distribution is reasonable, whether the
a
rranged, whether the plugs are connected firmly,
o
n exists, and whether any part is missing.
wiring mode or the floor access wiring mode
installation site conditions (This guide uses the top
e
scription).
000068) Please refer to
Hardware Description
for the
Fastening the mouseproof hop-
pockets on the top of cabinet
e
ed to remove the front panel of the PDP. If space is
a
t the bottom of the PDP.
and cables, restore the front panel and baffle to their
000068)
.
Please
refer
to
Hardware
Description
for
the
D
P.
h
op-pockets
ckets after
ckets
after
cabinet and
n the top
o
sition, size
he wiring
pliers at desired positions to make wiring
a
ke wiring holes on the top of the cabinet.
Making a wiring hole
u
ence.
y
will not cut hands or cables.
Pierce the cover plate
with diagonal pliers
along the edges desired
for making a wiring hole
3
3
10 Cabinet with Routed Fibers and
C
A PON Service Subrack
1
1
4
C
ables
An MSAN Service Subrack
4
4

Cling one end of the cabinet protection earth g
r
cabinet top and tighten it with a screw. Lead th
e
point on the head of row cabinet in the equipm
e
11 Connecting Power Cables and Pr
o
11.1 Connecting the Cabinet Protection Eart
h
11.2 Connecting the Cabinet Power Cable
Make sure the external power supply is s
h
connect the power cable when it is powe
Make sure the DC input is cut off; identif
y
Never expose the joining part of the pow
e
If the bonding resistance between the gr
o
larger than 0.1 ohm, the ground cable sh
o
Caution
Warning
1
With the premise that the cables must be
cables (including ground cables) should
b
principle.
The power cables should be made of a c
o
intermediate connections.
1
5
r
ound cable to the earth ground point on the
e
other end of the cable to the earth ground
e
nt room.
o
tection Earth Ground Cables
h
Ground Cable
Connected to the earth ground
point on the head of row
cabinet in the equipment
room
Cross
screwdriver
M6
Screw
h
ut off before connecting the power cable. Do not
red.
y
the switches to be used.
e
r cable and the power connector unless necessary.
o
und cable of the equipment and the ground bar is
o
uld be re-arranged.
5
arranged in compliance with the route, the power
b
e processed on site according to the “shortest” route
o
ntinuous segment of copper core with no
5

Connection
PDP End
CableNote 1
PDP296B (3000068)
-48V_A terminal (active)
-48V_B terminal (standby)
-48V power cabl
e
0V_A terminal (active)
0V_B terminal (standby)
0V power cable (
b
Bus bar
St t
Itllti
PE terminal
PDP protection e
a
(yellow- /green)
PDP296B (3000
0
Note 1: Please refer to the chapter on cables in Hard
w
cabinet power cables.
The following introduces how to connect the
The protection earth ground cable for the P
D
delivery of the PDP; users need only to con
n
point on the cabinet top.
Note
Tip
Shorting bar
Insulating
sleeve
St
ruc
t
ure
I
ns
t
a
ll
a
ti
on
The
following
introduces
how
to
connect
the
used.
1
6
Opposite End
e
(blue) External -48V DC power
supply
b
lack)
External power earth ground
a
rth ground cable
0
68):
Earth ground point on the top
of cabinet
w
are Description for the model numbers of the
cabinet power cables when the PDP296B
(3000068) is
D
P has been connected with the PE terminal before
n
ect the other end of the cable to the earth ground
cabinet
power
cables
when
the
PDP296B
(3000068)
is
6
Table of contents
Other FiberHome Network Hardware manuals

FiberHome
FiberHome HG6143D User manual

FiberHome
FiberHome AN6001-G16 User manual

FiberHome
FiberHome AN5116-06B Guide

FiberHome
FiberHome CiTRANS 650 U3 Technical specifications
FiberHome
FiberHome AN5506-04-F User manual

FiberHome
FiberHome AN5506-04-B User manual

FiberHome
FiberHome AN5506-04 Series User manual

FiberHome
FiberHome AN5116-06B Guide

FiberHome
FiberHome AN5116-06B Technical specifications

FiberHome
FiberHome AN5506-01-A User manual