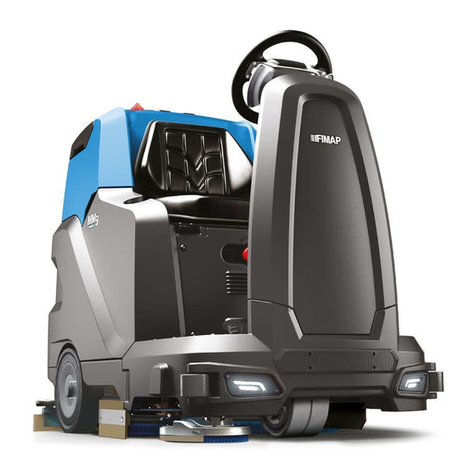
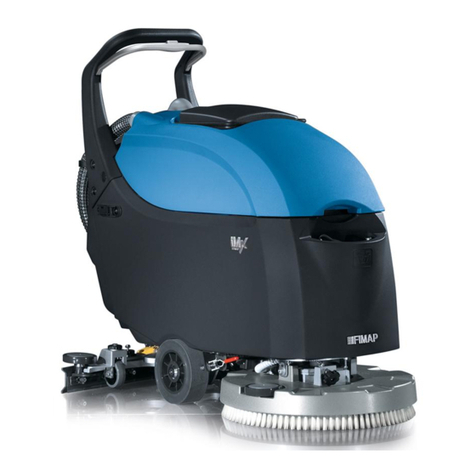
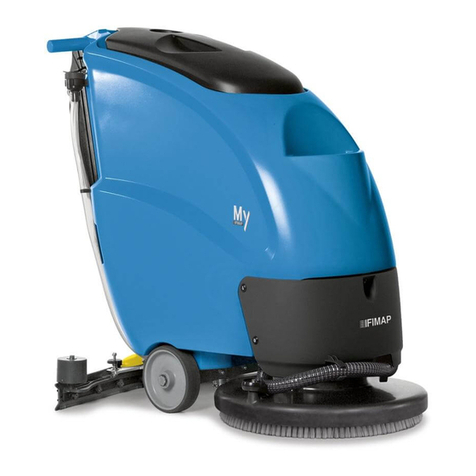
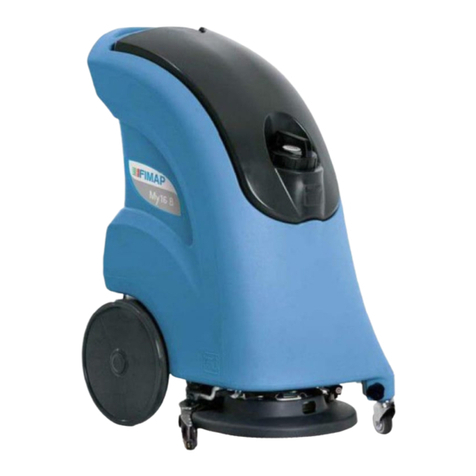
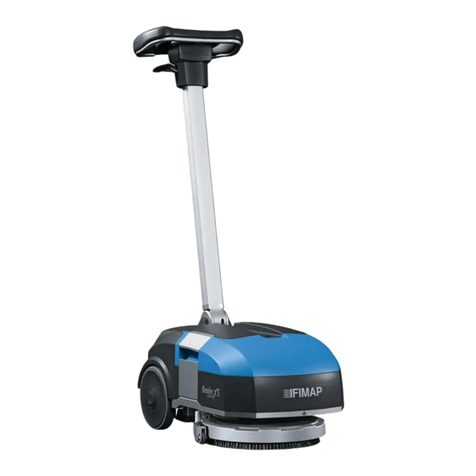
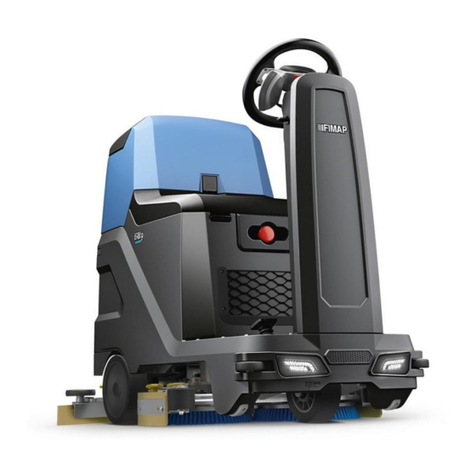
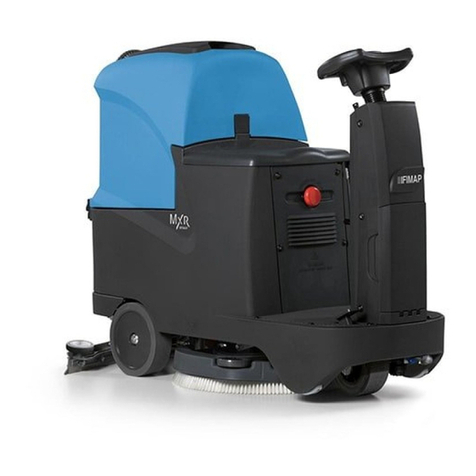
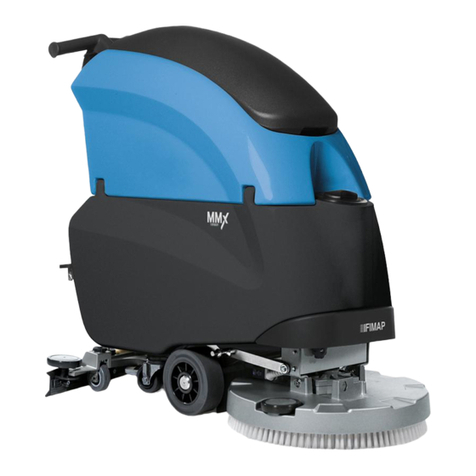
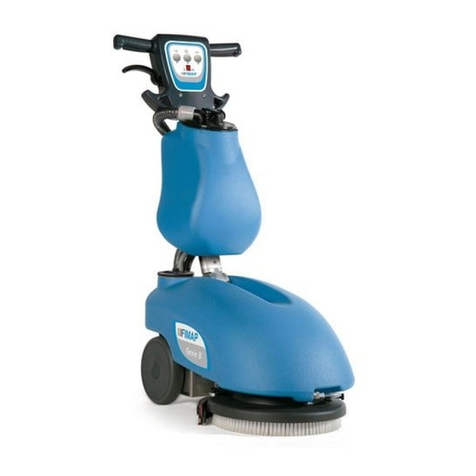
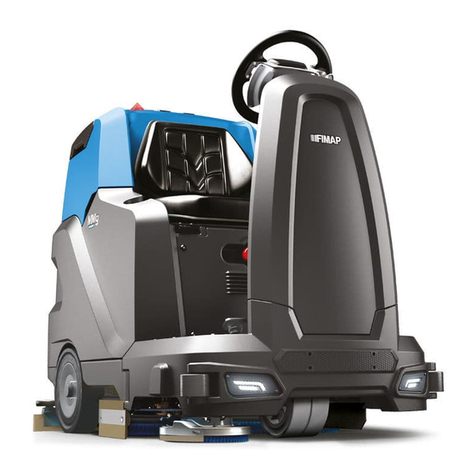
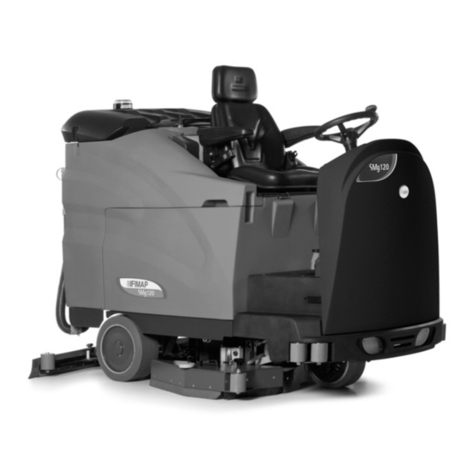
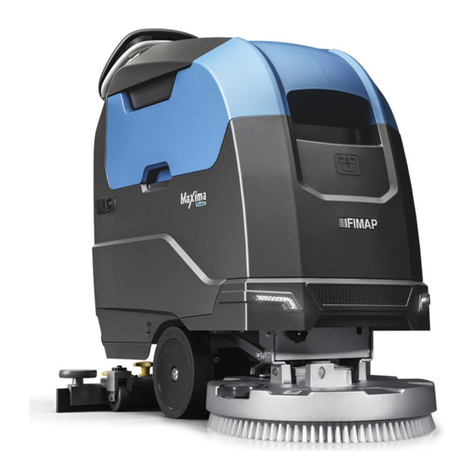
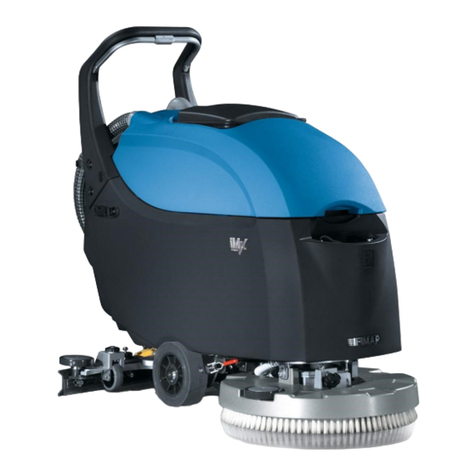
Fimap Maxima Base E User manual

ORIGINAL INSTRUCTIONS DOC. 10077476 - Ver. AA - 01-2018
PROFESSIONAL SCRUBBING MACHINES
USE AND MAINTENANCE MANUAL
MAXIMA 2017
BASE E


MAIN MACHINE COMPONENTS
The main machine components are the following:
1. Control handlebars.
2. Dead man's lever.
3. Control display.
4. Main key switch.
5. Emergency button.
6. Main switch.
7. Squeegee body control lever.
8. Brush head control pedal.
9. Support hook for recovery tank drainage tube.
10. Power supply cable support hook.
11. Recovery tank drainage tube.
12. Solution tank level indicator.
13. Solution tank drainage cap.
14. Squeegee body.
15. Squeegee body support.
16. Vacuum tube.
17. Water ow adjustment tap.
18. Brush support.
19. Brush head body.
20. Solution tank.
21. Solution tank ller cap/measuring inlet.
22. Solution tank ller tube cap.
23. Cover cap for FFF “FIMAP FAST FILL” quick coupling kit (optional).
24. Recovery tank.
25. Recovery tank lifting handle.
26. Recovery tank cover lifting handle.
27. Control handle for accessory compartment door.
28. Accessory compartment door.
29. Detergent solution lter.
3
1
3
2
6
17
14
12
15
13
16
17
25
23
26
24
27
19
11
8
7
10
6
5
21 22 20

CONTENTS
MAIN MACHINE COMPONENTS...............................................3
CONTENTS.................................................................................4
GENERAL SAFETY REGULATIONS.........................................4
CONNECTION TO THE ELECTRICITY GRID......................................5
EXTENSION CABLES ..........................................................................5
CABLE LENGTH ........................................................................5
USING THE MACHINE .........................................................................6
DEACTIVATION OF THE MACHINE.....................................................8
MAINTENANCE ....................................................................................8
TRANSPORT ........................................................................................9
SYMBOLS USED IN THE MANUAL ........................................10
PURPOSE AND CONTENT OF THE MANUAL .......................10
TARGET GROUP......................................................................10
STORING THE USE AND MAINTENANCE MANUAL.............10
ON CONSIGNMENT OF THE MACHINE .................................10
INTRODUCTORY COMMENT ..................................................10
IDENTIFICATION DATA............................................................10
TECHNICAL DESCRIPTION ....................................................10
INTENDED USE........................................................................10
SAFETY ....................................................................................10
CONVENTIONS ........................................................................10
SERIAL NUMBER PLATE ........................................................10
TECHNICAL DATA ................................................................... 11
SYMBOLS USED ON THE MACHINE .....................................12
LABELS USED ON THE MACHINE.........................................12
MACHINE PREPARATION .......................................................13
HANDLING THE PACKAGED MACHINE ...........................................13
HOW TO UNPACK THE MACHINE ....................................................13
HOW TO MOVE THE MACHINE ........................................................13
SECURING THE MACHINE ...............................................................13
ASSEMBLING THE BRUSH (50BT VERSIONS)................................14
ASSEMBLING THE BRUSH (60BT VERSIONS)................................14
ASSEMBLING THE SQUEEGEE BODY.............................................14
FILLING THE SOLUTION TANK WITH WATER .................................14
DETERGENT SOLUTION...................................................................14
HOUR METER ....................................................................................15
PREPARING TO WORK ...........................................................15
STARTING WORK ....................................................................15
SCRUBBING WITH DRYING ..............................................................15
SCRUBBING WITHOUT DRYING ......................................................16
DRYING...............................................................................................16
REGULATING THE FLOW OF DETERGENT SOLUTION .................16
EXTRA BRUSH HEAD PRESSURE ...................................................16
RECOVERY TANK OVERFLOW.........................................................16
AT THE END OF THE WORK.................................................. 17
RECOMMENDED MAINTENANCE OPERATIONS .................17
EMPTYING THE RECOVERY TANK ..................................................17
CLEANING THE BRUSH HEAD BRUSH (VERSION 50E).................17
CLEANING THE BRUSH HEAD BRUSHES (VERSIONS 60E) .........17
CLEANING THE RECOVERY TANK...................................................18
EMPTYING THE SOLUTION TANK....................................................18
CLEANING THE WATER SYSTEM FILTER .......................................18
CLEANING THE VACUUM TUBE.......................................................18
EXTRAORDINARY MAINTENANCE WORK ...........................18
REPLACING THE BRUSH HEAD BRUSH (50BT VERSIONS)..........18
REPLACING THE BRUSH HEAD BRUSH (60BT VERSIONS)..........19
REPLACING THE SQUEEGEE BODY RUBBER BLADES................19
ADJUSTMENT INTERVENTIONS............................................19
ADJUSTING THE SQUEEGEE BODY RUBBER BLADES ................19
DISPOSAL ................................................................................19
CHOOSING AND USING THE BRUSHES ...............................20
EC DECLARATION OF CONFORMITY ...................................20
TROUBLESHOOTING..............................................................21
The following symbols are used to indicate any
potentially hazardous situations. Always read
this information carefully and take the necessary
precautions to protect any people and/or objects that
may be present.
Operator cooperation is paramount for accident
prevention. No accident prevention programme can
be eective without the full cooperation of the person
directly responsible for operating the machine. The
majority of occupational accidents that happen either
in the workplace or whilst moving are caused by failure
to respect the most basic safety rules. An attentive,
careful operator is most eective guarantee against
accidents and is fundamental in order to implement any
prevention programme.
DANGER: Indicates an imminent danger that
could cause serious injury or death.
WARNING: Indicates a probable dangerous
situation that could cause serious injury or death.
CAUTION: Indicates a probable dangerous
situation that could cause minor injuries.
ATTENTION: Indicates a probable dangerous
situation that could damage objects.
GENERAL SAFETY
REGULATIONS
4

CONNECTION TO THE ELECTRICITY GRID
DANGER:
• To reduce the risk of re, electric shocks or injury, please read and comply with all the safety
instructions and warnings. This machine has been designed to be safe when it is used for
cleaning in the manner specied. If damage to electrical or mechanical components is found,
the machine must be repaired at the relative authorised service centre before use, in order to
prevent further damage to the machine or physical injury to the user.
• Before connecting the machine to the electric socket, make sure the electrical information on
the serial number plate corresponds to that of the mains supply. The machine must only be
powered with alternating current and with a voltage equal to that shown on the serial
number plate.
• The power supply cable outlet must have an earth connection in compliance with the
regulatory standards.
• If the machine packaging contains the cable to connect to the mains supply, it should only be
used for the above-mentioned machine.
• Before using, check for any damage on the connection cable and on the power plug. If the
cable is damaged, immediately contact a technician for restoring normal functioning.
• Connect the machine only to an electrical connection installed by an electrical installer in
conformity with IEC 60364-1.
• Never touch the power plug with wet hands.
• Make sure that the cable to the mains or the extension cable have not been damaged by
having been walked on, crushed, pulled or the like. Protect the cable from heat and from
contact with oils or sharp edges.
• Regularly check that the cable connecting to the mains is not damaged, for example with
signs of ageing or cracks. If the cable is damaged it should be replaced before using the
machine again.
• Protection against splashes of water and the mechanical strength need to be ensured also
after any replacement of the joints of the power cable or the extension cable.
ATTENTION:
• The procedure causes a short-term reduction in voltage.
• In unfavourable grid conditions the other appliances could be damaged.
• This damage could occur if the grid impedance is less than 0.15Ω.
EXTENSION CABLES
CAUTION:
Only use the materials expressly recommended by
a service technician as cable extensions (contact an
authorised retailer) or else high quality models. When
using an extension, respect its minimum cross-section.
CABLE LENGTH
CABLE SECTION
<16A <25A
Up to 20m 1.5mm22.5mm2
From 20m to 50m 2.5mm24.0mm2
5

USING THE MACHINE
DANGER:
• In the event of danger, take prompt action by pressing the emergency button on the back of
the machine (near the control handlebars).
• Never collect gases, explosive/inammable liquids or powders, nor acids and solvents!
These include gasoline, paint thinners and fuel oil (which, when mixed with the vacuum air,
can form explosive vapours or mixtures), and also non-diluted acids and solvents, acetones,
aluminium and magnesium powders. These substances may also corrode the materials
used to construct the machine.
• If the machine is used in dangerous areas (e.g. petrol stations), the relative safety standards
must be observed. It is forbidden to use the machine in environments with a potentially
explosive atmosphere.
WARNING:
• Always use the machine in compliance with its intended use, taking into consideration local
conditions and looking out for the presence of others when working, especially children.
• The machine should only be used by people trained in its use and who have shown that
they know how to use the machine and have been expressly authorised to do so.
• This machine should not be used by persons (including children) with physical, sensorial
or mental impairments and by persons with little experience and/or little knowledge of the
machine itself.
• The machine must only be used by authorised, trained personnel.
• Do not use the machine on surfaces with a slope greater than the one indicated on the serial
number plate.
• The machine is not suitable for cleaning rough or uneven oors. Do not use the machine on
slopes.
• In the event of a re, use a powder extinguisher. Do not use water.
• Adapt the speed to the adhesion conditions.
• Do not use the machine if you do not have the requisite knowledge or authorisation.
• Do not use the machine if you have not read and understood the following user manual.
• Do not use the machine under the inuence of alcohol or drugs.
• Do not use the machine while using a mobile phone or other electronic devices.
• Do not use the machine if it is not working correctly.
• Do not use the machine in areas where there are inammable vapours or liquids or
combustible powders.
• Do not use the machine in areas where it is too dark to see the controls or operate the
machine safely, unless the work lights or the front headlights are on.
• To prevent the unauthorised use of the machine, the power supply must be interrupted:
switch o the machine using the main switch (then removing the key from the block) and
disconnect the power cable from the wall socket.
6

CAUTION:
• Children must be supervised to ensure they do not play with the machine.
• During machine operation, pay attention to other people and especially to children.
• Read the labels on the machine carefully. Do not cover them for any reason, and replace
them immediately if they become damaged.
• The machine must only be used and stored in an enclosed or covered environment.
• The machine must not be used or stored outdoors in damp conditions or directly exposed to
rain.
• The machine does not cause harmful vibrations.
• Use the machine only in the manner described in this manual.
• Do not collect inammable or steaming refuse, like cigarettes, matches and hot embers.
• Reduce speed along dangerous bends or slopes.
• Always follow the instructions on the containers for mixing, using and disposing of chemical
substances.
ATTENTION:
• Always take appropriate measures to protect any individuals and/or objects that may be
present while using this machine.
• Be careful to avoid collisions with shelving or scaolding, above all if there is a risk of
objects falling from heights.
• Do not place any liquid containers on the machine.
• The machine must only be used under temperature conditions ranging from 0 °C to +40 °C.
• When using detergents to clean the ooring, always follow the instructions and respect the
warnings indicated on the container labels.
• Always use appropriate gloves and protective equipment when handling the detergents
used to clean the oor.
• Avoid working with the brushes when the machine is standing still, so as not to damage the
oor.
• In the event of a re, use a powder re extinguisher if possible, and avoid the use of water.
• Do not allow any objects to penetrate into the machine openings. Do not use the machine if
the openings are obstructed.
• Keep the machine openings free of dust, lint, hairs, or any other foreign materials that could
reduce the airow.
• Do not remove or alter any labels xed to the machine.
• Only use the brushes and pad holders that have been supplied with the machine, or those
specied in the Use and Maintenance Manual. The use of other brushes or felt pads may
compromise the machine safety conditions.
• Before starting to work, check there are no leaks.
• Before starting to work, check that all the safety devices have been installed and are
working correctly.
7

DEACTIVATION OF THE MACHINE
WARNING:
• Always protect the machine against sunlight, rain, and other atmospheric agents, both while
it is stationary and while it is functioning. Store the machine in a dry, sheltered place: this
machine is only designed for use under dry conditions, and must not be used or stored
outdoors in humid conditions.
• Do not park the machine near combustible materials, powders, gases or liquids.
• Stop the machine on a at surface.
• Switch o the machine using the main switch (then removing the key from the block) and
remove the plug of the power cable from the wall socket.
• If the machine is left unattended, it must be protected from any accidental movements
ATTENTION:
• The machine must only be stored under temperature conditions ranging from 0 °C to +40 °C.
The humidity level must be between 30% and 95%.
MAINTENANCE
DANGER:
• To avoid short-circuits when working in the vicinity of electrical components: avoid the use of
non-insulated tools; do not place or allow metallic objects to fall upon the electrically powered
components; remove rings, watches and/or clothing with metallic parts that might come into
contact with the electrically powered components.
• Do not work underneath the raised machine without adequate xed safety supports.
WARNING:
• Read all the relevant instructions carefully before performing any maintenance/repair
operations.
• If the machine does not work properly, check this is not caused by failure to carry out routine
maintenance. Otherwise, ask for the intervention of the authorised technical assistance centre.
• Restore all electrical connections after any maintenance interventions.
CAUTION:
• When carrying out maintenance switch o the machine using the main switch (then removing
the key from the block) and disconnect the power cable from the wall socket.
• Avoid contact with moving parts. Do not wear loose clothing or jewellery and tie up long hair.
• Block the wheels before lifting the machine.
• Lift the machine with equipment suitable for the weight to be lifted.
ATTENTION:
• Never tamper with the machine protection devices for any reason. Always follow the supplied
routine maintenance instructions scrupulously.
• If the machine needs to be pushed for maintenance purposes (batteries absent; discharged
batteries; etc.), never exceed 4 km/h.
8

• If there are any machine operation anomalies, check they are not due to a lack of proper
maintenance. Otherwise, request the intervention of authorised personnel or an authorised
service centre.
• If any parts need to be replaced, always request ORIGINAL spare parts from an authorised
dealer or retailer.
• To ensure machine safety and its proper functioning, always have the scheduled maintenance
interventions (specied in the appropriate section of this manual) performed by authorised
personnel or by an authorised service centre.
• Do not clean the machine with direct or pressurised jets of water, or with corrosive substances.
• Have the machine checked by an authorised technical assistance centre every year.
• When disposing of consumable materials, observe the laws and regulations in force. Once
the machine has reached the end of its service life, the materials contained within it must be
disposed of in an appropriate manner, keeping in mind that the machine itself has been built
using fully recyclable materials.
• Do not wash the machine with pressurised water, or wet it in the vicinity of electrical components.
• All repairs must be carried out by qualied personnel.
• Do not physically change the design characteristics of the machine.
• Use spare parts provided by authorised service centres.
• Wear personal protective equipment as required and as suggested in the manual.
TRANSPORT
WARNING:
• Drain both tanks before transport.
• Bring both the squeegee and the brushes to a working position before securing the machine
to the transport vehicle.
• Use a ramp, truck or trailer that can support the weight of the machine and the operator.
• The ramp gradient must not be such as to cause damage to the machine as it moves up onto
the vehicle.
9

Warning symbol:
Carefully read the sections preceded by this symbol meticulously following the
instructions indicated for the safety of the operator and the device.
Covered place symbol:
The operations preceded by this symbol must always be carried out in a dry, covered
area.
Danger symbol (moving carriages):
Indicates that the packed product should be handled with suitable carriages that
conform to legal requirements.
Disposal symbol:
Carefully read the sections marked with this symbol for disposing of the appliance.
Recycling symbol:
Tells the operator to carry out the operations in compliance with environmental
regulations in force in the place where the appliance is being used.
Symbol of the open book with i:
Indicates the need to consult the instruction manual.
The descriptions contained in this document are not binding. The company therefore reserves the
right to make any modications at any time to elements, details, or accessory supply, as considered
necessary for reasons of improvement or manufacturing/commercial requirements. The reproduction,
even partial, of the text and drawings contained in this document is prohibited by law.
The company reserves the right to make any technical and/or supply modications. The images
are shown as reference only and are not binding as to the actual design and/or equipment.
Symbol of the open book:
Tells the operator to read the user manual before using the device.
Symbol indicating the compulsory use of protective gloves:
Indicates that the operator should always wear protective gloves, to avoid the risk of
serious injury to his hands from sharp objects.
Mandatory room ventilation symbol:
Informs the operator that the room must be ventilated while the batteries are being
recharged.
Symbol indicating a treading ban:
Informs the operator that it is forbidden to tread on machine components, as this could
lead to serious injury.
Danger symbol (corrosive substances):
The operator should always wear protective gloves to avoid the risk of serious injury to
the hands caused by corrosive substances.
Danger symbol (battery acid leakage):
Indicates the danger of leaking acid or acid fumes from the batteries while they are
being recharged.
SYMBOLS USED IN THE MANUAL
Information symbol:
Indicates additional information for the operator, to improve the use of the device.
PURPOSE AND CONTENT OF THE MANUAL
The aim of this manual is to provide customers with all the information needed to use the machine
in the safest, most appropriate and most autonomous way. This includes information concerning
technical aspects, safety, operation, downtime, maintenance, spare parts and scrapping. The operators
and qualied technicians must carefully read the instructions in this manual before carrying out any
operations on the machine. If in doubt about the correct interpretation of instructions, contact your
nearest Customer Service Centre to obtain the necessary clarications.
TARGET GROUP
This manual is written both for operators and for qualied machine maintenance technicians.
Operators must not perform operations that should be carried out by qualied technicians.
The manufacturer is not liable for damages resulting from failure to comply with this veto.
Symbol of the squeegee body vacuum tube position:
Used to indicate the correct position of the squeegee body vacuum tube. The tube must
be positioned behind the squeegee body lifting chain.
STORING THE USE AND MAINTENANCE MANUAL
The Use and Maintenance Manual must be stored in its special pouch close to the machine, protected
from liquids and anything else that could compromise its legibility.
ON CONSIGNMENT OF THE MACHINE
When the machine is consigned to the customer, an immediate check must be performed to ensure all
the material mentioned in the shipping documents has been received, and also to check the machine
has not suered damage during transportation. If this is the case, the carrier must ascertain the extent
of the damage at once, informing our customer service oce. It is only by prompt action of this type that
the missing material can be obtained, and compensation for damage successfully claimed.
INTRODUCTORY COMMENT
Any oor scrubbing machine can only work properly and eectively if used correctly and kept in full
working order by performing the maintenance operations described in the attached documentation. We
therefore suggest you read this instruction booklet carefully and read it again whenever diculties arise
while using the machine. If necessary, remember that our assistance service (organised in collaboration
with our dealers) is always available for advice or direct intervention.
IDENTIFICATION DATA
For technical assistance or to request replacement parts, always give the model, the version and the
serial number (written on the relevant plate).
TECHNICAL DESCRIPTION
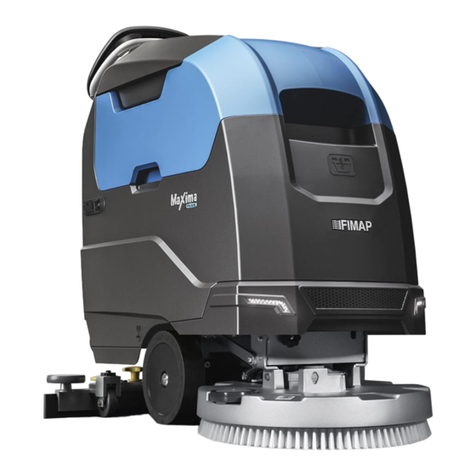
The MAXIMA2017 is a oor scrubbing machine that can work on various types of oor and dirt thanks to
the mechanical action of a brush and the chemical action of a water-detergent solution. As it advances,
it collects the dirt removed, along with the detergent solution not absorbed by the ooring itself. The
machine must only be used for this purpose.
INTENDED USE
This scrubbing machine was designed and built for the cleaning (scrubbing and drying) of smooth,
compact ooring in the commercial, residential and industrial sectors by a qualied operator in proven
safety conditions. The scrubbing machine is not suitable for cleaning rugs or carpet oors. It is only
suitable for use in closed (or at least covered) places.
ATTENTION: the machine is not suitable for use in the rain, or under water jets.
IT IS FORBIDDEN to use the machine for picking up dangerous dusts or inammable liquids in
places with an explosive atmosphere. In addition, it is not suitable as a means of transport for
people or objects.
SAFETY
Operator cooperation is paramount for accident prevention. No accident prevention programme can
be eective without the full cooperation of the person directly responsible for machine operation. The
majority of occupational accidents that happen either in the workplace or whilst moving are caused by
failure to respect the most basic safety rules. An attentive, careful operator is most eective guarantee
against accidents and is fundamental in order to implement any prevention programme.
CONVENTIONS
All references to forwards and backwards, front and rear, right and left indicated in this manual should
be understood as referring to the operator in the driving position, with his/her hands on the control
handlebars.
SERIAL NUMBER PLATE
The serial number plate is located above the electric system panel, inside the machine. It shows the
general machine characteristics, in particular the serial number. The serial number is a very important
piece of information and should always be provided together with any request for assistance or to
purchase spare parts.
10
TECHNICAL DATA
Remarks:
(1) Machine weight: refers to the overall weight of the machine,with the batteries, with both tanks empty.
(2) Machine weight during work operations: refers to the overall weight of the machine, with the solution tank full, with the recovery tank empty.
11
TECHNICAL DATA
Unit of
measurement
symbol
MAXIMA 2017
BASE 50 E
230V
MAXIMA 2017
BASE 60 E
230V
MAXIMA 2017
BASE 50 E
110V
MAXIMA 2017
BASE 60 E
110V
Rated machine power W 825 1200 825 1200
Working capacity up to m2/h 1275 1513 1275 1513
Working width mm 510 605 510 605
Squeegee width mm 712 785 712 785
Brush head brush diameter (number - diameter) mm 1 - 510 2 - 310 1 - 510 2 - 310
Number of brush head brush rotations rpm 140
Brush head motor (voltage / nominal power) V - W 230 - 375 230 - 375 110 - 375 110 - 375
Maximum weight exerted on the brush head kg 21 27 21 27
Maximum possible gradient % 2
Maximum ambient temperature for machine operation °C +40
Minimum ambient temperature for using the machine's
scrubbing functions °C +5
Vacuum motor (voltage - nominal power rating) V - W 230 - 450 110 - 450
Vacuum on vacuum head mbar 123
Maximum solution tank capacity l 53
Maximum recovery tank capacity l 55
Machine dimensions (length - width - height) Mm 1299 - 558 - 1097 1268 - 641 - 1097 1299 - 558 - 1097 1268 - 641 - 1097
Machine weight during transport(1) Kg 100 110 100 110
Machine weight during work operations(2) Kg 154 164 154 164
Sound pressure level (ISO 11201) - LpA dB (A) 66,8 66,8 66,8 66,8
Uncertainty KpA dB (A) 1,5 1,5 1,5 1,5
Hand vibration level (ISO 5349) m/s2<2,5 <2,5 <2,5 <2,5
Vibration measurement uncertainty - - - -

SYMBOLS USED ON THE MACHINE
LABELS USED ON THE MACHINE
Symbol of maximum temperature for lling the solution tank:
Located on the front of the solution tank, to indicate the maximum temperature
of the water for lling the solution tank safely.
Filter body position symbol:
Located on the right-hand side of the machine to indicate the position of the
detergent solution lter.
Label for detergent solution tap control:
Located on the right-hand side of the machine, to identify the control knob of
the detergent solution tap.
Label for brush head tilt adjustment:
Located on the front of the machine, to identify the knob for adjusting the brush
head body tilt.
Maintenance safety warning label:
Used on the machine to warn the operator that before maintenance work the
power cable must be disconnected from the mains socket.
Machine use warning label:
Located on the rear of the machine, to warn the operator which substances
cannot be removed with the machine.
Solution tank lter daily care warning label:
Applied to the machine to remind the operator to clean the solution tank after
each use.
Label reminding to close tap at the end of the work:
Used on the machine to remind the operator to close detergent solution supply
when work is nished.
Moving brush hazard label:
Used on the machine to warn the operator not to place his/her hands near the
moving brush.
Mains socket warning label:
Used on the machine to warn the operator that the mains socket, where the
machine's power cable is connected, should be duly grounded.
Label warning of the danger of electrocution (versions 110-120 volt):
Used on the machine to warn the operator that there is a danger of
electrocution with a voltage from 110-120 volt.
Label warning of the danger of electrocution (versions 220-230 volt):
Used on the machine to warn the operator that there is a danger of
electrocution with a voltage from 220-230 volt.
Label warning about the risk of crushed hands:
Indicates danger to hands due to crushing between two surfaces.
Position symbol for the solution tank drainage cap:
Applied to the back of the machine to identify the solution tank drainage cap.
Position symbol for the recovery tank drainage tube:
Applied to the back of the machine to identify the recovery tank drainage tube.
Position symbol for the brush head control pedal:
Located on the rear part of the machine, to identify the brush head control
pedal.
Symbol for extra brush head pressure activation:
Located on the rear part of the machine, to identify the correct position of the
brush head control pedal in order to activate the extra pressure function.
Squeegee body working position symbol:
Located on the rear part of the machine, to indicate the squeegee control lever
rotation direction for bringing the squeegee to its working position.
Symbol for squeegee body idle:
Located on the rear part of the machine, to indicate the squeegee control lever
rotation direction for bringing the squeegee to its idle position.
Battery connection symbol:
Located on the front of the solution tank, to indicate how to connect the 12V
batteries in order to obtain a total voltage of 24V.
Main key switch symbol:
Located near the control panel, to indicate the main key switch.
Main switch symbol:
Located near the control panel, to indicate the machine's main key switch.
12
ATTENZIONE!
Eseguire tutte le operazioni di manutenzione con il cavo di alimentazione
scollegato dalla presa di corrente
ATTENTION!
Make all maintenance operations with supply cable disconnected from the socket
¡ATENCIÓN!
Realizar todas las operaciones de manutención con el cable de alimentación
desconectado de la toma de corriente
ATTENTION!
Exécuter toutes les opérations d'entretien avec le câble d'aumenée detaché de la
prise de courant
ACHTUNG!
Ei allen unterhaltsarbeiten muss das kabel von der steckdose abgezogen werden
ATTENZIONE!
È fatto assoluto divieto di aspirare/raccogliere con questo
apparecchio polveri e/o liquidi infiammabili e/o esplosivi
o particelle incandescenti.
ATTENTION!
It is absolutely forbidden to suck/pick up inflammable
and/or explosive liquid and/or solid substances or aflame
particles with this machine.
¡ATENCIÓN!
Queda terminantemente prohibido aspirar/recoger con
esta maquina polvo y/o líquidos inflamables y/o
explosivos o partículas incandescentes.
ATTENTION!
Il est strictement interdit d'aspirer/ramasser avec cette
machine, poussières et/ou de liquides inflammables
et/ou particules explosives ou incandescentes.
ACHTUNG!
Es ist streng verboten, um Staub und/oder brennbare
Flüssigkeiten, und/oder explosive oder glühende Partikel,
mit dieser Maschine zu saugen/sammeln
CHIUDERE IL
RUBINETTO A FINE
LAVORO
TURN OFF THE COCK
WHEN OPERATIONS
ARE FINISHED
CIERRESE EL GRIFO
AL FINALIZAR EL
TRABAJO
FERMER LE ROBINET
A LA FIN DU TRAVAIL
DEN HAHN
BEIARBEITSSCHLUSS
SCHLIESSEN
PULIRE GIORNALMENTE IL
TERGIPAVIMENTO E I FILTRI
ALL’INTERNO DEI SERBATOI
CLEAN THE SQUEEGEE
AND FILTERS INSIDE THE
TANKS DAILY
LIMPIAR A DIARIO LA
BOQUILLA DE SECADO Y
LOS FILTROS DEL INTERIOR
DE DEPOSITOS
NETTOYER LE SUCEUR ET
LES FILTRES DU
RESERVOIRS
TOUS LES JOURS
TAEGLICHE REINIGUNG
DES SAUGFUSSES UND DER
FILTER IM TANKINNEREN
ATTENZIONE!
La presa per il cavo di alimentazione della macchina
deve essere provvista di messa a terra regolamentare
ATTENTION!
The socket for the supply cable of the machine must be
equipped with earthing according to the local
regulations
¡ATENCIÓN!
El enchufe para el cable de alimentación de la máquina
debe estar provisto con toma a tierra reglamentaria
ATTENTION!
La prise pour le câble d'aumenée de la machine doit
être equipée avec la mise à la terre aux termes de la loi
ACHTUNG!
Die steckdose für das anschlusskabel muss über eine
erdung entsprechend gültigen normen verfügen
110/120
VOLT
ATTENZIONE!
ATTENTION!
¡ATENCIÓN!
ATTENTION!
ACHTUNG!
220/230
VOLT
ATTENZIONE!
ATTENTION!
¡ATENCIÓN!
ATTENTION!
ACHTUNG!

MACHINE PREPARATION
HANDLING THE PACKAGED MACHINE
The machine is contained in specic packaging, and since the packaging
elements (plastic bags, staples, etc.) are a potential source of danger,
they should not be left within the reach of children, disabled persons, etc.
The machine's overall weight including packaging is 000Kg.
The overall dimensions of the package are: A=765mm B=1460mm
C=1270mm.
ATTENTION: it is recommended that all the packaging
components be kept for any future machine transportation.
ATTENTION: move the packaged product with handling
equipment that complies with legal requirements regarding size and mass of the packaging.
HOW TO UNPACK THE MACHINE
The machine is shipped in specic packaging. To remove it, proceed as follows:
1. Place the lower part of the outer packaging in contact with the oor.
NOTE: use the pictograms printed on the box as a reference.
2. Remove the outer package.
CAUTION: these operations must be carried out using protective gloves to avoid any possible
contact with the edges or tips of metal objects.
3. The machine is xed to the pallet by means of chocks (1) that block the wheels and brush head
(Fig.1), remove these chocks.
4. Raise the brush head body and fully depress the "BRUSH HEAD CONTROL" pedal (2) at the
rear of the machine (Fig.2).
NB:to lock the brush head in the raised position, depress the pedal (2) fully and then move it
towards the right-hand side of the machine (Fig.2).
5. Raise the squeegee body and turn the squeegee control lever (3) in the direction of the arrow
(Fig.3). The lever is located on the back of the machine.
1 2 3
12
3
6. Use a ramp to bring the machine down from the pallet.
CAUTION: do not t the brush and the rear squeegee body before unloading the machine, and
avoid any violent jolts to the brush head and squeegee support.
NB: the ramp gradient must not be such as to cause damage to the machine as it comes
down.
HOW TO MOVE THE MACHINE
To transport the machine safely, proceed as follows:
DANGER: before starting any task, make sure the current regulations concerning the safe
transport of dangerous substances are scrupulously observed.
1. Make sure that the solution tank and the recovery tank are empty. If not, empty them (see the
sections “EMPTYING THE SOLUTION TANK” and “EMPTYING THE RECOVERY TANK”).
2. Check that the main key switch on the control panel is set to “0”. If necessary turn the key (1) to
the left (Fig.1).
3. Check that the main button switch on the control panel is set to “0”. If necessary press the button
(2) (Fig.2).
NB:if the LED in the button switch (2) is on it means that the switch is set to “I” (Fig.2). if the
LED in the button switch (2) is o it means that the switch is set to “0”.
4. Raise the brush head body and fully depress the "BRUSH HEAD CONTROL" pedal (3) at the
rear of the machine (Fig.2).
NB:to lock the brush head in the raised position, press the pedal (2) all the way down and
then move it towards the right-hand side of the machine (Fig.3).
3
3
1 2
1
2
5. Raise the squeegee body and turn the squeegee control lever (4) in the direction of the arrow
(Fig.4). The lever is located on the back of the machine.
6. Use a ramp to move the machine up onto the transport vehicle.
CAUTION: during this operation, check there are no people or objects near the machine.
N.B.: the ramp gradient must not be such as to cause damage to the machine as it goes up.
WARNING: secure the device according to the directives in force in the country of use, so that it
cannot slide or tip over.
4
4
MACHINE SAFETY MEASURES
To ensure that work is carried out in the best safety conditions, proceed as follows:
1. Switch o the machine by positioning the main switch (1) to “0” (Fig.1).
NB:if the LED in the button switch (1) is on it means that the switch is set to “I” (Fig.1). if the
LED in the button switch (1) is o it means that the switch is set to “0”.
2. S witch o the machine setting the main key switch to “0", turn the key (2) to the left (Fig.2).
Remove the key from the instrument panel.
3. Disconnect the plug (3) of the power cable (4) from the mains supply socket (5) (Fig.3).
2 31
2
3
4
5
1
4. Wind up the power cable and put it in the tear-resistant hook (6) in the rear of the machine (Fig.4).
CAUTION: We recommend handling the power cable with dry hands to avoid serious injury.
CAUTION: To prevent damaging the power cable, disconnect the plug from the mains socket
by directly pulling the plug and not the cable.
5. Make sure the recovery tank is empty. If it isn't, empty it using the tube (7) on the rear left-hand
side of the machine (Fig.5) (see "EMPTYING THE RECOVERY TANK").
ATTENTION: the tanks should be emptied in the place used for draining dirty water.
ATTENTION: the place designated for this operation must comply with current environmental
protection regulations.
6. Raise the brush head body and push all the way down the "BRUSH HEAD CONTROL" pedal (8)
at the rear of the machine (Fig.6).
NB:to lock the brush head in the raised position, depress the pedal (8) fully and then move it
towards the right-hand side of the machine (Fig.6).
4 65
6
8
7
7. Raise the squeegee body and turn the squeegee control lever (9) in the direction of the arrow
(Fig.7), the lever is located on the back of the machine.
7
9
13

ASSEMBLING THE BRUSH (50BT VERSIONS)
For packaging reasons, the brush is supplied disassembled from the machine. To assemble it on the
brush head body, proceed as follows:
1. Make sure the machine has been secured (see “SECURING THE MACHINE”).
CAUTION: users are advised to always wear protective gloves, to avoid the risk of serious
injury to hands.
2. Raise the brush head body and fully depress the "BRUSH HEAD CONTROL" pedal (1) at the
rear of the machine (Fig.1).
NB:to lock the brush head in the raised position, depress the pedal (1) fully and then move it
towards the right-hand side of the machine (Fig.6).
3. With the brush head up, insert the brush in the plate housing underneath the brush head, turning
it until the three buttons engage with the notches on the plate itself (Fig.2).
4. Turn until the pin is pushed towards the coupling spring and is locked into place.
12
1
ASSEMBLING THE BRUSH (60BT VERSIONS)
For packaging reasons, the brushes are supplied disassembled from the machine. To assemble them
on the brush head body, proceed as follows:
1. Make sure the machine has been secured (see “SECURING THE MACHINE”).
CAUTION: users are advised to always wear protective gloves, to avoid the risk of serious
injury to hands.
2. Raise the brush head body and fully depress the "BRUSH HEAD CONTROL" pedal (1) at the
rear of the machine (Fig.1).
NB:to lock the brush head in the raised position, depress the pedal (1) fully and then move it
towards the right-hand side of the machine (Fig.6).
3. With the brush head in the raised position, press the brush-holder plate retainer (2) and
simultaneously rotate the brush in the direction shown in the image (Fig.2).
ATTENTION: Fig.2 shows the rotation direction of the left-hand brush, rotate in the opposite
direction for the right-hand brush.
4. When brush rotation is prevented, turn until the button on the brush is engaged in the coupling
spring on the brush-holder plate.
5. Repeat the operations completed for the right-hand front brush as well.
112
2
ASSEMBLING THE SQUEEGEE BODY
For packaging reasons, the squeegee body comes disassembled from the machine. To assemble it
on the squeegee support, proceed as follows:
1. Make sure the machine is in a safe condition (see “MACHINE SAFETY MEASURES”).
2. Raise the squeegee body and turn the squeegee control lever (1) in the direction of the arrow
(Fig.1). The lever is located on the back of the machine.
CAUTION: these operations must be carried out using protective gloves to avoid any possible
contact with the edges or tips of metal objects.
3. Unscrew the knobs (2) in the squeegee body pre-assembly (Fig.2).
4. First of all, insert the left-hand pin (3) on the squeegee body in the left slit (4) in the squeegee
support (Fig.3), so that the bushing (5) adheres to the walls of the slit.
5. Repeat the same operation for the right-hand pin.
2 31
1 2 4
3 5
6. Insert the vacuum tube (6) in the sleeve (7) in the squeegee body (Fig.4).
NB: the tube must be positioned behind the squeegee lifting chain.
NB: The squeegee has already been adjusted, but refer to “ADJUSTING THE SQUEEGEE
BODY RUBBER BLADES” if you need any information.
47
6
FILLING THE SOLUTION TANK WITH WATER
Before lling the solution tank, carry out the following steps:
1. Take the machine to the usual place for lling the solution tank.
2. Make sure the machine is in a safe condition (see “MACHINE SAFETY MEASURES”).
3. Check the solution tank drainage cap (1) (on the rear right-hand side of the machine) is tight. If it
isn't, turn it clockwise (Fig.1).
4. Check the water lter cap (2) (on the rear right-hand side of the machine) is tight. If it isn't, turn it
clockwise (Fig.2).
21
1 2
The solution tank can be lled with water in three dierent ways:
• Removing the cap/measuring device (3) (Fig.3) and lling the solution tank by means of a rubber
tube or a bucket (Fig.4).
• Using the ller tube (4) (Fig.5), which supports the water tube on its own. In this case, remember
to remove the cap/measuring device (3) to ensure the air is properly vented.
• Using the optional system for automatic clean water top-up. This system has a oat for avoiding
any overow.
43 5
3
4
5. Fill with clean water, at a temperature not higher than 50°C and not lower than 10°C. The amount
inside the tank can be seen by means of the level tube (5) (Fig.6) on the rear left-hand side of
the machine.
6
5
DETERGENT SOLUTION
After lling the solution tank with clean water add the liquid detergent to the tank in the concentration
and manner indicated on the detergent manufacturer's label. To prevent the formation of an excessive
amount of foam that could damage the vacuum motor, use the minimum percentage of detergent
required.
CAUTION: protective gloves should always be worn before handling detergents or acidic or
alkaline solutions, to avoid serious injury to the hands.
CAUTION: always use detergents whose manufacturer's label indicates their suitability for
scrubbing machines. Do not use acid or alkaline products or solvents without this indication.
ATTENTION: acid or alkaline maintenance detergents can be used, as long as they have pH
values between 4 and 10, and do not contain: oxidising agents, chlorine or bromine,
formaldehyde, mineral solvents. The detergents used must be suitable for use with scrubbing
machines.
CAUTION: always use low-foam detergent. To avoid the production of foam, put a minimum
quantity of anti foam liquid in the recovery tank before starting to clean. Do not use pure acids.
NB: to make it easier to measure the detergent on the cap/measuring device, there are notches
indicating the detergent percentage quantities that can be used. The notches range from a
minimum of 0.1% to a maximum of 0.5%.
14

HOUR METER
The machine control panel contains the control display, which shows the total usage time. The numbers
before the letter “h” identify the hours, while the numbers before the letter “m” identify the tenths of an
hour (a tenth of an hour corresponds to six minutes). The ashing “:” symbol indicates that the hour
meter is counting the machine functioning time.
CURTIS
1
10
000000.0
PREPARING TO WORK
Before beginning to work, it is necessary to:
1. Make sure the recovery tank is empty. If it isn't, empty it (see “EMPTYING THE RECOVERY
TANK”).
2. For versions without FSS, make sure the amount of detergent solution in the solution tank is
suitable for the type of work to be carried out. If it isn't, ll the solution tank (see "FILLING THE
SOLUTION TANK WITH WATER” and "DETERGENT SOLUTION"). Check the level tube (1) in
the rear left-hand part of the machine (Fig.1).
3. Check the rubber squeegee blades are in good working condition. If they aren't, replace them
(see “REPLACING THE SQUEEGEE BODY RUBBER BLADES”).
4. Check the brush is in good working condition. If it isn't, replace it (see “REPLACING THE BRUSH
HEAD BRUSH”).
5. Check that the main key switch on the control panel is set to “0”. If necessary turn the key (2) to
the left (Fig.2).
6. Check that the main button switch on the control panel is set to “0”. If necessary press the button
(3) (Fig.3).
NB:if the LED in the button switch (3) is on it means that the switch is set to "I” (Fig.3). if the
LED in the button switch (3) is o it means that the switch is set to "0”.
1
1
2
2
3
3
7. Check that the water tap is fully open, the water adjustment knob (4) must be turned fully in the
direction shown by the arrow (Fig.4).
8. Make sure the solution tank drainage cap (5) is closed. If it isn't, close it (Fig.5).
9. Make sure the water system lter cap (6) is closed. If it isn't, close it (Fig.6).
4
4
65
5 6
10. Make sure the cap of the recovery tank drainage tube (7) is closed. If it isn't, close it (Fig.7).
11. Make sure the vacuum tube (8) is correctly connected to the sleeve in the squeegee body. If it
isn't, connect it (Fig.8).
12. Make sure the vacuum motor lter (9) is correctly connected and is clean (Fig.9). If it isn't, clean
it (see “CLEANING THE RECOVERY TANK”).
7
7
98
8
9
13. Make sure the lter basin (10) is correctly connected and is clean (Fig.10). If it isn't, clean it (see
“CLEANING THE RECOVERY TANK ”).
14. Make sure the recovery tank cover is properly closed. If it isn't, close it.
10
10
STARTING WORK
To start working, proceed as follows:
1. Carry out all the checks listed in the chapter “PREPARING TO WORK”.
2. Connect the plug (1) of the power cable (2) to the mains supply socket (3) (Fig.1).
CAUTION: We recommend handling the power cable with dry hands to avoid serious injury.
3. Go to the driving position, behind the machine.
4. Switch on the machine by setting the main switch to “I”, press the button (4) (Fig.2).
NB:if the LED in the button switch (4) is on it means that the switch is set to “I” (Fig.2). if the
LED in the button switch (4) is o it means that the switch is set to “0”.
5. Set the main key switch to “I”, turn the key (5) by a quarter turn to the left (Fig.3).
2
4
31
523
1
NB: the steps for a complete scrubbing and drying cycle are explained below.
6. Lower the brush head body and detach the "BRUSH HEAD BODY CONTROL" pedal (6) at the
back of the machine (Fig.4).
7. Lower the squeegee body and turn the squeegee control lever (7) in the direction of the arrow
(Fig.5). The lever is located on the back of the machine.
8. When the dead man's lever (8) is pressed, the machine will begin to move. The lever is located
underneath the control handlebars (Fig.6).
5
7
4 6
8
7
NB: the gearmotor will only begin functioning, and the solenoid valve will only begin dispensing
detergent solution, when the brush head body is in its working position.
9. During the rst few metres, check that the detergent solution coming out is suitable for the task in
hand. If it isn't, adjust it after reading the section "REGULATING THE DETERGENT SOLUTION".
The machine will start to work at maximum eciency until the detergent solution is nished.
During the rst few metres, check that there is sucient solution and that the squeegee is drying
correctly.
NB:If the dead man's lever is released during the scrubbing with drying operation, the brush
motor and the solenoid valve will be deactivated. The vacuum motor will continue working until
the squeegee control lever is rotated to bring it back to its idle position.
NB:if the squeegee body is raised during the scrubbing and drying operation, the vacuum
motor will continue working at maximum speed for a certain period of time, and then switch o.
This ensures that all the liquid in the vacuum tube is eliminated.
NB:when lling the solution tank, it is good practice to empty the recovery tank using the
special drainage tube.
SCRUBBING WITH DRYING
To perform a scrubbing and drying program, proceed as follows:
1. Carry out all the checks listed in the chapter “PREPARING TO WORK”.
2. Connect the plug (1) of the power cable (2) to the mains supply socket (3) (Fig.1).
CAUTION: We recommend handling the power cable with dry hands to avoid serious injury.
3. Go to the driving position, behind the machine.
4. Switch on the machine by setting the main switch to “I”, press the button (4) (Fig.2).
NB:if the LED in the button switch (4) is on it means that the switch is set to “I” (Fig.2). if the
LED in the button switch (4) is o it means that the switch is set to “0”.
5. Set the main key switch to “I”, turn the key (5) by a quarter turn to the left (Fig.3).
2
4
1
23
1
3
5
6. Lower the brush head body and release the "BRUSH HEAD CONTROL" pedal (6) at the back of
the machine (Fig.4).
7. Lower the squeegee body and turn the squeegee control lever (7) in the direction of the arrow
(Fig.5). The lever is located on the back of the machine.
8. When the dead man's lever (8) is pressed, the machine will begin to move. The lever is located
underneath the control handlebars (Fig.6).
NB: the brush head body will only begin to descend to its working position when the dead
man's lever has been pressed.
NB: the gearmotor will only begin functioning, and the solenoid valve will only begin dispensing
detergent solution, when the brush head body is in its working position.
6
8
5
7
4
6
15

SCRUBBING WITHOUT DRYING
To perform a scrubbing only program, proceed as follows:
1. Carry out all the checks listed in the chapter “PREPARING TO WORK”.
2. Connect the plug (1) of the power cable (2) to the mains supply socket (3) (Fig.1).
CAUTION: We recommend handling the power cable with dry hands to avoid serious injury.
3. Go to the driving position, behind the machine.
4. Switch on the machine by setting the main switch to “I”, press the button (4) (Fig.2).
NB:if the LED in the button switch (4) is on it means that the switch is set to “I” (Fig.2). if the
LED in the button switch (4) is o it means that the switch is set to “0”.
5. Set the main key switch to “I”, turn the key (5) by a quarter turn to the left (Fig.3).
3
5
2
4
1
23
1
6. Lower the brush head body and detach the "BRUSH HEAD CONTROL" pedal (6) at the back of
the machine (Fig.4).
7. When the dead man's lever (7) is pressed, the machine will begin to move. The lever is located
underneath the control handlebars (Fig.5).
NB: the brush head body will only begin to descend to its working position when the dead
man's lever has been pressed.
NB: the gearmotor will only begin functioning, and the solenoid valve will only begin dispensing
detergent solution, when the brush head body is in its working position.
5
7
4
6
DRYING
To perform a drying program, proceed as follows:
1. Carry out all the checks listed in the chapter “PREPARING TO WORK”.
2. Connect the plug (1) of the power cable (2) to the mains supply socket (3) (Fig.1).
CAUTION: We recommend handling the power cable with dry hands to avoid serious injury.
3. Go to the driving position, behind the machine.
4. Switch on the machine by setting the main switch to “I”, press the button (4) (Fig.2).
NB:if the LED in the button switch (4) is on it means that the switch is set to “I” (Fig.2). if the
LED in the button switch (4) is o it means that the switch is set to “0”.
5. Set the main key switch to “I”, turn the key (5) by a quarter turn to the left (Fig.3).
3
5
2
4
1
23
1
6. Lower the squeegee body and turn the squeegee control lever (6) in the direction of the arrow
(Fig.4). The lever is located on the back of the machine.
7. When the dead man's lever (7) is pressed, the machine will begin to move. The lever is located
underneath the control handlebars (Fig.5).
NB: the vacuum motor will only begin to work when the squeegee body is in contact with the
oor.
4
6
5
7
The drying without scrubbing operation should only be
carried out if the machine was previously used to
carry out a scrubbing without drying operation.
ADJUSTMENT OF THE DETERGENT SOLUTION FLOW
To adjust the ow of detergent solution during work, proceed as follows:
1. Make sure the detergent solution tap is fully open, rotating the knob (1) in the direction of
the arrow (Fig.1). As the knob is rotated, the ow of detergent in the machine water circuit is
increased.
2. By pushing the dead man's lever (2) the brush motor will start operating and the solenoid valve
will distribute detergent solution to the brush (Fig.2).
3. During the rst few meters check that the amount of solution is sucient to wet the oor, but not
excessive to exit the splash guard.
4. If the amount of chemical that comes out is not suitable, it can be controlled via the knob (1) on
the rear left-hand side of the machine (Fig.1).
2
2
1
1
EXTRA BRUSH HEAD PRESSURE
This machine can increase the pressure exerted on the brush during the work cycle. To do this:
1. Check that the brush head body is in contact with the ground; if not, detach the "BRUSH HEAD
CONTROL" pedal (2) at the rear of the machine from the plate retainer (Fig.1).
2. Raise the brush head pedal and engage it in the “EXTRA PRESSURE” position (Fig.2).
1 2
1
RECOVERY TANK OVERFLOW
The machine is tted with a mechanical device (oat) under the recovery tank lid. When the recovery
tank is full, this device shuts o the air to the vacuum motor in order to protect it; the sound of the
vacuum motor will then be deeper.
If this is the case, proceed as follows:
1. Raise the brush head body and fully depress the "BRUSH HEAD CONTROL" pedal (1) at the
rear of the machine (Fig.1).
NB:to lock the brush head in the raised position, depress the pedal (1) fully and then move it
towards the right-hand side of the machine (Fig.1).
2. Raise the squeegee body o the oor by means of the lever (2) on the back of the machine (Fig.2).
3. Bring the machine to the designated place for draining o the dirty water, and empty the recovery
tank (see “EMPTYING THE RECOVERY TANK”).
1 2
1
2
16

AT THE END OF THE WORK
At the end of the work, and before carrying out any type of maintenance, perform the following
operations:
1. Raise the brush head body and detach the "BRUSH HEAD CONTROL" pedal (1) at the rear of
the machine from the plate retainer (Fig.1).
2. Raise the squeegee body o the oor by means of the lever (2) on the back of the machine
(Fig.2).
3. Take the appliance to the dedicated dirty water drainage area.
4. Switch o the machine by turning the main switch (3) to "0", making a quarter turn of the key in
the direction of the arrow (Fig.3). Remove the key from the instrument panel.
112
2
3
3
5. Carry out all the procedures listed in the paragraph “RECOMMENDED PERIODIC
MAINTENANCE” (in the column “AT THE END OF THE WORK”).
6. Take the appliance to the designated machine storage place.
ATTENTION: park the machine in an enclosed place, on a at surface, and at a safe distance
from any objects that could either damage it or be damaged due to contact with the machine
itself.
7. Make sure the machine is in a safe condition (see “MACHINE SAFETY MEASURES”).
ATTENTION: if the machine is left unused for more than one whole day, remove the brush
from the brush head body, and the squeegee body from the squeegee support.
8. Grip the handle (4) on the right-hand side of the recovery tank (Fig.4) and turn the tank as far as
it will go, until it reaches the maintenance position.
9. Grip the prop (5) and turn it as far as it will go (Fig.5), until it reaches the work position.
10. Block the rotation of the prop (5) by pushing it towards the inside of the cover (Fig.6).
5
5
6
4
4
11. Grip the handle (4) on the right-hand side of the recovery tank and turn the tank as far as it will go,
until it reaches the work position (Fig.7).
7
RECOMMENDED MAINTENANCE OPERATIONS
TYPE OF MAINTENANCE
AT THE END OF THE
WORK
DAILY
WEEKLY
BEFORE A LONG
PERIOD OF NON-
USE
TRANSPORT
DRAINING THE RECOVERY TANK X X X
CLEANING THE SQUEEGEE BODY X X X
CLEANING THE BRUSH HEAD BRUSH (VERSION 50E) X X
CLEANING THE BRUSH HEAD BRUSHES (60E VERSION) X X
CLEANING THE RECOVERY TANK X X X
EMPTYING THE SOLUTION TANK X X X X
CLEANING THE WATER SYSTEM FILTER X X
CLEANING THE VACUUM TUBE X X
CLEANING THE SOLUTION TANK X X
CLEANING THE VACUUM WAND KIT X X X
DRAINING THE RECOVERY TANK
Proceed as follows to empty the recovery tank:
1. Take the machine to the maintenance area.
2. Make sure the machine has been secured (see the section titled “SECURING THE MACHINE”).
CAUTION: users are advised to always wear protective gloves, to avoid the risk of serious injury
to hands.
3. Release the recovery tank drainage tube (on the back of the machine) from the retainers (Fig.1).
4. Bend the end of the drainage tube in order to create a choke and prevent the content from coming
out (Fig.2), then position the tube on the discharge surface, unscrew the cap, and gradually
release the tube.
NB: the place designated for this operation must comply with current environmental protection
regulations.
5. Repeat the operations in reverse order to reassemble all the parts.
21
CLEANING THE BRUSH HEAD BRUSH (VERSION 50E)
Careful cleaning of the brush guarantees better cleaning of the oor, as well as a longer brush head
gearmotor lifespan. To clean the brush, proceed as follows:
1. Take the machine to the maintenance area.
CAUTION: these operations must be carried out using protective gloves to avoid any possible
contact with the edges or tips of metal objects.
2. Turn the brush anti-clockwise until it comes out of the seat of the brush-holder plate (Fig.1).
3. Clean the brush under a stream of running water to remove any impurities from its bristles. Check
the wear status of the bristles and replace the brushes if they are excessively consumed (the bristle
protrusion must not be less than 10mm; this distance is indicated on the brush by the yellow band).
When replacing the brush, read "REPLACING THE BRUSH HEAD BRUSH".
1
CLEANING THE BRUSH HEAD BRUSHES (VERSIONS 60E)
Careful cleaning of the brush guarantees better cleaning of the oor, as well as a longer brush head
gearmotor lifespan. To clean the brush, proceed as follows:
1. Take the machine to the maintenance area.
2. Make sure the machine has been secured (see the section titled “SECURING THE MACHINE”).
CAUTION: users are advised to always wear protective gloves, to avoid the risk of serious
injury to hands.
N.B.: the place designated for this operation must comply with current environmental
protection regulations.
3. Go to the front of the machine.
4. Press the brush-holder plate retainer (1) and simultaneously rotate the brush in the direction
shown in the image (Fig.1).
ATTENTION: Fig.1 shows the rotation direction of the left-hand brush.
5. When brush rotation is prevented, turn until the button on the brush is disengaged from the
coupling spring on the brush-holder plate.
6. Repeat the same operation for the right-hand brush.
7. Clean the brush under running water to remove any impurities from its bristles. Check the bristles
are not worn; in the event of excessive wear, replace the brush (the bristles should be at least
10mm long). When replacing the brush, read "REPLACING THE BRUSH HEAD BRUSH".
1
1
17

CLEANING THE RECOVERY TANK
To clean the recovery tank (without the optional tank cleaning kit), proceed as follows:
1. Take the machine to the maintenance area.
2. Make sure the machine has been secured (see the section titled “SECURING THE MACHINE”).
CAUTION: users are advised to always wear protective gloves, to avoid the risk of serious
injury to hands.
N.B.: the place designated for this operation must comply with current environmental
protection regulations.
3. Grip the handle (1) on the left-hand side of the recovery tank (Fig.1) and turn the tank cover as
far as it will go, until it reaches the maintenance position.
4. Remove the dirty water basket/lter (2) from the support (Fig.2).
5. Remove the basket cover (3) from the basket/lter (2) (Fig.3).
2 31
1
2
2
3
6. Clean the basket/lter (2) and the basket cover (3) under a jet of water.
NB: use a spatula or brush to eliminate any dirt that is particularly dicult to remove.
7. Use a dry cloth to dry the basket/lter (2) and the basket cover (3) and place them back inside
the recovery tank.
8. Remove the lter protection cup (4), turning it in the direction of the arrow (Fig.4).
9. Remove the vacuum motor lter (5), taking care not to lose the support tie (6) inside the recovery
tank (Fig.5).
10. Rinse the cup (4) and lter (5) thoroughly under running water.
N.B.: use a spatula to eliminate any dirt that is particularly dicult to remove.
11. Repeat the operations in reverse order to reassemble all the parts.
54
4
5
6
EMPTYING THE SOLUTION TANK
Proceed as follows to empty the solution tank:
1. Take the machine to the maintenance area.
2. Make sure the machine has been secured (see the section titled “SECURING THE MACHINE”).
CAUTION: users are advised to always wear protective gloves, to avoid the risk of serious injury
to hands.
1. Fully open the tap outow, rotating the knob (1) in the direction of the arrow (Fig.1).
2. Unscrew the cap (2) of the solution tank drainage system (Fig.2); the cap is located at the rear
of the machine.
3. Remove the cap/measuring device (3) (Fig.3), located on the left-hand side of the machine.
4. With the solution tank empty, rinse the inside of the solution tank with a jet of running water.
N.B.: the place designated for this operation must comply with current environmental protection
regulations.
2 31
1
2
3
CLEANING THE WATER SYSTEM FILTER
To clean the water system lter, proceed as follows:
1. Take the machine to the maintenance area.
2. Make sure the machine has been secured (see the section titled “SECURING THE MACHINE”).
CAUTION: users are advised to always wear protective gloves, to avoid the risk of serious
injury to hands.
3. Block the tap outow, rotating the knob (1) in the direction of the arrow (Fig.1).
4. Go to the right-hand side of the machine and loosen the detergent solution lter cap (2) (Fig.2).
5. Rinse the lter cartridge under a jet of water, and use a brush to eliminate any impurities, if
necessary.
N.B.: the place designated for this operation must comply with current environmental
protection regulations.
6. Once the lter cartridge is clean, repeat the operations in the reverse order to reassemble all the
parts.
21
1
2
CLEANING THE VACUUM TUBE
Careful cleaning of the vacuum tube guarantees better cleaning of the oor as well as a longer
vacuum motor life. Proceed as follows to clean the vacuum tube:
1. Take the machine to the maintenance area.
2. Make sure the machine has been secured (see “SECURING THE MACHINE”).
ATTENTION: users are advised to always wear protective gloves, to avoid the risk of serious
injury to hands.
3. Raise the squeegee body and turn the squeegee control lever (1) in the direction of the arrow
(Fig.1). The lever is located on the back of the machine.
4. Grip the handle (2) on the left-hand side of the recovery tank (Fig.2) and turn the tank cover as
far as it will go, until it reaches the maintenance position.
5. Remove the dirty water basket/lter (3) from the support (Fig.3).
6. Rinse the inside of the vacuum tube with a jet of running water (Fig.4).
7. Repeat the operations in reverse order to reassemble all the parts.
32
2
3
1
4
1
EXTRAORDINARY MAINTENANCE WORK
REPLACING THE BRUSH HEAD BRUSH (50BT VERSIONS)
The good condition of the brush guarantees better cleaning of the oor, as well as a longer brush head
gearmotor lifespan. To replace the brush, proceed as follows:
1. Take the machine to the maintenance area.
CAUTION: these operations must be carried out using protective gloves to avoid any possible
contact with the edges or tips of metal objects.
2. Turn the brush anti-clockwise until it comes out of the seat of the brush-holder plate (Fig.1).
3. Replace the worn brush with a new one. With the brush head UP, insert the brush in the plate
housing underneath the brush head, turning it until the three buttons engage with the notches on
the plate itself.
4. Turn until the pin is pushed towards the coupling spring and is locked into place.
18

REPLACING THE BRUSH HEAD BRUSH (60BT VERSIONS)
The good condition of the brush guarantees better cleaning of the oor, as well as a longer brush head
gearmotor lifespan. To replace the brush, proceed as follows:
1. Take the machine to the maintenance area.
2. Make sure the machine has been secured (see the section titled “SECURING THE MACHINE”).
CAUTION: users are advised to always wear protective gloves, to avoid the risk of serious
injury to hands.
NB: the place designated for this operation must comply with current environmental protection
regulations.
3. Go to the front of the machine.
4. Replace the worn brush with a new one.
5. Press the brush-holder plate retainer (1) and simultaneously rotate the brush in the direction
shown in the image (Fig.1).
ATTENTION: Fig.1 shows the rotation direction of the left-hand brush.
6. When brush rotation is prevented, turn until the button on the brush is disengaged from the
coupling spring on the brush-holder plate.
7. Repeat the same operation for the right-hand brush.
1
1
REPLACING THE SQUEEGEE BODY RUBBER BLADES
Ensuring the good condition of the squeegee body rubber blades guarantees better oor cleaning and
drying results, as well as a longer service life for the vacuum motor. To replace the squeegee body
rubber blades, proceed as follows:
1. Take the machine to the maintenance area.
2. Make sure the machine has been secured (see the section titled “SECURING THE MACHINE”).
CAUTION: these operations must be carried out using protective gloves to avoid any possible
contact with the edges or tips of metal objects.
3. Extract the vacuum hose (1) from the vacuum nozzle on the squeegee body (Fig.1).
4. Completely unscrew the knobs (2) in the squeegee body's pre-assembly (Fig.2).
5. Remove the squeegee body from the slits in the squeegee connector (Fig.3).
2 31
1
2
6. Remove the rear rubber blade compression plate, and release the stopper (3) at the rear of the
squeegee (Fig.4).
7. Remove the rear rubber blade (4) from the squeegee body (Fig.5).
8. Completely unscrew the knobs (5) in the squeegee body's pre-assembly (Fig.6).
5 64
3
4
5
9. Remove the front rubber blade (7) from the inside of the squeegee (Fig.7).
10. Repeat the operations in reverse order to reassemble all the parts.
NB: Before using the machine, remember to adjust the squeegee body (see “ADJUSTING THE
SQUEEGEE BODY RUBBER BLADES”).
NB: you are advised to replace both squeegee body blades in order to ensure good results when
drying the oor.
7
6
ADJUSTMENT INTERVENTIONS
ADJUSTING THE SQUEEGEE BODY RUBBER BLADES
Careful adjustment of the squeegee body rubber blades guarantees better cleaning of the oor.
To adjust the squeegee body blades, proceed as follows:
1. Make sure the machine is in a safe condition (see “MACHINE SAFETY MEASURES”).
ATTENTION: these operations must be carried out using protective gloves to avoid any
possible contact with the edges or tips of metal objects.
2. Stand at the back of the machine.
Adjusting the height of the squeegee body:
3. Adjust the height of the rubber blade in relation to the oor by loosening or tightening the knobs
(1) (Fig.1).
NB: Figure 1 indicates the rotation direction for decreasing the distance between the squeegee
support and the oor. This distance can be increased by turning it in the opposite direction.
NB: by decreasing the distance between the squeegee support and the oor, the rubber blades
present in the squeegee body move closer to the oor.
NB: the right-hand and left-hand knobs must be rotated the same number of times, so that the
squeegee is parallel to the oor when it is working.
NB: make sure the adjustment is correct by looking at the instrument (2) on the squeegee body
(Fig.2).
21
1
2
Adjusting the tilt of the squeegee body:
4. Loosen the retainer knob (3) of the squeegee tilt adjustment knob (4) (Fig.3).
5. To adjust the tilt of the squeegee body rubber blades in relation to the oor, tighten or loosen the
knob (5) (Fig.4) until the blades are bent outwards by about 30° in relation to the oor, in an even
manner along their entire length.
NB: make sure the adjustment is correct by looking at the instrument (6) on the squeegee body
(Fig.5).
6. Once the adjustment has been completed, tighten the retainer knob (3).
43 5
3
44
5
DISPOSAL
To dispose of the machine, take it to a demolition centre or an
authorised collection centre. Before scrapping the machine, it is
necessary to remove and separate out the following materials,
then send them to the appropriate collection centres in
accordance with the environmental hygiene regulations currently
in force:
• Brushes
• Felt
• Electric and electronic parts*
• Batteries
• Plastic parts (tanks and handlebars)
• Metal parts (levers and frame)
(*) In particular, contact your distributor when scrapping electric
and electronic parts.
19

The undersigned manufacturer:
FIMAP spa
Via Invalidi del Lavoro, 1
37059 Santa Maria di Zevio (VR)
declares under its sole responsibility that the products
FLOOR SCRUBBING MACHINES
mod. Maxima2017 BASE 50E - Maxima2017 BASE 60E
they comply with the requirements of the following Directives:
• 2006/42/EC: Machinery Directive.
• 2014/35/EC: Low Voltage Directive.
• 2014/30/EC: Electromagnetic compatibility directive.
The person authorized to compile the technical le:
Mr. Giancarlo Ruo
Via Invalidi del Lavoro, 1
37059 Santa Maria di Zevio (VR) - ITALY
Santa Maria di Zevio (VR), 01/01/2018
Fimap S.p.A.
The Legal Representative
Giancarlo Ruo
EC DECLARATION OF CONFORMITY
CHOOSING AND USING THE BRUSHES
POLYPROPYLENE BRUSH (PPL)
Used on all types of oors. Good resistance to wear and tear, and hot water (no greater than 50°C.).
The polypropylene is non-hygroscopic and therefore retains its characteristics even when working in
wet conditions.
ABRASIVE BRUSH
The bristles of this type of brush are charged with highly aggressive abrasives. It is used to clean very
dirty oors. To avoid oor damage, work only with the pressure strictly necessary.
BRISTLE THICKNESS
Thicker bristles are more rigid and are therefore used on smooth oors or oors with small joints.
On uneven oors or those with deep joints, it is advisable to use softer bristles which can enter the
gaps more easily.
Remember that when the bristles are worn and therefore too short, they will become rigid and are no
longer able to penetrate and clean deep down. In this case, like with over-large bristles, the brush
tends to jump.
PAD HOLDER
The pad holder is recommended for cleaning shiny surfaces.
There are two types of pad holder:
1. The traditional pad holder is tted with a series of anchor points that allow the abrasive oor pad to
be held and dragged while working.
2. The CENTRE LOCK type pad holder not only has anchor points, but also a snap-type central
locking system in plastic that allows the abrasive oor pad to be perfectly centred and held without
any risk of it becoming detached. This type of pad holder is recommended above all for machines
with more than one brush, where the centring of the abrasive discs is dicult.
MACHINE CODE QTY BRISTLE NOTES
MAXIMA2017
BASE 50E
404654 1 PPL 0.3 BLUE BRUSH
405631 1 PPL 0.6 WHITE BRUSH
404653 1 PPL 0.9 BLACK BRUSH
405632 1 ABRASIVE BRUSH
405527 1 PAD HOLDER WITH CENTRE LOCK
MAXIMA2017
BASE 60E
442823 2 PPL 0.3 BLUE BRUSH
442824 2 PPL 0.6 WHITE BRUSH
442825 2 PPL 0.9 BLACK BRUSH
442826 2 ABRASIVE BRUSH
442828 2 PAD HOLDER WITH CENTRE LOCK
20
Table of contents
Other Fimap Scrubber manuals

Fimap
Fimap MAXIMA 2017 PLUS User manual

Fimap
Fimap Minny 17-20b User manual

Fimap
Fimap MMg Series User manual

Fimap
Fimap MY 16 B User manual

Fimap
Fimap BMg User manual

Fimap
Fimap BMg Series User manual

Fimap
Fimap GMG B User manual

Fimap
Fimap MY50 User manual

Fimap
Fimap FSR7 PRO Instruction sheet

Fimap
Fimap FIMOP User manual
Popular Scrubber manuals by other brands

Clemas & Co
Clemas & Co C110 55B Operator's manual

Legend Brands
Legend Brands Prochem Ninja Warrior 200 PSI operating instructions

Numatic
Numatic TGB 8572/200T Owner's instructions

Nilfisk-Advance
Nilfisk-Advance FLOORTEC R 670 P Instructions for use

Parish
Parish PANTHER 15B owner's manual

Nilfisk-Advance
Nilfisk-Advance CA 430 S Use and maintenance manual