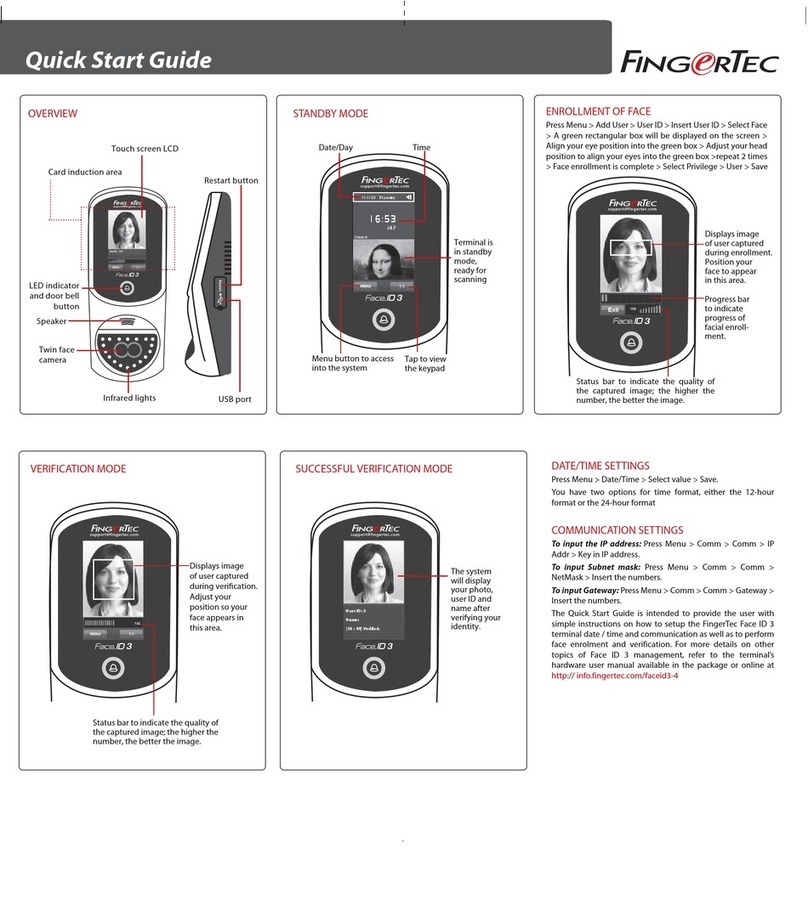
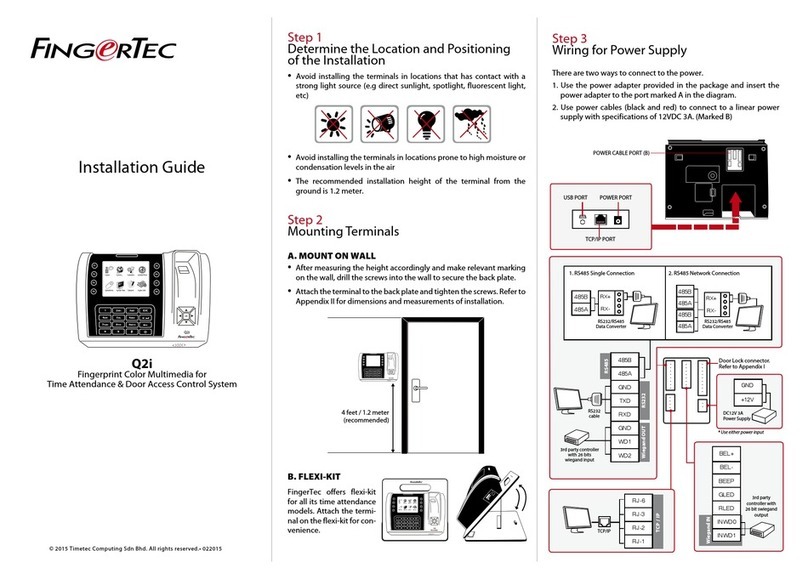
FingerTec ML-10B User manual

ML-10B
Fingerprint Lock with Voice Guide Feature
Admin & User Guide

3
CONTENTS
4-5 Chapter 1 • READ BEFORE USE
Safety Caution
Structure
6-7 Chapter 2 • BASICS
User Introduction
Button Definition
Lock Status Indication
Lock Initialization
How to Use Mechanical Key?
How to Use 9V Emergency Battery?
8-12 Chapter 3 • THE TIMETEC SECURITY APP
Download TimeTec Security App
Register & Sign In to TimeTec Security App
Add Smart Lock
Unlock Smart Lock
Remove Smart Lock
Configure Smart Lock
Create Admin & Users
Create Access Group
Create Temporary Pass
13-17 Chapter 4 • HOW TO USE
Register First Administrator
Register Other Administrators
Registering Normal User
Deleting Temporary User Group
Delete Normal User Group
Deleting Admin Group
Enabling/Disabling Normally Open Mode

4
1• READ BEFORE USE
The Smart Lock is designed to work independently or with TimeTec Security
Mobile App. To use the Smart Lock with TimeTec Security Mobile App, you must
first create an account on TimeTec Security. Next, you will need to pair the Blue-
tooth communication between the Smart Lock and TimeTec Security Mobile App
with a pairing password and admin password.
With TimeTec Security Mobile App, you do not have to store any user information
within the Smart Lock. By using the app, you can:
• Send unlock command to Smart Lock via Bluetooth.
• Add and manage additional unit(s) of Smart Lock into the App.
• Create login account for other users to use the App to unlock Smart Lock.
• Create temporary passes for users to unlock Smart Lock at a specific date and
time.
• Create passcodes and sync with Smart Lock for other users to unlock Smart
Lock via passcode.
• Receive push notification whenever Smart Lock is unlocked.
Safety Caution
1. New lock is configured to grant any fingerprint or ID card access.
2. The lock is equipped with mechanical keys for manual unlocking. Remove me-
chanical keys from the package and keep them in a safe place.
3. To power up the lock, four alkaline AA batteries (not included) are required. Non-
alkaline and rechargeable batteries are NOT recommended.
4. Press the fingerprint sensor or the sensor holder to power up the lock. To avoid un-
locking the door when pressing the fingerprint sensor, pressing the sensor holder
to power up the lock is recommended.
5. The operation of lock setting has a stand-by time limit of 10 seconds; if there is no
activity, the lock will shut off after 10 seconds.
6. Keep your fingers clean when using this lock.
7. To open door with ID card, you must press the sensor holder to power up the lock
first.

5
Mechanical Key Hole
Fingerprint Sensor
Handle
8. Administrator and other users can choose either fingerprint or ID card for enrollment
and verication.
9. Identity verification of administrator is required before enrolling other users. No mat-
ter which verification method administrator uses, other users can choose independ-
ently whether to enroll by fingerprint or ID card.
Structure
LED
Sensor Holder
ID Card Swiping Area
Reset Button
Battery Box Cover
Battery Area

6
2 • BASICS
User Introduction
Button Denition
Lock Status Indication
USER TYPE
Administrator
Normal User
Temporary User
CAPACITY
20 (Fingerprint:10, ID Card:10)
120 (Fingerprint: 60, ID Card: 60)
40 (Fingerprint: 20, ID Card:20)
PRIVILEGE
Add/delete fingerprint or ID card;
Enable
Normally Open (NO) mode; Unlock
the door
Unlock the door; Enable NO mode
BUTTONS FUNCTION
Add Users
Delete Users
Administrator User Group
Normal User Group
Temporary User Group
OTHER FUNCTIONS
Enable NO mode
Enable NO mode
Enable NO mode
+
_
1
2
3
LOCK STATUS
Successful Operation
Failed Operation
Low battery
Unlocking
Locking
INDICATION
1 beep and LED blinks in green
2 beeps and LED blinks in red
7 beeps and LED blinks in red for 7 times
1 beep and electric engine makes a rolling sound for the first time,
which indicates that the door is open.
Electric engine makes a rolling sound for the second time, which
indicates that the door is closed.

7
Lock Initialization
Note: The lock will be restored to factory defaults after initialization, and the door can be opened
with any fingerprint or ID card.
How to Use Mechanical Key?
How to Use 9V
Emergency Battery?

8
iOS
Android
3 • THE TIMETEC SECURITY APP
Download TimeTec Security App
You must download TimeTec Security App in order to manage Smart Lock. Please
scan the QR code below to download TimeTec Security App from the Appstore or
Play Store.
Note: The above battery must be 9V alkaline battery (6LR61).
Register & Sign In To TimeTec Security App
1. Register an account using your email address from TimeTec Security App. You
will then receive an email from TimeTec Security. Therefore, please follow the
instructions in the email to activate your account.
2. Login to TimeTec Security App by using the registered email address and pass-
word.
Add Smart Lock
To add smart lock into your account, please follow the steps below:
1. Tap Menu > Smart Access > Configure Locks.
2. Under Nearby Lock > Tap Search to look for nearby smart lock.
3. Tap the smart lock name that appears on screen to add it into the list.
4. Scan the QR code (find it at the packing box or lock body) to get the smart lock
serial number. Otherwise, you can also insert the serial number by referring to
the serial number.
5. Tap Add Lock > App will validate the serial number with the server.
6. Insert the Pairing Password to connect to the smart lock. The default password
is 000000(6 ‘zero’). This is the first protection to block unauthorised Bluetooth
connection from accessing the smart lock.
7. Insert the Admin Password to continue adding the smart lock. The default
password is 12345678. This is the second protection to block unauthorised ac-
cess from accessing the smart lock.

9
8. After smart lock is added into the list, you can then start to use the App to
manage the smart lock.
Repeat the steps above to add another smart lock into the list.
Unlock Smart Lock
You can use the App to send unlock command to smart lock via Bluetooth connec-
tion. Please follow the steps below:
1. Tap Menu >Smart Access >Unlock Doors.
2. App starts to search for nearby smart locks and display it on screen.
3. Tap Unlock next to the smart lock name in order to trigger unlock com-
mand.
Remove Smart Lock
When smart lock is no longer in use, you can remove it from the list. Please follow
the steps below:
1. Tap Menu >Smart Access >Configure Locks.
2. Select the smart lock to remove > Swipe from right to left.
3. Tap Remove to remove the smart lock from the list.
Congure Smart Lock
This portion is for Super Admin to change the smart lock pairing password and ad-
min password. It is recommended that you change these passwords during initial
installation. Please follow the steps below:
1. Tap Menu >Smart Access >Configure Locks.
2. Tap Bluetooth to start connecting the smart lock (you can only configure the
smart lock after the App is connected to the smart lock).
3. Tap the smart lock name to configure > Settings
4. Tap Pairing Password to change it.
5. Tap Admin Password to change it.
Note: Server will update the changes to all admins and users accounts accordingly.

10
Create Admin & Users
You can assign your families, relatives, friends and etc. to download the App and use
it to manage the smart lock.
There are 3 levels which are:
• Super Admin: The smart lock owner (or the first person who adds the smart
lock into the Mobile App) has the highest authority and he/she can add new
Admin and User to access or manage the individual lock.
• Admin: The person assigned by Super Admin to use and manage the smart
lock. Admin can add new Admin or User but is restricted to only allow for the
usage or management of the supposed smart lock.
•User: The person assigned by Super Admin or Admin and can access the smart
lock only.
To assign Admin and User, you must first create new user accounts. Please follow the
steps below to create users.
1. Tap Menu >Manage Users.
2. Tap Add to start adding users.
3. Name the users and insert his/her email address.
4. Server will send invitation email to the user in order to notify him/her to regis-
ter.
5. User registers and signs into the App to use it.
Note: The Mobile App will display a P to indicate users who have yet to create account and sign into
the App. The P icon will disappear after the users sign into the Mobile App.
To grant the users access as Admin or User, please follow the steps below:
1. Tap Menu >Manage Users.
2. Tap the new create user name from the list
3. Tap Smart Access > Select the lock to assign this user to
4. Tap toggle to select User (if you want to assign this user as the Admin for this
lock, tap to change their role into Admin).
5. Tap Back to save settings.
To have a quick check in determining the admins or users assigned to a smart lock,
please follow the steps below:
1. Tap Menu >Configure Locks
2. Tap the smart lock to check > Manage Users
Note: You will find the list that displays all admins and users assigned to this smart lock. You can add
new admin or new user from this page.
11
Create Access Group
You must configure Access Group in order to grant users access via the smart lock.
For example, you can create the group ‘Family’ to allow your families to access the
smart lock anytime; or you can create the group ‘Maid’ to allow your maid to only
access during Saturday 10 am to 2pm for housekeeping purposes.
Please follow the steps below:
1. Tap Menu >Configure Locks > Tap the smart lock to configure access
group.
2. Tap Access Group >Add > Name the access group.
3. Tap Access Time > Set the start and end time to allow access, or tap Full Day
to grant full day access.
4. Tap Users > Select the users from the list to assign them into this access
group
5. Tap Save.
Note: Server will notify these users about the changes done.
Create Temporary Pass
You can grant temporary access to an individual, whereby he/she can only unlock
the smart lock at specific date and time. This is a One Time pass. In case you want to
allow the individual to access the premise for multiple days, you will have to repeat
the same steps. For example, if you want to allow your friend to stay at your home
for 3 days due to his/her business trip.
Please follow the steps below:
1. Tap Menu >Configure Locks > Tap the smart lock to configure temporary
pass.
2. Tap Temporary Pass >Add > Name the temporary pass.
3. Tap Access Time > Set the date, start and end time
4. Tap User > Select the user to assign the individual to this temporary pass.
5. Tap Save to save settings.
Note: Server will send notification to this person regarding the details of the temporary pass.

12
FOR USER TO USE TIMETEC SECURITY TO UNLOCK DOOR
1. Make sure admin already created your login account.
2. Register an account using your email address from TimeTec Security App. You
will then receive an email from TimeTec Security. Therefore, please follow the
instructions in the email to activate your account.
3. Login to TimeTec Security App by using the registered email address and pass-
word.
4. Tap Menu >Smart Access >Unlock Doors
5. App starts to search for nearby smart locks and display it on screen.
6. Tap Unlock next to the smart lock name in order to trigger unlock command.

13
4• HOW TO USE
Register First Administrator
Note:
1. The rst user (ngerprint or ID card) will be the rst administrator automatically in default setting.
2. Admin group supports 20 users (10 for fingerprints and 10 for ID cards); you can still register 19 new
administrators in the next step.
3. The operating steps of registering new users: press button 1/2/3 to select user group, and then place
one new finger 3 times on the fingerprint sensor or swipe a new ID card 1 time on the card swiping
area for registration. You can continue registering new user afterwards.

14
Register Other Administrators
Note:
Admin group supports 20 users; you can still register 19 new administrators in this step.

15
Registering Normal User
Note: Normal user group supports 120 users (60 for fingerprints and 60 for ID cards).
Deleting Temporary User Group
Note: Deleting operation is only valid for groups.

16
Delete Normal User Group
Note: Deleting operation is only valid for groups.
Deleting Admin Group
Note: Deleting operation is only valid for groups.

17
Enabling/Disabling Normally Open Mode
Enabling Normally Open Mode:
Disabling Normally Open Mode:
Press the sensor holder to power up the lock, and then place any registered finger or
ID card 1 time to disable it.

© 2018 Timetec Computing Sdn Bhd. All rights reserved • 012018
Other manuals for ML-10B
1
Table of contents
Other FingerTec Door Lock manuals

FingerTec
FingerTec ML-10B User manual

FingerTec
FingerTec Keylock 7700 User manual

FingerTec
FingerTec Face ID2 User manual

FingerTec
FingerTec 6600 User manual

FingerTec
FingerTec Q2i User manual

FingerTec
FingerTec FaceID 3 User manual

FingerTec
FingerTec Keylock 8800 User manual

FingerTec
FingerTec R3 User manual

FingerTec
FingerTec Q2 User manual