FLIR ONE Series User manual

Getting started
FLIR ONE series


Table of contents
1 Illustrations ...................... . . . . . ............. . . . . . ............. . . . . . ..... 1
2 EN-US English ..... . . . . . ............ . . . . . . ............ . . . . . ............. . . . . . .. 2
3 DE-DE Deutsch .... . .. . . . . . ............. . . . . . ............. . . . . . ............. . . . 4
4 ES-ES Español........ . . . . . ............. . . . . . ............. . . . . . ............. . . . 6
5 FR-FR Français ........... . . . . . ............. . . . . . ............ . . . . . . ............ 8
6 IT-IT Italiano ........... .... . . . . . ............. . . . . . ............ . . . . . . ...........10
7 JA-JP 日本語.. ............. . . . . . ............. . . . . . ............ . . . . . . ...........12
8 KO-KR 한국어. ................ . . ................ . . ... ............. . . . . . ........14
9 NL-NL Nederlands........... . . . . . ............. . . . . . ............. . . . . . ........16
10 PT-PT Português...... . . . . . ............. . . . . . ............. . . . . . ............. . .18
11 RU-RU Русский. . ............ . . . . . ............. . . . . . ............. . . . . . ........20
12 ZH-CN 简体中文 ....... . . . . . ............. . . . . . ............. . . . . . ............. . .23
#T810402; r. AC/77079/77079; mul iii

2 EN-US English
2.1 List of contents
• Infrared camera.
• Pouch.
• USB cable.
Note FLIR Systems reserves the right to discontinue models, parts or accesso-
ries, and other items, or to change specifications at any time without prior notice.
2.2 Read the manual before use
Go to the following website to read or download the
manual:
http://support.flir.com/resources/6ygz
2.3 Extend your product warranty
Register your product now to get:
• 2 years camera warranty
• 10 years detector warranty
To activate your extended warranty, go to http://support.flir.com/camreg.
Note Registration must be completed within 60 days of purchase.
2.4 Download FLIR software
FLIR Systems provides freeware and licensed software for image editing, thermal
analysis, and reporting.
To download FLIR Thermography software, go to
https://www.flir.com/thermography-software.
2.5 Customer support
Do not hesitate to contact our Customer Support Center at http://support.flir.com
if you experience problems or have any questions about your product.
#T810402; r. AC/77079/77079; mul 2

2 EN-US English
2.6 View from the front
See Figure 1.1 View from the front, page 1.
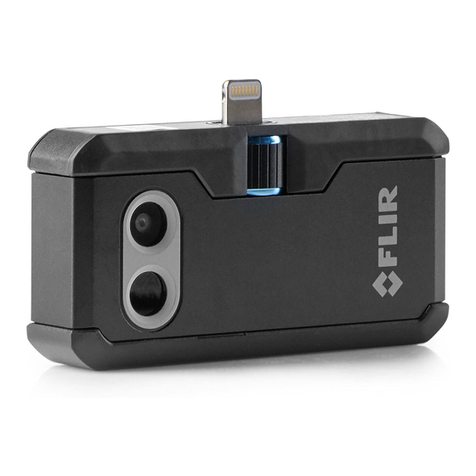
1. Visual camera.
2. Thermal camera.
3. Phone connector.
4. Height control for the OneFit connector.
2.7 View from the bottom
See Figure 1.2 View from the bottom, page 1.
1. On/off switch and Power indicator.
2. Charge indicator LED.
3. USB-C power connector.
2.8 Quick start guide
1. Charge the FLIR ONE camera for approximately 40 minutes.
2. Download the FLIR ONE app from your preferred app store, and then install
it on your phone.
3. Push the On/off button on the bottom of the FLIR ONE camera to turn it on. It
takes about 20 seconds for the camera to start. The indicator will flash green
when the FLIR ONE camera is ready.
4. Connect the FLIR ONE camera to your phone. If needed, adjust the blue dial
of the OneFit connector and extend the connector to fit your phone’s protec-
tive case.
5. Start the FLIR ONE app on your phone.
6. The onboarding of the FLIR ONE app will guide you and help you setup the
permissions for the app. After that, the app is opened in Photo mode and is
ready to use.
7. To turn off the FLIR ONE camera, push and hold the On/off button for more
than 2 seconds.
#T810402; r. AC/77079/77079; mul 3

3 DE-DE Deutsch
3.1 Inhalt
• Infrarotkamera.
• Tasche.
• USB-Kabel.
Hinweis FLIR Systems behält sich das Recht vor, die Herstellung von Model-
len, Teilen, Zubehör und anderen Artikeln ohne vorherige Ankündigung einzustel-
len oder deren Spezifikationen zu ändern.
3.2 Lesen Sie vor Gebrauch zunächst die Anleitung
Besuchen Sie die folgende Website, um das Benutzer-
handbuch zu lesen bzw. herunterzuladen:
http://support.flir.com/resources/6ygz
3.3 Verlängern Sie die Garantie Ihres Produkts
Registrieren Sie Ihr Produkt jetzt, und erhalten Sie:
• 2 Jahre Garantie auf die Kamera
• 10 Jahre Garantie auf den Detektor
Um Ihre erweiterte Garantie zu aktivieren, besuchen Sie die Seite
http://support.flir.com/camreg.
Hinweis Die Registrierung muss innerhalb von 60 Tagen nach Kauf abge-
schlossen werden.
3.4 FLIR Software herunterladen
FLIR Systems bietet Freeware und lizenzierte Software für Bildbearbeitung, ther-
mische Analysen und Berichterstellung.
Um FLIR Thermografie-Software herunterzuladen, besuchen Sie die Seite
https://www.flir.com/thermography-software.
#T810402; r. AC/77079/77079; mul 4

3 DE-DE Deutsch
3.5 Kundendienst
Wenn Probleme auftreten oder Sie Fragen zu unserem Produkt haben, wenden
Sie sich an unser Customer Support Center unter http://support.flir.com.
3.6 Ansicht von vorn
Siehe Figure 1.1 View from the front, Seite 1.
1. Tageslichtkamera.
2. Wärmebildkamera.
3. Telefon-Steckverbinder.
4. Höheneinstellung für den OneFit Steckverbinder.
3.7 Ansicht von unten
Siehe Figure 1.2 View from the bottom, Seite 1.
1. Ein/Aus-Schalter und Netzanzeige.
2. Ladestand-LED-Anzeige.
3. USB-C-Netzanschluss.
3.8 Schnelleinstieg
1. Laden Sie die FLIR ONE Kamera ca. 40 Minuten lang auf.
2. Laden Sie die FLIR ONE App aus Ihrem bevorzugten App Store herunter,
und installieren Sie sie auf Ihrem Telefon.
3. Drücken Sie die Ein/Aus-Taste an der Unterseite der FLIR ONE Kamera, um
sie einzuschalten. Es dauert etwa 20 Sekunden, bis die Kamera startet. Die
Anzeige blinkt grün, wenn die FLIR ONE Kamera bereit ist.
4. Schließen Sie die FLIR ONE Kamera an Ihr Telefon an. Passen Sie bei Be-
darf mithilfe des blauen Rädchen den OneFit Steckverbinder auf die passen-
de Länge für die Schutzhülle Ihres Telefons an.
5. Starten Sie auf Ihrem Telefon die FLIR ONE App.
6. Das Onboarding der FLIR ONE App leitet Sie und hilft Ihnen bei der Einrich-
tung der Berechtigungen für die App. Danach wird die App im Fotomodus
geöffnet und kann verwendet werden.
7. Um die FLIR ONE Kamera auszuschalten, halten Sie die Ein/Aus-Taste län-
ger als 2 Sekunden gedrückt.
#T810402; r. AC/77079/77079; mul 5

4 ES-ES Español
4.1 Contenido
• Cámara de infrarrojos.
• Funda.
• Cable USB.
Nota FLIR Systems se reserva el derecho a dejar de fabricar modelos, piezas
y accesorios, así como otros elementos, o a cambiar las especificaciones en
cualquier momento sin previo aviso.
4.2 Lea el manual antes de usar el producto
Visite el siguiente sitio web para leer o descargar el
manual:
http://support.flir.com/resources/6ygz
4.3 Amplíe la garantía de sus productos
Registre su producto ahora y obtendrá:
• 2 años de garantía en cámaras
• 10 años de garantía en detectores
Para activar la ampliación de la garantía, vaya a http://support.flir.com/camreg
Nota El registro debe completarse dentro de los primeros 60 días de la compra.
4.4 Descargar software de FLIR
FLIR Systems proporciona software gratuito y con licencia para la edición de
imágenes, el análisis térmico y la generación de informes.
Para descargar el software de termografía de FLIR, vaya a
https://www.flir.com/thermography-software
#T810402; r. AC/77079/77079; mul 6

4 ES-ES Español
4.5 Atención al cliente
No dude en ponerse en contacto con nuestro centro de soporte técnico en
http://support.flir.com si tiene problemas o alguna pregunta referente a su
producto.
4.6 Vista desde la parte delantera
Consulte Figure 1.1 View from the front, página 1.
1. Cámara visual.
2. Cámara térmica.
3. Conexión para el teléfono.
4. Control de altura para el conector OneFit.
4.7 Vista desde la parte inferior
Consulte Figure 1.2 View from the bottom, página 1.
1. Interruptor de encendido/apagado e indicador de alimentación.
2. Indicador LED de carga.
3. Conector de alimentación USB-C.
4.8 Guía de inicio rápido
1. Cargue la cámara FLIR ONE durante aproximadamente 40 minutos.
2. Descargue la aplicación FLIR ONE de su tienda de aplicaciones preferida y,
a continuación, instálela en su teléfono.
3. Pulse el botón de encendido/apagado en la parte inferior de la cámara FLIR
ONE para encenderla. La cámara tarda unos 20 segundos en iniciarse. El in-
dicador parpadeará en verde cuando la cámara FLIR ONE esté lista.
4. Conecte la cámara FLIR ONE al teléfono. Si es necesario, ajuste el dial azul
del conector OneFit y extienda el conector para que encaje con la funda pro-
tectora de su teléfono.
5. Inicie la aplicación FLIR ONE en el teléfono.
6. El proceso de incorporación de la aplicación FLIR ONE le guiará y le ayuda-
rá a configurar los permisos de la aplicación. Después, la aplicación se abri-
rá en modo Foto y estará lista para usarse.
7. Para apagar la cámara FLIR ONE, mantenga pulsado el botón de encendi-
do/apagado durante más de 2 segundos.
#T810402; r. AC/77079/77079; mul 7
5 FR-FR Français
5.1 Liste des pièces fournies
• Caméra infrarouge.
• Housse.
• Câble USB.
Remarque FLIR Systems se réserve le droit d’interrompre la fabrication de cer-
tains modèles de produits, de pièces, d'accessoires ou de tout autre composant,
ou d'en modifier les spécifications à tout moment et sans préavis.
5.2 Veuillez lire le manuel avant utilisation
Rendez-vous sur le site Web suivant pour consulter ou
télécharger le manuel :
http://support.flir.com/resources/6ygz
5.3 Étendez la garantie de votre produit
Enregistrez votre produit dès maintenant et profitez des garanties suivantes :
• 2 ans de garantie sur la caméra
• 10 ans de garantie sur le détecteur
Pour activer votre extension de garantie, rendez-vous sur
http://support.flir.com/camreg.
Remarque Vous devez enregistrer votre produit dans les 60 jours suivant son
achat.
5.4 Télécharger le logiciel FLIR
FLIR Systems fournit des logiciels gratuits et des logiciels sous licence pour l'édi-
tion d'images, l'analyse thermique et la création de rapports.
Pour télécharger le logiciel de thermographie FLIR, rendez-vous sur
https://www.flir.com/thermography-software.
#T810402; r. AC/77079/77079; mul 8

5 FR-FR Français
5.5 Assistance clientèle
N'hésitez pas à contacter notre centre d'assistance clientèle sur la page
http://support.flir.com si vous rencontrez des problèmes ou avez des questions
concernant votre produit.
5.6 Vue de face
Voir Figure 1.1 View from the front, page 1.
1. Caméra en lumière visible.
2. Caméra thermique.
3. Connecteur du téléphone.
4. Commande de la hauteur du connecteur OneFit.
5.7 Vue inférieure
Voir Figure 1.2 View from the bottom, page 1.
1. Interrupteur marche/arrêt et indicateur d'alimentation.
2. Indicateur de chargement LED.
3. Connecteur d'alimentation USB-C.
5.8 Guide de démarrage rapide
1. Chargez la caméra FLIR ONE pendant environ 40 minutes.
2. Téléchargez l'application FLIR ONE depuis votre boutique d'applications
préférée, puis installez-la sur votre téléphone.
3. Appuyez sur le bouton marche/arrêt sur la base de la caméra FLIR ONE
pour l'allumer. Le démarrage de la caméra prend environ 20 secondes. Le
témoin clignote en vert lorsque la caméra FLIR ONE est prête.
4. Branchez la caméra FLIR ONE à l’ordinateur. Si nécessaire, réglez le cadran
bleu du connecteur OneFit et tirez le connecteur pour l'adapter à l'étui de
protection de votre téléphone.
5. Lancer l'application FLIR ONE sur votre téléphone.
6. L'intégration de l'application FLIR ONE vous guidera et vous aidera à confi-
gurer les permissions de l'application. Ensuite, l'application s'ouvre en mode
Photo et est prête à être utilisée.
7. Pour éteindre la caméra FLIR ONE, appuyez sur le bouton Marche/Arrêt
pendant plus de 2 secondes.
#T810402; r. AC/77079/77079; mul 9

6 IT-IT Italiano
6.1 Elenco del contenuto
• Termocamera a infrarossi.
• Custodia.
• Cavo USB.
Nota FLIR Systems si riserva il diritto di interrompere la produzione di alcuni
modelli, parti o accessori e di altri elementi o di cambiarne le specifiche in qua-
lunque momento senza alcun preavviso.
6.2 Leggere il manuale prima dell'utilizzo
Accedere al seguente sito Web per leggere o scaricare il
manuale:
http://support.flir.com/resources/6ygz
6.3 Estensione della garanzia del prodotto
Registrando subito il prodotto, si riceverà quanto segue:
• 2 anni di garanzia per la termocamera
• 10 anni di garanzia per il rilevatore
Per attivare l'estensione della garanzia, accedere al sito Web
http://support.flir.com/camreg.
Nota La registrazione deve essere completata entro 60 giorni dall'acquisto.
6.4 Download del software FLIR
FLIR Systems fornisce un software freeware con licenza per editing di immagini,
analisi termica e creazione di report.
Per scaricare il software per termografia FLIR, accedere al sito Web
https://www.flir.com/thermography-software.
#T810402; r. AC/77079/77079; mul 10

6 IT-IT Italiano
6.5 Assistenza clienti
In caso di problemi o domande sul prodotto, contattare il Centro di assistenza
clienti all'indirizzo http://support.flir.com.
6.6 Vista anteriore
Vedere Figure 1.1 View from the front, pagina 1.
1. Videocamera.
2. Termocamera.
3. Connettore telefonico.
4. Controllo dell'altezza per il connettore OneFit.
6.7 Vista dal basso
Vedere Figure 1.2 View from the bottom, pagina 1.
1. Interruttore di accensione/spegnimento e indicatore di alimentazione.
2. Indicatore LED di ricarica.
3. Connettore di alimentazione USB-C
6.8 Guida introduttiva
1. Ricaricare la termocamera FLIR ONE per circa 40 minuti.
2. Dall'app store, scaricare l'app FLIR ONE ed installarla sul proprio telefono.
3. Premere il pulsante di accensione/spegnimento sulla parte inferiore della ter-
mocamera FLIR ONE per accenderla. Per accendersi, la termocamera im-
piega circa 20 secondi. L'indicatore lampeggia in verde quando la
termocamera FLIR ONE è pronta.
4. Collegare la termocamera FLIR ONE al telefono. Se necessario, regolare il
selettore blu del connettore OneFit ed estendere il connettore in modo che si
adatti alla custodia protettiva del telefono.
5. Avviare l'app FLIR ONE sul telefono.
6. Seguire la procedura di configurazione dell'app FLIR ONE per impostare le
autorizzazioni dell'app. Al termine, l'app si apre in modalità Foto ed è pronta
per essere utilizzata.
7. Per spegnere la termocamera FLIR ONE, tenere premuto il pulsante di ac-
censione/spegnimento per almeno 2 secondi.
#T810402; r. AC/77079/77079; mul 11

7 JA-JP 日本語
7.1 同梱物
•赤外線カメラ
•ポーチ。
• USB ケーブル
注FLIR Systems は、事前の通知なく、どの時点においてもモデル、部品や付
属品、およびその他のアイテムを製造中止にしたり、仕様を変更したりする権
限を有します。
7.2 使用前にマニュアルをお読みください。
以下の Web サイトに移動して、マニュアルを読むかダ
ウンロードしてください。
http://support.flir.com/resources/6ygz
7.3 製品保証の延長
製品を今すぐ登録すると、下記の保証が受けられます。
•カメラの 2年保証
•検出器の 10 年保証
延長保証を有効にするには、http://support.flir.com/camreg にアクセスしてくだ
さい。
注 登録は、ご購入から 60 日以内に行ってください。
7.4 FLIR ソフトウェアのダウンロード
FLIR Systems では、画像編集、熱分析、レポート作成用のフリーフェアやライ
センス ソフトウェアを提供しています。
FLIR サーモグラフィ ソフトウェアをダウンロードするには、
https://www.flir.com/thermography-software にアクセスしてください。
#T810402; r. AC/77079/77079; mul 12

7 JA-JP 日本語
7.5 顧客サポート
問題が発生した場合や製品について質問がある場合には、お客様サポート セン
ター (http://support.flir.com) までお問い合わせください。
7.6 前面からの外観
Figure 1.1 View from the front,ページ 1を参照してください。
1. 可視カメラ
2. 赤外線カメラ
3. スマートフォン用コネクタ。
4. OneFit コネクタの高さ調整。
7.7 下側からの外観
Figure 1.2 View from the bottom,ページ 1を参照してください。
1. オン/オフ スイッチと電源インジケーター。
2. 充電インジケーター LED。
3. USB-C 電源コネクタ。
7.8 クイック スタート ガイド
1. FLIR ONE カメラを約 40 分充電します。
2. お好きなアプリ ストアから FLIR ONE アプリをダウンロードし、スマート
フォンにインストールします。
3. FLIR ONE カメラ下部のオン/オフ ボタンを押して電源をオンにします。カ
メラの起動には約 20 秒かかります。FLIR ONE カメラが使用可能になると
インジケーターが緑に点滅します。
4. FLIR ONE カメラをスマートフォンに接続します。必要に応じて OneFit 上
の青いダイアルを調整し、スマートフォンの保護ケースにフィットするよ
うコネクタを伸ばします。
5. FLIR ONE アプリをスマートフォンで起動します。
6. FLIR ONE アプリのオンボーディング画面に従って操作し、アプリに対す
るアクセス許可の設定を行います。その後、アプリが [写真]モードで開き、
使用する準備が整います。
7. FLIR ONE カメラの電源をオフにするには、[オン/オフ]ボタンを 2秒以上
押し続けます。
#T810402; r. AC/77079/77079; mul 13

8 KO-KR 한국어
8.1 내용 목록
•적외선 카메라
•파우치.
• USB 케이블
참고 FLIR Systems는 언제든지 사전 통지 없이 모델,부품,액세서리 및 기타 품
목의 생산을 중단하거나 제품 사양을 변경할 수 있는 권리를 보유합니다.
8.2 사용하기 전에 설명서 읽기
다음 웹 사이트로 이동하여 매뉴얼을 읽거나 다운로드하
십시오.
http://support.flir.com/resources/6ygz
8.3 제품 보증 연장
다음을 얻으려면 지금 바로 제품을 등록하십시오.
• 2년 카메라 보증
• 10년 감지기 보증
기간이 연장된 보증을 적용하려면 http://support.flir.com/camreg로 이동하십시오.
참고 구매일로부터 60일 이내에 등록해야 합니다.
8.4 FLIR 소프트웨어 다운로드
FLIR Systems는 이미지 편집,열 분석 및 보고서 작성을 위해 프리웨어와 사용을
허가 받은 소프트웨어를 제공합니다.
FLIR 열화상온도계측 소프트웨어를 다운로드하려면
https://www.flir.com/thermography-software로 이동하십시오.
8.5 고객 지원
제품에 문제가 있거나 문의 사항이 있는 경우 고객 서비스 센터(
http://support.flir.com)로 언제든 연락 주시기 바랍니다.
#T810402; r. AC/77079/77079; mul 14

8 KO-KR 한국어
8.6 전면도
Figure 1.1 View from the front,페이지 1참조.
1. 실영상 카메라.
2. 열화상 카메라.
3. 휴대폰 커넥터.
4. OneFit 커넥터 높이 조절
8.7 밑면도
Figure 1.2 View from the bottom,페이지 1참조.
1. 켜기/끄기 스위치 및 전원 표시등.
2. 충전 표시등 LED.
3. USB-C 전원 커넥터.
8.8 퀵 스타트 가이드
1. FLIR ONE 카메라를 약 40분 동안 충전합니다.
2. 원하는 앱 스토어에서 FLIR ONE 앱을 다운로드한 다음 휴대폰에 설치합니다.
3. FLIR ONE 카메라 하단의 켜기/끄기 버튼을 눌러 카메라를 켭니다.카메라가
시작되는 데 약 20초가 소요됩니다. FLIR ONE 카메라가 준비되면 표시등이
녹색으로 깜박입니다.
4. FLIR ONE 카메라를 휴대폰에 연결합니다.필요한 경우, OneFit 커넥터의 파
란색 다이얼을 조정하고 커넥터를 휴대폰의 보호 케이스에 알맞게 연장합니
다.
5. 휴대폰에서 FLIR ONE 앱을 시작합니다.
6. FLIR ONE 앱을 실행하면 안내를 따라 앱의 권한을 설정할 수 있습니다.그 후
앱이 사진 모드에서 실행되며 사용할 준비가 완료됩니다.
7. FLIR ONE 카메라를 끄려면 켜기/끄기 버튼을 2초 넘게 길게 누릅니다.
#T810402; r. AC/77079/77079; mul 15

9 NL-NL Nederlands
9.1 Inhoud
• Infraroodcamera.
• Tas
• USB-kabel.
Opm. FLIR Systems behoudt zich te allen tijde het recht voor om zonder voor-
afgaande kennisgeving bepaalde modellen, onderdelen of accessoires en an-
dere artikelen uit de handel te nemen of specificaties te wijzigen.
9.2 Lees de handleiding vóór gebruik
Ga naar de volgende website om de handleiding te lezen
of te downloaden:
http://support.flir.com/resources/6ygz
9.3 Uw productgarantie verlengen
Registreer uw product nu en ontvang:
• 2 garantie op de camera
• 10 jaar garantie op de detector
Ga naar http://support.flir.com/camreg om de uitgebreide garantie te activeren.
Opm. De registratie moet binnen 60 dagen na aankoop zijn voltooid.
9.4 Download FLIR-software
FLIR Systems verstrekt software voor beeldbewerking, warmtebeeldanalyse en
rapportage als freeware en onder licentie.
Om FLIR Thermography-software te downloaden, gaat u naar
https://www.flir.com/thermography-software.
#T810402; r. AC/77079/77079; mul 16

9 NL-NL Nederlands
9.5 Klantenondersteuning
Aarzel niet om contact op te nemen met onze klantenservice op http://support.flir.
com indien u problemen ondervindt of vragen heeft over uw product.
9.6 Vooraanzicht
Zie Figure 1.1 View from the front, pagina 1.
1. Visuele camera
2. Wamtebeeldcamera
3. Telefoonaansluiting
4. Hoogteregeling voor de OneFit-connector.
9.7 Van onderen weergeven
Zie Figure 1.2 View from the bottom, pagina 1.
1. Aan/uit-schakelaar en voedingslampje
2. Laadcontrole-led
3. USB-C-voedingsconnector
9.8 Snelstartgids
1. Laad de FLIR ONE-camera ongeveer 40 minuten op.
2. Download de FLIR ONE app uit de app store van uw voorkeur en installeer
deze op uw telefoon.
3. Druk op de aan/uit-knop aan de onderkant van de FLIR ONE-camera om
deze in te schakelen. Het opstarten van de camera duurt ongeveer 20 se-
conden. De indicator knippert groen wanneer de FLIR ONE-camera gereed
is.
4. Sluit de FLIR ONE-camera aan op uw telefoon. Stel indien nodig de blauwe
schijf van de OneFit-connector af en schuif de connector uit zodat deze op
uw telefoonhoesje past.
5. Start de FLIR ONE-app op uw telefoon.
6. De inleiding van de FLIR ONE app helpt u bij het instellen van de toestem-
mingen voor de app. Daarna wordt de app geopend in de fotomodus en is hij
klaar voor gebruik.
7. Houd de aan/uit-knop langer dan 2 seconden ingedrukt om de FLIR ONE-
camera uit te schakelen.
#T810402; r. AC/77079/77079; mul 17
Other manuals for ONE Series
3
Table of contents
Languages:
Other FLIR Thermographic Camera manuals

FLIR
FLIR EX Series User manual

FLIR
FLIR ThermaCAM EX300 User manual

FLIR
FLIR E53 User manual

FLIR
FLIR SCOUT II User manual

FLIR
FLIR ThermaCAM P20 User manual

FLIR
FLIR T420 User manual

FLIR
FLIR ThermaCAM P65 HS User manual

FLIR
FLIR T6 series User manual

FLIR
FLIR T865 User manual

FLIR
FLIR EX Series User manual

FLIR
FLIR E4 Instruction manual

FLIR
FLIR E4 User manual

FLIR
FLIR X6570sc series User manual

FLIR
FLIR Ax5 series User manual

FLIR
FLIR ix Series User manual

FLIR
FLIR FlashSight User manual

FLIR
FLIR EX Series User manual

FLIR
FLIR T560 User manual

FLIR
FLIR A3 PT series User manual

FLIR
FLIR FLIR T5 series User manual