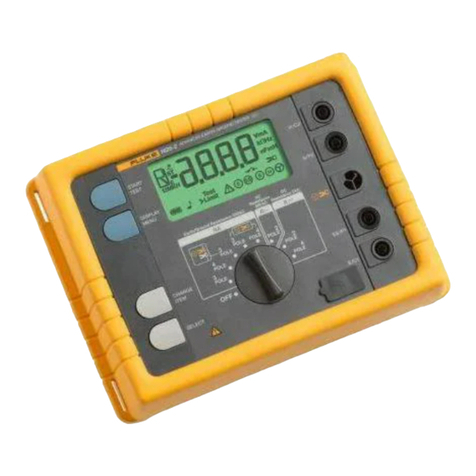
Fluke 1623 User manual

®
1623
Earth/Ground Tester
Users Manual
January 2006
© 2006 Fluke Corporation, All rights reserved. Printed in USA
All product names are trademarks of their respective companies.
Shop for Fluke products online at: 1.877.766.5412
www.MyFlukeStore.com

LIMITED WARRANTY AND LIMITATION OF LIABILITY
Each Fluke product is warranted to be free from defects in material and workmanship
under normal use and service. The warranty period is two years and begins on the date of
shipment. Parts, product repairs, and services are warranted for 90 days. This warranty
extends only to the original buyer or end-user customer of a Fluke authorized reseller,
and does not apply to fuses, disposable batteries, or to any product which, in Fluke's
opinion, has been misused, altered, neglected, contaminated, or damaged by accident or
abnormal conditions of operation or handling. Fluke warrants that software will operate
substantially in accordance with its functional specifications for 90 days and that it has
been properly recorded on non-defective media. Fluke does not warrant that software will
be error free or operate without interruption.
Fluke authorized resellers shall extend this warranty on new and unused products to end-
user customers only but have no authority to extend a greater or different warranty on
behalf of Fluke. Warranty support is available only if product is purchased through a Fluke
authorized sales outlet or Buyer has paid the applicable international price. Fluke re-
serves the right to invoice Buyer for importation costs of repair/replacement parts when
product purchased in one country is submitted for repair in another country.
Fluke's warranty obligation is limited, at Fluke's option, to refund of the purchase price,
free of charge repair, or replacement of a defective product which is returned to a Fluke
authorized service center within the warranty period.
To obtain warranty service, contact your nearest Fluke authorized service center to obtain
return authorization information, then send the product to that service center, with a de-
scription of the difficulty, postage and insurance prepaid (FOB Destination). Fluke as-
sumes no risk for damage in transit. Following warranty repair, the product will be re-
turned to Buyer, transportation prepaid (FOB Destination). If Fluke determines that failure
was caused by neglect, misuse, contamination, alteration, accident, or abnormal condition
of operation or handling, including overvoltage failures caused by use outside the prod-
uct’s specified rating, or normal wear and tear of mechanical components, Fluke will pro-
vide an estimate of repair costs and obtain authorization before commencing the work.
Following repair, the product will be returned to the Buyer transportation prepaid and the
Buyer will be billed for the repair and return transportation charges (FOB Shipping Point).
THIS WARRANTY IS BUYER'S SOLE AND EXCLUSIVE REMEDY AND IS IN LIEU OF
ALL OTHER WARRANTIES, EXPRESS OR IMPLIED, INCLUDING BUT NOT LIMITED
TO ANY IMPLIED WARRANTY OF MERCHANTABILITY OR FITNESS FOR A PAR-
TICULAR PURPOSE. FLUKE SHALL NOT BE LIABLE FOR ANY SPECIAL, INDIRECT,
INCIDENTAL OR CONSEQUENTIAL DAMAGES OR LOSSES, INCLUDING LOSS OF
DATA, ARISING FROM ANY CAUSE OR THEORY.
Since some countries or states do not allow limitation of the term of an implied warranty,
or exclusion or limitation of incidental or consequential damages, the limitations and ex-
clusions of this warranty may not apply to every buyer. If any provision of this Warranty is
held invalid or unenforceable by a court or other decision-maker of competent jurisdiction,
such holding will not affect the validity or enforceability of any other provision.
Fluke Corporation
P.O. Box 9090
Everett, WA 98206-9090
U.S.A.
Fluke Europe B.V.
P.O. Box 1186
5602 BD Eindhoven
The Netherlands
11/99
Shop for Fluke products online at: 1.877.766.5412
www.MyFlukeStore.com
i
Table of Contents
Title Page
Introduction ................................................................................ 1
Unpacking............................................................................... 1
Packing................................................................................... 1
Safety Regulations ..................................................................... 1
Features ................................................................................. 2
Accessories................................................................................ 4
Carrying Case......................................................................... 4
Models and Accessories ......................................................... 5
Setup.......................................................................................... 6
Inserting Batteries................................................................... 6
Operating Instructions............................................................. 7
RA2-pole, 3-pole Measurements ........................................ 7
RA4-pole Measurements .................................................... 9
RA3-pole Selective Earth Resistance Measurement with
Current Clamp..................................................................... 10
RA4-pole Selective Earth Resistance Measurement with
Current Clamp..................................................................... 11
Stakeless Ground Loop Measurement................................ 12
Troubleshooting.......................................................................... 14
Specifications ............................................................................. 16
Service ....................................................................................... 21
Storage....................................................................................... 21
Shop for Fluke products online at: 1.877.766.5412
www.MyFlukeStore.com
1623
Users Manual
ii
Shop for Fluke products online at: 1.877.766.5412
www.MyFlukeStore.com
iii
List of Tables
Table Title Page
1. Features and Functions.............................................................. 3
2. Models and Accessories ............................................................ 5
3. Troubleshooting.......................................................................... 14
Shop for Fluke products online at: 1.877.766.5412
www.MyFlukeStore.com

Users Manual
iv
Shop for Fluke products online at: 1.877.766.5412
www.MyFlukeStore.com
v
List of Figures
Figure Title Page
1. Features and Functions.............................................................. 3
2. Inserting Batteries ...................................................................... 6
3. RA2-pole Measurement ............................................................. 8
4. RA3-pole Measurement ............................................................. 8
5. RA4-pole Measurements ........................................................... 9
6. RA3-pole Selective Earth Resistance Measurement with
Current Clamp ............................................................................ 10
7. RA4-pole Selective Earth Resistance Measurement with
Current Clamp ............................................................................ 11
8. Stakeless Ground Loop Measurement ....................................... 13
9. Troubleshooting.......................................................................... 15
Shop for Fluke products online at: 1.877.766.5412
www.MyFlukeStore.com

Users Manual
vi
Shop for Fluke products online at: 1.877.766.5412
www.MyFlukeStore.com

1
Earth/Ground Tester
Introduction
This instrument has been manufactured complying with quality assurance
system DIN ISO 9001. The compliance with the actual EMC-regulations is
documented by the attached CE-sign.
Unpacking
Check delivery for damage during transport. Keep the packing material for
later transport and check scope of delivery.
Packing
Use for shipping the original packing only.
Safety Regulations
This instrument is suited for measurements according to IEC 1024, ENV
61024, DIN VDE 0185 and ÖVE-E 49.
This measuring device is only to be installed and operated by qualified
personnel and according to the technical data in compliance with the safety
precautions and regulations set forth below. Additionally, the use of this
equipment requires compliance with all legal and safety regulations pertaining
to each specific application. Similar regulations apply to the use of accessories.
Operating electrical devices implies that parts of the device carry dangerous
voltages. Disregarding warning notices may lead to serious physical injury and
material damage.
Shop for Fluke products online at: 1.877.766.5412
www.MyFlukeStore.com
Fluke 1623
Users Manual
2
It can be assumed that safe operation is no longer possible if the device
•shows visible damage,
•has been exposed to unfavourable conditions (e.g. storage beyond the
permissible climatic limits without adaptation to the ambient climate,
dewing etc.) or
•has been exposed to major strain during transport (e.g. been dropped
from some height without visible external damage etc.).
No measurements must be performed on unprotected measuring circuits.
While a measurement is in progress no earth stake must be touched!
Qualified Personnel are persons familiar with the setting up, installation,
starting off and operation of the device and possess a formal qualification
required for such activities.
Features
•Earth/ground resistance measurements in different installations (e.g.
high voltage pylons, buildings, electrical service grounding systems,
mobile communication stations, HF transmitters etc.)
•Monitoring and planning of lightning protection systems
•Resistance measurements with earth electrodes; no separation
Refer to Figure 1 and Table 1 for a complete list of features and functions.
Shop for Fluke products online at: 1.877.766.5412
www.MyFlukeStore.com
Earth/Ground Tester
Safety Regulations
3
ulps
V05xam
1
1P
SE
2P
S
FLUKE
11
2
3
4
5
6
7
8
9
10
FLUKE 1623
edv001.eps
Figure 1. Features and Functions
Table 1. Features and Functions
Item Description
ARotary switch for selection of measurement functions and ON/OFF.
BSTART button for starting the selected measurement function.
CLiquid crystal display (LCD).
D Connection “H” for auxiliary earth 4 mm ∅
E Connection “S” for probe 4 mm ∅
F Connection Afor sensing current test clamp
G Connection “ES” for earth electrode probe 4 mm ∅
HConnection “E” for the earth/ground electrode to be measured
4 mm ∅
IBattery compartment for 6 alcaline batteries (type AA, LR6) or NiCd
JBatteries (bottom side of instrument)
Shop for Fluke products online at: 1.877.766.5412
www.MyFlukeStore.com

Fluke 1623
Users Manual
4
Accessories
The following standard accessories were shipped with your Tester:
•6 alkaline AA – type (LR6) batteries
•2 measuring leads 1,5 m
•1 connector cable (for RA 2-pole measurements)
•2 alligator clips
•1 Users Manual
Carrying Case
The part number for the carrying case for the 1623 Earth/Ground Tester and
accessories such as the current probes is 2583565.
Shop for Fluke products online at: 1.877.766.5412
www.MyFlukeStore.com
Earth/Ground Tester
Accessories
5
Models and Accessories
Table 2 lists the models and accessories.
Table 2. Models and Accessories
Description Item/Part Number
Earth Ground Tester – Basic
(Includes manual, 2 leads and 2 clips)
Fluke-1623
Earth Ground Tester - Fully Loaded
(Includes manual, 2 leads and 2 clips,
ES162P4, EI-1623)
Fluke-1623 Kit
Service Replacement Kit
(Includes 2 Leads, 2 Clips)
Fluke-162x-7001
Stake Set for 3 Pole Measurement
(Includes three stakes, one 25 m cable
reel, one 50 m cable reel)
ES-162P3
Stake set for 4 Pole Measurement
(Includes four stakes, two 25 m cable
reels, one 50 m cable reel)
ES-162P4
Selective/Stakeless Clamp Set for
1623, Consists oF EI-162X and EI-
162AC
EI-1623
Clip-on Current Transformer (sensing)
with shielded cable set
EI-162X
Shielded Cable (Used w/EI-162X
Clamp)
2630254
Clip-on Current Transformer (inducing) EI-162AC
12.7 Inch (320mm) Spilt Core
Transformer
EI-162BN
Earth Stake 2630222
Cable Reel w/25m Wire 2630231
Cable Reel w/50m Wire 2630246
1623 Users Manual 2560327
Shop for Fluke products online at: 1.877.766.5412
www.MyFlukeStore.com
Fluke 1623
Users Manual
6
Setup
WWarning
Please, read carefully the “safety regulations” before
powering up the instrument. If you have problems see
section “Troubleshooting”.
Inserting Batteries
Refer to Figure 2 and following these steps:
1. Switch off instrument.
2. Disconnect all test leads.
3. Open battery compartment.
4. Insert batteries. Close battery compartment.
2
+
4
1
3
edv002.eps
Figure 2. Inserting Batteries
Shop for Fluke products online at: 1.877.766.5412
www.MyFlukeStore.com
Earth/Ground Tester
Setup
7
Operating Instructions
RA2-pole, 3-pole Measurements
To make 2-pole or dead-earth measurements, connect a jumper between
terminals H/C2 and S/P2 with the supplied connector cable. Refer to Figures 3
and 4. Then follow steps 1 thru 4 except use only earth electrode and the
auxiliary earth electrode with minimum distance between them of 20 m.
ASelect function RA3-pole.
Display is as shown below.
BConnect test leads
Connect terminal E/C1 to the earth/ground system to be measured
with the supplied test lead and clip (1.5 m). Place 2 ground stakes in
earth/dirt. Minimum distance between earth electrode (E/C1), probe
(S/P2), and auxiliary earth (H/C2) should be at least 20 m!
Connect the stakes with the 25 m and 50 m cable reels to H/C2 and
S/P2 as shown below.
CPress START.
The “active” symbol indicates that a measurement is in progress. For
a continuous measurement keep START pressed.
DThe Symbol “9” indicates a completed measurement. The result is
kept on the display until a new measurement is started or the main
switch is turned.
Shop for Fluke products online at: 1.877.766.5412
www.MyFlukeStore.com
Fluke 1623
Users Manual
8
m02>
EHS
SE H
evitca
2C/H
1C/E
H
SE
sulp
V
05
x
a
m
2P
S
F
L
LUKE
1
2
34
FLUKE 1623
edv003.eps
Figure 3. RA2-pole Measurement
m02>
m02>
EHS
SE H
evitca
2P/S 2C/H
1C/E
H
SE
sulp
V
05
x
a
m
2P
S
F
L
LUKE
1
2
34
FLUKE 1623
edv003b.eps
Figure 4. RA3-pole Measurement
Shop for Fluke products online at: 1.877.766.5412
www.MyFlukeStore.com

Earth/Ground Tester
Setup
9
RA4-pole Measurements
Refer to Figure 5.
ASelect function RA4-pole.
Display as shown below.
BConnect test leads.
Connect terminals E/C1 and ES/P1 to the earth system to be
measured with the 2 supplied test leads (1.5 m). Place 2 ground
stakes in earth/dirt. Minimum distance between earth electrode
(E/C1), probe (S/P2), and auxiliary earth (H/C2) should be at least
20 m! The ES test lead eliminates the influence of the test leads.
Connect the stakes with the 25 m and 50 m cable reels to H/C2 and
S/P2 as shown below.
CPress START.
The “active” symbol indicates that a measurement is in progress. For
a continuous measurement keep START pressed.
DThe symbol “9” indicates a completed measurement. The result is
kept on the display until a new measurement is started or the rotary
switch is turned.
m02>
m02>
SESEH
evitca
EHS
SE
2P/S 2C/H
1P/SE 1C/E
sulp
V
05
xa
m
2P
S
1P
SE
E
EHS
SE
FLUKE
1
2
34
FLUKE 1623 Earth/Ground Tester
edv004.eps
Figure 5. RA4-pole Measurements
Shop for Fluke products online at: 1.877.766.5412
www.MyFlukeStore.com

Fluke 1623
Users Manual
10
RA3-pole Selective Earth Resistance Measurement with
Current Clamp
The RA3-pole Selective Earth Resistance Measurement with Current Clamp
procedure is useful for measuring the resistance of different parallel sections of
an earth/ground system. Refer to Figure 6.
ASelect function RA3-pole A.
Display as shown below.
BConnect test leads.
Connect the supplied test lead (1.5 m) to terminal E/C1 and its other
end to the ground system to be measured. Place 2 ground stakes in
earth/dirt. Minimum distance between earth electrode (E/C1), probe
(S/P2) and auxiliary earth (H/C2) should be at least 20 m!
Connect stakes with 25 m and 50 m wires to H/C2 and S/P2 as
shown. Connect current clamp with adapter cable as shown.
CPress START.
The “active” symbol indicates that measurement is in progress. For
continuous measurement keep START pressed.
DSymbol “9” indicates completed measurement. The result is kept on
display until a new measurement is started or the rotary switch is
turned.
SE H
evitca
EHS
sulp
V05xam
2P
S
EHS
FLUKE
1
2
34
edv005.eps
Figure 6. RA3-pole Selective Earth Resistance Measurement with Current
Clamp
Shop for Fluke products online at: 1.877.766.5412
www.MyFlukeStore.com

Earth/Ground Tester
Setup
11
RA4-pole Selective Earth Resistance Measurement with
Current Clamp
The RA4-pole Selective Earth Resistance Measurement with Current Clamp
procedure is useful for measuring the resistance of different parallel sections of
an earth/ground system. Refer to Figure 7.
ASelect function RA4-pole A.
Display as shown below.
BConnect test leads.
Connect terminals E/C1 and ES/P1 with the supplied safety test leads
(1.5 m) to the earth electrode to be measured. Place 2 ground stakes
in earth/dirt. Minimum distance between earth electrode (E/C1),
probe (S/P2) and auxiliary earth (H/C2) should be at least 20 m! The
ES test lead eliminates the influence of the test leads.
Connect stakes with 25 m and 50 m wires to H/C2 and S/P2 as
shown.
Connect current clamp with adapter cable as shown.
CPress START.
The “active” symbol indicates that measurement is in progress. For
continuous measurement keep START pressed.
DSymbol “9” indicates completed measurement. The result is kept on
display until a new measurement is started or the rotary switch is
turned.
EHS
evitca
SE H
sulp
V05xam
2P
S
1P
SE
SE SE
SE
EHS
FLUKE
1
2
34
edv006.eps
Figure 7. RA4-pole Selective Earth Resistance Measurement with Current
Clamp
Shop for Fluke products online at: 1.877.766.5412
www.MyFlukeStore.com
Fluke 1623
Users Manual
12
Stakeless Ground Loop Measurement
Refer to Figure 8.
ASelect function
D
Display as shown below.
BConnect current clamps.
Connect the inducing clamp (see Recommended Accessories) to
terminals H/C2 and E/C1 using the supplied safety test leads (1.5 m) as
shown.
Hint: Use the recommended current clamp for inducing only. Other
current clamps are not suited.
Connect the second current clamp using the adapter cable
(sensing current clamp).
Clamp both current clamps around the earth electrode, which
will subsequently be measured.
Hint: Minimum distance between the two current clamps is 10 cm.
CPress START.
The “active” symbol indicates that measurement is in progress. For
continuous measurement keep START pressed.
DSymbol “ ” indicates completed measurement. The result is kept on
display until a new measurement is started or the rotary switch is
turned.
Shop for Fluke products online at: 1.877.766.5412
www.MyFlukeStore.com
Other manuals for 1623
1
Table of contents
Other Fluke Test Equipment manuals

Fluke
Fluke 1AC II VoltAlert User manual

Fluke
Fluke 820-2 User manual

Fluke
Fluke 5730A User manual

Fluke
Fluke 9011 User manual

Fluke
Fluke i400 Use and care manual

Fluke
Fluke 9009 User manual

Fluke
Fluke T100 VDE User manual

Fluke
Fluke CopperPro 990DSLWT Reference guide

Fluke
Fluke 7080 User manual

Fluke
Fluke 714B/EN User manual

Fluke
Fluke FIBER QUICKMAP User manual

Fluke
Fluke 1550C Use and care manual

Fluke
Fluke LinkRunner AT 1000 User manual

Fluke
Fluke 5502E User manual

Fluke
Fluke 753 User manual

Fluke
Fluke CertiFiber Pro User manual

Fluke
Fluke ScopeMeter 190-104 Instruction manual

Fluke
Fluke Micro-Bath 7102 User manual

Fluke
Fluke 9009 User manual

Fluke
Fluke 9171-A-R-156 User manual