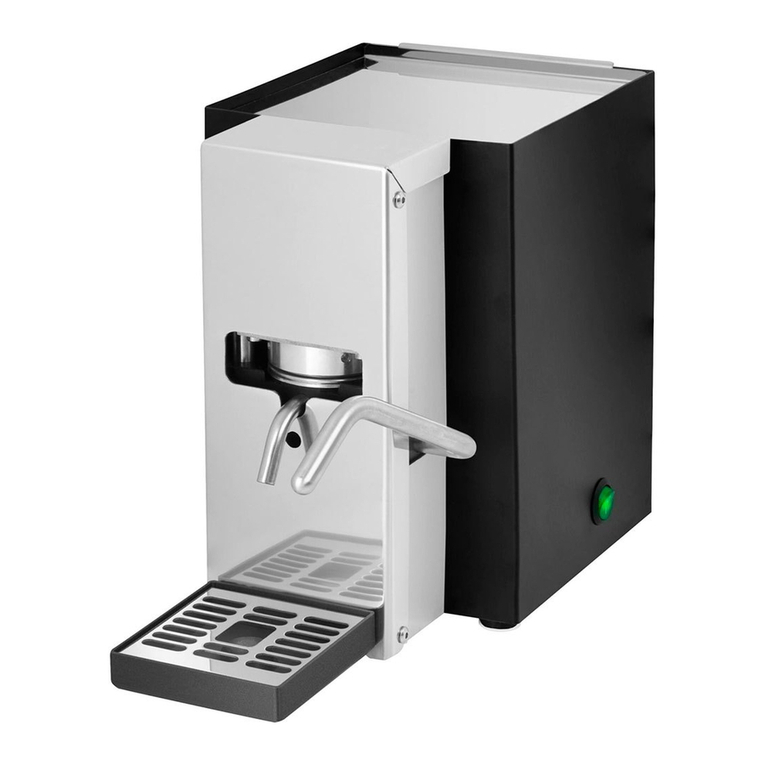
FlyTek MAXIBAR User manual

MAXIBAR
Manuale d’uso e manutenzione
Operations and maintenance manual
100% MADE IN ITALY

Italiano................................................................................. pag 4
English................................................................................ pag 14
INDICE DELLE LINGUE - LANGUAGE INDEX
2

3

A. Vaschetta raccogli acqua;
B. Beccuccioerogazionecaè;
D. Pulsantierainterruttorierogazionecaè;
F. Leva pressa-cialda;
G. Ripiano scalda-tazze;
I. Manopola erogazione vapore;
J. Manopola erogazione acqua calda;
K. Interruttoredialimentazionecaè/caldaia;
M. Lancia erogazione vapore;
N. Doccetta erogazione acqua calda;
O. Manometrocaldaiavapore/acqua.
Tecno Meccanica S.r.l.
Tutti i diritti sono riservati
Nessuna parte di questo manuale può essere riprodotta, copiata o divulgata con qualsiasi mezzo senza
l’autorizzazione scritta della Tecno Meccanica S.r.l.
Indicazioni generali di sicurezza ............ pag 5
Smaltimento .................................................. pag 5
Caratteristiche tecniche ........................... pag 5
Installazione .................................................. pag 6
Riempimento serbatoio ............................ pag 6
Collegamento alla rete elettrica ............ pag 6
Beccuccioerogazionecaè ................... pag 6
Accensione .................................................... pag 7
Comefareilcaè ........................................ pag 7
Programmazione elettronica delle dosi pag 8
Apparato vapore............................................pag 8
Ripiano superiore scalda-tazze ...............pag 8
Puliziadelgruppocaè .............................pag 9
Pulizia della lancia vapore ..........................pag 9
Pulizia della macchina ............................... pag 9
Anomalie e possibili soluzioni ................. pag 9
Condizioni di garanzia ............................ pag 12
INDICE DEGLI ARGOMENTI
Vi ringraziamo per aver scelto la macchina da caè MAXIBAR, un prodotto di alta qualità
progettato, sviluppato, fabbricato e collaudato totalmente in Italia.Questoprodottoèuna
macchinadacaèacialdeadutilizzoprevalentementeprofessionale.
Vi ricordiamo di utilizzare esclusivamente le cialde del Vostro Fornitore; l’uso di cialde diverse da
quelleperlequalilamacchinaèstataconcepitapuòdareunoscarsorisultatodellaqualitàdelcaè.
F
N
D
J
B
M
A
KO
G
I

QuestoprodottoèconformealDL151/2005eallaDirettivaeuropea2002/96/EC.
Al termine della propria vita utile, l’apparecchio NON deve essere smaltito come
riutogenericodomestico.Deveinveceessereportatoinunodeicentridi
raccoltadierenziataperriutielettriciedelettroniciapprontatidallaPubblica
Amministrazione.Un’appropriataraccoltadierenziatacontribuisceadevitare
possibilieettinegativisullasaluteesull’ambiente!
Il danneggiamento, la rimozione o l’alterazione della targa identicativa deve essere
immediatamente segnalata al Rivenditore. Non saranno possibili interventi in
garanzia se la targa identicativa risulta danneggiata, rimossa o alterata.
Sullatoposterioredellamacchinaèappostalatargaidenticativaconriportatiidatitecnicidacomunicare
al Rivenditore in caso di richiesta di informazioni o di assistenza tecnica.
INDICAZIONI GENERALI DI SICUREZZA
SMALTIMENTO
CARATTERISTICHE TECNICHE
ALIMENTAZIONE: 220-230 V CAPACITÀ SERBATOIO: 3 l
FREQUENZA: 50/60 Hz MATERIALE PRINCIPALE: acciaio
POTENZA MAX: 2.200 W DIMENS. LxHxP: 385x415x510 mm
PRESS. MAX GRUPPI CAFFÈ: 20 bar PESO: 21 Kg ca.
PRESS. MEDIA GRUPPI CAFFÈ: 8 bar CAPACITÀ CALDAIA: 2,3 l
5
Di seguito sono riassunte alcune indicazioni generali di sicurezza:
• Leggere attentamente le istruzioni d’uso prima di procedere alla messa in funzione della macchina;
• Noneettuaremaialcunaoperazioneconlemaniumideobagnate;
• Noncopriremailamacchina,neppureparzialmente,constronacciocontelidiprotezione;
• Nonmetterelemaniinprossimitàdelbeccucciodierogazionecaè(rif.B),dellalanciaerogazione
vapore(rif.M),delladoccettaerogazioneacquacalda(rif.N)edelripianosuperiorescalda-tazze(rif.G)
durante il funzionamento;
• Non immergere la macchina in acqua né utilizzare getti d’acqua per la pulizia;
• Questoapparecchiopuòessereutilizzatodabambinidietànoninferiorea8annisoltantosevengono
adeguatamente sorvegliati, se sono istruiti all’utilizzo sicuro dell’apparecchio, e se ne capiscono i
rischiconnessi.Operazionidipuliziae/omanutenzionenondevonoessereeettuatedapartedi
bambini,amenocheessinonabbianoetàsuperiorea8anni,esoltantosesonoadeguatamente
sorvegliati.Mantenerel’apparecchioedilcavofuoridallaportatadibambinidietàinferiorea8anni;
• Questoapparecchiopuòessereutilizzatodapersoneconcapacitàsiche,sensorialiomentali
ridotte, oppure con mancanza di esperienza e conoscenza, soltanto se vengono adeguatamente
sorvegliate ed istruite all’utilizzo sicuro dell’apparecchio, e se ne capiscono i rischi connessi. I bambini
non devono giocare con l’apparecchio;
• Questo apparecchio deve essere posizionato in una zona accessibile solamente a personale
qualicato:èdestinatoinfattiadessereutilizzatoinapplicazioniprofessionaliesimilari,quali:bar,
ristoranti, agriturismo, alberghi e altre strutture di tipo ricettivo, trattorie e simili.

Estrarre la macchina dall’imballo e collocarla su un piano stabile ed orizzontale, adatto a sostenerne il
peso,inprossimitàdiunapresadicorrenteidonea.Lamacchinadeveessereinstallatainunambientecon
temperatura minima di 15°C e massima di 25°C. Raccomandiamo inoltre di conservare l’imballo in tutte le
sue parti per eventuali futuri trasporti.
INSTALLAZIONE
Togliereilripianoscalda-tazze(rif.G)peraccederealserbatoioacqua.RACCOMANDIAMOL’UTILIZZO
DI UN FILTRO ADDOLCITORE-ANTICALCARE che deve essere periodicamente sostituito. Se ciò non
viene fatto, all’interno della macchina si possono formare incrostazioni calcaree tali da pregiudicarne il
buonfunzionamento,oltrechelavaliditàdellagaranzia.Dopoaverquindiintrodottoilltroaddolcitore
all’interno del serbatoio, riempire quest’ultimo con acqua potabile a basso contenuto di calcio. E’
altamente raccomandato eseguire il riempimento del serbatoio utilizzando un imbuto e una bottiglia.
Lamacchinaèdotatadiunsensoredilivelloacquanelserbatoio.Sel’acquaall’internodelserbatoio
raggiunge un livello troppo basso, le eventuali erogazioni in corso vengono interrotte e i tre led luminosi
presentisullapulsantiera(rif.D)inizianoalampeggiarecontemporaneamente,segnocheènecessario
procederealriempimentodelserbatoiocomespiegatosopra.Perevitarediarrivareaquestopunto,è
consigliabilevericareperiodicamenteillivellodell’acqua.Incasodicongelamentodell’acquaall’interno
del circuito della macchina, staccare la spina di alimentazione, spegnere la macchina e posizionarla in
unambienteriscaldato,cheabbiaunatemperaturanoninferiorea15°C.Attenderecirca30minutiprima
di riaccendere e riutilizzare l’apparecchio. Per evitare il congelamento della macchina, e per avere un
funzionamento generale ottimale, raccomandiamo l’utilizzo della stessa in un ambiente con temperatura
non inferiore a 15°C.
RIEMPIMENTO DEL SERBATOIO
6
Ilbeccuccioerogazionecaèèsituatonellaparteanterioredellamacchina.
BECCUCCIO EROGAZIONE CAFFÈ (rif. B)
Durante l’erogazione non toccare il beccuccio e non esporsi con il viso alle parti
calde dell’apparecchio (pericolo di ustioni). Le superci riscaldanti della macchina
sono soggette a calore residuo anche dopo l’uso!
Seilcavoesternodiquestoapparecchioèdanneggiato,deveesseresostituitodauncavospeciale
fornito dal Costruttore o dal servizio di assistenza.
COLLEGAMENTO ALLA RETE ELETTRICA
La tensione di alimentazione della macchina non è modicabile dall’utente.
Prima del collegamento alla rete elettrica, vericare che la tensione della rete
corrisponda alla tensione di alimentazione della macchina indicata nella targhetta
di identicazione.

Conl’interruttoregenerale(rif.K)inposizione1oppure2,attenderecircadueminutianchèilgruppo
caèvadaintemperaturaottimalediesercizioperesserequindiprontoall’uso.
Unavoltatrascorsoquestotempo,azionarelalevapressa-cialda(rif.F)sollevandolaversol’alto.Inserire
unacialdanell’appositasedeeabbassaredelicatamentelalevanoascattonecorsa.
Porreunbicchierinoincorrispondenzadelbeccuccioerogazionecaè(rif.B)epremereunodeitretasti
(caècorto,caèlungo,oppurestart/stopmanuale)dellarelativapulsantiera(rif.D).Adesempio,sesi
desideraottenereuncaècorto,sidevepremereiltasto0dellapulsantiera:
Seinvecesidesideraottenereuncaèlungo,sidevepremereiltasto1dellapulsantiera.Unavolta
premuto uno dei tasti di erogazione, bisogna attendere circa tre secondi per l’inizio della fuoriuscita del
caè.Raggiuntoillivelloprogrammato,l’uscitadelcaèsiarrestaautomaticamente(adeccezionedi
quandosipremeiltasto2).Sesivuolefermareanticipatamentelafuoriuscita,èsucientepremeredi
nuovoilmedesimotastodierogazione.Unavoltacheilcaèèstatoerogatosiconsigliadirimuoverela
cialda per evitare che, asciugandosi, rimanga attaccata.
COME FARE IL CAFFÈ
7
Accenderelamacchinaagendosull’interruttoregenerale(rif.K)postonellaparteanteriore,inbasso,
dellamacchinastessa.Conl’interruttoreinposizione1siattivailgruppodierogazionecaèedilripiano
scalda-tazze;perpoterutilizzareanchelacaldaiaperlaproduzionedivaporeedacquacalda,ènecessario
posizionare l’interruttore sulla posizione 2.
ACCENSIONE
Utilizzare esclusivamente le cialde del Vostro Fornitore. L’uso di cialde diverse
da quelle per le quali la macchina è stata concepita può non garantire la stessa
qualità di erogazione.
Se la vaschetta non viene svuotata, l’acqua può fuoriuscire
E’ importante svuotare la vaschetta raccogli acqua (rif. A) dopo l’erogazione di non più di 50 caè.
01 2

8
PROGRAMMAZIONE ELETTRONICA DELLE DOSI
APPARATO VAPORE E ACQUA CALDA
Lamacchinaèstatataratainfabbricaconunaadeguataprogrammazioneelettronicadelledosi,che
tienecontodellapressaturaedellamacinaturaspecicadellecialdedistribuitedalVostroFornitore.
Comunque,èpossibilepersonalizzareemodicaretuttelaquantitàdicaèpre-impostateinquesto
modo:
Tenerepremutoiltasto2nchèillednoniniziaalampeggiare(daquestomomentolaprogrammazione
deveessereeseguitaentro15secondi).Perprogrammareil“caècorto”erogatodallamacchinaoccorre
preventivamenteinserireunacialda,premereiltasto0periniziarelafuoriuscitadelcaèepremerlo
nuovamenteadoseraggiuntadesiderata.Perprogrammareil“caèlungo”erogatodallamacchina
occorrepreventivamenteinserireunacialda,premereiltasto1periniziarelafuoriuscitadelcaèe
premerlo nuovamente a dose raggiunta desiderata.
MaXibarèdotatadiuncomodoepraticoripianoscalda-tazzeelettrico,situatosullapartesuperioredella
macchina, che raggiunge la temperatura ideale dopo circa tre minuti dalla sua accensione tramite le
posizioni1oppure2dell’interruttoregenerale(rif.K).
LaVostraMaXibarèdotatadiunecaceapparatoperlaproduzionedivaporeeacquacalda.Perpoter
utilizzaretaleapparatoènecessarioportarel’interruttoregenerale(rif.K)inposizione2;ciòconsentirà
il riscaldamento dell’apposita caldaia dedicata. Attendere circa cinque minuti, durante i quali la caldaia
andràinpressioneidealediesercizio.Vericaredamanometro(rif.O),chelapressionearriviacirca1,5
bar:quandociòsivericavuoldirechelacaldaiaèprontaaderogarevaporee/oacquacalda.
Pererogarevapore:inserirelalanciavapore(rif.M)all’internodiunatazzaoaltrorecipientecontenente
illiquidodascaldareoemulsionare(es.latte)egirarelamanopoladierogazionevapore(rif.I)insenso
antiorarionoaraggiungerelacorrettaintensitàdivapore.Unavoltaottenutoilrisultatodesiderato,
girarelastessamanopola(rif.I)insensoorarionoadarrestarecompletamentel’uscitadelvapore.
Per erogare acqua calda: posizionare una tazza –o altro recipiente adatto- sotto la doccetta dell’acqua
calda(rif.N)egirarelamanopolaerogazioneacquacalda(rif.J)insensoantiorarionoaraggiungerela
correttaintensitàdelusso.Unavoltaottenutoilrisultatodesiderato,girarelastessamanopola(rif.J)in
sensoorarionoadarrestarecompletamentel’uscitadell’acquacalda.
Durante l’erogazione non toccare la lancia vapore e/o la doccetta dell’acqua calda,
e non esporsi con il viso alle parti calde dell’apparecchio (pericolo di ustioni). Le
superci riscaldanti della macchina sono soggette a calore residuo anche dopo
l’uso!
Non toccare il ripiano superiore scalda-tazze, e non esporsi con il viso alle parti
calde dell’apparecchio (pericolo di ustioni). Le superci riscaldanti della macchina
sono soggette a calore residuo anche dopo l’uso!
RIPIANO SUPERIORE SCALDA-TAZZE (rif. G)

9
Le riparazioni devono essere eseguite esclusivamente da personale autorizzato e competente. Se non
sièingradodirisolvereiproblemiconl’aiutodellapresentetabella,rivolgersialproprioRivenditore
Autorizzato.
ANOMALIE E POSSIBILI SOLUZIONI
Eventuali riparazioni eseguite non rispettando i capitolati di produzione della
Casa costruttrice e/o utilizzando pezzi di ricambio non originali, possono essere
fonte di pericolo per l’utente. Se l’acqua del serbatoio viene a mancare si può
bruciare la pompa e, di conseguenza, la macchina può andare in cortocircuito.
Qualsiasitipodipulizia,eccezionfattaquelladeigruppicaèedellalanciavapore,deveessere
eseguitaamacchinaspenta(interruttoregeneraledialimentazionesuzero)edopochelamacchina
sièrareddata.Perpulirelasupercieesternadellamacchinausaresolamenteunpannomorbido
inumiditoconacqua.Lavaschettaraccogliacqua(rif.A)deveessereestrattaelavataconacquacalda
e sapone utilizzando una spugna non abrasiva e deve essere accuratamente asciugata prima del suo
reinserimento.
Ilgruppocaèdeveesserepulitosettimanalmente.Perfareciòbisognaprocedereadeettuareuna
erogazionesenzacialda.Abbassarelalevapressa-cialda(rif.F),porreunbicchiereabbastanzacapiente
sottoilbeccucciodierogazionecaè(rif.B)epremereiltastodierogazionecaèlungo(1);dopocircatre
secondiinizieràl’erogazionediacquacalda.Raggiuntoillivelloprogrammato,l’uscitadiacquasiarresta
automaticamente.
Lalanciavaporedeveesserepulitagiornalmente,seutilizzata.Ataleriguardo,inserirelalanciavapore(rif.
M)all’internodiunatazzaoaltrorecipientecontenenteesclusivamenteacquapulitaegirarelamanopola
dierogazionevapore(rif.I)insensoantiorarionoaraggiungerelamassimaintensitàdivapore.Dopoun
minutogirarenuovamentelastessamanopolainsensoorarionoadarrestarecompletamentel’uscita
delvapore.Attenderechelalanciavaporesisiasucientementerareddata,dopodichèprocederealla
suapuliziaesternatramiteunpannomorbidoinumiditodiacquacalda.Eliminaretutteleincrostazioni(ad
esempiodilatte)perevitarechevenganoostruitiiforidiuscitadelvapore.
PULIZIA DELLA MACCHINA
PULIZIA DEL GRUPPO CAFFÈ E DELLA LANCIA VAPORE
Non utilizzare la lavastoviglie per pulire la macchina o suoi componenti. Si
danneggiano irrimediabilmente! Non usare altresì solventi e prodotti o materiali
abrasivi.
Se si utilizzano detergenti per la pulizia del serbatoio, assicurarsi di risciacquarlo
scrupolosamente, poiché eventuali residui chimici all’interno del serbatoio
possono provocare pericolo di intossicazione alimentare.

PROBLEMA POSSIBILE CAUSA SOLUZIONE
Erogazione del caè
insuciente o impossibile
Serbatoio dell’acqua vuoto Riempireilserbatoio(pag.6).
Macinaturatroppone Utilizzare una cialda nuova.
Rivolgersi al Fornitore delle
cialde
I caè erogati sono freddi Tazze ceramiche fredde Preriscaldare le tazze
con acqua calda, oppure
riponendole sul ripiano
superiore scalda-tazze.
In alternativa, utilizzare
bicchierini monouso.
Sistema di riscaldamento
difettoso
Rivolgersi al Fornitore.
La pompa causa eccessivo
rumore e non permette
l’erogazione del caè
La pompa ha aspirato aria Riempireilserbatoio(pag.
6)epremerearipetizione
l’interruttore di erogazione
manualedelcaè(tasto2
dellapulsantierarif.D)no
a sentire il corretto innesco
della pompa.
La “crema” è troppo poca o
manca del tutto
Macinatura troppo grossa Utilizzare una cialda nuova.
Rivolgersi al Fornitore delle
cialde.
Caènonfresco Utilizzare una cialda nuova.
Rivolgersi al Fornitore delle
cialde.
Acqua nel serbatoio
presente da molti giorni
Sostituire l’acqua del
serbatoio facendo
attenzione al suo corretto
re-inserimento.
10

LaSocietàcostruttrice Tecno Meccanica S.r.l. con sede amministrativa sita in Via Marlianese 43,
51034SerravallePistoiese(PT)ITALY
Dichiarasottolapropriaresponsabilitàchelamacchinaperilcaèespressodescrittainquesto
manuale:
Modello: MaXibar Alimentazione: 220/230v 50/60hz Anno di costruzione: vedi targa CE
È conforme alle Direttive:
2006/42/CE relativa al ravvicinamento delle legislazioni degli Stati membri relative alle macchine,
chesostituiscelaDirettiva98/37/CE;
2014/35/UE relativa al materiale elettrico destinato ad essere adoperato entro taluni limiti di
tensione;
2014/30/UErelativaallacompatibilitàelettromagnetica(EMC),chesostituiscelaDirettiva
2004/108/CEE.
L’Amministratore.
DICHIARAZIONE DI CONFORMITÀ
11

L’apparecchioègarantitoper1annodalladatadiacquisto,salvoiterminidilegge.
Lagaranziaèlimitataadifettidifabbricazioneodimateriali,nonèestesaaipezzisoggettiadusuraoa
danneggiamentiallepartidelicate(interruttori,cavodialimentazione,ecc.…),eNONèaltresìestesaa
danniconseguentiincuriaodusoerratodell’apparecchiomedesimo(adesempioutilizzodiacquacon
durezzasuperiorea8°Fe/omancatoutilizzoosostituzionediidoneoltroaddolcitore,chepossono
causareincrostazionidicalcare).Incasodiguastocopertodagaranzia,riportarel’apparecchiopresso
ilRivenditoredovelostessoèstatoacquistato,munitidiscontrinoofatturasullaqualedeveessere
riportato il numero di matricola, che deve corrispondere a quello posto sull’apparecchio. Solo in questo
modoègarantitoilripristinogratuitodellefunzionalitàdell’apparecchio,mentrelespeseditrasporto
rimangono SEMPRE ad esclusivo carico del Cliente. La garanzia decade in caso di impiego improprio
o manomissione, uso della forza e interventi non eseguiti da nostro personale specializzato. La nostra
garanzia non limita comunque i diritti legali del Cliente.
GARANZIA
12
ETICHETTA COLLAUDO - NUMERO DI MATRICOLA

13

Tecno Meccanica S.r.l.
All rights reserved
No part of this manual may be reproduced, copied or divulged by any means without the prior written
authorization of Tecno Meccanica S.r.l.
Generalsafetyinstructions.................. pag 15
Disposal ...................................................... pag 15
Technical features .................................... pag 15
Installation .................................................. pag 16
Tanklling ................................................... pag 16
Power grid connection ........................... pag 16
Coeespout.............................................. pag 16
Power on ...................................................... pag 17
Howtomakecoee ................................ pag 17
Programmable electronic dosing .................18
Steam and hot water system .........................18
Cup warmer ..........................................................18
Coeegroupandsteamwandcleaning ....19
Machine cleaning ...............................................19
Common problems and possible solutions ..
19
Warranty conditions ................................ pag20
INDICE DEGLI ARGOMENTI
ThankyouforchoosingtheMAXIBARcoeemachine,atop-qualityproductentirelydesigned,
developed,manufacturedandtestedinItaly.Thispodcoeemachineisprimarilydesignedfor
professional use.
PleaseremembertouseonlypodsprovidedbyyourSupplier;theuseofdierentpodsfrom
thoseforwhichthecoeemachinewasdesignedmayleadtopoorcoeequality.
A. Drip tray;
B. Coeespout;
D. Coeedispensingswitchpanel;
F. Pod-press lever;
G. Cup warmer;
I. Steam knob;
J. Hot water knob;
K. Generalpowerswitchcoee/boiler;
M. Steam wand;
N. Hot water dispenser;
O. Steam/waterboilerpressuregauge.
F
N
D
J
B
M
A
KO
G
I

Some general safety instructions are summarized below:
• Readtheoperatinginstructionscarefullybeforeturningonthecoeemachine;
• Never perform any operation with wet or damp hands;
• Never cover the machine, not even partially, with cloths or protective covers;
• Donotputyourhandsnearthecoeespout(ref.B),thesteamwand(ref.M),thehotwaterdispenser
(ref.N)andthecupwarmer(ref.G)whilethemachineisworking;
• Do not immerse the machine in water nor use water jets for cleaning;
• This device may only be used by children of at least 8 years of age if adequately supervised,
instructedinthesafeuseofthedevice,andawareoftherisksinvolved.Cleaningand/ormaintenance
operations should never be carried out by children, unless they are over 8 years of age, and only if
adequatelysupervised.Keepthecoeemachineandthecableoutofthereachofchildrenunder8
years of age;
• This device can be used by persons with reduced physical, sensory or mental capabilities, or lack of
experience and knowledge, if they are adequately supervised and instructed in the safe use of the
machineandunderstandtherisksinvolved.Childrenshouldneverplaywiththecoeemachine;
• Thisdevicemustbeplacedinanareaaccessibleonlytoqualiedpersonnel:infact,itisintendedfor
use in professional and similar applications, such as bars, restaurants, holiday farms, hotels and other
accommodation facilities, guest houses and similar structures.
ThisproductisincompliancewithLegislativeDecree151/2005andEuropean
Directive2002/96/EC.
At the end of its life, the device must NOT be disposed of with general household
waste. Instead, it must be taken to one of the separate waste collection centres
for electrical and electronic waste set up by the Public Administration. Proper
separatewastecollectionhelpstopreventpossiblenegativeeectsonhealthand
environment!
Damage, removal or alteration of the identication plate must be immediately
reported to the Retailer. Warranty claims will not be possible if the identication plate
is damaged, removed or altered.
Onthebacksideofthemachineyoucanndtheidenticationplatereportingthetechnicaldatatobe
communicated to the Retailer in case of request for information or technical assistance.
GENERAL SAFETY INSTRUCTIONS
DISPOSAL
TECHNICAL FEATURES
POWER SUPPLY: 220-230 V DRIP TRAY CAPACITY: 2,3 l
FREQUENCY:50/60 Hz MAIN MATERIAL: steel
MAX POWER: 2.200 W SIZE LxHxP: 385x415x510 mm
MAX PRESS. COFFEE GROUPS: 20 bars WEIGHT: ca. 21 Kg
AVERAGE PRESS. COFFEE GROUPS: 8 bars TANK CAPACITY: 3 L
15

Remove the machine from the packaging and place it on a stable, horizontal surface, suitable to support
itsweight,nearasuitablepowersocket.Thecoeemachinemustbeinstalledinanenvironmentwitha
minimumtemperatureof15°Candamaximumtemperatureof25°C.Keeptheoriginalpackaginginallits
parts for possible future transport.
INSTALLATION
Removethecupwarmer(ref.G)toaccessthewatertank.WERECOMMENDUSINGASOFTENERAND
ANTI- SCALE FILTER that needs to be periodically replaced. Should this not be done, scale deposits may
form inside the machine that could jeopardize its proper functioning and the validity of the warranty. After
havinginsertedthesoftenerlterinsidethetank,llitwithdrinkingwaterwithlowcalciumcontent.We
recommendllingthetankusingafunnelandabottle.
The machine is equipped with a water tank level sensor. If the water in the tank reaches a level that is too
low,anyongoingcoeedispensingwillbeinterruptedandthethreeLEDlightsonthecontrolpanel(ref.
D)willstarttoashatthesametime,indicatingthatthetankneedstobelledasexplainedabove.To
avoid reaching this point, we recommend you to periodically check the water level.
Ifwaterfreezesinsidethemachinesystem,disconnectthepowerplug,switchothemachineand
placeitinaheatedroomwithatemperatureofatleast15°C.Waitabout30minutesbeforeswitching
the machine on and using it again. To prevent the machine from freezing and for an optimal general
performance, we recommend using it in an environment with a temperature not below 15°C.
TANK FILLING
POWER GRID CONNECTION
Thecoeespoutislocatedonthefrontsideofthemachine.
If the external power cable of this device is damaged, it must be replaced by a special cable provided by
the Manufacturer or by the Customer Service.
COFFEE SPOUT (ref. B)
While the machine is dispensing coee, do not touch the spouts and do not
expose your face to the hot parts of the machine (danger of burns). The heating
surfaces of the machine are subject to residual heat even after use!
The supply voltage of the machine cannot be modied by the user. Before
connecting the device to the power grid, check that the mains voltage
corresponds to the machine’s supply voltage indicated on the identication plate.
16

Turnthegeneralpowerswitch(ref.K)inposition1or2andwaitabouttwominutesforthecoeegroupto
reach optimum operating temperature and thus be ready for use.
Oncethistimehaselapsed,operatethepod-presslever(ref.F)liftingitupwards.Insertapodintothe
podholderandgentlylowertheleveruntilitclicksintoplace.Placeacupunderthecoeespout(ref.B)
andpressoneofthethreekeys(shortcoee,longcoeeormanualstart/stop)onthecorresponding
controlpanel(ref.D).Forexample,ifyouwanttoprepareashortcoee,youhavetopresskey0onthe
control panel:
Ifinsteadyouwanttomakealongcoee,youhavetopresskey1onthecontrolpanel.Onceyouhave
pressedoneofthecoeedispensingkeys,youhavetowaitaboutthreesecondsuntilthecoeestarts
toowout.Oncetheprogrammeddosehasbeenreached,thecoeedispensingstopsautomatically
(exceptwhenyoupresskey2).Ifyouwanttostopthedeliveryearlier,simplypressthesamekeyagain.
Oncethecoeehasbeendispensed,werecommendremovingthepodtopreventitfromstickingasit
dries.
Itisimportanttoemptythedriptray(ref.A)afterdispensingnotmorethan50cupsofcoee.
HOW TO MAKE COFFEE
17
Please remember to use only pods provided by your Supplier. The use of
dierent pods from those for which the coee machine was designed may not
guarantee the same dispensing quality.
If the tray is not emptied, water may leak out.
Turnonthemachinebypressingthegeneralpowerswitch(ref.K)locatedatthebottomonthefrontsideof
themachine.Settheswitchtoposition1toactivatethecoeebrewingunitandthecupwarmer.Inorderto
also use the boiler for steam and hot water production, set the switch to position 2.
POWER ON
01 2

YourMaXibarcoeemachineisequippedwithanecientsteamandhotwatersystem.Touseit,
youhavetoturnthegeneralpowerswitch(ref.K)toposition2,sothattheboilercanheatup.Wait
approximatelyveminutesfortheboilertoreachtheidealoperatingpressure.Checkonthepressure
gauge(ref.O)thatthepressureisapproximately1.5bar:whenthisoccurs,itmeansthattheboileris
readytogeneratesteamand/orhotwater.
Togeneratesteaminsertthesteamwand(ref.M)intoacuporanyotherrecipientscontainingtheliquid
tobeheatedoremulsied(e.g.milk)andturnthesteamknob(ref.I)anticlockwiseuntilthecorrectsteam
intensityisreached.Onceyouhaveobtainedthedesiredresult,turnthesameknob(ref.I)clockwiseuntil
the steam output is completely stopped.
Todispensehotwaterplaceacuporothersuitablerecipientunderthehotwaterdispenser(ref.N)and
turnthehotwaterknob(ref.J)anticlockwiseuntilthecorrectowintensityisreached.Onceyouhave
obtainedthedesiredresult,turnthesameknob(ref.J)clockwiseuntilthehotwaterowiscompletely
stopped.
MaXibar is equipped with a user-friendly and practical electric cup warmer, located on the top of the
machine, which reaches the ideal temperature about three minutes after it is switched on at position 1 or
2onthegeneralpowerswitch(ref.K).
STEAM AND HOT WATER SYSTEM
CUP WARMER (ref. G)
While the machine is dispensing coee, do not touch the steam wand and/or the
hot water dispenser and do not expose your face to the hot parts of the machine
(danger of burns). The heating surfaces of the machine are subject to residual
heat even after use!
Do not touch the cup warmer and do not expose your face to the hot parts of the
machine (danger of burns). The heating surfaces of the machine are subject to
residual heat even after use!
18
The machine has been preset at the factory with a suitable programmed electronic dosing, which takes
intoaccountthespecicpressingandgrindingofthepodsprovidedbyyourSupplier.However,youcan
customiseandmodifyallpre-setcoeedosesinthisway:
Pressandholdkey2untiltheLEDstartsashing(fromthispointon,programmingmustbecarriedout
within15seconds).Toprogrammethemachinefor“shortcoee”,rstinsertapod,presskey0tostart
thecoeedispensingandpressitagainwhenthedesireddosehasbeenreached.Toprogrammethe
machinefor“longcoee”,rstinsertapod,presskey1tostartthecoeedispensingandpressitagain
when the desired dose has been reached.
PROGRAMMABLE ELECTRONIC DOSING

Thecoeegroupmustbecleanedweekly.Tocleanit,youhavetomakeacoeewithoutapod.Lowerthe
pod-presslever(ref.F),placeasucientlylargecupunderthecoeespout(ref.B)andpressthelong
coeekey(1);afteraboutthreeseconds,hotwaterwillstarttoowout.Oncetheprogrammeddosehas
been reached, the water dispensing will stop automatically.
Thesteamwandmustbecleaneddailyifused.Todothis,placethesteamwand(ref.M)insideacupor
otherrecipientcontainingonlycleanwaterandturnthesteamknob(ref.I)anticlockwiseuntilthe
maximum steam output is reached. After one minute, turn the same knob clockwise again until the steam
outputstopscompletely.Waituntilthesteamwandhascooledsuciently,thencleanitsoutersurface
withasoftclothdampenedwithhotwater.Removealldeposits(e.g.milk)topreventobstructionofthe
steam outlet holes.
Repairsmustbeexclusivelyexecutedbyauthorizedandqualiedpersonnel.Ifyouareunabletosolvethe
problems with the help of the following table, please contact your Authorized Retailer.
Anytypeofcleaning,exceptthatofthebrewingunit,mustbecarriedoutwhenthemachineisturnedo
(generalpowerswitchonzero)andafterithascooleddown.Tocleantheexternalsurfaceofthemachine,
useasoftwetcloth.Thedriptray(ref.A)mustberemovedandwashedwithhotwaterandsoapusinga
non-abrasive sponge and must be thoroughly dried before being reinserted.
COFFEE GROUP AND STEAM WAND CLEANING
COMMON PROBLEMS AND POSSIBLE SOLUTIONS
MACHINE CLEANING
Do not use the dishwasher to clean the machine or its components. They would
be irreparably damaged! Do not use solvents and abrasive products or materials.
If you clean the tank with detergents, be sure to rinse it thoroughly, as any
chemical residues inside the tank may cause food poisoning.
Any repairs executed without observing the manufacturing specications and/or
using non-original spare parts may be a source of danger to the user. If the water
in the tank runs out, the pumps may burn and consequently the machine may
short-circuit.
19

PROBLEM POSSIBLE CAUSE SOLUTION
Insucient or impossible
coee brewing
Empty water tank Fillthetank(page16).
Grindingtoone Use a new pod. Contact
coeepodSupplier.
Brewed coees are cold Cold ceramic cups Preheat the cups with hot
water or putting them on the
cup warmer. Alternatively,
use disposable cups.
Faulty heating system Contact the Supplier.
Pump makes too much
noise and does not allow
coee brewing
The pump sucked in air Fillthetank(page16)and
repeatedly press the manual
coeedispensingswitch
(switch2ofthepanelref.C)
until the pump is correctly
triggered.
The “cream” is not enough
or missing at all
Grindingtoocoarse Use a new pod. Contact
coeepodSupplier.
Coeenotfresh Use a new pod. Contact
coeepodSupplier.
Water has been in the tank
for many days
Replace the water in the
tank paying attention that
the probe is resinserted
correctly.
20
Table of contents
Languages:
Other FlyTek Coffee Maker manuals
FlyTek
FlyTek ZIP PRO 4 User manual
FlyTek
FlyTek Zip User manual
FlyTek
FlyTek EXTRA User manual
FlyTek
FlyTek STEEL PRO User manual

FlyTek
FlyTek ZiP Professional User manual
FlyTek
FlyTek ZIP PRO 2 User manual
FlyTek
FlyTek CLICK PRO User manual
FlyTek
FlyTek Steel Vapor User manual

FlyTek
FlyTek Zip User manual

FlyTek
FlyTek Zip User manual
Popular Coffee Maker manuals by other brands

Scanomat
Scanomat TopBrewer Pro Cleaning manual

Behmor
Behmor Brazen Operation and maintenance guide
cecotec
cecotec CUMBIA POWER MATIC-CCINO 6000 Series BIANCA instruction manual
Gaggia
Gaggia La Giusta user manual
illy
illy X1 Anniversary ESE & Ground instruction manual
Bosch
Bosch TCA 4101 UC use and care manual
