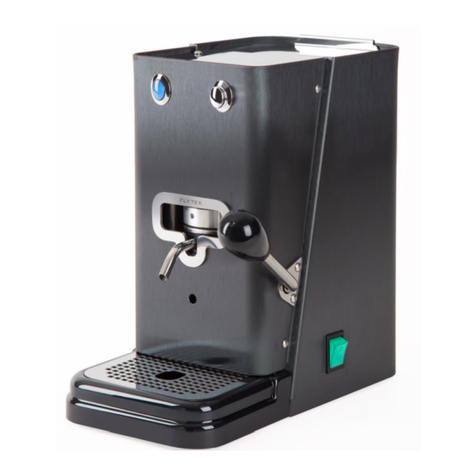
FlyTek Zip User manual

1
Z i P
Manuale d’uso e manutenzione
Operations and maintenance manual
Betriebs- und Wartungsanleitung
1 0 0 % M A D E I N I T A L Y
w w w . f l y t e k i t a l i a . c o m

2
P. 03
P. 03
P. 03
P. 03
P. 03
P. 04
P. 04
P. 04
P. 05
P. 05
P. 05
P. 06
P. 07
Tecno Meccanica S.r.l.
Tutti i diritti sono riservati
Nessuna parte di questo manuale può essere riprodotta, copiata o divulgata con qualsiasi mezzo senza
l’autorizzazione scritta della Tecno Meccanica S.r.l.
Vi ringraziamo per aver scelto la macchina da caffè ZIP, un prodotto di alta qualità progettato, sviluppato,
fabbricato e collaudato totalmente in Italia. Questo prodotto è una macchina da caffè a cialde ad utilizzo
prevalentemente domestico.
Vi ricordiamo di utilizzare esclusivamente le cialde del Vostro Fornitore; l’uso di cialde diverse da quelle per le quali
la macchina è stata concepita possono dare uno scarso risultato della qualità del caffè.
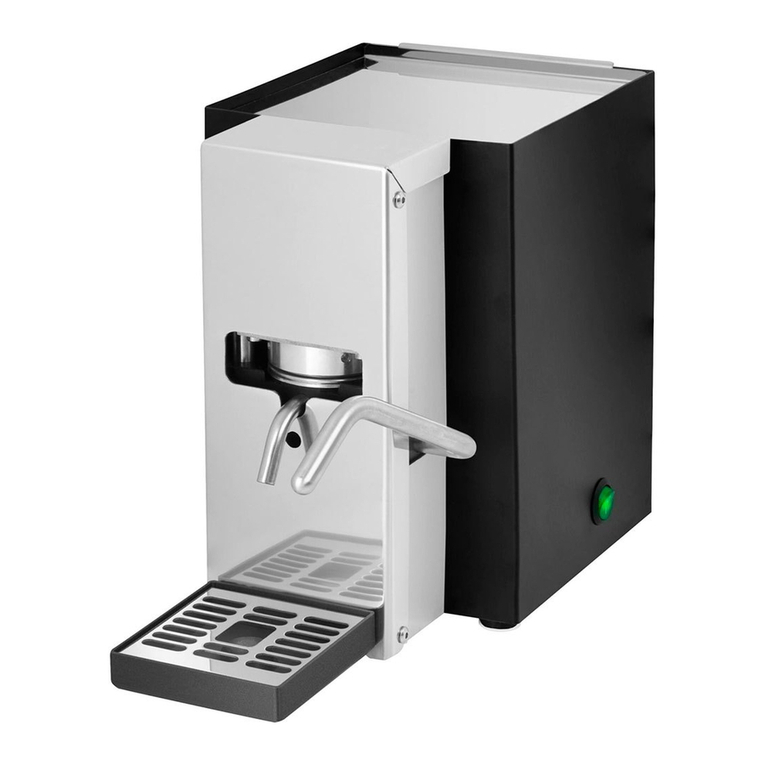
A. Vaschetta raccogli acqua;
B. Beccuccio erogazione caffè;
C. Spia di riscaldamento;
D. Interruttore erogazione caffè;
E. Interruttore accensione macchina;
F. Manopola;
G. Serbatoio acqua;
H. Sede inserimento cialda.
INDICE
Indicazioni generali di sicurezza………………………..…………………….
Smaltimento…………………………………………………..…………………..
Caratteristiche tecniche……………………………………..………………….
Installazione……………………………………………………..………………..
Riempimento serbatoio………………………………………..………………..
Collegamento alla rete elettrica………………………………..……………...
Beccuccio erogazione caffè……………………………………..……………..
Accensione…………………………………………………………..……………
Come fare il caffè……………………………………………………..………….
Pulizia del gruppo erogatore e del beccuccio……………………..…….….
Pulizia della macchina…………………………………………………..………
Anomalie e possibili soluzioni…………………………………………..…….
Condizioni di garanzia…………………………………………………………..
D
A
E
C
F
A
G
B
H

3
INDICAZIONI GENERALI DI SICUREZZA
Di seguito sono riassunte alcune indicazioni generali di sicurezza:
- Leggere attentamente le istruzioni d’uso prima di procedere alla messa in funzione della macchina;
- Non effettuare mai alcuna operazione con le mani umide o bagnate;
- Non coprire mai la macchina, neppure parzialmente, con strofinacci o con teli di protezione;
- Non mettere le mani in prossimità del beccuccio erogazione caffè (rif. B) durante il funzionamento;
- Non immergere la macchina in acqua per la pulizia;
- Questo apparecchio può essere utilizzato da bambini di età non inferiore a 8 anni soltanto se vengono
adeguatamente sorvegliati, se sono istruiti all’utilizzo sicuro dell’apparecchio, e se ne capiscono i rischi
connessi. Operazioni di pulizia e/o manutenzione non devono essere effettuate da parte di bambini, a
meno che essi non abbiano età superiore a 8 anni, e soltanto se sono adeguatamente sorvegliati.
Mantenere l’apparecchio ed il cavo fuori dalla portata di bambini di età inferiore a 8 anni;
- Questo apparecchio può essere utilizzato da persone con capacità fisiche, sensoriali o mentali ridotte,
oppure con mancanza di esperienza e conoscenza, soltanto se vengono adeguatamente sorvegliati ed
istruiti all’utilizzo sicuro dell’apparecchio, e se ne capiscono i rischi connessi. I bambini non devono giocare
con l’apparecchio;
- Questo apparecchio è destinato ad essere utilizzato in applicazioni domestiche e similari, quali: aree di
cottura all’interno di negozi, uffici e altri ambienti lavorativi, case coloniche, da parte dei clienti in alberghi e
altre strutture di tipo residenziale, bed & breakfast e simili.
SMALTIMENTO
Questo prodotto è conforme al DL 151/2005 e alla Direttiva europea 2002/96/EC. Al termine della
propria vita utile, l’apparecchio NON deve essere smaltito come rifiuto generico domestico. Deve
invece essere portato in uno dei centri di raccolta differenziata per rifiuti elettrici ed elettronici
approntati dalla Pubblica Amministrazione. Un’appropriata raccolta differenziata contribuisce ad
evitare possibili effetti negativi sulla salute e sull’ambiente!
CARATTERISTICHE TECNICHE
Nella parte inferiore della macchina è apposta la targa identificativa con riportati i dati tecnici da comunicare al
Rivenditore in caso di richiesta di informazioni o di assistenza tecnica.
ALIMENTAZIONE: 220-230 V
FREQUENZA: 50/60 HZ
POTENZA: 800 W
PRESSIONE: 20 bar
PESO: 7 KG ca.
DIMENS. LxHxP: 150x293x280 mm
CAPACITA’ SERBATOIO: 1,0 litro
CAPACITA’ VASCHETTA: 335 cm3
MATERIALE PRINCIPALE: acciaio
INSTALLAZIONE
Estrarre la macchina dall’imballo e collocarla su un piano stabile, adatto a sostenerne il peso, in prossimità di una
presa di corrente idonea. Conservare l’imballo in tutte le sue parti per eventuali futuri trasporti.
RIEMPIMENTO DEL SERBATOIO
Togliere il coperchio di acciaio per accedere al serbatoio acqua (rif. G). RACCOMANDIAMO L’UTILIZZO DI UN
FILTRO ADDOLCITORE O DI UN SACCHETTO ANTICALCARE che deve essere periodicamente sostituito. Se
ciò non viene fatto, all’interno della macchina si possono formare incrostazioni calcaree tali da pregiudicarne il
buon funzionamento, oltre che la validità della garanzia. Dopo aver quindi introdotto il filtro addolcitore all’interno
del serbatoio, riempire quest’ultimo con acqua potabile, possibilmente a basso contenuto di calcio. Si può eseguire
il riempimento del serbatoio utilizzando un imbuto e una bottiglia.
Il danneggiamento, la rimozione o l’alterazione della targa identificativa deve essere
immediatamente segnalata al Rivenditore. Non saranno possibili interventi in garanzia se
la targa identificativa risulta danneggiata, rimossa o alterata.

4
COLLEGAMENTO ALLA RETE ELETTRICA
BECCUCCIO EROGAZIONE CAFFE’ (RIF. B)
Il beccuccio erogazione è situato nella parte anteriore della macchina.
ACCENSIONE
Accendere la macchina premendo l’interruttore luminoso verde posto sul fianco sinistro della stessa; la spia
incorporata si accenderà. Appena accesa la macchina, inizia il rapido processo di riscaldamento della caldaia.
Attendere l’accensione della spia di riscaldamento (rif. C): quando ciò si verifica vuol dire che l’acqua è in
temperatura ottimale di esercizio e che la macchina è pronta all’uso.
La tensione di alimentazione della macchina non è modificabile dall’utente. Prima del
collegamento alla rete elettrica, verificare che la tensione della rete corrisponda alla
tensione di alimentazione della macchina indicata nella targhetta di identificazione.
Durante l’erogazione non toccare il beccuccio e non esporsi con il viso alle parti calde
dell’apparecchio (pericolo di ustioni). Le superfici riscaldanti della macchina sono
soggette a calore residuo anche dopo l’uso!
C
D

5
COME FARE IL CAFFE’
Alzare la leva della macchina (rif. F) verso l’alto come indicato in fig.1 e inserire la cialda come indicato in fig. 2.
fig. 1 fig.2
PER LA PRIMA EROGAZIONE: inserire una cialda nell’apposita sede (rif. H) e abbassare delicatamente la leva
fino a scatto fine corsa. Porre un bicchierino sotto al beccuccio e premere l’interruttore di erogazione (rif. D); dopo
circa 5 secondi inizierà l’erogazione del caffè. Raggiunto il livello desiderato nel bicchierino premere nuovamente
l’interruttore di erogazione per fermare l’uscita del caffè. Se durante l’erogazione la spia di riscaldamento (rif. C) si
spegne, significa semplicemente che la macchina si sta riscaldando per portare l’acqua in temperatura ottimale;
l’erogazione può quindi tranquillamente continuare. Una volta che il caffè è stato erogato si consiglia di rimuovere
la cialda per evitare che asciugandosi rimanga attaccata. E’ consigliabile invece attendere l’accensione della
suddetta spia (rif. C) prima di erogare il caffè successivo.
PER TUTTE LE EROGAZIONI SUCCESSIVE: si procede esattamente come sopra.
E’ importante svuotare la vaschetta raccogli acqua (rif. A) dopo l’erogazione di non più di 20 caffè.
PULIZIA DEL GRUPPO EROGATORE E DEL BECCUCCIO
Il gruppo erogatore ed il beccuccio vanno puliti settimanalmente. Per fare ciò bisogna procedere ad effettuare una
erogazione senza cialda. Porre un bicchiere abbastanza capiente sotto al beccuccio e premere l’interruttore di
erogazione (rif. D); dopo circa 5 secondi inizierà l’erogazione di acqua calda. Dopo circa due minuti premere
nuovamente l’interruttore di erogazione per fermare l’uscita dell’acqua.
PULIZIA DELLA MACCHINA
Qualsiasi tipo di pulizia, eccezion fatta quella del gruppo erogatore, deve essere eseguita a macchina spenta
(interruttore di alimentazione su zero) e dopo che la macchina si è raffreddata. Per pulire la superficie esterna della
macchina usare solamente un panno morbido inumidito con acqua. La vaschetta raccogli acqua (rif. A) va estratta
e lavata con acqua calda e sapone utilizzando una spugna non abrasiva e deve essere accuratamente asciugata
prima del suo reinserimento. Se si rendesse necessaria la pulizia del serbatoio dell’acqua, utilizzare acqua calda.
Utilizzare esclusivamente le cialde del Vostro Fornitore. L’uso di cialde diverse da quelle
per le quali la macchina è stata concepita può danneggiare l’apparecchio.
Non utilizzare la lavastoviglie per pulire la macchina o suoi componenti. Si danneggiano
irrimediabilmente! Non usare altresì solventi e prodotti o materiali abrasivi.
Se si utilizzano detergenti per la pulizia del serbatoio, assicurarsi di risciacquarlo
scrupolosamente, poiché eventuali residui chimici all’interno del serbatoio possono
provocare pericolo di intossicazione alimentare.
Se la vaschetta non viene svuotata, l’acqua può fuoriuscire.

6
ANOMALIE E POSSIBILI SOLUZIONI
Le riparazioni devono essere eseguite esclusivamente da personale autorizzato e competente. Se non si è in
grado di risolvere i problemi con l’aiuto della presente tabella, rivolgersi al proprio Rivenditore Autorizzato.
DICHIARAZIONE DI CONFORMITA’
La Società costruttrice Tecno Meccanica S.r.l. con sede amministrativa sita in Via Marlianese
43, 51034 Serravalle Pistoiese (PT) ITALY
Dichiara sotto la propria responsabilità che la macchina per il caffè espresso descritta in questo
manuale:
Modello: ZIP Alimentazione: 220v 50/60hz Anno di costruzione: vedi targa CE
È conforme alle Direttive:
2006/42/CE relativa al ravvicinamento delle legislazioni degli Stati membri relative alle
macchine, che sostituisce la Direttiva 98/37/CE;
2014/35/UE relativa al materiale elettrico destinato ad essere adoperato entro taluni limiti
di tensione;
2014/30/UE relativa alla compatibilità elettromagnetica (EMC), che sostituisce la Direttiva
2004/108/CEE.
L’Amministratore
PROBLEMA
POSSIBILE CAUSA
SOLUZIONE
Erogazione del caffè insufficiente
o impossibile
Serbatoio dell’acqua vuoto
Riempire il serbatoio (pag. 3)
Macinatura troppo fine
Utilizzare una cialda-carta nuova.
Rivolgersi al Fornitore delle cialde.
Le bevande erogate sono fredde
anche se la spia (rif. C) è accesa
Tazze ceramiche fredde
Preriscaldare le tazze con acqua
calda o utilizzare bicchierini
monouso.
Erogazione troppo lenta
L’acqua nel serbatoio sta per finire,
riempire il serbatoio (pag. 3).
Sistema di riscaldamento
difettoso
Rivolgersi al Rivenditore
La pompa fa troppo rumore
Serbatoio dell’acqua vuoto
Riempire il serbatoio (pag. 3) e
premere a ripetizione il tasto (rif. D).
La “crema” è troppo poca o
manca del tutto
Macinatura troppo grossa
Utilizzare una cialda nuova.
Rivolgersi al Fornitore delle cialde.
Caffè non fresco
Utilizzare una cialda nuova.
Rivolgersi al Fornitore delle cialde.
Acqua nel serbatoio presente
da molti giorni
Sostituire l’acqua del serbatoio
(pag. 3)
Eventuali riparazioni eseguite non rispettando i capitolati di produzione della Casa costruttrice
e/o utilizzando pezzi di ricambio non originali, possono essere fonte di pericolo per l’utente.
Se l’acqua nel serbatoio viene a mancare si può bruciare la pompa e mandare la macchina in
cortocircuito.

7
GARANZIA
L’apparecchio è garantito per 1 anno dalla data di acquisto, salvo i termini di legge.
La garanzia è limitata a difetti di fabbricazione o di materiali, non è estesa ai pezzi soggetti ad
usura o a danneggiamenti alle parti delicate (interruttori, cavo di alimentazione, ecc.…), e NON
è altresì estesa a danni conseguenti incuria od uso errato dell’apparecchio medesimo (ad
esempio utilizzo di acqua con durezza superiore a 12°F e/o mancato utilizzo o sostituzione di
idoneo sacchetto addolcitore, che possono causare incrostazioni di calcare). In caso di guasto
coperto da garanzia, riportare l’apparecchio presso il Rivenditore dove lo stesso è stato
acquistato, muniti di scontrino o fattura sulla quale deve essere riportato il numero di matricola,
che deve corrispondere a quello posto nella parte inferiore dell’apparecchio. Solo in questo
modo è garantito il ripristino gratuito delle funzionalità dell’apparecchio, mentre le spese di
trasporto rimangono ad esclusivo carico del Cliente. La garanzia decade in caso di impiego
improprio o manomissione, uso della forza e interventi non eseguiti da nostro personale
specializzato. La nostra garanzia non limita comunque i diritti legali del Cliente.
ETICHETTA COLLAUDO –NUMERO DI MATRICOLA:

8
Note

9
P. 10
P. 10
P. 10
P. 10
P. 10
P. 10
P. 11
P. 11
P. 11
P. 12
P. 12
P. 12
P. 14
Tecno Meccanica S.r.l.
All rights reserved
No part of this manual may be reproduced, copied or distributed by any means without the written permission of
Tecno Meccanica S.r.l.
Thank you for choosing the “ZIP” coffee machine, an high-quality product entirely designed, developed, made and
tested in Italy. This product is a pods coffee machine per use primarily domestic.
We remind you to use only the pods of your supplier, the use of pods different from those for which the machine
has been designed can damage the appliance.
A. Water container;
B. Coffee delivery spout;
C. Temperature ready-light;
D. Coffee delivery switch;
E. Machine ignition switch;
F. Lever;
G. Water tank;
H. Pods insert point.
I.
TABLE OF CONTENTS
General safety information………………………..……………………………….
Waste disposal information………………………………..……………………...
Technical features……………………………………..…………………………….
Installation……………………………………………………..……………………..
Water tank filling………………………………………..……………………………
Connection to the mains supply………………………………..……………......
Coffee delivery spout……………………………………..…………………………
Turning on…………………………………………………………..…………………
How to make the coffee……………………………………………………..……...
Keeping brewing head and spout clean……………………..………………….
Keeping the coffee machine clean…………………………………..……………
Anomalies and possible solutions…………………………………………..…...
Warranty terms……………………………………………………………………….

10
GENERAL SAFETY INFORMATION
Below some general safety instructions are summarised:
-Read all instructions before using the appliance;
-Never use the machine with wet or damp hands;
-Never cover the machine, even partially, with cloths for protection;
-Do not put your hands near the coffee delivery spout (Ref. B) during the use;
-Do not put the coffee machine in water for keeping it clean;
-This appliance can be used by children aged from 8 years and above if they have been given supervision
or instruction concerning use of the appliance in a safe way and if they understand the hazards involved.
Cleaning and user maintenance shall not be made by children unless they are older than 8 and supervised.
Keep the appliance and its cord out of reach of children aged less than 8 years;
-Appliances can be used by persons with reduced physical, sensory or mental capabilities or lack of
experience and knowledge if they have been given supervision or instruction concerning use of the
appliance in a safe way and understand the hazards involved. Children shall not play with the appliance;
-This appliance is intended to be used in household and similar applications such as: staff kitchen areas in
shops, offices and other working environments; farm houses; by clients in hotels, motels and other
residential type environments; bed and breakfast type environments.
WASTE DISPOSAL INFORMATION
This product is in conformity with LD 151/2005 and European Directive 2002/96/EC. This product
may not be treated as household waste. Instead it shall be handed over to the applicable
collection point for the recycling of electrical and electronic equipment. By ensuring this product is
disposed of correctly, you will help prevent potential negative consequences for the environment
and human health.
TECHNICAL FEATURES
In the lower section of the coffee machine there is the plate with technical details which must be communicated to
the dealer in the event of request for information or technical assistance.
ELECTRICITY SUPPLY: 220-230 V
FREQUENCY: 50/60 HZ
TOTAL POWER: 800 W
PRESSURE: 20 bar
WEIGHT: about 7 KG
DIMEN.: WxHxD 150x293x280 mm
WATER TANK CAP.: 1,0 L
CONTAINER CAPACITY: 335 cm3
MAIN MATERIAL: steel
INSTALLATION
Remove the coffee machine from packaging and put it on a stable surface, suitable to support its weight, close to a
socket. Keep the packaging in all its parts for possible next transports.
WATER TANK FILLING
Remove the steel cover for reaching the water tank (Ref. G). It is strongly recommended the use of a descaler or a
softener filter which must be replaced periodically. If this is not done, the limescale will accumulate within the coffee
machine and affect the operation of the unit, as well as warranty validity. After having put the softener filter within
the water tank, add the drinking water, possibly low calcium content. It is possible to fill the water tank by using a
funnel and a bottle.
CONNECTION TO THE MAINS SUPPLY
Damage, removal or alteration of the plate must be signaled to the dealer immediately. If
the plate is damaged, removed or altered, warranty coverage will be denied.
The supply voltage of the machine cannot be modified by the user. Before connection,
check that power voltage corresponds to the supply voltage of the machine specified on
the plate.

11
COFFEE DELIVERY SPOUT (REF. B)
The coffee delivery is located in the front of the machine
TURNING ON
Switch on the coffee machine by pressing the green light switch located on the left side of the appliance; the
power-on indicator light will light up. After switching on the machine, it begins the fast process of warming of the
boiler. Wait that the temperature ready-light is lighted up (Ref. C) and the coffee machine is ready to be used.
HOW TO MAKE THE COFFEE
Lift the lever machine upwards (Ref. F) as shown in the figure 1 and insert as the pod as shown in the figure 2.
For the first coffee brewing: insert a pod into its insert point (Ref. H) and gently lower the lever to snap limit.
Place one espresso cup under the delivery spout and press the coffee delivery switch (Ref. D); after about 5
seconds the coffee brewing will start. Reached the desired coffee level in the cup, press again the coffee delivery
switch to stop the coffee brewing. If during the coffee brewing the temperature ready-light (Ref. C) goes off, it
simply means that the machine is warming up to bring water to the correct temperature; thus the coffee brewing
can continue. While it is advisable to wait that the temperature ready-light (Ref. C) is lighted up before brewing the
next coffee.
For all subsequent coffee brewing : proceed exactly as above.
It is important to empty the water container (Ref. A) after the brewing of not more than 20 cups of coffee.
Use only the pods of your supplier, the use of pods different from those for which the
machine has been designed can damage the appliance.
During the delivery do not touch the spout and do not expose yourself to the hot surfaces
of the appliance (danger of burning). The heating surfaces are subject to residual heat
after use!
If the container is not emptied, the water can flow out.

12
KEEPING BREWING HEAD AND SPOUT CLEAN
The brewing head and the spout should be cleaned weekly. To do this we must proceed to make a supply without
pod. Place a big glass under the delivery spout and press the coffee delivery switch (Ref. D); after about 5 seconds
the hot water will start to flow off. After about 2 minutes press again the coffee delivery switch to shut off hot water.
KEEPING THE COFFEE MACHINE CLEAN
It is possible to clean the machine only when it is switched off (put the power switch in “zero”) and has cooled
down, with the exception of the brewing head. Wipe body of machine with a damp cloth. Remove the water
container (Ref. A) and wash in warm soapy water, using a soft sponge and must be thoroughly dried before its
reinsertion. If it is necessary to clean the water tank, use hot water.
ANOMALIES AND POSSIBLE SOLUTIONS
Repair service should be performed only by competent and authorized persons. If you cannot solve problems with
the help of this table, contact your authorized reseller.
PROBLEM
POSSIBLE CAUSE
SOLUTION
Coffee brewing is insufficient or
impossible
Water tank is empty
Fill the water tank (page 10)
The coffee is too fine
Use a new pod. Contact the supplier of
pods
The supplied drinks are cold even
if the temperature ready-light (Ref.
C) is lighted up
Ceramic cups are cold
Preheat the cups with hot water or use
disposable cups
The warming system is
defective
Contact the dealer
Pump makes loud noise
Water tank is empty
Fill the water tank (page 10) and press
the switch (Ref. D) repeatedly
Coffee has little/has not creamy
froth
The coffee is ground too
coarsely
Use a new pod. Contact the supplier
of pods.
The coffee is not fresh
Use a new pod. Contact the supplier
of pods.
The water is in the tank for
several days
Change the water in the tank (page 10)
Do not use the dishwasher to clean the machine or its components because they will be
irremediably damaged. Moreover, do not use solvents and/or abrasive substances.
If a cleaning soap is used to clean the water tank, make sure to rinse it scrupulously,
because any potential chemical residue in the tank can cause the food poisoning.
During the repair service, it can be dangerous to use non original spare parts and/or not
observe the terms of production of the manufacturer.
If the water in the tank is missing it can burn the pump and put the machine in short circuit.

13
DECLARATION OF CONFORMITY
The manufacturing company Tecno Meccanica S.r.l. with administrative in Via Marlianese 43
51034 Serravalle Pistoiese (PT) ITALY
Declares under its own responsibility that the espresso coffee machine described in this
manual:
Model: ZIP Voltage: 220v 50/60Hz Year of manufacture: see the CE plate
Is in conformity with the Directives:
2006/42/CE on the approximation of the laws of the Member States relating to
machinery, replaces the CEE Directive 98/37/CE;
2014/35/UE on Electric material to be used within such voltage limits;
2014/30/UE on Electromagnetic Compatibility (EMC), that replaces the CEE Directive
2004/108/CEE.
Administrator

14
WARRANTY TERMS
This warranty commences on the date you purchased the appliance and is valid for 1 year,
except as otherwise required by law.
The warranty is limited to defects of manufacture or materials. Warranty coverage is DENIED
for parts subject to wear or damages to the flimsy parts (switches, power cable, etc.) and for
damages caused by carelessness or misuse of the appliance (e.g. when the water is harder
than 12°F and/or the lack of use or substitution of an appropriate softener filter, which can
cause limestone incrustations). In the event of a claim under the guarantee, bring the machine
back to the dealer where it was purchased with the sales receipt or invoice, on which must be
specified the serial number that must correspond to that placed in the lower section of the
appliance. Only in this way it is guaranteed the free restoration to working conditions of the
appliance, while all shipping costs will be exclusively borne by the client. Warranty coverage is
denied in the event of improper use or tampering, the use of force and installation, maintenance
or repairs not performed by our authorized persons. However our warranty do not limit client’s
legal rights.
TESTING LABEL –SERIAL NUMBER

15
Notes

16
S. 17
S. 17
S. 17
S. 17
S. 18
S. 18
S. 18
S. 18
S. 19
S. 19
S. 20
S. 20
S. 22
Tecno Meccanica S.r.l.
Alle Rechte vorbehalten
Kein Teil dieses Handbuchs darf in keiner Weise ohne die schriftliche Genehmigung von Tecno Meccanica S.r.l.
reproduziert, vervielfältigt oder übertragen werden.
Wir danken Ihnen für die Wahl der Kaffeemaschine ZIP, eines qualitativ hochwertigen Produkt, das vollständig in
Italien entworfen, entwickelt, hergestellt und getestet wurde. Dieses Produkt ist eine Kaffeemaschine mit
Kaffeepads hauptsächlich für den privaten Einsatz.
Wir empfehlen Ihnen, ausshscliesslich die Pads Ihres Lieferanten zu verwenden; die Verwendung anderer Pads,
für die die Maschine nicht konzipiert wurde, kann die Qualität des Kaffees beschädigen.
A. Wasserauffangschale;
B. Kaffeeauslauf;
C. Temperaturkontrolllampe;
D. Taste für die Kaffeeausgabe;
E. Ein/Auschalter;
F. Drehgriff;
G. Wassertank;
H. Brührgruppe.
I.
INHALTSVERZEICHNIS
Allgemeine Sicherheitshinweise..………………..……………………………….
Entsorgung…………………..………………………………..……………………...
Spezifikationen…..……………………………………..…………………………….
Inbetriebnahme………………………………………………..……………………..
Befüllung des Tanks.…………………………………..……………………………
Anschluss an das Stromnetz…...………………………………..……………......
Kaffeeuaslauf………..……………………………………..…………………………
Einschalten..………………………………………………………..…………………
Zubereitung des Kaffees..…………………………………………………..……...
Reinigung der Kaffeegruppe und des Kaffeeauslaufs……..………………….
Reinigung der Maschine…………..…………………………………..……………
Probleme und mögliche Lösungen…………………………………………..…...
Garantiebedingungen……………………………………………………………….

17
ALLGEMEINE SICHERHEITSHINWEISE
Der folgende Teil fasst einige allgemeine Sicherheitsrichtlinien:
-Lesen Sie sorgfältig die Betriebsanleitungen vor Inbetriebnahme des Produktes;
-Berühren Sie das Gerät niemals mit feuchten oder nassen Händen;
-Decken Sie niemals die Maschine, auch nur partiell, mit Handtüchern oder mit Abdeckfolien;
-Legen Sie Ihre Hände nicht in der Nähe der Kaffeeauslaufs (B) während des Betriebs;
-Tauchen Sie nicht das Gerät in Wasser für die Reinigung;
-Dieses Gerät kann von Kindern ab 8 Jahren benutzt werden, nur wenn sie beaufsichtigt oder
bezüglich des sicheren Gebrauchs des Gerätes unterwiesen wurden und die daraus resultierenden
Gefahren verstehen. Reinigung und Pflege dürfen nicht von Kindern durchgeführt werden, es sei
denn, diese sind mehr als 8 Jahren alt und werden dabei beaufsichtigt. Halten Sie das Gerät und die
Kabel außerhalb der Reichweite von Kindern unter 8 Jahren;
-Dieses Gerät darf von Personen mit eingeschränkten physischen, sensorischen oder geistigen
Fähigkeiten oder Mangel an Erfahrung oder Wissen nur dann benutzt werden, wenn sie eine
angemessene Aufsicht gewährleistet ist oder wenn sie eine Einweisung in die Verwendung des Produkts
erhalten und die damit verbundenen Gefahren verstanden haben. Kinder dürfen nicht mit dem Gerät
spielen;
-Dieses Gerät ist für den Einsatz in privaten nd ähnliche Anwendungen konzipierti, wie z.B.: Kochnische in
Läden, Büros oder anderen Arbeitsumgebungen, Bauernhäuser, für den Einsatz von Kunden in Hotels
und anderen Wohneinrichtungen, Bed & Breakfast usw.
ENTSORGUNG
Dieses Produkt entspricht dem DL 151/2005 und der EU-Richtlinie 2002/96 / EG. Am Ende seiner
Lebensdauer darf das Gerät nicht als normaler Hausmüll entsorgt werden. Stattdessen muss es in
eine öffentliche Sammelstelle für Elektro- und Elektronikschrott gebracht werden. Eine korrekte
Mülltrennung hilft dabei, mögliche negative Auswirkungen auf die Gesundheit und die Umwelt zu
vermeiden!
TECHNISCHE SPEZIFIKATIONEN
An der Unterseite der Maschine befindet sich der Typenschild mit den technischen Daten, die dem Händler bei
technischem Unterstützungsbedarf oder bei Informationsanfrage mitgeteilt werden müssen.
STROMVERSORGUNG: 220-230 V
FREQUENZ: 50/60 Hz
LEISTUNG: 800 W
DRUCK: 20 bar
GEWICHT: 7 KG ca.
GRÖßE BxHxT: 150x293x280 mm
TANKINHALT: 1,0 Liter
KAPAZITÄT DER SCHALE: 335 cm3
HAUPTMATERIAL: Stahl
INTRIEBNAHME
Nehmen Sie das Gerät aus der Verpackung heraus und legen Sie es auf eine stabile Oberfläche, die in der Lage
ist, sein Gewicht zu tragen, und die in der Nähe einer geeigneter Steckdose ist. Bitte halten Sie die Verpackung in
allen seinen Teilen für einen eventuellen Rücktransport.
Die Beschädigung, die Entfernung oder die Veränderung des Typenschilds müssen sofort
an den Händler gemeldet werden. Garantiearbeiten sind nicht möglich, falls der
Typenschild beschädigt, entfernt oder verändert wird.

18
BEFÜLLUNG DES TANKES
Entfernen Sie die Stahlabdeckung, um den Wassertank (G) zu erreichen. WIR EMPFEHLEN DIE
VERWENDUNG EINES WASSERENTHÄRTERS ODER EINES ENTKALKUNGSMITTELS, die regelmäßig
ersatzt werden müssen. Ansonsten können Kalkbrocken in der Maschine entstehen, die den reibungslosen
Betrieb der Maschine und die Gültigkeit der Garantie beeinträchtigen können. Nachdem der Wasserenthärter in
den Tank eingeführt wurde, befüllen Sie den Tank mit kalkarmen Trinkwasser. Sie können den Tank mit der Hilfe
eines Trichters und einer Flasche füllen.
ANSCHLUSS AN DAS STROMNETZ
KAFFEEAUSLAUF (B)
Der Kaffeeauslauf befindet sich an der Vorderseite der Maschine.
EINSCHALTUNG
Zum einschalten des Geräts, drücken Sie den grünen Lichtschalter an der linken Seite der Maschine; die
Kontrolllampe wird aufleuchten. Nachdem Sie die Maschine eingeschaltet haben, beginnt die Schnellaufufheizung
des Kessels. Warten Sie, bis die entsprechenden Temperaturkontrollampen aufleuchten (C): dies bedeutet, dass
das Wasser in der optimalen Betriebstemperatur und somit betriebsbereit ist.
Die Versorgungsspannung der Maschine darf nicht vom Anwender geändert werden. Vor
dem Anschluss an das Stromnetz, überprüfen Sie, dass die Netzspannung die auf dem
Typenschild angegebene Versorgungsspannung entspricht.
Während der Kaffeeausgabe berühren Sie nicht den Kaffeeauslauf und setzen Sie nicht
Ihr Gesicht den heißen Teilen der Maschine (Verbrennungsgefahr) aus. Die Heizflächen
der Maschine behalten die Wärme auch nach dem Gebrauch!

19
ZUBEREITUNG DES KAFFEES
Ziehen Sie den Maschinenhebel (F) nach oben, wie in Abbildung 1, und legen Sie das Pad wie in Abb. 2, hinein.
FÜR DI ERSTE AUSGABE: Legen Sie ein Kaffeepad in eine Brühgruppe (H) und vorsichtig den Hebel (F) nach
unten bis zur Endlage ziehen. Stellen Sie ein Glas unter den Auslauf (B) und drücken Sie auf den entsprechenden
Schalter (D); nach ca. 5 Sekunden wird die Kaffeeausgabe beginnen. Drücken Sie erneut den Schalter, wenn der
Kaffee das gewünschte Niveau erreicht hat, um die Ausgabe zu stoppen. Falls die Temperaturkontrollampe (C)
während der Ausgabe ausgeht, heißt das einfach, dass die Maschine sich aufwärmt, um das Wasser auf die
optimale Temperatur zu bringen; die Kaffeeausgabe kann also reibungslos fortsetzen. Nachdem der Kaffee
abgegeben wurde, ist es empfohlen, das Kaffeepad zu entfernen, um zu verhindern, dass es sich trocknet und
stecken bleibt. Es ist aber empfohlen, vor der nächsten Kaffeeausgabe zu warten, dass die erwähnte Kontrollampe
(C) angeht.
FÜR ALLE NÄCHSTEN AUSGABEN: dasselbe Verfahren wie oben anwenden.
Es ist wichtig, die Wasserauffangschale (A) nach der Ausgabe von nicht mehr als 20 Kaffees zu leeren.
REINIGUNG DER KAFFEEGRUPPE UND DES KAFFEEAUSLAUFS
Die Kaffeegruppe und der Kaffeeauslauf müssen wöchentlich gereinigt werden. Für diesen Zweck müssen Sie eine
Ausgabe ohne das Pad durchführen. Stellen Sie ein Glas unter den Auslauf (B) und drücken Sie auf den
entsprechenden Schalter (D); nach ca. 5 Sekunden wird die Heisswasserausgabe beginnen. Nach etwa zwei
Minuten, drücken Sie erneut den Schalter, um den Wasserausgabe zu stoppen.
Verwenden Sie ausschließlich die Kaffeepads Ihres Lieferanten. Die Verwendung von
Pads, für die die Maschine nicht konzipiert wurde, kann das Gerät beschädigen.
Wenn die Schale nicht geleert wird, kann das Wasser abfließen.

20
REINIGUNG DER MASCHINE
Jede Art von Reinigung, mit der Ausnahme der Kaffeeauslaufes, muss durchgeführt werden, wenn die Maschine
ausgeschaltet ist (Hauptschalter auf Null) und nachdem die Maschine abgekühlt ist. Zur Reinigung der
Außenfläche der Maschine verweden Sie nur einen mit Wasser angefeuchteten weichen Tuch. Nehmen SIe die
Wasserauffangschale (A) heraus und reinigen Sie sie mit Heißwasser und Seife mittels eines nicht scheuernden
Schwammes. Trocknen Sie sie sorgfältig, bevor Sie sie wieder einsetzen. Falls Sie den Wassertank reinigen
müssen, verweden Sie Heißwasser.
PROBLEME UND MÖGLICHE LÖSUNGEN
Reparaturen dürfen ausschliesslich von autorisiertem Fachpersonal durchgeführt werden. Wenn die Probleme
nicht mit der Hilfe dieser Tabelle gelöst werden können, wenden Sie sich bei Ihrem Händler.
PROBLEM
MÖGLICHE URSACHE
LÖSUNG
Nicht ausreichende oder
unmögliche Kaffeeausgabe
Leerer Wassertank
Füllen Sie den Tank (S. 18)
Der Mahlgrad ist zu fein
Verwenden Sie ein neues Kaffeepad.
Wenden Sie sich an den Lieferanten
von Kaffeepads
Die ausgegebenen Flüssigkeiten
sind kalt selbst wenn die Leuchte
(C) an ist
Kalte Tassen aus Keramik
Wärmen Sie die Tassen mit heißem
Einwegbecher
Die Kaffeeuasgabe ist zu
langsam
Der Wassertank ist fast leer,
Füllen Sie den Tank (S. 18)
Defektes Heizungssystem
Heizungssystem
Kontaktieren Sie Ihren Händler
Die Pumpe ist zu laut
Leerer Wassertank
Füllen Sie den Tank (S. 18) und
wiederholt den Schalter (D) drücken
Der Schaum ist zu wenig oder
fehlt gänzlich
Der Mahlgrad ist zu grob
Verwenden Sie ein neues Kaffeepad.
Wenden Sie sich an den Lieferanten
von Kaffeepads
Kaffee ist nicht frisch
Verwenden Sie ein neues Kaffeepad.
Wenden Sie sich an den Lieferanten
von Kaffeepads
Das Wasser im Tank wurde
seit Tagen nicht gewechselt
Wechseln Sie das Wasser im Tank
(S. 18)
Verwenden Sie keine Spülmaschine, um die Maschine oder ihre Bestandteile zu reinigen.
Dadurch werden sie irreparabel beschädigt! Verwenden Sie keine Lösungsmittel und oder
auch abrasive Materialien.
Wenn Sie den Tank mit irgendwelchen Reinigungsmitteln reinigen, spülen Sie ihn
sorgfältig ab, da alle chemischen Rückstände innerhalb des Tanks
Lebensmittelvergiftungen verursachen können.
Eventuelle Reparaturen, die nicht unter Berücksichtigung der Produktionsvorgaben des
Herstellers und / oder unter Verwendung von nicht-original-Ersatzteile, kann für den
Benutzer gefährlich sein. Wenn das Wasser im Tank fehlt, kann sich die Pumpe verbrennen
und somit kann die Maschine einen Kurzschluss haben.
Other manuals for Zip
2
Table of contents
Languages:
Other FlyTek Coffee Maker manuals
FlyTek
FlyTek Zip User manual
FlyTek
FlyTek EXTRA User manual
FlyTek
FlyTek MAXIMA User manual
FlyTek
FlyTek STEEL PRO User manual
FlyTek
FlyTek MAXIBAR User manual
FlyTek
FlyTek CLICK PRO User manual
FlyTek
FlyTek Steel Vapor User manual

FlyTek
FlyTek Zip User manual
FlyTek
FlyTek ZiP Professional User manual
FlyTek
FlyTek ZIP PRO 2 User manual
