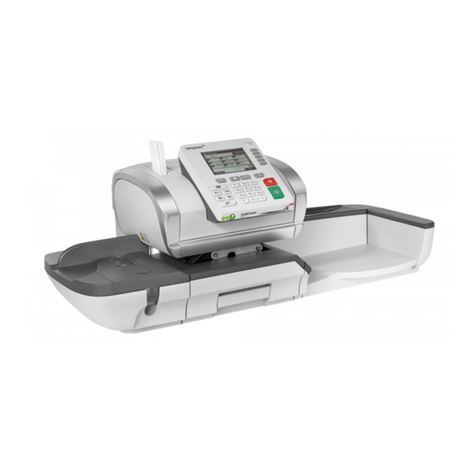
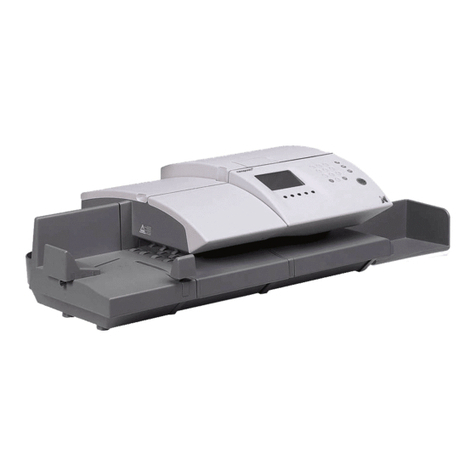
FP FPi 6600-2 User manual


Table of Contents
Read this First ...............................................................................................11
Warning............................................................................................................1
General information..........................................................................................1
Safety...............................................................................................................2
Country Specific Conditions.............................................................................3
End of Life........................................................................................................4
FCC Classification............................................................................................5
Installation .....................................................................................................62
Prepare the Inserter for Installation..................................................................6
Determine the Best Location for the System....................................................8
Install the Main Modules (with optional VersaFeeder).....................................8
Install the Main Modules (without optional VersaFeeder)..............................10
Install the Document Feed Trays...................................................................11
Install the Power Stacker Support (option).....................................................12
Install the HCDF.............................................................................................12
Install the MaxiFeeder....................................................................................13
Install the High Capacity Conveyor Belt.........................................................14
Install the High Capacity Envelope Hopper....................................................14
Assemble the Catch Tray (option)..................................................................15
Fill the Sealing Liquid Reservoir.....................................................................17
Connect the System to Mains Power Supply and Power Up ..................183
Power Up........................................................................................................18
Set the Service phone number.......................................................................19
Set the Language...........................................................................................20
Connect the System to the Internet ..........................................................214
Options for Connection...................................................................................21
Set up a Wired Connection............................................................................21
| Page 1 | TOC | mrt-03-2014 01:58 |
Set up a Wireless Connection........................................................................23
Test the Connection........................................................................................25
Test the System ...........................................................................................265
Test the system..............................................................................................26
Shut Down the System...................................................................................27
| Page 2 | TOC | mrt-03-2014 01:58 |
Read this First1
Warning
Ensure you have read and fully understood the safety requirements
in this section.
General information
This manual describes safety precautions when using the system, unpacking of the inserter
module, installation of the complete system and the steps for the first use.
User Guide
The (electronic) user guide of the system is part of the User Interface. It can be found under
the question mark button on the control panel.
According to the EC (European Commission) declaration following the Low Voltage Directive
(2006/95/EC), the user guide must be available in the national language(s) of the country
where the system is delivered. Therefore, if the User Guide is not available in your country’s
language(s), contact your authorized distributor.
Software
The software used for the reading option is based in part on the work of the Independent
JPEG Group.
1
| Page 1 | mrt-03-2014 01:58 | Read this First
1
English

Symbols
This manual uses the symbols listed below.
WARNING : Indicates a human safety hazard.
ATTENTION : A risk to the equipment or mail could result from an
action you may perform.
NOTE : A remark that explains different cases or specificities.
TIP : Advice to help save you time when processing your mail.
SUPERVISOR : Indicates that you have to use the supervisor
menu to perform the procedure.
Safety
Warnings
• Disconnect the power supply before performing any maintenance.
• Before connecting the system to the electrical supply, ensure that the system is
suitable for the local mains voltage. Refer to the serial plate on your system for voltage
requirements.
Precaution
The general process of automated document handling can sometimes create a build up of
static electricity. Therefore we recommend that the following measures are taken to reduce
the side effects of any electrostatic charge.
• Make sure that you operate the system within the recommended temperature and
humidity conditions.
• Make use of antistatic mats where appropriate.
• If necessary, make use of an ionizer to reduce static charge build up in the room
where the system is located.
Please contact your supplier for further information.
2
| Page 2 | mrt-03-2014 01:58 | Read this First
1
English

Safety Precautions
• Only competent, trained personnel should operate this system. If non-trained
personnel do operate this system, the manufacturer will not accept responsibility
for any resulting accidents or injuries.
• Only skilled persons, who are aware of the risks involved, may open the protective
covers.
For safety reasons, the system will not function when the covers are open.
• Keep long hair, fingers, jewelry, etc. away from rotating and moving parts.
• The power connection must be easily accessible, preferably close to the system.
For safety reasons, it is essential that the system is connected to a socket outlet that
has a protective earth (ground) connection.
• Overcurrent protection in the equipment also relies on the branch circuit protection
(max. 20 A).
• The following part(s) is (are) considered the equipment disconnect device(s):
- Power supply cord plug or appliance coupler.
- 12-pole connector, located on the right-hand side.
CAUTION: DOUBLE POLE / NEUTRAL FUSING
(this means that after operating of the fuse, parts of the equipment
that remain energized, might represent a hazard during servicing.)
Country Specific Conditions
Denmark
In Denmark, certain types of Class 1 appliances may be provided with a plug that does not
provide an adequate earth (ground) connection when inserted into a Danish socket outlet.
Make sure the system has a good functioning connection that has protective earthing (the
plug and socket outlet must match).
Japan
•Establish an earth (ground) connection before connecting the mains plug to the power
supply.
• First disconnect the power supply before removing the earth (ground) connection.
1
English
3
| Page 3 | mrt-03-2014 01:58 | Read this First
End of Life
The objectives of the European Community's environment policy are, in particular, to
preserve, protect and improve the quality of the environment, protect human health and
utilize natural resources prudently and rationally. That policy is based on the precautionary
principle and principles that preventive action should be taken, that environmental damage
should as a priority be rectified at source.
Separating waste during collection is the precondition to ensure reuse and recycling of waste.
The proper disposal of electrical or electronic equipment is necessary to achieve the chosen
level of protection of human health and the environment in the European Community.
More particularly, certain materials and components of waste electrical and electronic
equipment need special treatment as improper handling or disposal on or into land, water
or air would represent a major threat to the environment and human health.
In order to facilitate collection and treatment separated from normal domestic waste,
electrical and electronical equipment is marked with the following logo:
By law, not only are you not allowed to dispose of the waste equipment via other waste
channels, but we encourage you to actively contribute to the success of such collection
and to the common good and better quality of life of present and future generations. For
more information on the correct disposal of this product, please contact your local service
organization.
4
| Page 4 | mrt-03-2014 01:58 | Read this First
1
English

FCC Classification
This is a class A product. In a domestic environment this product may cause radio
interference in which case the user may be required to take adequate measures.
Note: this equipment has been tested and found to comply with the limits for class A digital
device, pursuant to Part 15 of the FCC Rules. These limits are designed to provide
reasonable protection against harmful interference when the equipment is operated in a
commercial environment. This equipment generates, uses, and can radiate radio frequency
energy and, if not installed and used in accordance with this instruction manual, may cause
harmful interference to radio communications. Operation of this equipment in a residential
area is likely to cause harmful interference in which case the user will be required to correct
the interference at his own expense.
1
English
5
| Page 5 | mrt-03-2014 01:58 | Read this First
Installation2
Prepare the Inserter for Installation
Remove the accessories from the inserter module:
- This Installation Guide
- Bottle with sealing liquid
- Power cable, LAN cable
- Bag with the brushes and the moistening cloth
- Power stacker support (option)
- Box with the catch tray (option)
1.
6
| Page 6 | mrt-03-2014 01:58 | Installation
2
English

2. Remove the screw as indicated in the figure.
3. Open the system and remove the bracket on the LH side, near the brushes.
4. Open the LH cover and remove the cardboard.
2
English
7
| Page 7 | mrt-03-2014 01:58 | Installation
Determine the Best Location for the System
Install the modules on a stable surface.1.
2. Make sure that the system is suitable for the local mains voltage. Refer to the type
plate.
3. The power connection must be easily accessible, preferably close to the system. For
safety reasons, it is essential that the system is connected to a socket outlet that has
a protective earth connection.
Install the Main Modules (with optional VersaFeeder)
When a versaFeeder is part of the system, the configuration looks as follows:
Install the modules as follows:
Always switch off the system before connecting to, or disconnecting
from any attached units.
1. Place the versaFeeder between the inserter and feeder module. Place both hands
under the left and right-hand side panel.
8
| Page 8 | mrt-03-2014 01:58 | Installation
2
English

2. Lift it above the inserter fixing plates and lower it until it locks into place. Both sides
are now locked.
3. Place both hands under the left and right-hand side panel of the feeder module.
4. Lift the feeder module above the versaFeeder fixing plates and lower it until it locks
into place. Both sides are now locked.
5. Connect the 12-pole connector of the inserter to 12-pole socket Bof the versaFeeder.
6. Connect the 12-pole connector of the versaFeeder to 12-pole socket Aof the feeder
module.
7. Connect the power cables to socket Cand D.
2
English
9
| Page 9 | mrt-03-2014 01:58 | Installation

Install the Main Modules (without optional VersaFeeder)
If the versaFeeder is not part of the system, the configuration is as follows:
Install the modules as follows:
Place both hands under the left and right-hand side panel of the feeder module.1.
2. Lift the feeder/folder module on the front side and slide it onto the pins of the inserter.
3. Connect the 12-pole connector to 12-pole socket Aof the feeder module.
4. Connect the power cable to socket D.
10
| Page 10 | mrt-03-2014 01:58 | Installation
2
English

Install the Document Feed Trays
As the paper detection actuators are fragile, take care of them when
you install the document feed trays.
Place the document feed trays in position:
Hold the document feed tray slightly inclined as shown in the figure.1.
2. Place the front end of the document feed tray underneath the two black rollers.
3. Move the document feed tray upwards (lifting the black rollers), until it is possible to
‘hook’ the feeder into place.
4. Move the document feed tray towards the machine and move the hooks over the
mounting points (on both sides).
5. Let the document feed tray rest on the machine.
2
English
11
| Page 11 | mrt-03-2014 01:58 | Installation
Install the Power Stacker Support (option)
The optional power stacker support is delivered with the inserter. Install the power stacker
support as shown in the figure on the power stacker of the inserter.
Install the HCDF
To install the feeder tray of the HCDF:
As the paper detection actuators are fragile, take care of them when
(re)placing document feed trays.
1. Pull down lever A.
2. Hook in the feeder tray.
3. Release lever A.
12
| Page 12 | mrt-03-2014 01:58 | Installation
2
English

Install the MaxiFeeder
The maxiFeeder should be installed at the position of feeder no. 1 and/or 4. If you install
the maxiFeeder on position 4, you cannot use position 2 and 3 for document feeders.
Install the maxiFeeder as follows:
Move the feeding plate of the maxiFeeder to the rear position.1.
2. Lift the paper feed rollers with the front edge of the maxiFeeder.
3. Move the maxiFeeder forward until it hooks behind the frame axle.
4. Connect the connector A to the socket B.
The maxiFeeder is auto-detected by the system when the system is switched on. This
makes it easy to switch over from the standard document feeder tray to the maxiFeeder
and vice versa.
To make use of a maxiFeeder it is not necessary to (re-)program the jobs.
2
English
13
| Page 13 | mrt-03-2014 01:58 | Installation
Install the High Capacity Conveyor Belt
The complete installation is described in Mounting Instruction 103 'Installation of the HCCB
CS-2' that is delivered with the High Capacity Conveyor Belt.
Install the High Capacity Envelope Hopper
The complete installation is described in Mounting Instruction 102 'Installation of the High
Capacity Envelope Hopper' that is delivered with the High Capacity Envelope Hopper.
14
| Page 14 | mrt-03-2014 01:58 | Installation
2
English

Assemble the Catch Tray (option)
Unpack the box that contains the catch tray.1.
2
English
15
| Page 15 | mrt-03-2014 01:58 | Installation

2. If you want to have the catch tray on the RH side of the system, assemble it as indicated
in the figure.
3. If you want to have the catch tray on the LH side of the system, assemble it as indicated
in the figure.
16
| Page 16 | mrt-03-2014 01:58 | Installation
2
English

Fill the Sealing Liquid Reservoir
Open the front cover B.1.
2. Fill the reservoir Ato the "Max" lip with sealing liquid.
3. Close the front cover B.
Before starting the job, wait approximately 5 minutes for the brushes to moisten or use
moistened brushes. For instructions on the installation of brushes, see the User Guide,
section Clean and replace brushes.
If the liquid reservoir is almost empty the touchscreen shows a message to warn you that
you should refill the reservoir.
2
English
17
| Page 17 | mrt-03-2014 01:58 | Installation
Table of contents
Other FP Digital Mailing System manuals

FP
FP PostBase Vision User manual

FP
FP PostBase Vision User manual

FP
FP PostBase Vision User manual

FP
FP Post Base Vision Operator's manual

FP
FP Optimail30 User manual

FP
FP myMail User manual

FP
FP PostBase User manual

FP
FP PostBase User manual

FP
FP Postbase 20 Operating and safety instructions

FP
FP PostBase User manual