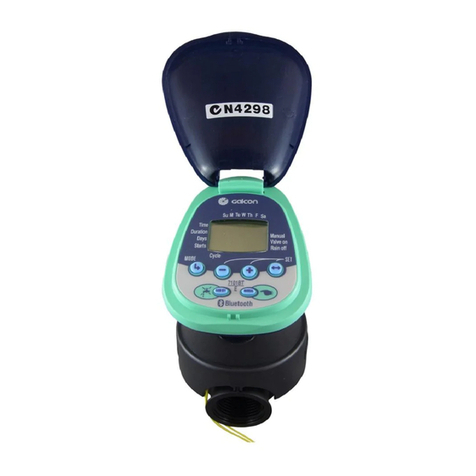
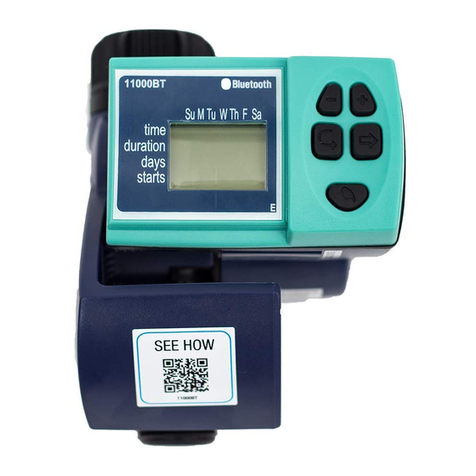
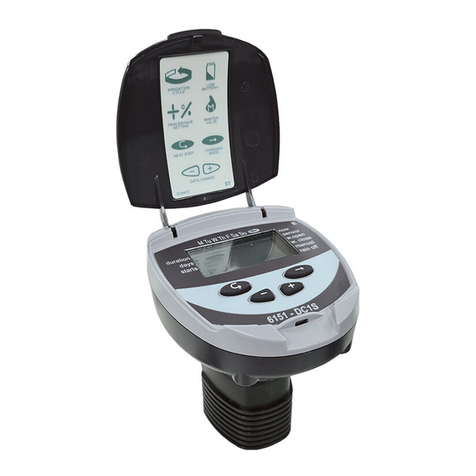
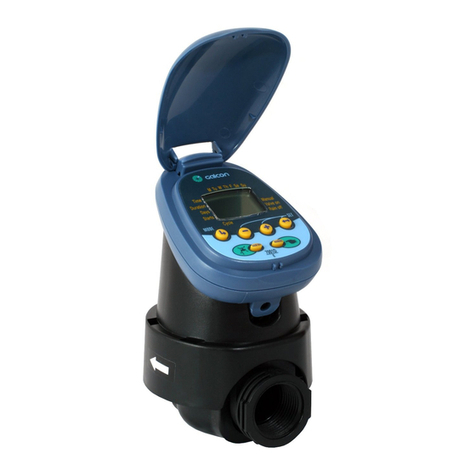
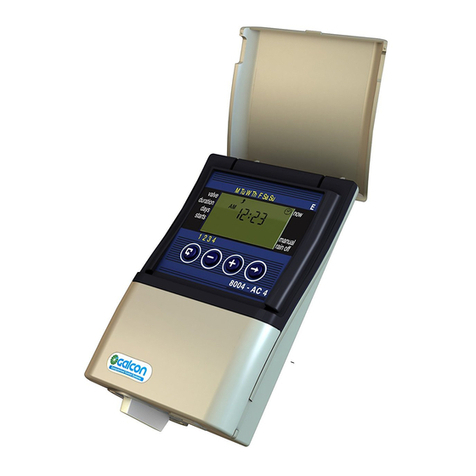
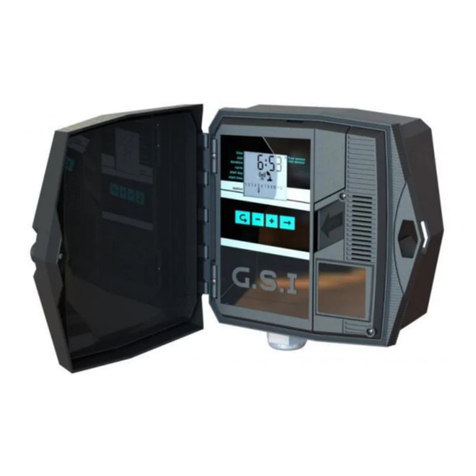
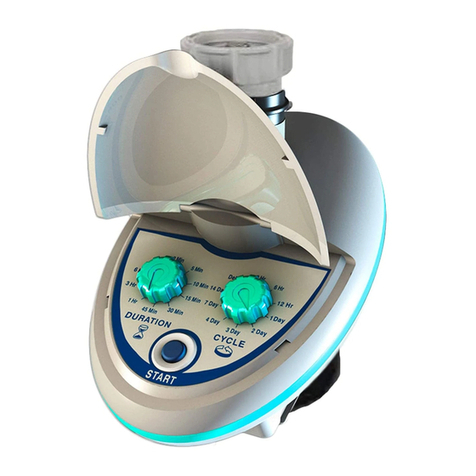
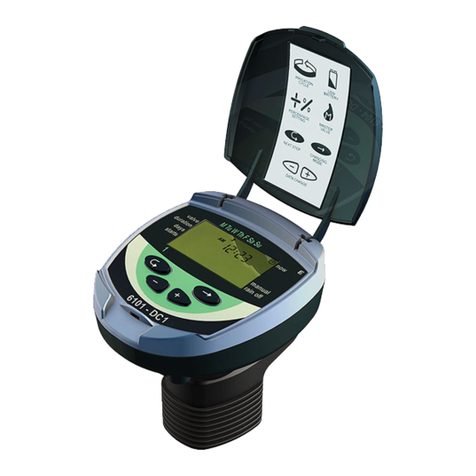
Galcon S Series User manual

Battery
Operated
Advanced
Computerized
Irrigation
Controller
Installation
and
Operating
Instructions
This
handbook
provides
the
installation
and
operating
instructions
for
the
DC-1
and
DC-4
controllers,
and
for
the
"S"
series
of
professional
controllers:DC-1S,DC-4S,DC-6S,DC-9S,DC-12S
Main
Features:
Independent
valve
programming
of
each
individual
Weekly
orcyclical
programming
Up
to
4
operations
per
day
in
weekly
program
mode
Irrigation
duration
in
DC-1
and
DC-4
models:
one
minute
to
12
hours
Irrigation
duration
in
professional
controllers
of
the
"S"
series:
one
second
to
12
hours
Irrigation
frequency
in
DC-1
and
DC-4
models:
once
a
day
to
once
every
thirty
days
in
a
cyclical
program
Irrigation
frequency
in
professional
controllers
of
the
"S"
series:
once
every
minute
to
once
every
thirty
days
in
the
cyclical
program
Irrigation
window
in
cyclical
program
mode
in
the
professional
controllers
of
the
"S"
series
Waterproof
when
immersed
in
water:
DC-1,
DC-4
and
DC-6S
models
Weather
resistant
-
all
models
Irrigation
duration
modifiable
as
a
function
of
percentage
entered
Operation
of
one
to
12
valves
and
a
master
valve.
Computerized
"manual"
operation
of
individual
valves.
Sequential
operation.
Batteries:
DC-1-4-6S
and
DC-1S-4S-6S
models:
two
9V
alkaline
batteries
DC-9S
and
DC-12S
models:
four
9V
alkaline
batteries
Operation
of
remote
valves
up
to
50m
from
the
controller
-
in
DC-4L,
DC-6S,
DC-
9S
and
DC-12S
models.
“sGalcon
Israel’s
Leading
Manufacturers
of
Irrigation
Controllers

CONTENTS
1.
Parts
IASNUMNC
AUG
Msaceseres
sa
tereedeaannctsvenmiadacestentiencda
vende
e
ie
3
2
Setting
Up
the
Irrigation
Control
F
iasisnicciesecvavsverunetrteweneanixaneinenaeveratacnaadmacssaas
3
2.1
Valve
and
Solenoid
Assembly
2.2
Manual-Mechanical
Operation
2.3
Battery
Installation
2.4
Installing
the
Controller
in
the
Irrigation
System
2.5
Wiring
the
Solenoids
in
the
DC-4,
DC-4S
and
DC-6S
Models
2.6
Assembly
Instructions
for
the
DC-9S-12S
Models
3
Programming
the
Irrigation:
COntole
lis
ss:;seccosss
vives
save
enatienopcenctvecsieesiveaseads
9
3.1
Setting
the
Current
Time
and
Day
of
the
Week
3.2
Switching
between
AM/PM
and
24
Hour
Time
Format
3.3
Valve
Selection
3.4
Setting
the
Irrigation
Duration
3.5
Selecting
Days
of
the
Week
for
Irrigation
3.6
Setting
Irrigation
Start
Times
3.7
Example:
Programming
a
Weekly
Irrigation
Schedule
4
Additional
PUM
CUON
S
ric
cesescteectciaecderctnenctecesceuranieiiantnelnctieetieouetoenclnas:
14
4.1
One-Time
Irrigation
4.2
Cyclical
Irrigation
4.3
Setting
the
Day
of
the
Week
and
Time
for
Cyclical
and
One-Time
Irrigation
Programs
4.4
Irrigation
Window
In
the
Cyclical
Program
Mode
4.5
Opening
an
Irrigation
Window
after
Start
Time
has
passed
4.6
Example:
Programming
a
Cyclical
Irrigation
Schedule
4.7
"Manual"
Irrigation
System
Operation
via
the
Irrigation
Controller
4.8
Sequential
"Manual"
Operation
of
all
the
Valves
4.9
Suspension
4.10
Irrigation
Duration
Extended
or
Shortened
by
a
Specified
Percentage
5
COMMON
al
DIS
DIAN
S
sorarrain
ie
inaia
Eei
EEan
20
5.1
Valve
in
Wait
Mode
5.2
Blinking
Low
Battery
Warning
5.3
Permanent
Low
Battery
Warning
5.4
Missing
Program
Data
5.5
Sensor
6
Maintenance,
Troubleshooting
and
RepalrS..............:::::eeeeeeeeeeeeeeeeeneees
24
7
Additional
Accessories
and
Products..............c.ccccceceecececeecececeececeseeeeeeees
25
1.
Parts
Identification
1.
Top
Cover
2.
Controller
display
3.
Bottom
cover
4.
Battery
compartment
cover
5.
Connecting
cables
to
solenoids
6.
Solenoid
7.
Mechanical
operation
handle
8.
Bayonet
adapter
9.
Water
flow
direction
arrow
10.
Hydraulic
valve
Important!
Assembly
of
a
filter
upstream
of
the
valve
is
mandatory.
(See
list
of
accessories
near
the
end
of
this
handbook).
2.
Setting
up
the
Irrigation
Controller
2.1Valve
and
Solenoid
Assembly
.1.1
Shut
the
main
irrigation
system
valve.
.1.2
Installing
the
hydraulic
valve
in
the
irrigation
system.
Pay
attention
to
the
correct
water
flow
direction,
as
indicated
by
the
arrow
[4]
on
the
valve.
2.1.3
If
necessary,
remove
the
solenoid
[1]
from
the
bayonet
adapter
by
making
a
quarter
turn
to
the
left.
Note:
Be
careful
not
to
lose
the
seal
(O-ring)
[3].
2.1.4
After
installing
the
hydraulic
valve
[5],
assemble
the
solenoid
(if
you
removed
it)
by
making
a
quarter
turn
to
the
right.
Be
sure
to
correctly
position
the
seal
(O-ring)
[3]
in
place.
NO
PO
Important!
It
is
recommended
that
you
do
not
disassemble
the
bayonet
adapter.

2.2
Manual-Mechanical
Operation
The
irrigation
valve
can
be
opened
and
closed
independent
of
the
controller's
operation.
Manual
operation
is
useful
when
immediate
operation
irrigation
is
required,
and
there
is
insufficient
handle
time
or
knowledge
to
program
the
controller.
The
valve
handle
is
located
on
the
solenoid,
and
has
three
positions:
Open,
Automatic
[AUTO]
and
Closed.
(MD
Open
Close
Remember!
For
controller
operated
irrigation,
the
valve
handle
must
be
in
the
middle
(AUTO)
position.
mechanical
2.3
Battery
Installation
Open
the
battery
compartment
cover.
Insert
batteries
(see
illustration).
All
the
controller
display
elements
appear
briefly
on
the
display,
followed
by
a
blinking
time
of
12:00.
The
controller
is
now
ready
to
be
programmed.
Important!
Make
sure
to
replace
the
battery
compartment
cover
with
the
grip
aligned
with
the
left
arrow,
and
then
rotate
the
cover
1/8
of
a
turn
to
the
right.

2.4
Installing
the
Controller
in
the
Irrigation
System
lf
the
mounting
plate
[2]
is
attached
to
the
back
of
the
controller,
remove
it.
1.
Insert
the
mounting
coupling
[1]
in
the
rectangular
opening
on
the
mounting
plate,
aligning
the
word
"TOP"
imprinted
on
both
the
coupling
and
the
plate.
2.
Press
the
mounting
plate,
with
the
mounting
coupling
inserted
in
it,
against
the
back
of
the
irrigation
controller
and
push
upwards.
The
controller
mounting
plate
[2]
can
be
mounted
on
a
wall
using
two
screws
(not
included
in
the
kit),
in
which
case
the
mounting
coupling
[1]
is
not
used.
The
distance
between
the
controller
and
the
solenoid
is
limited
by
the
length
of
connecting
cable
between
them.

2.5
Wiring
the
Solenoids
in
the
DC-4,
DC-4S
and
DC-6S
Models
In
the
DC-4,
DC-4S
and
DC-6S
models,
connect
the
valves
to
the
cables
emerging
from
the
controller
according
to
the
illustration
and
explanation
below.
*
*In
specific
models
only.
Labeled
cables
emerge
from
the
controller
[1].
The
end
of
each
cable
is
protected
by
a
cover
that
must
be
removed
prior
to
connecting
the
cable.
The
cables
are
specifically
designed
to
connect
to
Galcon
DC
type
irrigation
valves
and
solenoids
[3].
The
controller
and
its
connections
are
waterproof.
To
safeguard
the
waterproof
characteristics,
compliance
with
the
following
is
essential:
-
Do
not
remove
protective
covers
from
cables
that
are
not
connected
to
valves.
Exposed
cable
ends
can
short-circuit
with
each
other
or
with
conducting
bodies.
e
Connect
the
cables
to
the
valves
(3)
using
the
special
waterproof
connectors
(2)
supplied
with
the
product.
See
illustration.
1.
Cut
away
the
covering
from
the
controller
cable
(1)
near
the
end
of
the
cable
and
expose
the
cable
leads
from
the
black
insulation.
The
solenoid
cables
have
three
wires:
white,
red
and
black.
Do
not
expose
the
three
wires
from
their
colored
insulation.
z

2.Connect
each
of
the
wires
to
a
waterproof
connector
(2).
3.
Three
wires
emerge
from
each
of
the
solenoids:
white,
red
and
black.
Cut
the
entire
exposed
segment
of
the
wires.
Connect
the
white
wire
from
the
solenoid
to
the
same
to
connector
which
you
connected
the
white
wire
from
the
controller,
and
apply
pressure
to
the
red
protruding
part
of
the
connector
with
a
pliers
until
it
is
aligned
with
the
base.
Connect
the
other
wires
in
the
same
manner:
red
with
red,
and
black
with
black.
See
the
illustration.
4.
Connect
as
many
of
the
other
controller
cables
to
solenoid
cables
as
there
are
valves
in
the
system.
Make
sure
that
each
valve
number
matches
the
number
on
the
cable
emerging
from
the
controller.
5.
Do
not
lengthen
the
cable
wires
except
in
the
DC-4L
and
DC-6S,
9S,
12S
models.
6.
In
the
DC-4L
and
DC-6S,
9S,
and
12S
models,
solenoids
can
be
connected
up
to
a
distance
of
50m.
The
cables
used
must
be
identical
to
the
solenoid
cables.
The
connections
are
made
in
the
same
manner.
*
The
grey
cable
(4)
connects
to
the
sensor
and
comes
with
the
DC-1S,
DC-4S
and
DC-6S
models
only.
2.6
Assembly
Instructions
for
the
DC-9S-12S
Models
1.
Open
the
controller
housing
hinged
cover
using
the
enclosed
key
(Figure
1).
2.
To
access
the
connection
panel
and
the
screw
holes,
open
the
controller
panel
by
releasing
the
lock
screws
on
the
controller's
left
side,
under
the
main
cover
(Figure
1).
3.
Mount
the
controller
to
the
wall
or
to
the
control
closet
by
inserting
the
mounting
screws
through
the
holes
indicated
(Figure
2).
Cover
the
crews
with
the
3
supplied
caps
(Figure
2)..
mounting
battery
e
battery
Lock
Controller
box
screw
mounting
hole
large
cables
selector
Figure
2
connector

4.
Installing
the
batteries:
Install
four
9V
alkaline
batteries.
Two
batteries
to
the
expansion
connector.
Two
batteries
to
the
main
connector.
Always
install
the
batteries
for
the
expansion
connector
first.
5.
Connecting
the
solenoids
to
the
controller:
Pass
the
solenoid
wires
through
the
large
cables
connector,and
connect
them
to
the
connectio
strips
located
at
the
bottom
of
the
bottom
panel.
B-
black
wire
R-
red
wire
W
-
white
wire.
VM
-
main
valve.
V1
-
valve
1,
etc.
Four
W
connections
are
possible.
W
connections
on
the
bottom
connection
strip
are
designated
for
valves
1
to
6
and
for
the
master
valve.
The
W1
connections
on
the
top
connection
strip
are
designated
for
valves
7
to
12.
The
sensor
wires
must
be
connected
to
the
SNS
sensor
connectors.
6.
Close
the
panel
by
locking
the
screws
on
the
controller's
left
side.
The
controller
is
now
ready
to
be
programmed
F
RIB
aye
RIB
db
be
RIB
R
V7
I
V8
|11
VƏ
I
V10
111
V11[
V12
RIB
RB
R
V3
IWI
V4
I
V5
|
V6
ISNS
[wl
V2
|
B
iP

3.
Programming
the
Irrigation
Controller
This
section
describes
the
programming
steps
for
a
simple
irrigation
schedule.
It
is
followed
by
a
section
dealing
with
more
advanced
irrigation
controller
operations.
©
The
irrigation
controller
is
programmed
with
the
aid
of
4
buttons:
Programming
Step
Selector
-
used
to
select
the
desired
programming
mode
(e.g.,
clock
setting
mode)
©
Parameter
Selection
Button
-
used
to
select
the
parameter
to
be
changed
(e.g.,
hour,
minute,
etc.).
The
selected
parameter
can
only
be
changed
when
its
entry
is
blinking
on
the
display.
@)
Increment
Button
-
increases
the
value
of
the
selected
parameter
(e.g.,
when
hours
is
selected,
from
06:00
to
07:00).
©
Decrement
Button
-
decreases
the
value
of
the
selected
parameter
(e.g.,whenhours
is
selected,
from
06:00
to
05:00).
3.1
Setting
the
Current
Time
and
Day
of
the
Week
To
enable
the
irrigation
controller
to
operate
the
irrigation
system
at
the
correct
times,
the
current
|
(2
time
and
current
day
of
the
week
must
first
be
set.
1.
Press
©)
several
times
until
the
©
appears.
2.
Press
©)
The
hour
digits
blink.
Set
the
current
hour
using
®
and
©
(Note
the
AM
and
PM
designations).
3.
Press
&
The
minute
digits
blink.
Set
the
current
minute
using
®
and
©.
4.
Press
®©
A
blinking
up
arrow
appears
at
the
top
of
the
display.
Move
the
arrow
to
the
current
day
of
the
week
using
the
@
or
©
button.
If
the
most
recent
data
item
stops
blinking
before
you
finish
programming
it,
press
®
to
continue
the
programming
process.
9

3.2
Switching
between
AM/PM
and
24
Hour
Time
Format
The
default
time
format
is
AM/PM.
There
is
M
Tu
W
Th
F
Sa
Su
also
a
24
hour
time
format.
To
switch
between
the
two
formats:
1.
Press
©
until
the
appears.
2.
Press
©)
The
hours
digits
blink.
3.
Press
®
and
©
simultaneously.
The
clock
reading
switches
from
AM/PM
to
a
24
hour
time
display
or
vice
versa.
6056
-
DC
6s
You
can
switch
the
time
display
format
at
any
step
in
the
programming
process.
3.3
Valve
Selection
This
section
does
not
apply
to
the
DC-1
model.
M
Tu
W
Th
F
SaSu
valve
|
be
now
ee
duration
Sensor
Program
an
irrigation
schedule
for
each
valve
days
w.open
individually.
First
select
the
desired
valve,
and
starts
se
then
program
a
schedule
as
follows:
rain
off
1.
Press
©
until
@
appears.
2.
Press
®©.
A
blinking
arrow
appears
at
the
bottom
of
the
display.
3.
Move
the
arrow
to
the
desired
valve
number
|
|E
6056-DC6s
by
pressing
®
and
©.
4.
Press
©
to
proceed
to
the
next
step.
10

3.4
Setting
the
Irrigation
Duration
This
setting
determines
how
long
the
irrigation
lasts.
1.
Press
©
until
X
appears.
2.
Press
®).
The
hour
digits
blink.
Set
the
desired
number
of
hours
by
pressing
@)
and
©.
Press
©)
again
-
the
minute
digits
blink.
Set
the
desired
number
of
minutes
by
pressing
@
and
©
3.
Press
©
to
proceed
to
the
next
step.
4.
In
professional
controllers
-"S"
series,
the
duration
of
the
irrigation
can
also
be
programmed
in
seconds.
The
method
of
programming
is
the
same.
M
Tu
W
Th
F
SaSu
rain
off
6056
-
-DC6s
6s
3.5
Selecting
Days
of
the
Week
for
Irrigation
This
setting
determines
which
days
of
the
week
the
irrigation
controller
will
operate
the
specified
valve.
.
Press
©
until
È
appears.
2.
Press
©.
A
blinking
arrow
appears
at
the
top
of
the
display,
under
Monday.
3.
Move
the
blinking
arrow
to
the
desired
day
of
the
week
by
pressing
©,
4.
Selecting/adding
irrigation
days:
Press
@).
The
arrow
under
the
selected
day
stops
blinking,
moves
one
position
to
the
right,
and
blinks
under
the
next
day
of
the
week.
Youcan
select
additionaldays
of
the
week
in
the
same
manner.
5.
Canceling
Scheduled
Irrigation
Days:
Have
the
arrow
blink
under
the
day
you
want
to
cancel.
Press
©),
The
arrow
under
—h
M
Tu
W
Th
F
SaSu
now
Sensor
W.open
w.close
manual
rain
off
6056
-
DC
6s
the
selected
day
will
disappear.
The
blinking
arrow
will
move
one
position
to
the
right,
under
the
next
day
of
the
week.
Cancel
additional
scheduled
irrigation
days
in
the
same
manner.
6.
Press
©
to
proceed
to
the
next
step.
e
When
the
blinking
arrow
reaches
Sunday,
pressing
again
displays
in
the
center
of
the
display,
and
&
at
the
top
right
of
the
display.
To
return
to
the
"Selecting/Adding
Irrigation
Days"
mode,
press
once
or
twice.
11

3.6
Setting
Irrigation
Start
Times
M
Tu
W
Th
F
SaSu
In
this
step,
up
to
4
separate
irrigation
start
times
can
be
programmed
for
a
selected
day
for
the
valve
being
programmed.
The
selected
valve
will
open
at
each
of
the
start
times
set,
for
the
irrigation
duration
set
as
described
in
Section
3.4.
1.
Press
©
until
the
START
|
appears.
The
word
or
the
last
start
time
set
will
ee
appear
on
the
display.
F605
-
DCs
2.
Press
©)
.
The
displayed
item
blinks
(OFF
or
last
start
time
entered).
3.
Set
the
desired
start
time
by
pressing
®
and
©.
(Take
note
of
the
AM
and
PM
designations).
Repeat
actions
2
and
3
to
set
start
times
Il,
III
and
IV,
as
needed.
4.
To
cancel
a
specific
start
time,
select
it
by
pressing
©
.
Next,
press
®©.
The
hour
digits
blink.
Press
@
or
©
until
the
word
OFF
appears
on
the
display.
5.
To
program
another
valve,
select
it,
and
repeat
the
above
steps,
starting
from
section
3.3
above.
12

3.7
Example:
Programming
a
Weekly
Irrigation
Schedule
Let's
assume
you
want
to
program
the
irrigation
controller
to
water
three
times
a
day
using
the
24
hour
time
display
format:
at
08:00
AM,
13:00
PM
and
19:00
PM,
for
21/2
hours
at
a
time,
on
Tuesday
and
Friday.
To
switch
to
an
AM/PM
time
display
format,
see
section
3.2.
(If
you
are
using
a
DC-1
model
irrigation
controller,
start
from
step
4.)
1.
Press
©
until
&
appears.
.
Press
®©.
A
blinking
arrow
appears
at
the
bottom
of
the
display.
.
Press
®
or
©
to
move
the
arrow
to
the
number
of
valve
to
be
programmed.
Press
©
until
X
appears.
.
Press
®©
.
The
hour
digits
blink.
Press
®
or
©
until
the
hour
displays
.
Press
©.
The
minute
digits
blink.
Press
®
or
©
until
the
minute
displays
30.
.
Press
©.
appears.
.
Press
®.
A
blinking
¥
appears
at
the
top
of
the
display,
under
Monday.
Press
&
until
the
blinking
arrow
appears
under
Tuesday,
and
then
press
®.
The
arrow
under
Tuesday
will
stop
blinking
and
advance
one
position
to
the
right,
to
Wednesday.
Press
©
twice
to
move
the
arrow
to
Friday,
and
then
press
@
.
8.
Press
©.
START
|
time
appears.
Press
®©.
The
hour
digits
blink.
9.
Set
the
start
time
to
08:00
by
pressing
®
or
©.
Repeat
this
step
to
set
START
II
time
[
2]
to
13:00
and
START
III
time
[
3]
to
19:00.
10.
Press
©.
START
IV
time
[
4]
appears.
Press
®©.
The
hour
digits
blink.
11.
Press
®
or
©
until
IFF
appears.
The
fourth
opening
of
the
valve
is
canceled.
NO
NOOK
ON
13

4.Additional
Functions
4.1
One-Time
Irrigation
This
function
is
used
to
program
the
irrigation
controller
to
operate
the
irrigation
system
once
only,
for
the
set
irrigation
duration,
at
the
set
time.
(Duration
set
as
described
in
Section
3.4).
1.Press
©
until
EX
appears.
2.Press
©
several
times
(for
all
the
days
of
the
week)
until
<S
appears,
and
fn
LE
blinks
on
the
display.
M
Tu
W
Th
F
Sa
Su
6056
-
DC 6s
3.Go
to
Section
4.3
to
set
the
start
day
and
time.
4.2
Cyclical
Irrigation
This
option
is
used
to
program
the
irrigation
controller
to
operate
the
irrigation
system
in
a
cyclical
manner,
once
every
x
days,
for
the
irrigation
duration.
(Note:
Duration
for
which
valve
stays
open
set
as
described
in
Section
3.4).
1.
Press
©
until
BS
appears.
2.
Press
®
several
times
(for
all
the
days
of
the
week)
until
&
appears,
and
Hn
LE
blinks
on
the
display.
M
Tu
W
Th
F
SaSu
now
sensor
W.open
w.close
manua
rain
off
6056
-
DC6s
3.
With
the
display
blinking,
press
®
or
©.
The
interval
between
irrigation
sessions
(irrigation
cycle)
in
days,
hours
or
minutes
is
displayed.
For
example,
if
you
set
2
days,
the
irrigation
will
be
performed
every
two
days
for
the
defined
duration.
4. In
the
"S"
series
of
professional
controllers,
the
irrigation
cycle
can
be
programmed
from
one
minute
up.
The
settings
are
performed
in
the
same
manner.
14

4.3
Setting
the
Day
of
the
Week
and
Time
for
Cyclical
and
One-Time
Irrigation
rome
=
AI
y
Programs
ciao
7
These
programs
enable
you
to
pre-set
the
time
of
valve
opening.
The
number
of
days
until
the
valve
opening
appears
on
the
display,
to
the
right
of
the
irrigation
start
time
(above
the
word
"days").
0
days
=
program
starts
today;
1
day
=
program
starts
tomorrow,
etc.
(up
to
30
days).
1.
Press
©
until
START
[I
]
appears.
The
last
opening
time
entered
appears
on
the
display.
2.
Press
©
.
The
hour
digits
blink.
3.
Set
the
desired
opening
time
by
pressing
®
or
©
(Take
note
of
AM
and
PM
designations).
4.
Press
until
the
digit
to
the
right
of
the
opening
time
blinks
(The
digit
above
the
word
"days").
5.
Set
the
number
of
days
until
the
opening
of
the
valve
by
pressing
®or
©.
‘Valve
openings
2,
3
and 4
are
canceled
in
this
mode.
6056
-
DC6s
15

4.4
Irrigation
Window
In
the
Cyclical
Program
Mode
The
irrigation
window
function
is
incorporated
in
the
"S"
series
of
professional
controllers.
The
See
eS
irrigation
window
is
an
advanced
feature
which
enables
you
to
define
that
the
operations
ina
cyclical
irrigation
program
(see
Section
4.2)
be
performed
during
a
specified
part
of
the
day
only
(window).
An
irrigation
window
can
only
be
defined
for
an
irrigation
cycle
that
is
shorter
than
a
full
day
(up
to
23.59
hours),
and
only
in
the
cyclical
irrigation
mode.
If
the
irrigation
cycle
exceeds
24
hours,
the
window
function
is
disabled.
This
function
is
useful,
for
example,
when
irrigation
is
only
required
during
the
hot
hours
of
the
day.
1.
Press
©
until
MS
appears
on
the
display
next
to
W.
OPEN.
The
word
OFF
or
the
last
OPEN
WINDOW
time
setting
entered
is
displayed.
2.
Press
©.
The
word
OFF
blinks
on
the
display.
3.
Press
®
and
©
to
set
the
desired
OPEN
WINDOW
time
(pay
attention
to
the
AM/PM
designation).
4.
Press
©
until
GD
appears,
with
12:00
PM
or
the
last
CLOSE
WINDOW
time
setting
displayed.
5.
Press
@
and
©
to
set
the
desired
CLOSE
WINDOW
time
(pay
attention
to
the
AM/
PM
designation).
“If
an
irrigation
cycle
exceeding
24
hours
has
been
programmed,
the
irrigation
window
function
is
disabled.
To
cancel
the
irrigation
window
1.
Press
©
until
appears
next
to
OPEN
WINDOW,
along
with
the
display
of
the
last
OPEN
WINDOW
time
setting
entered.
2.
Press
©.
The
irrigation
window
open
time
blinks
on
the
display.
3.
Press
until
Off
appears
next
to
RM
.
The
irrigation
window
is
now
cancelled.

4.5
Opening
an
Irrigation
Window
after
Start
Time
has
passed
Example:
You
are
setting
an
irrigation
program
specifying
5
minutes
of
irrigation
every
30
minutes,
from
9:00
AM
to
5:00
PM.
However,
you
have
entered
the
settings
at
9:20
AM.
As
a
result,
the
program
will
not
commence
today,
but
only
from
9:00
AM
tomorrow.
To
force
the
program
to
begin
today,
perform
the
following
steps:
1.
Press
©
until
START
|
is
displayed.
2.
Press
®
and
©
to
set
any
time
after
the
current
time:
e.g.
9:30
AM.
This
time
will
constitute
the
first
start
time
for
today.
From
tomorrow,
the
schedule
will
operate
according
to
the
program
you
set.
The
Start
|
display
will
display
the
next
start
time
taking
into
account
the
window
you
have
set.
4.6
Example:
Programming
a
Cyclical
Irrigation
Schedule
Let's
assume
you
want
to
program
the
irrigation
controller
to
open
the
valve
at
12:45
PM,
for
a
period
of
one
hour,
every
5
days.
1.
Set
the
irrigation
duration
as
described
in
Section
3.4:
Setting
the
Irrigation
Duration.
(Press
©
until
X
appears,
then
set
the
desired
irrigation
duration
by
pressing
®
and
©
).
2.
Press
©
until
SS
appears.
3.
Press
©)
a
number
of
times
(for
all
the
days
of
the
week)
until
On
CE
appears
blinking
on
the
display.
4.
While
the
display
is
still
blinking,
press
or
until
"5
days"
appears
on
the
display,
representing
the
irrigation
frequency.
.
Press
©.
START
|
is
displayed.
.
Press
®©.
The
hours
digits
blink.
Press
®
until
the
hours
digits
change
to
12
(PM).
.
Press
©
until
the
minute
digits
change
to
45.
ONO
OH
17

4.7
"Manual"
Irrigation
System
Operation
via
the
Irrigation
Controller
ee
M
Tu
W
Th
F
Sa
Su
This
function
operates
the
selected
valve
for
the
irrigation
duration
defined
in
the
program.
The
valve
will
close
automatically
at
the
end
of
the
irrigation
duration.
Note
that
the
originally
programmed
irrigation
schedule
continues
to
operate
at
the
set
times.
1.
Press
©
until
&
appears.
Select
one
or
more
valves
as
described
in
Section
3.3:
"Valve
Selection".
2.
Press
©
until
@
appears.
3.
Press
®
to
open
the
valve.
The
word
"On"
is
displayed.
After
an
interval
of
5
seconds,
a
count
down
of
the
remaining
irrigation
duration
appears
on
the
display.
now
Mee
To
close
the
valve
manually,
press
©.
{i
FF
appears
|
eich
on
the
display.
w.close
4.To
close
the
valve
manually
before
the
end
of
manual
the
irrigation
duration,
press
©
until
ON
appears
again
on
the
display.
Press
©
to
close
the
valve.
Up
to
two
valves
can
be
operated
simultaneously
in
this
manner.
Simply
repeat
the
above
steps
for
the
second
valve.
4.8
Sequential
"Manual"
Operation
of
all
the
Valves
The
valves
can
be
operated
sequentially,
one
after
the
other.
1.
Press
©
until
the
©
appears.
2.
When
nothing
is
blinking
on
the
display,
press
and
hold
down
®
for
5
seconds.
Valve
1
will
open
and
operate
for
the
programmed
irrigation
duration.
When
valve
1
closes,
valve
2
opens,
and
so
forth
until
the
last
valve
has
opened.
All
the
valves
designated
to
open
blink.
3.You
can
influence
the
process.
Pressing
©)
closes
the
current
valve
and
opens
the
next
one.
4.Important:
You
can
only
exit
this
screen
after
all
the
valves
have
opened.
6056
-
DC
6s
18

4.9
Suspension
This
option
is
Heed
to
temporarily
suspend
the
irrigation
controller's
control
of
the
valves,
for
example,
while
it
is
raining.
The
irrigation
schedule
remains
stored
in
the
controller,
but
is
not
implemented.
The
suspension
option
disables
ALL
valves
connected
to
the
irrigation
controller.
1.
Press
©
until
the
appears.
2.
Press
and
hold
down
©
for
5
seconds.
⁄&
appears
blinking
alongside
the
word
"rain
off".
The
controller
is
now
suspended.
3.
To
restore
control
to
the
controller,
6056
-
DC
6s
press
©
until
the
appears,
and
then
press
and
hold
down
©
until
the
%
disappears.
4.
Suspension
can
also
be
implemented
while
a
valve
has
been
activated.
5.
If
an
attempt
is
made
to
operate
a
valve
manually
while
the
irrigation
controller
has
been
suspended,
or
when
a
valve
is
meant
to
open
sequentially,
the
word
"rAin"
appears
on
the
display,
and
the
valve
will
not
open.
4.10
rrigation
Duration
Extended
or
Shortened
by
a
Specified
Percentage
You
can
extend
/
shorten
the
irrigation
duration
for
all
the
valves
simultaneously
by
specifying
a
percentage
for
the
duration.
Mu
W
Th
F
Sasu
Example:
if
the
irrigation
duration
has
been
set
to
one
hour,
adding
10%
extends
the
duration
by
6
minutes
(to
66
minutes).
1.
Press
©
until
the
©
appears.
2.
Wait
until
no
digit
is
blinking
3.
Press
@)
and
simultaneously.
00+%
is
4.
Press
©)
.
The
00
blinks.
Press®
or
©
to
———
increase
or
decrease
the
percentage
as
necessary
(in
increments
of
5%).
+%
or
-%
is
permanently
displayed
on
the
main
display,
accordingly.
Important!
The
percentage
cannot
be
changed
for
an
individual
valve.
19

5.
Additional
Displays
a
5.1
Valve
in
Wait
Mode
This
section
does
not
apply
to
the
DC-1
Model.
When
two
valves
are
currently
open,
and
a
third
valve
is
scheduled
to
open,
the
third
valve
enters
into
wait
mode.
A
blinking
appears
above
the
number
of
the
waiting
valve.
When
one
of
the
first
two
valves
closes,
the
waiting
valve
opens.
During
6056
-
DC
6s
"manual"
operation
of
a
waiting
valve
via
the
irrigation
controller,
the
letter
"W"
(Wait)
appears
on
the
display.
The
valve
opens
when
another
valve
closes.
20
This manual suits for next models
7
Table of contents
Other Galcon Controllers manuals

Galcon
Galcon 61 Series User manual

Galcon
Galcon 7101BT User manual

Galcon
Galcon Galileo Manual

Galcon
Galcon 11000BT User manual

Galcon
Galcon Dc-1 User manual

Galcon
Galcon AC 4 User manual

Galcon
Galcon 9001 E-Z User manual

Galcon
Galcon 7001D User manual

Galcon
Galcon 6100 Series User manual

Galcon
Galcon G.S.I DC Operation manual
Popular Controllers manuals by other brands

Extron electronics
Extron electronics HD CTL 100 Setup guide

WEG
WEG PFW03-M08 user manual

Toshiba
Toshiba TS3000 Series instruction manual

KAMWELD
KAMWELD KAM-TC1000 Operation & instruction manual

American Dynamics
American Dynamics ADTT16E Touch Tracker datasheet

Loctite
Loctite Single CureJet Operation manual