manuals.online logo
Brands
  1. Home
  2. •
  3. Brands
  4. •
  5. Garland
  6. •
  7. Network Hardware
  8. •
  9. Garland AggregatorTAP INT1G10CSA User manual

Garland AggregatorTAP INT1G10CSA User manual

INSTALL GUIDE
AggregatorTAP | INT1G10CSA |1.1.37
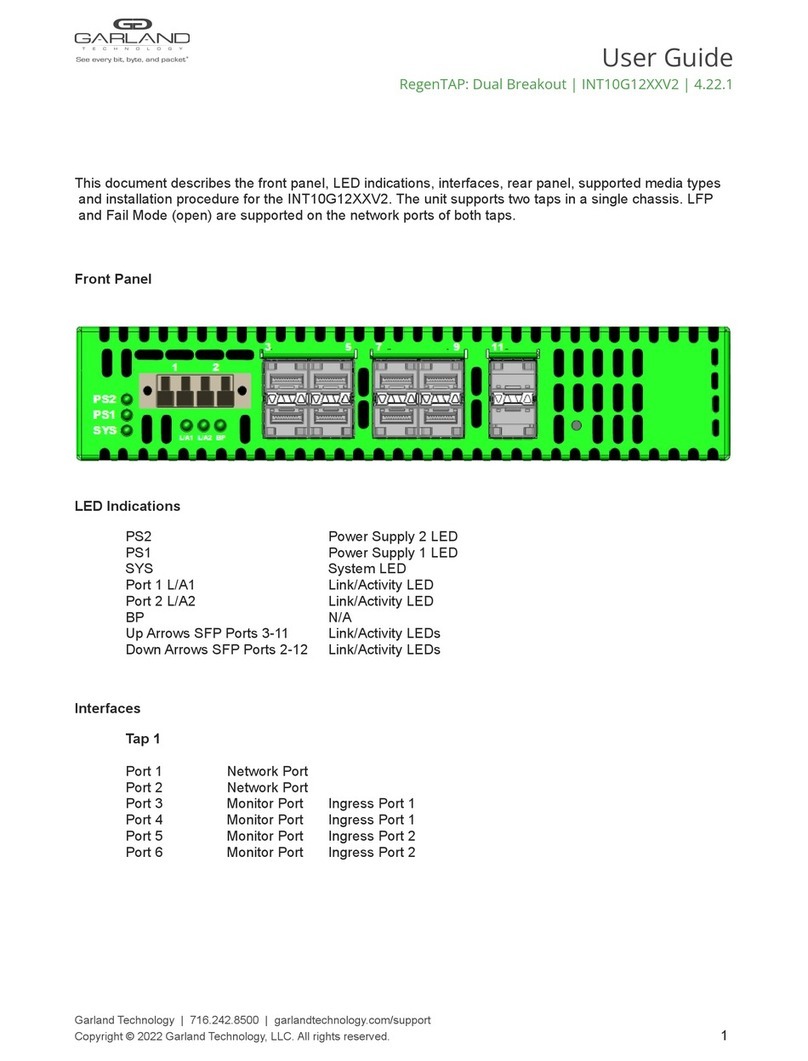
This document describes the front panel, LED indications, interface and the installation procedure for the
INT1G10CSA. This Aggregator TAP is ideal for 10/100/1000MB copper network monitoring. The
innovative design allows these TAPs to be easily installed into any copper 10/100/1000MB network
segment.
Front Panel
LED Indications
Port 1 LFP Orange indicates LFP on Off indicates LFP off
Port 1 LNK Link LED
Port 2 LFP Orange indicates LFP on Off indicates LFP off
Port 2 LNK Link LED
Port 3 LFP Orange indicates LFP on Off indicates LFP off
Port 3 LNK Link LED
Port 4 LFP Orange indicates LFP on Off indicates LFP off
Port 4 LNK Link LED
Port 5 LFP Orange indicates LFP on Off indicates LFP off
Port 5 LNK Link LED
Port 6 LFP Orange indicates LFP on Off indicates LFP off
Port 6 LNK Link LED
Port 7 LFP Orange indicates LFP on Off indicates LFP off
Port 7 LNK Link LED
Port 8 LFP Orange indicates LFP on Off indicates LFP off
Port 8 LNK Link LED
Port 9 LNK Link/Activity LED
Port 9 Activity Solid Green indicates no Activity Flashing Green indicates activity
Port 10 LNK Link/Activity LED
Port 10 Activity Solid Green indicates no Activity Flashing Green indicates activity
PS1 Power Supply 1 LED (Green indicates normal / Off indicates power not applied)
PS2 Power Supply 2 LED (Green indicates normal / Off indicates power not applied)
Interfaces
Serial Serial Interface used to configure the INT1G10CSA
(see Settings for the Console Port)
Garland Technology | 716.242.8500 | garlandtechnology.com/support
Copyright © 2021 Garland Technology, LLC. All rights reserved. 1
INSTALL GUIDE
AggregatorTAP | INT1G10CSA |1.1.37
List of Components Supplied
The components supplied with each INT1G10CSA TAP are
listed below. If any component is found to be missing,
damaged, not working, or otherwise faulty, please report it
immediately to Garland Technology Technical Support.
1 x INT1G10CSA Span Tap
1 x Rack mounting kit (bracket and screws)
2 x AC Power Cords
1 x Ethernet Cable (RJ45)
1 x Console Cable (RJ45 x DB9)
Rack-mounting the Chassis
This section describes how to mount the INT1G10CSA into a 19” rack. Follow the usual security
precautions.
To rack mount the INT1G10CSA:
1. Unpack the INT1G10CSA and place it on a suitable work surface.
2. Attach the two mounting brackets supplied to the side of the INT1G10CSA chassis.
3. Slide the chassis into the rack and secure it with screws (not supplied).
4. Attached the AC Power cords to seperate power sources. The INT1G10CSA is able to work with
a single power input but two power inputs from seperate power sources will help safeguard the
device against power failure.
If the INT1G10CSA is DC powered, see connection instructions below.
To wire a DC power supply:
1. Verify the power is off to the DC input circuit.
2. Attach the appropriate ring fittings to the DC input wires.
3. From the bottom of the terminal block wire the DC input power supply to the terminal block as
follows:
Ground wire to Ground terminal (left)
-48 Vdc return to “+” terminal (center)
-48 Vdc wire to “-” terminal (right)
Caution: Before performing this procedure, ensure that all power is off to the DC circuit or the power
supply being added or removed. Locate the circuit breaker that services the DC circuit and switch it to the
off position. Tape the circuit breaker switch handle in the off position to prevent accidental closing of the
circuit.
Garland Technology | 716.242.8500 | garlandtechnology.com/support
Copyright © 2021 Garland Technology, LLC. All rights reserved. 2
INSTALL GUIDE
AggregatorTAP | INT1G10CSA |1.1.37
Settings for the Console Port
A terminal emulator is required to access and manage the INT1G10CSA. The settings to connect to the
Serial Console are the following:
Bits per second: 19200
Data Bits: 8
Parity: None
Stop: 1
Flow Control: None
Logging into the INT1G10CSA
Insert the RJ45 connect of the Console Cable into the Console Port. Configure the settings for the
terminal emulator as previously instructed then press enter.
The default username is admin. The default password is gtadmin1.
Garland Technology | 716.242.8500 | garlandtechnology.com/support
Copyright © 2021 Garland Technology, LLC. All rights reserved. 3
INSTALL GUIDE
AggregatorTAP | INT1G10CSA |1.1.37
Configuring the INT1G10CSA
The main menu is displayed upon successful login.
Selecting 1 brings up the View System page. This page informs the user as to the status of the power
supplies and ports in addition to displaying the serial number of the unit.
Garland Technology | 716.242.8500 | garlandtechnology.com/support
Copyright © 2021 Garland Technology, LLC. All rights reserved. 4
INSTALL GUIDE
AggregatorTAP | INT1G10CSA |1.1.37
Selecting 2 brings up the Change/View Configuration page. Pressing 1 will bring up the configuration
screen that enables you to change the port to match your network. Pressing 2 and 3 enables you to select
which ports forwards a copy of the received packets to port 9 or port 10.
Note: The INT1G10CSA ships configured in Tap mode. The user may change this by enabling Span on
each Network Pair.
To change a Network Ports select 1 under the Setup Network (Tap) Ports. Select the Network Pair to be
changed.
Garland Technology | 716.242.8500 | garlandtechnology.com/support
Copyright © 2021 Garland Technology, LLC. All rights reserved. 5
INSTALL GUIDE
AggregatorTAP | INT1G10CSA |1.1.37
Under Setup Port Configuration Menu you can set the port speed, set LFP, disable Span mode for a
Network pair (Tap), and enable Sync Mode. Configuring the port to Forced Full Duplex prohibits the port
from responding to autonegotiate messages which requires the user to manually configure the port on the
device linked to the INT1G10CSA.
Note: Failure Propagation (LFP) allows the link state to be mirrored to adjacent live network interfaces.
When the tap is in SYNC mode then LFP is set to be enabled.
Garland Technology | 716.242.8500 | garlandtechnology.com/support
Copyright © 2021 Garland Technology, LLC. All rights reserved. 6
INSTALL GUIDE
AggregatorTAP | INT1G10CSA |1.1.37
Pressing 2 or 3 enables you to change which ports are assigned to send packets to port 9 or port 10. By
default ports 1 through 8 send copies of the packets they receive to port 9 and 10.
You may change the username or password by selecting 3 from the Main Menu.
Garland Technology | 716.242.8500 | garlandtechnology.com/support
Copyright © 2021 Garland Technology, LLC. All rights reserved. 7
INSTALL GUIDE
AggregatorTAP | INT1G10CSA |1.1.37
Restore Factory Defaults
The INT1G10CSA can be restored to Factory defaults by selecting 4 on the Main Menu.
Note: A power cycle is required after pressing 1.
Garland Technology | 716.242.8500 | garlandtechnology.com/support
Copyright © 2021 Garland Technology, LLC. All rights reserved. 8
INSTALL GUIDE
AggregatorTAP | INT1G10CSA |1.1.37
INT1G10CSA Flow Diagram
Understanding the Operational Possibilities for the INT1G10CSA TAP
Ports 9 and 10 are Monitor Ports.
2 INT1G10CSAs can be inserted in a 19” rack mount.
Application – TAP up to 4 network segments and aggregate traffic to 1 or 2 monitoring ports.
Send East-West traffic out port 9 and West-East traffic out port 10.
Span Mode Enable:
Ports 1 through 8 do not transmit packets to the network elements linked to them.
Ports 1 through 8 are sending packets to both 9 and 10.
Application – Aggregate Span ports to send to a tool.
Caution: The INT1G10CSA supports Fail-Safe. If the INT1G10CSA loses power than the relays would
close which send the packets received on port 1 out the transmit of port 2 and visa versa. This is true of
ports 3 and 4, 5 and 6, and 7 and 8 as well. It is recommended that you purchase the INT1G10CSASP if
Span mode is the primary mode used.
Garland Technology Technical Support at:
8AM-9PM (CST) Monday - Friday (Except for observed US Holidays)
Tel: 716.242.8500 Online: garlandtechnology.com/support
Garland Technology | 716.242.8500 | garlandtechnology.com/support
Copyright © 2021 Garland Technology, LLC. All rights reserved. 9

Other Garland Network Hardware manuals
Garland EdgeSafe M40G1AC User manual

Garland

Garland EdgeSafe M40G1AC User manual

Garland INT10G10SP1 User manual

Garland

Garland INT10G10SP1 User manual

Garland PacketMAX GAA10G10AC User manual

Garland

Garland PacketMAX GAA10G10AC User manual

Garland P10GSFPBPFE User manual

Garland

Garland P10GSFPBPFE User manual

Garland P10GXXA-X User manual

Garland

Garland P10GXXA-X User manual

Garland EdgeLens Focus User manual

Garland

Garland EdgeLens Focus User manual

Garland P10GMSA User manual

Garland

Garland P10GMSA User manual

Garland P1GCCAS User manual

Garland

Garland P1GCCAS User manual

Garland P10GMSA-5 User manual

Garland

Garland P10GMSA-5 User manual

Garland P1GCCB User manual

Garland

Garland P1GCCB User manual

Garland INT10G12 V2 Series User manual

Garland

Garland INT10G12 V2 Series User manual

Garland PacketMAX AA1G52ACV2 User manual

Garland

Garland PacketMAX AA1G52ACV2 User manual

Garland P10GSFPA User manual

Garland

Garland P10GSFPA User manual

Garland FieldTAP P1GCUA mini User manual

Garland

Garland FieldTAP P1GCUA mini User manual

Garland EdgeLens INT10G8LR56 User manual

Garland

Garland EdgeLens INT10G8LR56 User manual

Garland P10GMSBPE User manual

Garland

Garland P10GMSBPE User manual
Garland M1GCCB User manual

Garland

Garland M1GCCB User manual

Garland P10GMSBPE User manual

Garland

Garland P10GMSBPE User manual

Garland INT40G2-44 User manual

Garland

Garland INT40G2-44 User manual

Garland P1GCSSP User manual

Garland

Garland P1GCSSP User manual

Garland INT40G2SR44 User manual

Garland

Garland INT40G2SR44 User manual

Garland INT10G8SR56-SP User manual

Garland

Garland INT10G8SR56-SP User manual

Garland P1GCCAS User manual

Garland

Garland P1GCCAS User manual
Garland P1G-BP Series User manual

Garland

Garland P1G-BP Series User manual

Popular Network Hardware manuals by other brands

National Instruments NI Vision CVS-1456 user manual

National Instruments

National Instruments NI Vision CVS-1456 user manual

Blue Coat SG510 Series installation guide

Blue Coat

Blue Coat SG510 Series installation guide

Current E-WAND Setup guide

Current

Current E-WAND Setup guide

Cabletron Systems MMAC-5FNB Networking guide

Cabletron Systems

Cabletron Systems MMAC-5FNB Networking guide

Advantech FWA-3051 user manual

Advantech

Advantech FWA-3051 user manual

3Com AirProtect Enterprise Engine 6100 Quick setup guide

3Com

3Com AirProtect Enterprise Engine 6100 Quick setup guide

RuggedCom RUGGED VDSL RS910L installation guide

RuggedCom

RuggedCom RUGGED VDSL RS910L installation guide

NETWEEN NVR Quick installation guide

NETWEEN

NETWEEN NVR Quick installation guide

Patton electronics OnSite 2884 Getting started guide

Patton electronics

Patton electronics OnSite 2884 Getting started guide

WBOX Technologies 0E-4CHNVR2TB user manual

WBOX Technologies

WBOX Technologies 0E-4CHNVR2TB user manual

AMX NXF-MINI Specifications

AMX

AMX NXF-MINI Specifications

chinavasion 4CH Quick installation guide

chinavasion

chinavasion 4CH Quick installation guide

Brandywine NTV-100XX user guide

Brandywine

Brandywine NTV-100XX user guide

ADTRAN NetVanta 1335 Series Quick reference guide

ADTRAN

ADTRAN NetVanta 1335 Series Quick reference guide

Infoblox TE-2210 installation guide

Infoblox

Infoblox TE-2210 installation guide

Innodisk EGP2 Series user manual

Innodisk

Innodisk EGP2 Series user manual

CNB IDC4050F user manual

CNB

CNB IDC4050F user manual

Juniper SRX3400 instructions

Juniper

Juniper SRX3400 instructions

manuals.online logo
manuals.online logoBrands
  • About & Mission
  • Contact us
  • Privacy Policy
  • Terms and Conditions

Copyright 2025 Manuals.Online. All Rights Reserved.