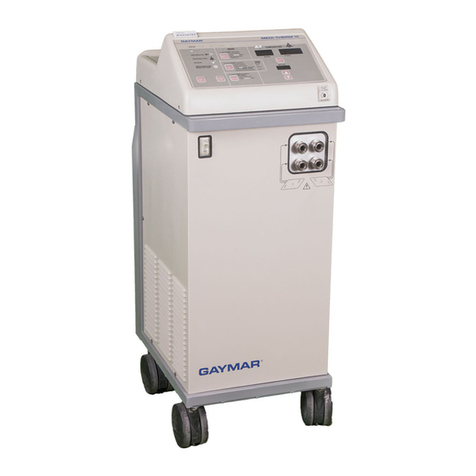
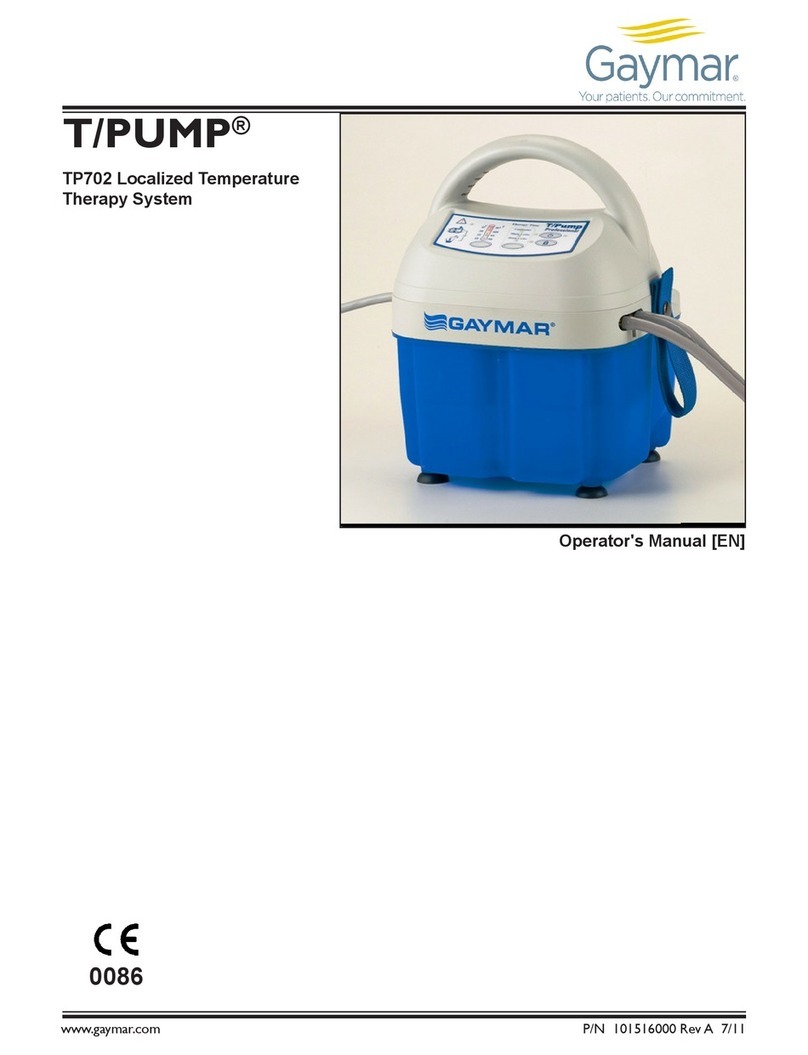
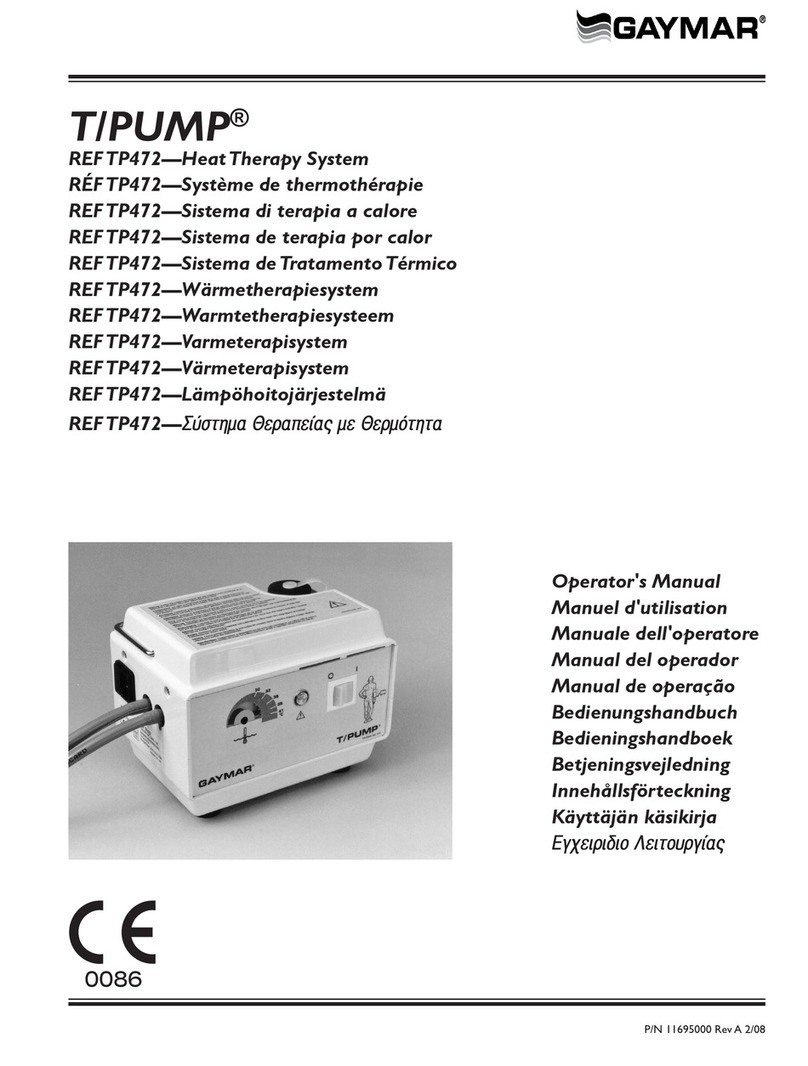
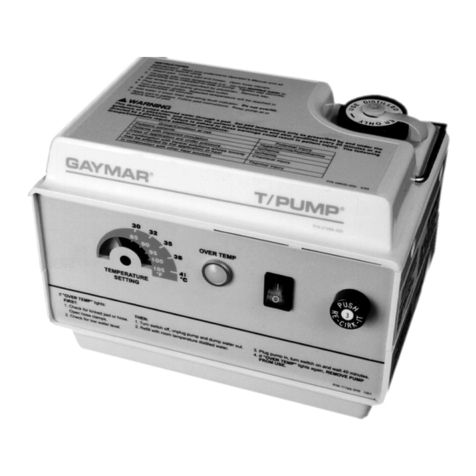
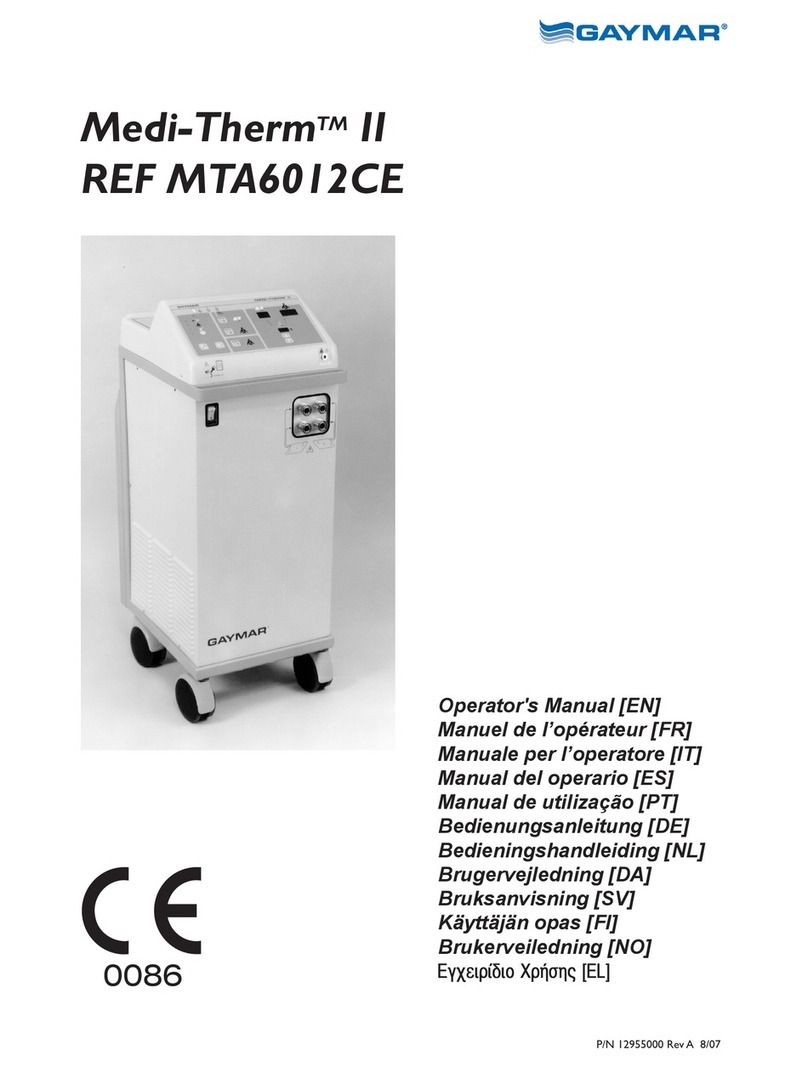
Gaymar MEDI-THERM II User manual

P/N 100908000 Rev B 11/09
Medi-Therm®III
REF MTA7912
Operator's Manual [EN]
Manuel de l’utilisateur [FR]
Manuale per l’operatore [IT]
Manual del operador [ES]
Manual do Utilizador [PT]
Bedienerhandbuch [DE]
Bedieningshandleiding [NL]
Brugerhåndbog [DA]
Användarhandbok [SV]
Brukerhåndbok [NO]
Εγχειρίδιο χρήσης [EL]
Návod k obsluze [CS]
Felhasználói kézikönyv [HU]
Instrukcja użytkownika [PL]
Kullanım Kılavuzu [TR]
MANUAL
Flow-OK

Medi-Therm®III
Table of Contents
Section Description Page
1.0 Indications for Use.................................1
2.0 Safety Precautions ..................................1
3.0 Description..............................................2
4.0 Operator Control Panel.......................4
5.0 Start-up Procedure ................................6
6.0 Modes of Operations:
BLANKET CONTROL .........................8
PATIENT CONTROL............................9
MONITOR ONLY............................... 10
7.0 Shutdown Procedure.......................... 10
8.0 Safety Systems...................................... 11
9.0 Troubleshooting................................... 12
10.0 Care and Cleaning............................... 14
11.0 Blankets/Body Wraps/Accessories .. 16
12.0 Customer Training............................... 16
13.0 Warranty............................................... 16
14.0 Specications........................................ 17
Illustrations
Figure Description Page
1 Medi-Therm III System.........................3
2 Medi-Therm III Control Panel............5
3 Float..........................................................6
4 Pinch Clamps..........................................6
5 Quick-disconnects.................................7
6 Clik-Tite Connector.............................7
7 Probe Check Well .............................. 13
8 Probe Check Well .............................. 15
Gaymar®andClik-Tite®trademarksareregisteredintheU.S.PatentandTrademarkOfce.
Gaymar®, Clik-Tite®, and Medi-Therm® are trademarks of Gaymar Industries, Inc.
© 2009. Gaymar Industries, Inc. All rights reserved.
Before you begin . . .
Receiving Inspection
Refer to the Medi-Therm III Service Manual for Receiving
Inspection and Check-out Procedures.
If you have any questions, contact your local dealer.
Dangerous voltage
Year of manufacture

Medi-Therm®III
1.0 Indications for Use
For the prevention or treatment of hyperthermia/
hypothermia.
1.1 Contraindications
Patients with an elevation of cold agglutin levels (cold
agglutinemia) should not be placed on a cooling blanket/
body wrap.
In rare instances, the cold temperature of the cooling
blanket/body wrap may lead to acrocyanosis and
necrosis of distal body structures (Talisman, R., et al.
Surgery 123(5): 592-595 (1998).
2.0 Safety Precautions
Read and understand this operating manual and all
precautions listed below prior to using the Medi-Therm
III Hyper/Hypothermia Machine.
WARNING
WARNING
• If the patient’s temperature is not responding or
does not reach the prescribed temperature in the
prescribed time or deviates from the prescribed
temperature range, notify the attending physician
promptly.Failuretonotifythephysician
promptlymayresultinseriousinjuryor
death.
• When performing the PROBE CHECK, use a
protective sheath on the probe. Failuretousea
sheathcouldresultincross-contamination.
• A physician’s order is required for use of
equipment. Check the integrity of the skin
according to department protocol when
regulating temperature with external devices.
Frequency of assessment and documentation will
vary depending upon the individual response of
the patient.
Failuretomonitorpatientmayresult
inskindamageorinappropriatepatient
temperature.
•Avoid placing additional heat sources between the
patient and blanket/body wrap.Skindamage
mayresult.
• Use only Gaymar probes (see Accessories, page 16)
or equivalentYSI 400 series probes approved for
use with medical devices in the Patient Probe jack.
Useofotherprobescouldresultin
erroneouspatienttemperaturevalues.
• Prevent excessive and/or prolonged tissue
pressure and shearing forces, especially over
boney prominences.Skindamagemayresult.
•Keep the area between the patient and the blanket/
body wrap dry.Excessivemoisturemayresult
inskindamage.
• Donottipmachineoverwithoutrstdrainingthe
water out and unplugging the power cord. Damage
tothemachineorelectricalshockcanresult.
• Use of thermally conductive materials (e.g., water
or gel) on a patient when the Medi-Therm III
is switched off may decrease the patient's body
temperature.
• Repairsshouldbeperformedonlybyqualied
medical service personnel in accordance with this
product's service manual.Otherwise,damageto
themachineorimpropertherapymayresult.
• All wire-lead, patient-connected transducer
assemblies are subject to reading error, local heating,
and possible damage from high-intensity sources of
RF energy. Inadequately grounded electrosurgical
equipment represents one such source, since
capacitively-coupled currents may seek alternate
paths to ground through probe cables and associated
instruments. Patientburnsmayresult.
If possible, remove the probe from patient contact
before activating the surgical unit or other RF
source. If probes must be used simultaneously with
electrosurgical apparatus, hazards can be reduced by
selecting a temperature monitoring point which is
remote from the expected RF current path to the
ground return pad.
• When using the rate controlled Auto Moderate or
Auto Gradual modes for warming; switching to other
modes, e.g.Auto Rapid or Manual, or changing the
temperature set point during the therapy will cause
the Medi-Therm to reset the therapy. Alteringthe
ModeorTemperaturesetpointmayimpact
theoveralldurationofthetherapy.
Indications/Safety Precautions
1
Medi-Therm®III
2
•For grounding reliability, plug only into a properly
grounded outlet.
•Fill with distilled water only.Do not use alcohol.
Donotoperatewithoutwater.Donotoverll.
Overllingmayresultinoverowwhenthe
waterintheblanket/bodywrapdrainsback
intothemachine.
•Place a dry absorbent sheet between the patient
and the blanket when using the plastic-like side of
any blanket. Moisturemayaccumulatewhich
mayresultinskindamage.
•The POWER LOSS INDICATOR battery may discharge
if the Medi-Therm III machine has not been used
for two months or more. Thebatterymaynot
becomerechargeduntilthemachinehas
operatedforfourhours.
CAUTION
3.0 Description
The MTA7912 provides a means of regulating patient
temperature by supplying temperature-controlled
water through a connector hose to a hyperthermia/
hypothermia blanket/body wrap.The blanket/body wrap
provides an interface for heating and cooling the patient.
The machine controls the water temperature to a
prescribed set point.
The feedback for control purposes depends upon the
machine's operating mode.The machine may be operated
in one of three operating modes:
In BLANKET CONTROL mode, the operator sets the
desired water temperature. A temperature sensor within
the machine monitors the water temperature and the
machine heats or cools the water as required to bring
the water to the SET POINT temperature.The patient
temperature may be monitored by use of a patient probe
connected to the patient probe jack on the front of the
unit.
In PATIENT CONTROL mode, the Medi-Therm III machine
automatically regulates the patient's temperature to the
selected SET POINT. The machine constantly compares
actual patient temperature with the SET POINT value, and
automatically adjusts the water temperature so that the
desired patient temperature is achieved.
In MONITOR ONLY mode, the operator can monitor
patient temperature through the patient probe, without
providing therapy.
Description
Hyperthermia/hypothermia blankets/body wraps may
be placed either under, over, or around the patient,
depending upon the type of procedure. Two gray hose
sets are provided to connect multiple blankets and/or
body wraps in order to provide more body surface
contact. Increasing body surface contact facilitates more
efcientwarming/cooling.
NOTE:When connecting a second blanket/body wrap
to the Medi-Therm III machine, check the water level
(see Start-up Procedure, pp. 6-7) prior to connecting the
additional blanket/body wrap.
In the event of a power loss, a battery backup circuit will
light the POWER LOSS light and sound the audible alarm.
Upon restoring power, the mode of operation and the set
points will have to be reselected.
NOTE: Refer to the MTA7912 Medi-Therm III Service
Manual for information on maintenance/replacement of
the rechargeable battery.
The MTA7912 Medi-Therm III Service Manual contains
circuit diagrams, functional test information, and
component parts lists.

Medi-Therm®III
Medi-Therm III
machine
control panel
Gaymar probe or equivalentYSI
400 series probe approved for use
with medical devices. Hyper/Hypothermia
blanket/body wrap
Water Fill Opening
Lift cover. Fill unit with
distilled water until green
band on oat is fully visible
(p. 6)
Dual Blanket/Body Wrap
Connections with Quick-
disconnects and Probe
Check Well
Use the PROBE CHECK well
to verify the integrity of the
patient probe (p. 13).
Description
Figure 1—Medi-Therm III Hyper/Hypothermia System
3
ON/OFF Switch
(Circuit Breaker)
Controls power to
Medi-Therm III.
Patient Probe Jack
Accepts patient probe plug connecting
patient probe to machine (pp. 8, 10).
Use only Gaymar probes or equivalent
YSI 400 series probes approved for use
with medical devices.

Medi-Therm®III
Operator Control Panel
4
MACHINESTATUS
FLOW-OKindicateswaterisowing
adequately.
WARMINGindicates the machine is
heating.
COOLINGindicates the machine is
cooling.
TESTLIGHTSashesallindicatorlights
and digital displays, while sounding an
audible alarm.
ALARMSILENCE temporarily silences
the audible alarm.The audible alarm will
reactivate in 10 minutes if the condition
persists.
ALERTS
CHECKFLOWindicatestheowof
water to the blanket/body wrap has been
restricted.
NOTE:When two gray hose sets are in use,
the CHECK FLOW alarm will only sound if
theowthroughBOTHgrayhosesetsis
occluded. (See page 7, section 5.6).
CHECKPATIENT indicates the patient
probe is sensing an abnormal patient
temperature (below 29°C or above 40°C).
It may indicate the patient probe has
become dislodged, an incorrect probe
is being used, or a probe has become
defective.An audible alarm accompanies this
alert.
ADDWATER indicates the water
reservoirislledtolessthanthe
recommended level.
REMOVEFROMUSENOW indicates
the Medi-Therm III machine has shut down
due to a malfunction.
Removethemachinefromuse.
Contactqualiedmedicalservice
personnel.
FLASHINGDISPLAY indicates that the
water or patient temperature is not being
maintained within the acceptable limits of
the set point temperature. It is accompanied
by an audible alarm. See pp. 8-10, sections
6.1 and 6.2 for explainations of the various
alarmsthathaveaashingtemperature
display.
POWERLOSSINDICATOR
lights when power is removed and
ON/OFF circuit breaker is ON.
[located on front of machine]
4.0 Operator Control Panel
Seegure2,page5.

Medi-Therm®III Operator Control Panel
Figure 2—Medi-Therm III Control Panel
5
® ®
SELECTMODE
BLANKETCONTROL—
Adjust SET POINT to control
water temperature.
(4°C to 41°C)
PATIENTCONTROL—
Connect patient probe, then
adjust SET POINT to control
patient temperature.
(30°C to 39°C)
CONTROLOPTION—
Cooling/Warming adjusted to
RAPID rate.
Cooling/Warming adjusted to
MODERATE rate.
Cooling/Warming adjusted to
GRADUAL rate.
MONITORONLY—
Connect patient probe,
then use to monitor patient
temperature. No therapy is
provided.
TEMPERATURE
WATERTEMPERATURE—
This display lights when either PATIENT
CONTROL or BLANKET CONTROL is
selected.
PATIENTTEMPERATURE—
As measured by the patient probe.
This display lights whenever a patient
probe is plugged in.
SETPOINTCHANGE—
Press the “q” or “p” button to select
machine set point.When selecting a
temperature outside the normothermic
range (36°C to 38°C), an audible alarm
will chime. Press and hold the “q” or
“p” button until the chime stops to
access the extended temperature range.
PATIENTPROBEJACK—
Insert only a Gaymar probe or an
equivalent YSI 400 series probe
approved fore use with medical devices.
[located on front of machine]

Medi-Therm®III
6
5.0 Start-up Procedure
The POWER LOSS INDICATOR battery may
discharge if the Medi-Therm III machine
has not been used for two months or more.
Thebatterymaynotbecomerecharged
untilthemachinehasoperatedforfour
hours.
Perform the following start-up procedure each time the
Medi-Therm III system is used:
5.1 Check Water Level
Check to make sure water is at the proper level by
raisingthecoveronthewaterllopening.Fillwith
distilledwateruntilthegreenbandontheoatisfully
visible(g.3).
Start-up Procedure
5.2 Close Pinch/Slide Clamps
Pinch/slide clamps are provided on both the DBK35CE
Connector Hose and the blanket/body wrap hoses to
prevent water spillage when blankets/body wraps are
changed(g.4).
Close the pinch/slide clamps on the connector hose and
Hyper/Hypothermia blanket/body wrap.
Figure 4—Pinch Clamps
Figure 3—Float, showing proper water level
green
band
CAUTION
• Donotoperatewithoutwater, since
damage to internal components may result.
• Donotoverll.Overllingmayresultin
overowbecausethewaterintheblanket/body
wrap drains back into the machine when the
machine is turned off.
5.3 Attach Blanket/Body Wrap
Check the surface of reusable blankets prior to
each use. If the blanket shows signs of cracking
or begins to leak, remove it from use and
replace the blanket.
Attach the Hyper/Hypothermia blanket/body wrap to the
Medi-Therm III machine using a DBK35CE Connector
Hose(g.1,p.3):
1. Attachonequick-disconnectttingtotheupper
machine connection and one to the lower(g.5,
p. 7). Push each retaining collar toward the cabinet
andinsertthequick-disconnectttingrmly.While
holdingthetting,allowtheretainingcollartosnap
backintoposition.Checktomakesurethettingis
fullyengagedbytuggingrmlyonthehose.
CAUTION
CAUTION

Medi-Therm®III Start-up Procedure
7
Figure 5—Quick-disconnects
Return
Supply
Figure 6—Clik-Tite Connector
2. AttachthetwoClik-Titeconnectors(g.6below)
on the connector hose to the blanket/body wrap.
Insertthemalettingintothefemale.Whenttings
are fully seated, snap the locking ring into place to
assure a positive lock.
3. Two gray hose sets are provided to connect multiple
blankets and/or body wraps in order to provide
more body surface contact. Increased body surface
contactfacilitatesmoreefcientwarming/cooling.
NOTE:When connecting a second blanket/body
wrap to the Medi-Therm III machine, check the
water level prior to connecting the additional
blanket/body wrap (see Start-up Procedure, pp. 6-7).
5.4 Open All Clamps
Open all pinch/slide clamps on the connector hose and
the Hyper/Hypothermia blanket/body wrap.
Failure to open the pinch/slide clamps will prevent water
owandwilltriggertheCHECK FLOW alert.
5.5 Connect Power/Turn Machine On
Insert the power cord plug into a properly grounded AC
receptacle. Press the ON/OFF Switch to the ON position.
Whenrstturnedon,theMedi-ThermIIIentersits
standby mode:
•the ON/OFF switch will light;
•the machine will beep once;
•the WATER, PATIENT, and SET POINT temperature
displays will show dashes;
•the SELECT MODEheadingwillash.
5.6 Perform Check Flow Procedure (when
using two gray hose sets)
When two gray hose sets are in use, the CHECKWATER
FLOWalarmwillonlysoundiftheowthroughbothgray
hoses is occluded.
Tochecktheowthroughtheblankets/bodywraps:
• Put machine into BLANKET CONTROL mode.
• Disconnect one gray hose set from the machine
connection.Iftheowispatent,thealarmwill
not sound.
• Reconnect the hose set to the machine.
• Disconnect the second gray hose set from the
machineconnection.Iftheowispatent,the
alarm will not sound.
• Reconnect the second hose set to the machine.
• See p.6, section 5.3, part 1 for instructions on
properly connecteing the hoses to the Medi-
Therm III.

Medi-Therm®III
6.1 BLANKET CONTROL
When operating in BLANKET CONTROL mode, the
Medi-Therm III machine regulates the water temperature
to the selected SET POINT. A temperature sensor within
the machine monitors water temperature, and the
machine heats or cools the water as required to bring it
to the SET POINT temperature.
In BLANKET CONTROL mode, the operator must observe
the patient’s temperature and manually adjust the water
temperature to obtain the desired results.
To operate in BLANKET CONTROL mode:
1. Perform all start-up procedures (pp. 6-7).
2. Press the BLANKET CONTROL button.The upper
window on the top of the BLANKET CONTROL
button will light.
The BLANKET display will indicate water
temperature.The SET POINT display will indicate
the default temperature (37°C ) at start-up, until
selecting the SET POINT temperature in step 3
below.
3. Adjust the SET POINT display to the prescribed
water temperature setting (4°C to 41°C). See
page 5, SET POINT CHANGE.
The STATUS display will indicate WARMING or
COOLING while the machine is heating or cooling
the water.When the water temperature stabilizes
(within 1.0°C of the SET POINT temperature), both
the WARMING and COOLING lights will turn off
indicating that the desired water temperature is
being maintained.
8
6.0 Modes of Operation
The Medi-Therm III machine is designed to operate in
three (3) modes:
• BLANKET CONTROL (water temperature control),
• PATIENT CONTROL (automatic patient temperature
control), and
• MONITOR ONLY (patient temperature monitoring).
When the Medi-Therm III machine is turned on, the set
point defaults to 37°C for both the BLANKET CONTROL
mode and the PATIENT CONTROL mode. If either set
point is changed, the new value is retained in memory
until power is removed.
Modes of Operation/BLANKET CONTROL
WARNING
NOTE: It takes approximately 8 minutes or less to
raise the water temperature from 22°C
(room temperature) to 37°C.
NOTE: Within the SET POINT range of 30°C
to 41°C, if the water temperature does not get
to within 1.0°C. of the SET POINT temperature
after 4 hours, the WATER displaywillashandthe
audible alarm will sound. Additionally, if the WATER
temperature reaches the set point and then deviates
by more than 1.0°C for more than 10 minutes, the
WATER displaywillashandtheaudiblealarmwill
sound.When this occurs:
•Pressing the ALARM SILENCE button will
silence the alarm for 10 minutes.
•Check the patient's condition and consult
with a physician.
•Changing the set point will restart the four-
hour timer.
4. Check the integrity of the skin
according to department protocol when
regulating temperature with external
devices. Frequency of assessment and
documentation will vary depending upon
the individual response of the patient.
Failuretomonitorpatientmayresult
inskindamageorinappropriate
patienttemperature.
5. While operating in the BLANKET CONTROL mode,
the patient probe may be used to monitor the
patient’s temperature.
To observe patient temperature, insert sensing end
of patient probe into patient and tape securely to
prevent accidental dislodgment. Insert plug end of
patient probe into PATIENT PROBE jack. Make sure
probe plug is fully seated.
UseonlyGaymarprobesorequivalent
YSI400seriesprobesapprovedforusewith
medicaldevices.If in doubt that the correct probe
is being used and is operating properly, perform a
PROBE CHECK test (p. 13).
Patient temperature will be indicated on the PATIENT
temperature display.

Medi-Therm®III PATIENT CONTROL
9
at start-up, until selecting the SET POINT
temperature in step 5.
5. Adjust the SET POINT display to the prescribed
patient temperature setting (30°C to 39°C). See
page 5, SET POINT CHANGE.
The STATUS display will indicate WARMING or
COOLING while the machine is heating or cooling
the patient.When the patient temperature
stabilizes (within 0.5°C of the SET POINT
temperature) both the WARMING and COOLING
lights will turn off indicating that the desired patient
temperature is being maintained.
6. The rate of patient cooling and warming is user
adjustable through the use of the CONTROL OPTION.
The CONTROL OPTION defaults to RAPID when
PATIENT CONTROL mode is entered. Select a
different CONTROL OPTION by pressing the PATIENT
CONTROL button again.
WhenCOOLINGthepatient:
RAPID - the coldest water is used for
cooling - as low as 4°C.This may not be
the most comfortable setting for the patient.
MODERATE - water temperature is limited
to 15°C below the patient's temperature.This
will provide an improved comfort setting to the
patient.
GRADUAL - water temperature is limited to
10°C below the patient's temperature.This will
provide an improved comfort settting to the
patient.
WhenWARMINGthepatient*:
RAPID - the highest allowable water
temperature is used for warming - as high as
41°C.This is the fastest warming mode the
machine can provide.
MODERATE - the patient's temperature will
increase at a rate of 1°C in a period of 3 hours
(0.33°C/Hr).
GRADUAL - the patient's temperature will
increase at a rate of 1°C in a period of 6 hours
(0.17°C/Hr).
When using AUTO MODERATE and AUTO GRADUAL
for patient warming, NOMANUALINTERVENTION
is required once the patient set point temperature has
been selected for warming.
NOTE: In BLANKET CONTROL mode, if the machine
senses a patient probe temperature below 29°C or
above 40°C, the CHECK PATIENT alert will light and
audible alarm will sound.Therapy will continue.When
this occurs:
•Check the patient's temperature.
•Check also to determine if the patient probe
has become dislodged, an incorrect probe
is being used, or the probe has become
defective. See Troubleshooting (pp. 12-13).
The CHECK PATIENT alert will turn off and
the audible alarm will silence when the patient
temperature returns to the range of 29°C to
40°C.
6.2 PATIENT CONTROL
When operating in the PATIENT CONTROL mode, the
Medi-Therm III automatically regulates the patient’s
temperature to the selected SET POINT.The machine
constantly compares actual patient temperature with
the SET POINT value, and automatically adjusts the water
temperature so that the desired patient temperature is
achieved.
To operate in PATIENT CONTROL mode:
1. Perform all start-up procedures (pp. 6-7).
2. Insert sensing end of patient probe into
patient and tape securely to prevent accidental
dislodgment.
3. Insert plug end of patient probe into PATIENT PROBE
jack. Make sure probe plug is fully seated.
UseonlyGaymarprobesorequivalentYSI
400seriesprobesapprovedforusewith
medicaldevices. If in doubt that the correct
probe is being used and is operating properly,
perform a PROBE CHECK test (p. 13).
4. Press the PATIENT CONTROL button.The upper
window on the top of the PATIENT CONTROL
button will light.
NOTE: To prevent accidental triggering of the
CHECK PATIENT alert, place probe in patient and
wait for patient temperature to stabilize before
pressing PATIENT CONTROL button.
The WATER display will indicate water
temperature.The PATIENT display will indicate
patient temperature.The SET POINT temperature
will indicate the default temperature (37°C)

Medi-Therm®III
*NOTE:The PATIENT temperature display
willbegintoash,theALERTLEDwillash
and the audible alarm will toggle when the
patient's temperature deviates by1.0°C or
more from the desired warming rate.This
alarm only applies when warming a patient in
MODERATE or GRADUAL modes.
In PATIENT CONTROL mode, if the machine
senses a patient probe temperature below
29°C or above 45°C, therapy will stop.
The CHECK PATIENT alert and audible alarm
will be on. When this occurs:
• Checkthepatient'stemperature.
• Checkalsotodetermineifthe
patientprobehasbecomedislodged,
anincorrectprobeisbeingused,
ortheprobehasbecomedefective
(seeTroubleshooting,pp.12-13).
• SwitchtoBLANKET CONTROLmode
ifcontinuedtherapyisdesired.
NOTE: For patient probe temperatures
between 40°C and 45°C, therapy will still be
provided even though the CHECK PATIENT
alert light and audible alarm are on.
NOTE: If the PATIENT temperature does not get
to within 0.5°C. of the SET POINT temperature after
4 hours, the PATIENT displaywillashandaudible
alarm will sound.
When this occurs:
•Pressing the ALARM SILENCE button will silence
the alarm for 10 minutes.
•Check the patient's condition and consult with a
physician.
•Switch to BLANKET CONTROL mode if continued
therapy is desired.
•Changing the set point will restart the four-
hour timer.
NOTE: When using the rate controlled AUTO MODER-
ATE or AUTO GRADUAL modes for warming; switch-
ing to other modes, e.g.AUTO RAPID or MANUAL, or
changing the temperature set point during the therapy
will cause the Medi-Therm to reset the therapy. This may
impact the overall duration of the therapy depending on
when in the hourly cycle the mode is interrupted. The
therapy time duration is also dependent on the patient's
temperature at the time the AUTO MODERATE or
AUTO GRADUAL modes are re-selected.
10
6.3 MONITOR ONLY
(PatientTemperature Monitoring,
NoTherapy)
Press MONITOR ONLY when no therapy is required,
but monitoring of patient temperature is desired.
To operate in MONITOR ONLY mode:
1. Insert sensing end of patient probe into patient
and tape securely to prevent accidental
dislodgment.
2. Insert plug end of patient probe into the
PATIENT PROBE jack. Make sure probe plug is
fully seated.
UseonlyGaymarprobesorequivalentYSI
400seriesprobesapprovedforusewith
medicaldevices. If in doubt that the correct
probe is being used and is operating properly,
perform a PROBE CHECK test (p. 13).
3. Press the MONITOR ONLY button.The upper
window on the top of the MONITOR ONLY
button will light.The patient’s temperature will be
displayed.
If the machine senses a patient probe temperature
below 29°C or above 40°C, the CHECK PATIENT
alert will light and an audible alarm will sound.
REMEMBER—
inMONITOR ONLY,notherapyisprovided.
7.0 Shutdown Procedure
When therapy is completed, turn off the Medi-Therm III
machine. Close the pinch clamps before disconnecting the
blanket(s)/body wrap(s).
NOTE: Do not discard the DBK35CE Connector Hose.
MONITOR ONLY/Shutdown
WARNING

Medi-Therm®III
11
8.0 Safety Systems
8.1 Overtemp Safety Circuits
In the event of a controller failure, there are two separate
backup circuits which prevent the water temperature
from surpassing safe operating limits.
Therstovertempbackupconsistsofanelectronic
sensing circuit, totally independent of the main control
circuitry.This circuit will interrupt heater power and
initiate a REMOVE FROM USE NOW audible and visual
alert to keep the water temperature below 42°C.The
second overtemp backup is a bimetallic thermostat which
will directly interrupt power to the heater in the event
thatboththemaincontrolcircuitryandtherstbackup
fail. This device will also initiate a REMOVE FROM USE
NOW alert.
8.1.1OvertempVericationTest
Performthefollowingtesttoverifyoperationof
therstovertempsafetybackupwithouthaving
toopenupthemachine.RefertotheMedi-Therm
III MTA7912 Service Manualifcompleteservice
testingofthemachineisrequired.
1. Disconnect the hoses from the SUPPLY and RETURN
ttingsonthefrontofthemachine.
2. Turn the machine on while simultaneously pressing
the TEST LIGHTS button.This will put the unit
into a TEST MODE. In thisTEST MODE, the water
temperature display will light, the set point will
display “0”, and the temperature will start to
increase.
NOTE: IftheunitashesCHECK FLOW, the
hoses have not been disconnected
and the temperature will not increase.
Disconnect the hoses.
3. Iftherstovertempsafetycircuitisworking
properly, the unit should go into a REMOVE FROM
USE NOW alert condition.The audible indicator will
remain on continuously.The entire test should take
approximately 3 minutes.
If the unit goes into a REMOVE FROM USE NOW alert
condition, but the audible indicator does not remain
on,therstovertempbackupisnotfunctioningand
the second overtemp backup has tripped. Do not use
the machine. Request service.
Safety Systems
If the unit does not go into a REMOVE FROM USE
NOW alert condition, do not use the machine.
Request service.
4. Turn the machine off. This will end the TEST MODE.
5. Reconnecthosestothettingsonthefrontofthe
unit.
6. Turn the unit on and select BLANKET CONTROL
modeimmediately.Thiswillallowwatertoowpast
therstover-tempprobeandresetit.
NOTE: If the machine goes into a REMOVE FROM
USE NOW alert condition again when selecting
BLANKET CONTROL, the second over-temp backup
device (the thermostat) has also tripped.Turn the
machine off. Connect a hose to the SUPPLYtting.
Direct the other end of the hose into a water
container so that water from the cold reservoir
will siphon past the thermostat and reset it. Allow
watertoowforapproximatelytwominutes.

Medi-Therm®III
12
Troubleshooting
9.0 Troubleshooting
Check for hoses fully inserted, one into return (top) and one into supply (bottom).
Check to be sure all pinch clamps are open.
Check for kinked hoses or creased blanket/body wrap.
Make certain patient probe is fully inserted into the patient probe jack.
Check for secure connection to patient. (If probe is sensing ambient, alarm will sound.)
Check for proper type of probe (Gaymar probe or equivalent YSI 400 series probe approved
for use with medical devices) and adaptor, if needed.
ADD WATER
Check to make sure water is at the proper level. If the green band on the float is not visible, fill
machine with distilled water until the green band is visible.
REMOVE FROM USE
NOW
Indicates that the machine has shut down due to the water temperature exceeding the high or
low limit. Or, a system error has been detected. Remove the machine from use immediately
and notify medical equipment repair personnel.
Check to make certain power cord is fully engaged into properly grounded receptacle.
Make certain the receptacle has power.
Reset unit circuit breaker by turning OFF then ON. If circuit breaker trips again, refer to
medical equipment repair personnel.
Check for water circulating through the blanket/body wrap. See CHECK FLOW. Do not fold
blankets/body wraps.
Check to make sure the temperature controller is working by adjusting the setpoint (while in
BLANKET CONTROL mode) at least 2°C above the water temperature. This should cause the
WARMING indicator to light.
Check for water circulating through the blanket/body wrap. See CHECK FLOW. Do not fold
blankets/body wraps.
Check to make sure the rear and side vents are not blocked. Inlet and exhaust grills should be
kept clear and clean to allow air to circulate freely.
Check to make sure the temperature controller is working by adjusting the setpoint (while in
BLANKET CONTROL mode) at least 2°C below the water temperature. This should cause the
COOLING indicator to light.
BLANKET/BODY WRAP
WILL NOT COOL
CHECK FLOW
CHECK PATIENT
POWER LOSS
BLANKET/BODY WRAP
WILL NOT HEAT

Medi-Therm®III
13
WARNING
9.1 Probe Check
When performing the PROBE CHECK, use a
protective sheath on the probe.
(Becton-Dickinson catalog 3700 oral sheath
or equivalent.)
Failuretouseasheathcouldresultin
cross-contamination.
1. Insert probe into protective sheath and
then into PROBE CHECKWELL on front of
machinebase(g.7).
2. Operate machine in BLANKET CONTROL mode
with a blanket/body wrap connected. Adjust SET
POINT temperature to between 33°C and 37°C.
Wait until machine temperature stabilizes (both
the WARMING and COOLING lights are off and
patient temperature display stabilizes).Water and
patient temperature displays should read within
2°C of each other. If not, patient probe may be
defective or incorrect probe is being used.
UseonlyGaymarprobesorequivalentYSI
400seriesprobesapprovedforusewith
medicaldevices.
3. If probe appears defective, try another probe and
repeat PROBE CHECK. If a new, correct probe
does not meet this test, remove machine from
use and request service.
Check Patient Probe/Probe Check
Figure 7—Probe CheckWell
probe
check
well
protective
sheath
probe

Medi-Therm®III
14
10.0 Care and Cleaning
As with any precision equipment, proper care and
maintenance will insure proper performance and
reliability.The following routine maintenance procedures
will help insure dependable Medi-Therm III operation.
10.1 Machine Care
• Fill with distilled water only.
Failuretousedistilledwatermayresultin
poormachineperformance.
• Donot use alcohol.Alcohol may accelerate
blanket/body wrap deterioration. Alcohol is
ammable.
• Donotoperate without water, since damage to
internal components may result.
• Donotoverll.Overllingmayresultin
overowbecausethewaterintheblanket/body
wrap drains back into the machine when the
machine is turned off.
• WhenllinganemptyMedi-ThermIIImachine,
add a small amount of germicidal or sanitizer
solution to the water (Air-Kem A-33 liquid or
equivalent). Carefully follow the manufacturer’s
recommended concentration to prevent algae
growth within the Medi-Therm III system and
Hyper/Hypothermia blanket/body wrap.
Donot use too much concentrate, since it
will result in “foaming,” which can reduce the
blanket/bodywrapefciencyandmaydamagethe
circulating pump.
•Donot use bleach. Bleach will damage the
heating element.
10.2 Draining the Machine
It is not necessary to drain the Medi-Therm III
machine after each use. However, periodic draining is
recommended at least once a month.
10.3 Machine Cleaning
Users should not use cleaning or decontamination
methods different from those recommended.
To clean the external surfaces of the machine and
connector hose, use a nonabrasive cleaning solution
(such as warm, soapy water) and a clean cloth.
Wipe or air dry.Apply a disinfectant such as 10%
chlorinated bleach solution (chlorinated bleach with
5.25% sodium hypochlorite) to the external surfaces
and allow to dry.
10.4 Blanket/Body Wrap Care
• Donotstorelledblankets/bodywraps.Algae
growth may occur inside.
• Do not use a blanket/body wrap if severe algae
buildup occurs.
• Do not expose blankets/body wraps to
temperatures over 65°C.
Disposable Blankets/Body Wraps
1. After the machine has been turned off, raise the
blanket/body wrap higher than the machine to
allow most of the water to drain back into the
machine.
2. Close both sets of hose clamps.
3. Disconnect the blanket/body wrap from the
machine.
4. Dispose of blanket/body wrap.
Reusable Blankets
1. After the machine has been turned off, raise the
blanket higher than the machine to allow most of
the water to drain back into the machine.
2. Close both sets of hose clamps.
3. Disconnect the blanket from the machine.
4. Manually clean both sides of the blanket on a
atsurfacewithwarmwater,amildcommercial
detergent, and a sponge or cloth.
CAUTION
CAUTION
CAUTION
Care & Cleaning

Medi-Therm®III
15
Care and Cleaning
Figure 8—Probe Check Well
probe
check
well
protective
sheath
probe
5. Thoroughly rinse with clean water for 30 seconds.
6. Air dry or wipe with a clean cloth.
7. Apply a disinfectant such as a 10% chlorinated bleach
solution (chlorinated bleach with 5.25% sodium
hypochlorite) to both sides of the blanket.
8. Allow to air dry. Solution contact time is what makes
disinfection effective.
NOTE: Excess solution pooled in the buttons can
be removed with a clean, dry cloth.
9. Loosely roll up the blanket and store for next use.
Reusable blankets can be cleaned and reused so
long as they do not crack or leak.
10.5 Probe Care
Reusable Probes
For cleaning, disinfecting, and sterilizing reusable Gaymar
probes (or equivalentYSI 400 series reusable probes),
refer to the instructions provided with the probe.
Disposable Probes
Gaymar disposable probes should be discarded after use.
10.6 Probe Check Well Care
The PROBE CHECKWELL should be cleaned with a
small tubular brush as outlined in section 10.3, Machine
Cleaning.
10.7 Quick-Disconnects
The quick-disconnects joining the connector hose to the
machinemaybecomedifculttoengage.Thisproblem
can be prevented by periodically applying a silicone base
or light machine oil to the outside of the male connector
prior to engagement.
10.8 Preventive Maintenance and Service
Preventive maintenance and service procedures are
described in the Medi-Therm III MTA7912 Service Manual.
These procedures should be performed annually (or as
requiredbyhospitalprotocol)byqualiedpersonnelsuch
ascertiedbiomedicalelectronicstechniciansorcertied
clinical engineers.

Medi-Therm®III
16
Blankets/Body Wraps/Accessories/Training/Warranty
11.0 Blankets/Body Wraps/Accessories
SinglePatientUseBlankets,
PolymerwithNonwovenFabric
REF DHP810 O.R.Table and General Use
(64 cm x 163 cm)
REF DHP812 Pediatric General Use
(56 cm x 84 cm)
REF DHP813 Adult General Use
(76 cm x 163 cm)
SinglePatientUseBlankets,AllVinyl
REF DHP901 Adult General Use
(64 cm x 175 cm)
REF DHP902 Pediatric General Use
(64 cm x 91 cm)
ReusableBlankets,AllVinyl
REF HP7010 Adult General Use
(64 cm x 175 cm)
REF HP7020 Pediatric General Use
(64 cm x 91 cm)
SinglePatientUseTorsoWraps,Polymerwith
NonwovenFabric
REF DHV530 Small/Medium
REF DHV535 Large
SinglePatientUseLegWraps,Polymerwith
NonwovenFabric
REFDHL540 Onesizetsall
All blankets/body wraps require use of the reusable
DBK35CE Connector Hose.
Accessories*
REF DBK35CE Insulated Connector Hose (3 meters)
REF PAT101CE Reusable Adult Patient Probe
(3 meters) Rectal/Esophogeal
REF PAT102CE Reusable Pediatric Patient Probe
(3 meters) Rectal/Esophogeal
REF PAT108CE Reusable Patient Probe (3 meters)
Skin Surface
12.0 CustomerTraining
In-service training is recommended and can be arranged
through your Gaymar dealer.
13.0 Warranty
The Medi-Therm III Hyper/Hypothermia machine is
warranted free of defects in material and workmanship
for a period of two years under the terms and conditions
of the Gaymar warranty in place at the time of purchase.
Thecompressorportionofthemachinecarriesave
year prorated warranty. Contact your local dealer if you
have questions about warranty or repair.
13.1 Return Authorization
Please contact your local dealer to obtain an RG
(Returned Goods) number prior to returning the
machine.
NOTE: Machines will not be accepted for repair unless
they have been cleaned and disinfected.
* These Gaymar probes, adapters, and hoses
should be used only with Gaymar Hyper/
Hypothermia Machines.
ADP10CE DP400CE
MTA7912
REF DP400CE Disposable Adult and Pediatric Patient
Probe (0.9 meters) Rectal/Esophogeal
[requires ADP10CE Adaptor Cable]
REF ADP10CE Reusable Probe Adaptor Cable
for DP400CE Probe

Medi-Therm®III Specications
14.0Specications
Physical
Dimensions 94.0 cm (height) x 35.6 cm (width) x 47.6 cm (depth)
Floor area 0.17 m2
Weight 66.2 kg empty; 73.9 kg full
Reservoir capacity 9.5 L distilled water
Refrigerant HFC-134a (does not contain chlorine)
Power loss indicator battery 8.4V NiMH
Power cord Detachable, 4.6 meters. Use only an international
(harmonized) 3-wire cord using cordage approved to
HD-21 conductor size 1.00mm² (HO5VVF3G1.00).
Performance
Patient temperature measurement accuracy:
with Gaymar disposable probe ±0.4°C (±0.2°C display accuracy; ±0.2°C probe accuracy)
with Gaymar reusable probe ±0.3°C (±0.2°C display accuracy; ±0.1°C probe accuracy)
Heater 500 W at 240V
Flow rate with Gaymar blanket 1 liter per minute
Ambient operating temperature 15.6°C to 32.2°C
Storage temperature >0°C
Electrical
Voltage/frequency ~220V to ~240V ±10%, 50 Hz
Current 6 A
Circuit breaker 10 A
Regulatory Medical Device Directive (93/42/EEC) Class II
Classication EN 60601-1 Class 1, grounded, not suitable for use in the
presenceofammableanaestheticmixturewithairor
withoxygenornitrousoxide.Notclassiedforprotection
against harmful ingress of liquid.
17

Medi-Therm®III
Table des matières
Section Description Page
1.0 Indications d’utilisation..........................1
2.0 Consignes de sécurité...........................1
3.0 Description..............................................2
4.0 Panneau de contrôle..............................4
5.0 Procédure de mise en marche.............6
6.0 Modes de fonctionnement :
COMMANDE COUVERTURE............8
COMMANDE PATIENT .......................9
ÉCRAN UNIQUEMENT ................... 10
7.0 Procédure d’arrêt................................ 10
8.0 Systèmes de sécurité.......................... 11
9.0 Résolution des pannes........................ 12
10.0 Entretien et nettoyage........................ 14
11.0 Couvertures / Enveloppes
corporelles / Accessoires................... 16
12.0 Formation.............................................. 16
13.0 Garantie................................................. 16
14.0 Caractéristiques techniques.............. 17
Illustrations
Figure Description Page
1 Medi-Therm III.......................................3
2 Panneau de commande ........................5
3 Flotteur....................................................6
4 Clipsdexation.....................................6
5 Connecteurs à désaccouplement
rapide .......................................................7
6 Connecteur Clik-Tite...........................7
7 Oricedecontrôledelasonde...... 13
8 Oricedecontrôledelasonde...... 15
Gaymar®etClik-Tite®sontdesmarquesdéposéesauprèsduU.S.PatentandTrademarkOfce.
Gaymar®, Clik-Tite® et Medi-Therm® sont des marques commerciales de Gaymar Industries, Inc.
© 2009. Gaymar Industries, Inc. Tous droits réservés.
Avant de commencer
Inspection à la livraison
Consulter le Manuel d’entretien du Medi-Therm III pour
l’Inspection à la livraison et les Procédures de vérication.
Pour toutes questions supplémentaires, veuillez contacter
votre revendeur.
Danger, haute tension
Année de fabrication
Other manuals for MEDI-THERM II
1
This manual suits for next models
1
Table of contents
Languages:
Other Gaymar Medical Equipment manuals

Gaymar
Gaymar T/PUMP TP400 Series User manual

Gaymar
Gaymar MTA7900 User manual

Gaymar
Gaymar Medi-Therm II MTA6012CE User manual

Gaymar
Gaymar Thermacare TC3249 User manual

Gaymar
Gaymar medi-therm III MTA6900 series User manual

Gaymar
Gaymar Thermacare TC3146 User manual

Gaymar
Gaymar MEDI-THERM III User manual

Gaymar
Gaymar T/PUMP TP600 Series User manual

Gaymar
Gaymar Air Express C1000DF User manual

Gaymar
Gaymar Plexus Auto Aire Select M2500S Series User manual