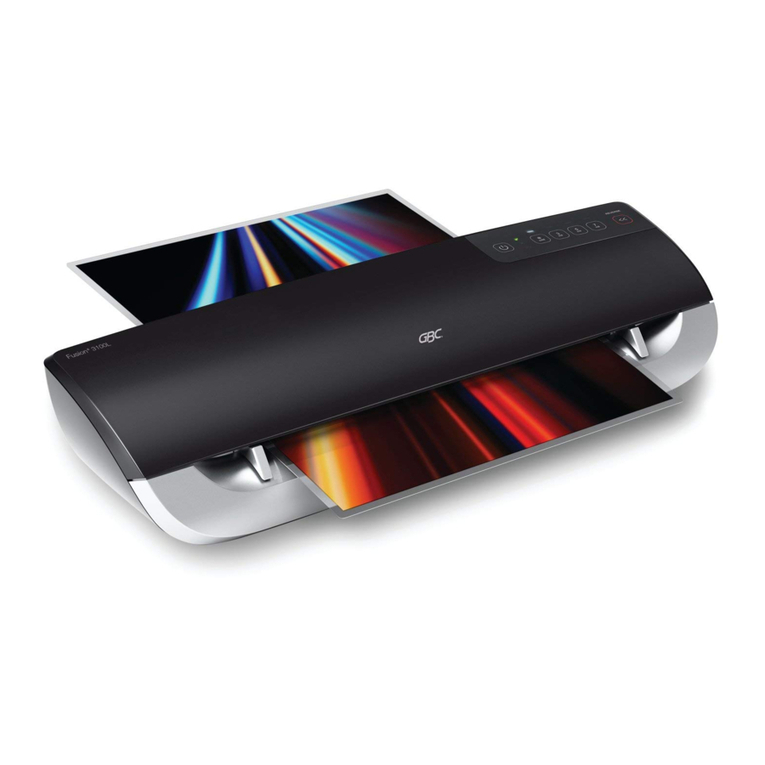
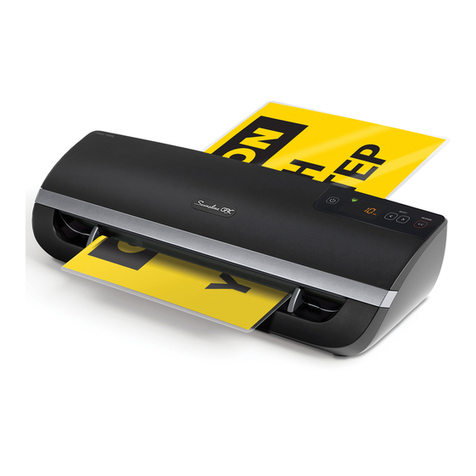
GBC PRO SERIES User manual

PRO SERIESTM
3600 / 4600
Pouch Laminators
G
Instruction Manual
F
Manuel d’utilisation
D
Bedienungsanleitung
I
Manuale d’istruzioni
O
Gebruiksaanwijzing
E
Manual de instrucciones
P
Manual de Instruções
T
K
c
Brugsvejledning
o
Käyttöopas
o
Bruksanvisning
S
Bruksanvisning
Q
o
Návod k obsluze
H
Használati útmutató
o
NO
FI
CZ
RUS
o
AR

English 4
Français 8
Deutsch 12
Italiano 16
Nederlands 20
Español 24
Português 28
Türkçe 32
Dansk 40
Suomi 44
Norsk 48
Svenska 52
Polski 56
72

BA C
ED F
1
2
3
4
5
6

4
GBC Pro Series™3600 GBC Pro Series™4600
Electrical
220-240V / 50~60Hz / 1050W / 6.0A 220-240V / 50~60Hz / 1050W / 6.0A
Machine Dimensions
540 x 271 x 112mm 691 x 271 x 112mm
Machine Weight
15.0kg 20.0kg
Maximum Pouch Width
330mm 480mm
Maximum Pouch Thickness 2 x 350mic (Total 700) 2 x 350mic (Total 700)
Maximum Thru-put Thickness 3.0mm 3.0mm
Warm-up Time 6 minutes 6 minutes
Description of
product parts
1Pouch Insertion Slot
2Pouch Exit Outlet
3Control Panel
4Main Power Switch
5Cable Socket
6Power Cord
TEMPERATURE - Indicate the temperature setting.
- Indicate that the machine is
ready to laminate.
HOT - Indicate that the HOT function
is selected.
COLD - Indicate that the COLD function
is selected.
MEAS - Indicate that measure roller temperature function is selected.
- Indicate that the heater is operating.
SPEED - Indicate the speed setting.
- Indicate that the roller is moving in reverse
revolution.
- Indicate that the roller is moving in forward
revolution.
- Indicate that the cooling fan is operating.
Switch Panel
Power ON/OFF the machine.
Preset mode for hot lamination.
Preset mode for cold lamination.
Display current roller temperature (approx. 3 seconds).
Reverse the revolution of the rollers to correct misfeeds.
Stop/start the revolution of the rollers.
Memory mode for saving frequent use
temperature and speed setting.
These keys are used to increase or decrease
temperature ( 0~140°C).
These keys are used to adjust the speed (1~9) of
the rollers. Speed 9 is the fastest speed.

5
G
YOUR SAFETY AS WELL AS THE SAFETY OF OTHERS IS
IMPORTANT TO ACCO®BRANDS.IN THIS INSTRUCTION
MANUAL ARE IMPORTANT SAFETY MESSAGES. READ THESE
MESSAGES CAREFULLY.
m
THE SAFETY ALERT SYMBOL PRECEDES EACH
SAFETY NOTICE IN THIS INSTRUCTION MANUAL.
THE SYMBOL INDICATES A POTENTIAL PERSONAL
SAFETY HAZARD TOYOU OR OTHERS, AS WELL AS
CAUSE PRODUCT DAMAGE OR PROPERTY DAMAGE.
m
Important Safeguards m
WARNING: FOR YOUR PROTECTION DO NOT
CONNECT THE POUCH LAMINATOR TO ELECTRICAL
POWER UNTIL YOU READ THESE INSTRUCTIONS
COMPLETELY. KEEP THESE INSTRUCTIONS IN A
CONVENIENT LOCATION FOR FUTURE REFERENCE.
TO GUARD AGAINST INJURY, THE FOLLOWING BASIC
SAFETY PRECAUTIONS MUST BE OBSERVED IN THE
SET-UP AND USE OF THIS PRODUCT.
m
General Safeguards
• Use the unit only for its intended purposes of laminating
documents.
• Do not place anything in the throat opening of the laminator other
than pouches/documents.
• Place unit on a secure, stable work area to prevent the unit from
falling and possibly causing personal injury and damage to the unit.
• Follow all warnings and instructions marked on the unit.
• The socket outlet shall be installed near the equipment and shall be
easily accessible.
• Do not attempt single side lamination, this will destroy the
laminator.
• Do not block the vent slots, this will cause the laminator to
overheat.
Special Notice
Thank you, for your recent purchase of a GBC Pouch Laminator.
Your new laminator may emit a slight odour during the initial stage
of operation. It is normal and will diminish after several hours of
operation.
Electrical Safeguards
• The unit must be connected to a supply voltage corresponding to
the electrical rating shown on the unit.
• Unplug the unit before moving it, or when it is not in use for an
extended period of time.
• Do not operate with a damaged supply cord or plug. Do not alter
electrical supply.
electrical shock could result.
• The unit is intended for indoor use only.
• Close supervision is required when this product is used near
children.
Service
Do not attempt to service or repair the pouch laminator yourself.
Unplug the unit and contact an authorised ACCO Brands service
representative for any required repairs.
Cleaning
Caution: Unplug this product before cleaning.
• Wipe exterior only with a damp cloth. Do not use detergents
or solvents.
• Do not use aerosol dusters or cleaners.
• Do not spray anything into the machine.
m
Waste Electrical and Electronic
Equipment (WEEE)
At the end of its useful life, your product is considered to be WEEE.
As such, it is important to note that:
WEEE is not to be disposed of as unsorted municipal waste. It is
to be collected separately such that it can be disassembled so its
components and materials can be recycled, re-used, and recovered
(burned for energy content in the production of electricity).
Public collection points have been set up by municipalities for the
collection of WEEE, free of charge to you.
Please return your WEEE to the collection facility nearest your home
you the product should accept your WEEE.
If you are no longer in contact with your retailer, please contact
ACCO for assistance with this matter.
Recycling of WEEE is geared toward protecting the environment,
protecting human health, preserving raw materials, improving
sustainable development, and ensuring a better supply of
commodities in the European Union.This will be achieved by
retrieving valuable secondary raw materials and reducing the
disposal of waste.You can contribute to the success of these goals
by returning your WEEE to a collection facility.
Your product is marked with the WEEE symbol (wheelie
bin with an X through it).This symbol is to inform you that
the WEEE is not to be disposed of as unsorted municipal
waste.

6
Operation, cold lamination
1. Connect power cord to appropriate power source.
2. Press the power switch on the back of the laminator and press
the POWER button for 1 second to turn on the machine.
3. Press COLD button and “COLD” symbol appears on the LCD.
4. When the machine is ready to laminate, the laminator will beep
and the “READY” symbol appears on the LCD.
5. Use and laminate your cold pouch by pressing the STOP <RUN>
button to start or stop the roller.
CAUTION: If you have just done hot lamination, press COLD
button (to cool down machine) and wait for the “READY”
symbol to reappear on the LCD before attempting to do cold
lamination.
m
Reverse Button
In the event of a misfeed or a jam follow these instructions.
1. Press the REV button and hold down.This will reverse the
rotation of the rollers allowing the pouch to exit the front of the
machine.
2. Pull the document out of the laminator.
3. After the document is out of the machine clean the rollers by
running the cleaning sheet through the laminator.
CAUTION: Be careful when removing the laminated pouch
from the machine. It may be hot.
m
Operation, hot lamination
1. Connect power cord to appropriate power source.
3. Using the lamination guidelines, select the appropriate temperature setting for the pouch gauge thickness and material you are laminating.
• If the laminated item appears to be cloudy, it means that the laminator temperature is not hot enough. Allow the laminator to heat for a few
more minutes then run the pouch through again.
• If the laminated item is wavy, the TEMPERATURE is too hot.Verify temperature selector is set at the appropriate temperature.
4. As the machine warms up, the heating symbol (
a. Press HOT button to choose Preset
mode. Machine is set to temperature
100°C / speed 6 and “HOT” symbol
a. Press the temperature Up/Down arrow
keys to modify the temperature setting.
b. Press the speed Up/Down arrow keys to
modify the speed setting.
a. Press either button 1 or 2 for one second
to enter memory mode.
b. Set your frequent use temperature and
speed setting using the Up/Down arrow
keys.
c. Press the number button again to save
setting to memory.
d. To use a saved memory, select either
button 1 or 2.The LCD will indicate the
temperature and speed selected.
1. Preset Mode 2. Manual Mode
(to change speed and temperature manually):

7
G
Finishing lamination
1. Press and hold POWER button for one second and “COOL”
symbol appears on the LCD.
2. After the roller cool down (below 65°C), the laminator will beep
and power will be stopped automatically.
3. Press the power switch on the back of the laminator to turn the
CAUTION:
power switch protects and extends the life of the rollers.
NOTE: For added safety and environmental reasons the laminator
will automatically go into sleep mode after 120 minutes of inactivity.
If you wish to use the laminator again, press the POWER button for 1
second to turn on the machine.
m
Laminating Tips
• DO NOT LAMINATE AN EMPTY POUCH.
could cause the machine to jam.
• Before laminating important or unique documents, always run a
test pouch through the laminator using a similar type of document.
• As soon as hot lamination is completed, remove the lamination
cooling to prevent the pouch from curling.
• Do not cut pouches prior to lamination.
Guarantee
Operation of this machine is guaranteed for 1 year from date of
purchase, subject to normal use.Within the guarantee period, ACCO
Brands Europe will at its own discretion either repair or replace the
defective machine free of charge. Defects due to misuse or use for
inappropriate purposes are not covered under the guarantee. Proof
of date of purchase will be required. Repairs or alterations made
by persons not authorised by ACCO Brands Europe will invalidate
the guarantee. It is our aim to ensure that our products perform to
rights which consumers have under applicable national legislation
governing the sale of goods.
If you experience a technical fault with your product during the
warranty period, please contact the relevant ACCO service centre.
Depending on the diagnostics and the model type, we will either
arrange a service call by an engineer or we will ask you to return
the machine to ACCO. If you return the machine, ACCO will, at its
discretion, in accordance with law, either (i) repair the machine using
either new or refurbished parts, or (ii) replace the machine with a
new or refurbished machine that is equivalent to the machine being
replaced.
Register this product online at www.accobrands.com
Lamination Guide
Material Film thickness Setting without Carrier Setting with Carrier
Temperature Speed Temperature Speed
75 ~ 100 Micron 100°C 6 130°C 4
125 ~ 150 Micron 120°C 4 130°C 3
175 ~ 250 Micron 120°C 3 140°C 2
300 ~ 350 Micron 130°C 2 - -
Brochure Paper
75 ~ 100 Micron 100°C 5 130°C 4
125 ~ 150 Micron 120°C 3 140°C 3
175 ~ 250 Micron 130°C 2 140°C 2
300 ~ 350 Micron 140°C 2 - -
Photo Paper
75 ~ 100 Micron 100°C 4 130°C 3
125 ~ 150 Micron 130°C 3 140°C 2
175 ~ 250 Micron 140°C 2 140°C 1
NOTE: For “STAND BY” mode, please keep the temperature at 70°C and speed 2.

8
GBC Pro Series™3600 GBC Pro Series™4600
Alimentation électrique
220-240 V / 50~60 Hz / 1050 W /
6,0 A
220-240 V / 50~60 Hz / 1050 W /
6,0 A
Dimensions de l’appareil
540 x 271 x 112 mm 691 x 271 x 112 mm
Poids de l’appareil
15,0 kg 20,0 kg
Largeur de pochette
maximale
330 mm 480 mm
Épaisseur de pochette
maximale
2 x 350 microns (total 700) 2 x 350 microns (total 700)
Épaisseur maximale pochette
et document
3,0 mm 3,0 mm
6 minutes 6 minutes
Arrière de
l'appareil
1Fente d'entrée de pochette
2Sortie de pochette
3Panneau de commande
4Interrupteur d'alimentation
5Prise de cordon
6Cordon d'alimentation
TEMPERATURE - Indique la température de
- Indique que l'appareil est
HOT - Indique que la fonction de
COLD - Indique que la fonction de
MEAS - Indique que la fonction d'indication de la température
existante des rouleaux est sélectionnée.
- Indique que les rouleaux sont en
sélectionnée.
- Indique que les rouleaux fonctionnent en
marche arrière.
- Indique que les rouleaux fonctionnent en
marche avant.
Indique que le ventilateur de refroidissement fonctionne.
Panneau de commande
Pour mettre l'appareil SOUS/HORS tension.
(pendant environ 3 secondes).
Pour inverser le sens de fonctionnement des rouleaux en
cas de mauvaise insertion de la pochette.
Pour arrêter/lancer la rotation des rouleaux.
Mode de mémoire pour sauvegarder la
température et la vitesse utilisées le plus
fréquemment.
Ces touches permettent d'augmenter ou de
diminuer la température (0 - 140 °C).
Ces touches permettent de régler la vitesse des
rouleaux de 1 à 9, sachant que 9 est la vitesse
la plus rapide.

9
F
Déchets d’équipements électriques
et électroniques (DEEE)
d’équipements électriques et électroniques. Il est alors important de
noter ce qui suit :
Les DEEE ne doivent pas être éliminés avec les déchets municipaux
non triés. Ils doivent être collectés séparément en vue de leur
être recyclés, réutilisés et valorisés (en tant que combustibles pour
valorisation énergétique dans la production d’électricité).
Les municipalités ont créé des points de collecte publics où vous
pouvez déposer vos DEEE gratuitement.
Veuillez déposer vos DEEE au point de collecte le plus proche de
votre bureau ou de votre domicile.
détaillant qui vous a vendu le produit doit normalement accepter
votre DEEE.
Si vous n’êtes plus en contact avec votre détaillant, veuillez
contacter ACCO pour obtenir son assistance en la matière.
Le recyclage des DEEE a pour objectif la protection de
l’environnement, la protection de la santé humaine, la préservation
des matières premières, l’amélioration du développement durable
et l’amélioration de l’approvisionnement de l’Union européenne en
produits de base. Cela sera possible en récupérant les matières
premières secondaires précieuses et en réduisant la quantité de
déchets à éliminer. Vous pouvez contribuer à la réalisation de ces
objectifs en déposant votre DEEE à un point de collecte.
Votre produit comporte le symbole DEEE (représentant une
poubelle barrée). Ce symbole vous indique que le DEEE ne
doit pas être éliminé avec les déchets municipaux non triés.
Consignes de sécurité
ACCO®BRANDS SE SOUCIE DE VOTRE SÉCURITÉ AINSI
QUE DE CELLE D’AUTRUI. DES MESSAGES DE SÉCURITÉ
IMPORTANTS SONT DONNÉS DANS CE MANUEL
D’INSTRUCTION.VEUILLEZ LES LIRE ATTENTIVEMENT.
m
LE SYMBOLE D’AVERTISSEMENT PRÉCÈDE CHAQUE
MESSAGE DE SÉCURITÉ FIGURANT DANS CE
MANUEL.
IL INDIQUE UN DANGER POTENTIEL SUSCEPTIBLE DE
PROVOQUER DES BLESSURES PERSONNELLES AINSI
QUE DES DOMMAGES AU PRODUIT OU À D’AUTRES
BIENS MATÉRIELS.
m
Consignes de sécurité importantes
m
AVERTISSEMENT : POUR VOTRE PROTECTION, NE
BRANCHEZ PAS LA PLASTIFIEUSE À POCHETTES
À UNE PRISE ÉLECTRIQUE AVANT D’AVOIR
LU L’INTÉGRALITÉ DES INSTRUCTIONS CI-
APRÈS. CONSERVEZ CES INSTRUCTIONS DANS
UN ENDROIT FACILE D’ACCÈS POUR TOUTE
RÉFÉRENCE ULTÉRIEURE. POUR ÉVITER TOUT
ACCIDENT, IL EST INDISPENSABLE DE RESPECTER
RIGOUREUSEMENT LES CONSIGNES DE SÉCURITÉ
DE BASE SUIVANTES LORS DE L’INSTALLATION ET
DE L’UTILISATION DE CE PRODUIT.
m
Consignes de sécurité générales
• Ne placez aucun objet dans la fente d’entrée de l’appareil à part
qu’il ne puisse pas tomber, ni s’endommager, ni provoquer des
blessures personnelles.
• Respectez l'ensemble des avertissements et instructions indiqués
sur l’appareil.
• L’appareil doit être installé à proximité d’une prise de courant
facilement accessible.
Note spéciale
odeur en début d'utilisation. Cette odeur est normale et s’atténuera
après quelques heures de fonctionnement.
Consignes de sécurité électrique
• L’appareil doit être branché sur une prise de courant correspondant
à la tension précisée sur l’appareil.
• Débranchez l’appareil avant de le déplacer ou en cas d’inutilisation
prolongée.
• Ne surchargez pas les prises électriques au-delà de leur capacité,
au risque de causer un incendie ou de subir un choc électrique.
• Cet appareil est destiné uniquement à un usage intérieur.
• Une surveillance étroite est nécessaire en cas d’utilisation à
proximité d’enfants.
Réparation
N’essayez pas d’entretenir ni de réparer vous-même cette
ACCO Brands agréé pour toute réparation requise.
Précaution : Débranchez cet appareil avant de le
• Essuyez l’extérieur uniquement avec un linge humide.
N’utilisez ni détergents ni dissolvants.
• N’utilisez pas de bombe aérosol dépoussiérante ou
nettoyante.
• Ne pulvérisez aucun produit dans l’appareil.
m

10
1.
Branchez le cordon d’alimentation à une prise secteur appropriée.
2. Pour allumer l'appareil, appuyez sur l'interrupteur d'alimentation
situé à l'arrière de l'appareil, puis appuyez sur le bouton POWER
pendant une seconde.
avec le document en appuyant sur le bouton STOP <RUN> pour
lancer ou arrêter le fonctionnement des rouleaux.
MISE EN GARDE :
m
Bouton marche arrière
En cas de mauvaise insertion ou de blocage, suivez les instructions
ci-après.
1. Appuyez et maintenez enfoncé le bouton REV. Cela permet
d’inverser la rotation des rouleaux et de laisser la pochette
ressortir à l’avant de l’appareil.
3. Après la sortie du document, nettoyez les rouleaux en faisant
MISE EN GARDE : Faites preuve de prudence lors du retrait
chaude.
m
1. Branchez le cordon d’alimentation à une prise secteur appropriée.
2. Pour allumer l'appareil, appuyez sur l'interrupteur d'alimentation situé à l'arrière de l'appareil, puis appuyez sur le bouton POWER pendant
ci-dessous.
appropriée.
a. Appuyez sur le bouton HOT
le mode de préréglage. La machine est
alors réglée à une température de 100
°C et à une vitesse de 6, tandis que le
bas de réglage de la température pour
haut/bas de réglage de la vitesse pour
a. Appuyez sur le bouton 1 ou 2 pendant
une seconde pour sélectionner le mode
mémoire.
b. Réglez la température et la vitesse
utilisées le plus fréquemment à l'aide
c. Appuyez de nouveau sur le bouton 1 ou
2 pour mémoriser les réglages.
d. Pour utiliser un réglage mémorisé,
appuyez sur le bouton 1 ou 2. L'écran
LCD indique alors la température et la
vitesse présélectionnées.
1. Mode de préréglage 2. Mode manuel
(pour changer manuellement la vitesse et la
température) :
3. Mode mémoire
(pour mémoriser une température et une vitesse
particulières)

11
F
1. Appuyez sur le bouton POWER pendant une seconde. Le
l'écran LCD.
2. Après le refroidissement des rouleaux (en dessous de 65 °C),
l'appareil émet un bip sonore et s'arrête automatiquement.
3. Appuyez sur l'interrupteur d'alimentation situé à l'arrière de
l'appareil pour mettre l'appareil hors tension.
MISE EN GARDE : Le refroidissement de l'appareil avant sa
mise hors tension à l'arrière permet de protéger et prolonger
la vie des rouleaux.
REMARQUE : Pour plus de sécurité et pour des raisons
mode veille après 120 minutes d’inutilisation. Si vous souhaitez
bouton POWER pendant une seconde.
m
• NE PAS INSÉRER DE POCHETTE VIDE DANS LA MACHINE.
• N'insérez jamais, en premier dans l'appareil, le bord non collé de la
pochette, au risque de causer un blocage.
similaire.
à l’arrière de l’appareil et laissez-le refroidir sur une surface plate et
Réglage avec transporteur Réglage sans transporteur
Température Vitesse Température Vitesse
Papier imprimante
75-100 microns 100 °C 6 130 °C 4
125-150 microns 120 °C 4 130 °C 3
175-250 microns 120 °C 3 140 °C 2
300-350 microns 130 °C 2 - -
Papier brochure
75-100 microns 100 °C 5 130 °C 4
125-150 microns 120 °C 3 140 °C 3
175-250 microns 130 °C 2 140 °C 2
300-350 microns 140 °C 2 - -
Papier
photographique
75-100 microns 100 °C 4 130 °C 3
125-150 microns 130 °C 3 140 °C 2
175-250 microns 140 °C 2 140 °C 1
REMARQUE : Pour laisser l'appareil en mode de veille, maintenez la température à 70 °C et la vitesse à 2.
Garantie
Le fonctionnement de cet appareil est garanti pendant 1 ans à
partir de la date d’achat, sous réserve d’un usage normal. Pendant
la période de garantie, ACCO Brands Europe décidera, à son gré,
de réparer ou de remplacer gratuitement l'appareil défectueux.
appropriées ne sont pas couverts par cette garantie.Une preuve
Europe annuleront la garantie. Notre objectif est d’assurer le bon
précisées. Cette garantie ne compromet pas les droits légaux
des consommateurs au titre de la législation nationale en vigueur
régissant la vente des biens de consommation.
En cas de défaillance technique de votre produit pendant la période
de garantie, veuillez contacter votre centre de service client ACCO.
Nous organiserons une visite de dépannage par un technicien ou
bien nous vous demanderons de retourner l’appareil à ACCO en
fonction du diagnostic et du type de modèle. Si vous retournez
l’appareil, ACCO pourra à son gré, conformément à la loi, soit (i)
réparer l’appareil en utilisant des pièces neuves ou remises à neuf,
soit (ii) remplacer l’appareil par un appareil neuf ou remis à neuf
équivalant à l’appareil défectueux.
Enregistrez ce produit en ligne à www.accobrands.com
12
Technische Daten
GBC Pro Series™3600 GBC Pro Series™4600
Netzanschluss
220–240 V, 50/60 Hz, 1050 W, 6,0 A 220–240 V, 50/60 Hz, 1050 W, 6,0 A
Abmessungen
540 x 271 x 112 mm 691 x 271 x 112 mm
Gewicht
15,0 kg 20,0 kg
Maximale
Laminiertaschenbreite
330 mm 480 mm
Maximale
Laminiertaschenstärke
Maximale Stärke von
Laminiertasche und
Dokument
3,0 mm 3,0 mm
Aufwärmzeit 6 Minuten 6 Minuten
Geräterückseite
1Zufuhrschlitz
2Ausgabe
3Bedienfeld
4Betriebsschalter
5Netzkabelanschluss
6Netzkabel
TEMPERATURE: zeigt die Temperatureinstellung an.
- zeigt an, dass das Gerät
betriebsbereit ist.
HOT: zeigt an, dass Heißlaminieren
gewählt wurde.
COLD: zeigt an, dass Kaltlaminieren
gewählt wurde.
MEAS: zeigt an, dass die Funktion zur Messung der Walzentemperatur
ausgewählt wurde.
- zeigt an, dass das Heizelement in
Betrieb ist.
SPEED: zeigt die Geschwindigkeitseinstellung an.
- zeigt an, dass die Walzen in umgekehrter
Richtung laufen.
- zeigt an, dass die Walzen vorwärts laufen.
- zeigt an, dass der Lüfter in Betrieb ist.
Bedienfeld
Gerät ein- und ausschalten
Voreinstellung für Heißlaminieren
Voreinstellung für Kaltlaminieren
Walzentemperatur anzeigen (ca. 3 Sekunden)
Walzenlaufrichtung zur Fehleinzugskorrektur umkehren
Walzen stoppen/starten
Geschwindigkeitseinstellungen
Änderung der Temperatureinstellung
(0–140 °C)
Änderung der Geschwindigkeitseinstellung (1–9,
9 = höchste Geschwindigkeit)

13
D
Elektro- und Elektronik-Altgeräte
Nach Ablauf der Nutzungsdauer Ihres Produkts gilt dieses als
Elektro- und Elektronik-Altgerät. Für solche Geräte gilt:
Elektro- und Elektronik-Altgeräte dürfen nicht als unsortierter
Siedlungsabfall entsorgt werden. Sie sind getrennt zu
sammeln, sodass sie demontiert und die Komponenten und
Materialien recycelt, wiederverwendet oder verwertet (d. h. zur
verwendet) werden können.
Rücknahmestellen abgegeben werden.
Geben Sie Ihr Elektro- und Elektronik-Altgerät bei der
dem das Produkt erworben wurde, das Altgerät zurücknehmen.
Besteht zu dem Händler kein Kontakt mehr, wenden Sie sich für
Hilfe in dieser Sache an ACCO.
Das Recycling von Elektro- und Elektronik-Altgeräten dient dem
besseren nachhaltigen Entwicklung und einer besseren Versorgung
erreicht. Sie können durch die Rückgabe des Altgeräts bei einer
Rücknahmestelle Ihren Beitrag zu diesen Zielen leisten.
Das Produkt ist mit dem Symbol für Elektro- und Elektronik-
Altgeräte (durchgestrichene Abfalltonne) gekennzeichnet.
Das Symbol bedeutet, dass das Altgerät nicht als
unsortierter Siedlungsabfall entsorgt werden darf.
Sicherheitshinweise
DIE SICHERHEIT DER BENUTZER DES GERÄTS SOWIE
ANDERER IST ACCO®BRANDS EIN WICHTIGES ANLIEGEN.
DIE VORLIEGENDE ANLEITUNG ENTHÄLT WICHTIGE
SICHERHEITSHINWEISE. DIESE HINWEISE SORGFÄLTIG
DURCHLESEN.
m
IN DIESER ANLEITUNG STEHT DAS WARNSYMBOL
VOR JEDEM SICHERHEITSHINWEIS.
DIESES SYMBOL KENNZEICHNET SOWOHL
HINWEISE, BEI DEREN NICHTBEACHTUNG
VERLETZUNGSGEFAHR BESTEHT, ALS AUCH
SOLCHE, DIE AUF POTENZIELLE PRODUKT- UND
SACHBESCHÄDIGUNG AUFMERKSAM MACHEN.
m
Wichtige Sicherheitsvorkehrungen
m
WARNUNG: DAS TASCHENLAMINIERGERÄT
ZUR EIGENEN SICHERHEIT ERST NACH DEM
VOLLSTÄNDIGEN DURCHLESEN DIESER ANLEITUNG
AN EINE STROMQUELLE ANSCHLIESSEN. DIESE
ANLEITUNG ZUM SPÄTEREN NACHSCHLAGEN
IN DER NÄHE DES GERÄTS AUFBEWAHREN.
ALS VORSICHTSMASSNAHME SIND DIE
NACHFOLGEND AUFGEFÜHRTEN, GRUNDLEGENDEN
SICHERHEITSVORKEHRUNGEN BEIM AUFSTELLEN
UND VERWENDEN DIESES GERÄTS ZU TREFFEN.
m
Allgemeine Vorsichtsmaßnahmen
• Das Gerät ausschließlich zum Laminieren von Dokumenten und
nie für einen nicht vorgesehenen Zweck verwenden.
• Nie etwas anderes als Laminiertaschen/Dokumente in die
• Das Gerät zur Vermeidung von Beschädigungen und Verletzungen
auf einer sicheren, stabilen Fläche aufstellen.
• Alle auf dem Gerät angegebenen Warnungen und Anweisungen
befolgen.
• Das Gerät in der Nähe der Steckdose aufstellen und dafür sorgen,
dass die Steckdose stets gut zugänglich ist.
• Niemals versuchen, nur eine Seite eines Dokuments zu laminieren.
Dabei wird das Laminiergerät beschädigt.
• Zur Vermeidung einer Überhitzung dürfen die Lüftungsschlitze
nicht blockiert werden.
Besonderer Hinweis
Vielen Dank für den Kauf dieses GBC-Taschenlaminiergeräts.
Während der ersten Betriebsphase kann es zu einer leichten
Geruchsentwicklung kommen. Der Geruch ist unbedenklich und
verliert sich nach einigen Betriebsstunden.
Elektrische Sicherheit
• Das Gerät muss an eine geeignete Stromquelle (s. Hinweis auf
dem Gerät) angeschlossen werden.
• Der Stecker des Geräts muss von der Steckdose abgezogen
werden, bevor das Gerät umgestellt wird oder wenn es längere Zeit
nicht verwendet wird.
• Das Gerät darf nicht mit einem beschädigten Kabel oder Stecker
betrieben werden. Der Stecker des Geräts darf nicht verändert
werden. Der Stecker ist auf die jeweilige Stromversorgung
ausgelegt.
• Steckdosen nicht über ihre Kapazität hinaus belasten, da dies
einen Brand oder Stromschlag auslösen könnte.
• Gerät ausschließlich in Innenräumen verwenden.
• Bei Verwendung des Geräts in der Nähe von Kindern ist eine
sorgfältige Beaufsichtigung erforderlich.
Wartung
Das Laminiergerät nicht selbst warten oder instand setzen. Ist
eine Reparatur erforderlich, den Gerätestecker ziehen und einen
autorisierten ACCO Brands-Kundendienst verständigen.
Reinigung
Achtung: Der Stecker des Geräts muss vor dem
Reinigen aus der Steckdose gezogen werden.
• Das Gerät nur außen mit einem feuchten Tuch abwischen.
Keine Reinigungs- oder Lösungsmittel verwenden.
• Keine Sprühreiniger oder Druckluftsprays verwenden.
• Nichts in das Gerät hineinsprühen.
m

14
Kaltlaminieren
1. Den Netzstecker an eine geeignete Stromquelle anschließen.
2. Betriebsschalter an der Geräterückseite einschalten und
Taste POWER eine Sekunde lang drücken, um das Gerät
einzuschalten.
3. Die Taste COLD drücken. Am Display wird nun COLD angezeigt
4. Sobald das Gerät betriebsbereit ist, ertönt ein Signalton und am
Display wird READY angezeigt.
5. Dokument in eine Kaltlaminiertasche einlegen. Laminiertasche
und Dokument in das Gerät einführen und den Laminiervorgang
mit der Taste STOP <RUN> starten und beenden.
ACHTUNG: Wurde kurz zuvor eine Heißlaminierung
durchgeführt, die Taste COLD drücken, um das Gerät
abzukühlen. Die Kaltlaminierung erst durchführen, wenn am
Display READY angezeigt wird.
m
Rücklauftaste
Im Fall eines Fehleinzugs oder eines Staus folgende Schritte
durchführen:
1. Die Taste REV drücken und gedrückt halten. Damit wird die
Drehrichtung der Walzen umgekehrt, sodass das Dokument an
der Gerätevorderseite ausgegeben wird.
2. Das Dokument aus dem Gerät herausziehen.
3. Nach Entnahme des Dokuments den Reinigungskarton durch
das Gerät laufen lassen, um die Walzen zu reinigen.
ACHTUNG: Vorsicht bei der Entnahme des Dokuments.
Dieses kann heiß sein.
m
Heißlaminieren
1. Den Netzstecker an eine geeignete Stromquelle anschließen.
2. Betriebsschalter an der Geräterückseite einschalten und Taste POWER (Abb. A) eine Sekunde lang drücken, um das Gerät einzuschalten.
3. Anhand der Temperaturtabelle weiter unten die für die Laminiertaschenstärke und Papierart geeignete Temperatureinstellung wählen.
• Wirkt das laminierte Dokument trüb, deutet dies auf eine zu niedrige Temperatur hin. Das Gerät einige Minuten aufwärmen lassen und die
Laminiertasche erneut durchlaufen lassen.
• Wellt sich das laminierte Dokument, ist die Temperatur zu hoch. Prüfen, ob die richtige Temperatur gewählt wurde.
• Bei einer Einstellungsänderung immer abwarten, bis die neue Temperatur erreicht ist.
4. Während der Aufwärmphase blinkt das Symbol für das Heizelement ( ). Sobald das Gerät betriebsbereit ist, ertönt ein Signalton und am
Display wird READY angezeigt (Abb. C).
5. Das zu laminierende Dokument mittig in die Laminiertasche einlegen, sodass die obere Kante an der versiegelten Kante der Tasche anliegt
(Abb. D).
6. Die Laminiertasche mit der versiegelten Kante nach vorn in das Gerät einführen (Abb. E).
7. Der fertig laminierte Artikel wird automatisch an der Rückseite des Geräts ausgegeben. Sobald der Artikel sich nicht mehr bewegt, diesen
sofort auf einer ebenen Fläche ablegen und eine Minute lang abkühlen lassen, bevor er weiter verwendet wird (Abb. F).
a. Taste HOT drücken, um den
Voreinstellungsmodus zu wählen.
Das Gerät ist nun auf 100 °C und
Geschwindigkeitsstufe 6 eingestellt. Am
Display wird HOT angezeigt (Abb. B).
a. Mithilfe der Temperaturpfeiltasten die
gewünschte Temperatur wählen.
b. Mithilfe der Geschwindigkeitspfeiltasten
die gewünschte Geschwindigkeit
wählen.
a. Taste 1 oder 2 eine Sekunde lang
drücken, um den Speichermodus
aufzurufen.
b. Mithilfe der Pfeiltasten die gewünschte
Temperatur und Geschwindigkeit
einstellen.
c. Taste 1 bzw. 2 erneut drücken, um die
Einstellung zu speichern.
d. Zum Verwenden einer gespeicherten
Einstellung die Taste 1 oder 2 drücken.
Am Display werden Temperatur und
Geschwindigkeit angezeigt.
1. Voreinstellungsmodus 2. Manueller Modus
Manuelle Temperatur-/Geschwindigkeitswahl:
3. Speichermodus
Speichern einer Temperatur-/
Geschwindigkeitseinstellung:

15
D
Ausschalten des Geräts
1. Die Taste POWER eine Sekunde lang drücken, bis das
Lüftersymbol angezeigt wird.
2. Sobald die Walzen auf unter 65 °C abgekühlt sind, ertönt ein
Signalton und die Stromzufuhr wird unterbrochen.
3. Gerät am Betriebsschalter an der Geräterückseite ausschalten.
ACHTUNG: Vor dem Ausschalten des
Hauptbetriebsschalters abwarten, bis das Gerät abgekühlt
ist, um die Walzen zu schützen und ihre Nutzungsdauer zu
verlängern.
HINWEIS: Aus Gründen der Sicherheit und des Umweltschutzes
wird das Laminiergerät nach 120 Minuten der Inaktivität automatisch
in den Standbymodus geschaltet. Zur erneuten Verwendung des
Geräts die Taste POWER eine Sekunde lang drücken, um das Gerät
einzuschalten.
m
Tipps zum Laminieren
• KEINE LEERE LAMINIERTASCHE IN DAS GERÄT EINFÜHREN.
• Laminiertaschen nie mit der nicht versiegelten Kante zuerst
einführen. Dies kann zu einem Stau führen.
• Vor dem Laminieren von wichtigen Dokumenten oder Unikaten
stets zuerst eine Testlaminiertasche mit einem ähnlichen
Dokumenttyp durch das Gerät laufen lassen.
• Sobald ein Heißlaminiervorgang beendet ist, den laminierten
Artikel zum Abkühlen auf einer kühlen, ebenen Fläche ablegen.
Dadurch wird verhindert, dass sich die Laminiertasche wellt.
• Laminiertaschen vor dem Laminiervorgang nicht schneiden.
Einstellungsleitfaden
Papierart Folienstärke Ohne Transporttasche Mit Transporttasche
Temperatur Geschwindigkeit Temperatur Geschwindigkeit
Kopierpapier
75–100 µm 100 °C 6 130 °C 4
125–150 µm 120 °C 4 130 °C 3
175–250 µm 120 °C 3 140 °C 2
300–350 µm 130 °C 2 - -
Broschürenpapier
75–100 µm 100 °C 5 130 °C 4
125–150 µm 120 °C 3 140 °C 3
175–250 µm 130 °C 2 140 °C 2
300–350 µm 140 °C 2 - -
Fotopapier
75–100 µm 100 °C 4 130 °C 3
125–150 µm 130 °C 3 140 °C 2
175–250 µm 140 °C 2 140 °C 1
HINWEIS: Für einen Wechsel in den Standbymodus die Temperatur auf 70 °C und die Geschwindigkeit auf 2 einstellen.
Garantie
Der Betrieb des Geräts ist bei normaler Verwendung für 1 Jahre ab
Kaufdatum gewährleistet. Innerhalb des Gewährleistungszeitraums
wird ACCO Brands Europe nach eigenem Ermessen das defekte
Gerät entweder kostenlos instand setzen oder ersetzen. Die
Garantie deckt keine Mängel aufgrund missbräuchlicher oder
unsachgemäßer Verwendung ab. Ein Nachweis des Kaufdatums
muss vorgelegt werden. Instandsetzungen oder Änderungen,
die von nicht von ACCO Brands Europe autorisierten Personen
vorgenommen werden, setzen die Gewährleistung außer Kraft. Es ist
unser Ziel, sicherzustellen, dass die Leistung unserer Produkte den
angegebenen technischen Daten entspricht. Diese Garantie stellt
keine Einschränkung der nach dem geltenden Kaufvertragsrecht
gültigen Rechte des Verbrauchers dar.
Bei Auftreten eines technischen Fehlers an dem Gerät während
des Gewährleistungszeitraums wenden Sie sich an die zuständige
ACCO-Kundendienststelle. Je nach diagnostiziertem Fehler und
Gerätemodell wird entweder ein Kundendiensttechniker entsandt
oder eine Rücksendung des Geräts an ACCO organisiert. Bei
Rücksendung des Geräts wird dieses von ACCO nach eigenem
Ermessen und gemäß gesetzlicher Bestimmungen entweder (I)
unter Verwendung neuer oder generalüberholter Komponenten
repariert oder (II) durch ein neues oder generalüberholtes
äquivalentes Gerät ersetzt.
Registrieren Sie dieses Produkt online bei www.accobrands.com

16
GBC Pro Series™3600 GBC Pro Series™4600
Caratteristiche elettriche
220-240 V / 50~60 Hz / 1050 W /
6,0 A
220-240 V / 50~60 Hz / 1050 W /
6,0 A
Dimensioni
540 x 271 x 112 mm 691 x 271 x 112 mm
Peso
15,0 kg 20,0 kg
Larghezza massima della
pouch
330 mm 480 mm
Spessore massimo della
pouch
2 x 350 mic (totale 700) 2 x 350 mic (totale 700)
Massimo spessore di
+ pouch)
3,0 mm 3,0 mm
Tempo di riscaldamento 6 minuti 6 minuti
Parte posteriore
1Imboccatura pouch
2Uscita pouch
3Pannello di controllo
4Interruttore di alimentazione
principale
5Presa cavo
6Cavo di alimentazione
TEMPERATURE - Indica la temperatura
selezionata.
- Indica che la macchina è
HOT - Indica che è stata selezionata
COLD - Indica che è stata selezionata la
MEAS - Indica che è stata selezionata la funzione “misurazione in
corso della temperatura attuale dei rulli”.
- Indica il funzionamento
dell’elemento riscaldante.
SPEED - Indica la velocità selezionata.
- Indica il senso di rotazione dei rulli all’indietro.
- Indica il senso di rotazione dei rulli in avanti.
Pannello di controllo
ACCENSIONE/SPEGNIMENTO della macchina.
Visualizzazione temperatura attuale dei rulli (circa 3 secondi).
Rotazione all’indietro dei rulli in caso di errato inserimento
di una pouch.
Arresto/Avviamento della rotazione dei rulli.
Modalità memoria per salvare le impostazioni
frequentemente utilizzate per la temperatura e
la velocità.
Frecce utilizzate per aumentare o diminuire la
temperatura (0 - 140°C).
Frecce utilizzate per regolare la velocità (1 - 9)
dei rulli. Il valore 9 corrisponde alla velocità più
elevata.

17
I
ed elettroniche (RAEE)
Al termine della loro vita utile, i prodotti acquistati verranno
(RAEE) ed è pertanto importante prendere atto di quanto di seguito
riportato.
vanno raccolti separatamente in modo tale da essere smontati per
consentire il riciclaggio, riutilizzo e recupero (come carburante ai
relativi componenti e materiali.
Punti pubblici di raccolta sono stati predisposti dalle amministrazioni
comunali per la raccolta gratuita dei RAEE.
I RAEE vanno smaltiti presso il centro di raccolta più vicino
abilitato al ricevimento dei RAEE, il rivenditore al dettaglio presso cui
Nel caso in cui l’utente non si sia più in contatto con il proprio
rivenditore, è possibile rivolgersi ad ACCO per ottenere informazioni
a riguardo.
Il riciclaggio dei RAEE è volto a proteggere l’ambiente e la salute
umana, salvaguardare le materie prime, migliorare lo sviluppo
sostenibile e garantire un migliore approvvigionamento di materie
prime nel territorio dell’Unione europea.Tali obiettivi potranno
essere conseguiti recuperando materie prime secondarie di valore
contribuire al raggiungimento di questi obiettivi provvedendo a
smaltire i propri RAEE presso gli appositi centri di raccolta.
Sui prodotti acquistati è riportato il simbolo RAEE
(cassonetto barrato).Tale simbolo indica che i RAEE non
Istruzioni per la sicurezza
ACCO®BRAND ATTRIBUISCE NOTEVOLE IMPORTANZA ALLA
SICUREZZA DEGLI OPERATORI E DI ALTRE PERSONE. ALCUNI
IMPORTANTI MESSAGGI RELATIVI ALLA SICUREZZA SONO
RIPORTATI NEL PRESENTE MANUALE DI ISTRUZIONI. SI PREGA
DI LEGGERLI CON ATTENZIONE.
m
QUESTO SIMBOLO PRECEDE OGNI MESSAGGIO
RELATIVO ALLA SALVAGURDIA DELL’INCOLUMITÀ
DEGLI UTENTI.
IL SIMBOLO INDICA UN RISCHIO POTENZIALE
PER L’OPERATORE O PER TERZI, O UN DANNO
POTENZIALE ALLA MACCHINA O AD ALTRI OGGETTI.
m
Precauzioni importanti m
ATTENZIONE - PER MOTIVI DI SICUREZZA, NON
COLLEGARE LA PLASTIFICATRICE A POUCH
ALL’ALIMENTAZIONE ELETTRICA PRIMA DI AVER LETTO
COMPLETAMENTE LE ISTRUZIONI. CONSERVARE
QUESTE ISTRUZIONI IN UN LUOGO ACCESSIBILE
PER UN’EVENTUALE CONSULTAZIONE FUTURA. PER
PREVENIRE EVENTUALI INFORTUNI, È NECESSARIO
OSSERVARE LE PRECAUZIONI DI SICUREZZA BASILARI
RIPORTATE NEI SEGUENTI PARAGRAFI RIGUARDANTI
L’INSTALLAZIONE E L'USO DEL PRESENTE PRODOTTO.
m
Precauzioni generali
• Utilizzare la macchina esclusivamente per le funzioni per cui è
• Non inserire alcun oggetto diverso dalle pouches o dai documenti
• Collocare la macchina su un piano di lavoro stabile e sicuro onde
evitare cadute che possano eventualmente causare danni alla
persona o alla macchina.
• Osservare tutte le precauzioni e istruzioni riportate sulla macchina.
• Posizionare la macchina nelle vicinanze di una presa elettrica
facilmente accessibile.
tale ostruzione può causare il surriscaldamento della macchina.
Avvertenza
fase iniziale di funzionamento.Tale odore è assolutamente normale
e dovrebbe diminuire dopo alcune ore di funzionamento.
Precauzioni relative
all’alimentazione elettrica
• L’unità deve essere collegata a una tensione di alimentazione
• Staccare la spina dalla presa di corrente prima di spostare la
macchina o quando non se ne prevede l’uso per un periodo di
tempo prolungato.
• Non utilizzare la macchina se la spina o il cavo di alimentazione
• Non sovraccaricare le prese di corrente oltre la propria capacità
poiché questo può causare incendi o pericolo di folgorazione.
• La macchina è stata progettata solamente per l’uso in locali interni.
• Fare molta attenzione se il prodotto viene utilizzato in presenza di
bambini.
Manutenzione e riparazione
manutenzione o riparazione. Scollegare la macchina dalla presa
di corrente e rivolgersi a un rappresentante dell’assistenza tecnica
ACCO Brands autorizzato per eventuali riparazioni.
Pulizia
Avvertenza: staccare sempre la spina dalla presa di
corrente prima di procedere alla pulizia.
utilizzare detergenti o solventi.
• Non usare toglipolvere o detergenti spray.
• Non spruzzare nessuna sostanza all’interno della macchina.
m

18
a freddo
1. Collegare il cavo di alimentazione a una fonte appropriata di
alimentazione.
2. Premere l'interruttore di alimentazione sul retro della
la macchina.
3. Premere il tasto COLD (freddo) e il simbolo “COLD” apparirà sul
display LCD.
4.
acustico e il simbolo “READY” (PRONTO) apparirà sul display LCD.
avviare o arrestare i rulli.
ATTENZIONE -
un documento a caldo, premere il pulsante COLD (per
il simbolo “READY” sul display LCD prima di procedere alla
m
Tasto Reverse
Seguire le istruzioni riportate di seguito in caso di errato inserimento
della pouch o di inceppamento.
1. Premere e mantenere premuto il pulsante REV. In questo modo
verrà invertita la rotazione dei rulli consentendo alla pouch di
uscire dalla parte frontale della macchina.
3. Una volta estratto il documento dalla macchina, pulire i rulli
ATTENZIONE - Fare attenzione quanto si rimuove il
essere caldo.
m
1. Collegare il cavo di alimentazione a una fonte appropriata di alimentazione.
4. Il simbolo del riscaldamento (
un segnale acustico e il simbolo “READY” (PRONTO) apparirà sul display LCD (Fig. C).
della pouch (Fig. D).
a. Premere il tasto HOT per selezionare la
modalità preimpostata. La macchina è
impostata su 100°C (temperatura) / e 6
(velocità) e il simbolo “HOT” appare sul
display LCD. (Fig. B).
a. Premere le frecce direzionali verso l’alto/
il basso della temperatura per cambiare
l’impostazione.
b. Premere le frecce direzionali verso l’alto/
il basso della velocità per cambiare
l’impostazione.
a.
Premere il pulsante 1 o 2 per un secondo
per accedere alla modalità memoria.
b. Impostare la temperatura e la velocità
più frequentemente utilizzate premendo
le frecce direzionali verso l’alto/il basso.
c. Premere di nuovo il pulsante del numero
per salvare l’impostazione in memoria.
d. Per usare un valore salvato in memoria,
selezionare il pulsante 1 o 2. Il display
LCD visualizzerà la temperatura e la
velocità selezionate.
(Per cambiare manualmente la velocità e la
temperatura)
(Per salvare determinate temperature e velocità in
memoria)

19
I
Completamento dell’operazione
1. Premere e mantener premuto il pulsante POWER per 1 secondo
LCD.
verrà tolta automaticamente.
3. Premere l’interruttore di alimentazione sul retro della
ATTENZIONE -
spegnerla utilizzando l’interruttore di alimentazione sul retro
consente di proteggere i rulli e prolungarne la vita utile.
N.B. - Per una maggiore sicurezza e un maggior rispetto
sleep dopo 120 minuti di inattività. Qualora si desideri utilizzare
secondo per accendere la macchina.
m
• NON INSERIRE POUCHES VUOTE NELLA MACCHINA.
• Non inserire mai la pouch nella macchina dal lato non presigillato
in quanto potrebbe causare inceppamenti.
sempre una prova inserendo una pouch con un documento simile.
onde evitare eventuali arricciature.
Tipo di carta Impostazione senza carrier Impostazione con carrier
Temperatura Temperatura
Carta per stampa
75 ~ 100 Micron 100°C 6 130°C 4
125 ~ 150 Micron 120°C 4 130°C 3
175 ~ 250 Micron 120°C 3 140°C 2
300 ~ 350 Micron 130°C 2 - -
Carta per brochure
75 ~ 100 Micron 100°C 5 130°C 4
125 ~ 150 Micron 120°C 3 140°C 3
175 ~ 250 Micron 130°C 2 140°C 2
300 ~ 350 Micron 140°C 2 - -
75 ~ 100 Micron 100°C 4 130°C 3
125 ~ 150 Micron 130°C 3 140°C 2
175 ~ 250 Micron 140°C 2 140°C 1
N.B. - Per la modalità “STANDBY”, mantenere la temperatura impostata su 70°C e la velocità su 2.
Garanzia
Il funzionamento di questa macchina è garantito per 1 anni dalla
data di acquisto, subordinatamente a uso normale. Durante il
periodo di garanzia, ACCO Brands Europe provvederà, a propria
discrezione, a riparare o sostituire gratuitamente la macchina
difettosa. Difetti provocati da un uso errato o un uso improprio
non sono coperti dalla garanzia. Sarà richiesta la prova della data
autorizzate da ACCO Brands Europe rendono nulla la garanzia. È
nostro obiettivo assicurare il funzionamento dei prodotti secondo
diritto riconosciuto ai consumatori dalle leggi nazionali applicabili
che regolano la vendita di beni.
della garanzia, si prega di rivolgersi al relativo centro di assistenza
di modello, ACCO provvederà a richiedere l’intervento di un
tecnico dell’assistenza oppure a richiedere la resa del prodotto.
Qualora venga restituito il prodotto, ACCO, a propria insindacabile
discrezione, provvederà, in conformità alla normativa vigente, a (i)
riparare la macchina utilizzando parti nuove o revisionate, oppure
(ii) sostituire il prodotto con un apparecchio nuovo o revisionato
equivalente a quello sostituito.
Registrare il prodotto online su www.accobrands.com

20
GBC Pro Series™3600 GBC Pro Series™4600
Elektrisch
220 - 240 V / 50 ~ 60Hz / 1050 W /
6,0 A
220 - 240 V / 50 ~ 60Hz / 1050 W /
6,0 A
Afmetingen
540 x 271 x 112 mm 691 x 271 x 112 mm
Gewicht
15,0 kg 20,0 kg
Maximumbreedte
lamineertas
330 mm 480 mm
Maximumdikte lamineertas 2 x 350 micron (in totaal 700) 2 x 350 micron (in totaal 700)
Maximumdikte lamineertas
plus document
3,0 mm 3,0 mm
Opwarmtijd 6 minuten 6 minuten
Achterkant
machine
1Invoersleuf lamineertassen
2Uitvoer lamineertassen
3Bedieningspaneel
4Stroomschakelaar
5Kabelaansluiting
6Netsnoer
TEMPERATURE - Geeft de ingestelde
temperatuur aan.
- Geeft aan dat de machine
gebruiksklaar is.
HOT - Geeft aan dat de functie voor
warm lamineren geselecteerd is.
COLD - Geeft aan dat de functie voor
koud lamineren geselecteerd is.
MEAS - Geeft aan dat de functie voor het meten van de actuele
temperatuur van de rollen geselecteerd is.
- Geeft aan dat de warmtefunctie actief is.
SPEED - Geeft de geselecteerde
snelheidsinstelling aan.
- Geeft aan dat de rollen in omgekeerde richting
draaien.
- Geeft aan dat de rollen in voorwaartse richting
draaien.
- Geeft aan dat de koelventilator actief is.
Bedieningspaneel
De machine in-/uitschakelen.
Vooraf ingestelde modus voor warm lamineren.
Vooraf ingestelde modus voor koud lamineren.
De actuele temperatuur van de rollen weergeven (ca. 3 sec.).
De draairichting van de rollen omkeren om verkeerd
ingevoerde lamineertassen te corrigeren.
Het draaien van de rollen stoppen/starten.
Geheugenmodus voor het opslaan
van veelgebruikte temperatuur- en
snelheidsinstellingen.
Toetsen voor het instellen van een hogere of
lagere temperatuur (0 - 140 °C).
Toetsen voor het aanpassen van de snelheid van
de rollen (1 - 9). Bij de instelling 9 is de snelheid
het hoogst.
This manual suits for next models
2
Table of contents
Languages:
Other GBC Laminator manuals

GBC
GBC 620OS User manual

GBC
GBC Inspire A3 User manual

GBC
GBC 640T User manual

GBC
GBC 80-99 Installation and operation manual

GBC
GBC FUSION 5100L Instruction Manual

GBC
GBC 5031TS ROLL User manual

GBC
GBC Discovery 50 User manual

GBC
GBC Fusion Plus 7000 L Instruction Manual

GBC
GBC 62FM User manual

GBC
GBC ORCA 64TH Quick start guide

GBC
GBC HeatSeal Sprint H925 User manual

GBC
GBC 930-115 User manual

GBC
GBC AutoUltima Pro User manual

GBC
GBC HeatSeal H65 User manual

GBC
GBC Pro-Tech NORD ORCA-I SP User manual

GBC
GBC GBC4250 User manual

GBC
GBC 40 User manual

GBC
GBC Arctic Titan 1040WFC User manual

GBC
GBC ULTIMA 65-1 Installation and operation manual

GBC
GBC TRIAD A3 User manual