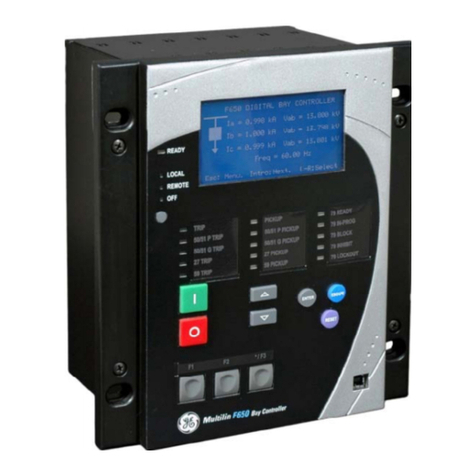
GE Multilin GEK-113000T User manual

GE Multilin
215 Anderson Avenue
L6E 1B3 Markham, ON -CANADA
T (905) 294 6222 F (905) 294 8512
Internet: www.GEMultilin.com
Firmware version: 3.7X
EnerVista F650 Setup version: 3.7X
Copyright © 2007 GE Multilin
F650
Digital Bay Controller
User manual
GEK-113000T
GE Multilin
Avda. Pinoa, 10
48170 Zamudio SPAIN
T +34 94 485 88 00 F +34 94 485 88 45
gGE Consumer & Industrial
Multilin

GEK-113000T F650 Digital Bay Controller 1
TABLE OF CONTENTS
1. GETTING STARTED 1.1 IMPORTANT PROCEDURES
1.1.1 CAUTIONS AND WARNINGS...........................................................................1-1
1.1.2 INSPECTION CHECKLIST................................................................................1-4
1.1.3 SAFETY INSTRUCTIONS.................................................................................1-6
1.2 OVERVIEW
1.2.1 INTRODUCTION TO 650 FAMILY OF RELAYS ...............................................1-7
1.2.2 HARDWARE ARCHITECTURE.........................................................................1-7
1.2.3 SOFTWARE ARCHITECTURE..........................................................................1-9
1.2.4 COMMUNICATIONS ARCHITECTURE ............................................................1-9
1.3 ENERVISTA 650 SETUP SOFTWARE
1.3.1 SYSTEM REQUIREMENTS ............................................................................1-11
1.3.2 INSTALLATION................................................................................................1-11
1.3.3 CONNECTING ENERVISTA 650 SETUP WITH F650....................................1-15
1.4 650 HARDWARE
1.4.1 MOUNTING & WIRING....................................................................................1-17
1.4.2 650 COMMUNICATIONS.................................................................................1-17
1.4.3 FACEPLATE DISPLAY....................................................................................1-18
1.4.4 MAINTENANCE...............................................................................................1-18
2. PRODUCT DESCRIPTION 2.1 OVERVIEW
2.1.1 F650 OVERVIEW...............................................................................................2-1
2.2 SUMMARY
2.2.1 ANSI DEVICE NUMBERS AND FUNCTIONS...................................................2-2
2.2.2 OTHER DEVICE FUNCTIONS .......................................................................... 2-3
2.3 ORDERING CODE
2.4 TECHNICAL SPECIFICATIONS
2.4.1 PROTECTION ELEMENTS ...............................................................................2-6
2.4.2 CONTROL........................................................................................................2-16
2.4.3 MONITORING..................................................................................................2-20
2.4.4 USER-PROGRAMMABLE ELEMENTS...........................................................2-22
2.4.5 METERING......................................................................................................2-23
2.4.6 INPUTS............................................................................................................2-24
2.4.7 REAL TIME CLOCK.........................................................................................2-26
2.4.8 OUTPUTS........................................................................................................2-26
2.4.9 CONTROL POWER SUPPLY..........................................................................2-27
2.4.10 COMMUNICATIONS........................................................................................2-27
2.4.11 OPTIC FEATURES..........................................................................................2-29
2.4.12 ENVIRONMENTAL CHARACTERISTICS.......................................................2-30
2.4.13 PACKAGING AND WEIGHT............................................................................2-30
2.4.14 TYPE TESTS...................................................................................................2-30
2.4.15 APPROVALS ...................................................................................................2-30
2.5 EXTERNAL CONNECTIONS
3. HUMAN INTERFACES.
SETTINGS & ACTUAL
VALUES
3.1 ENERVISTA 650 SETUP SOFTWARE INTERFACE
3.1.1 INTRODUCTION................................................................................................3-1
3.1.2 ENERVISTA 650 SETUP SOFTWARE OVERVIEW.........................................3-1
3.1.3 MAIN SCREEN..................................................................................................3-3
3.1.4 COMMUNICATION MENU ................................................................................3-4
3.1.5 FILE MANAGEMENT.........................................................................................3-6
3.1.6 ENERVISTA 650 SETUP MENU STRUCTURE..............................................3-10
3.1.7 FILE MENU OVERVIEW..................................................................................3-11
3.1.8 SETPOINT MENU OVERVIEW.......................................................................3-15
3.1.9 ACTUAL VALUES MENU OVERVIEW............................................................3-23
3.1.10 OPERATIONS MENU OVERVIEW..................................................................3-26
3.1.11 COMMUNICATION MENU OVERVIEW..........................................................3-27
3.1.12 SECURITY MENU OVERVIEW.......................................................................3-30
3.1.13 VIEW MENU OVERVIEW................................................................................3-30
2 F650 Digital Bay Controller GEK-113000T
TABLE OF CONTENTS
3.1.14 HELP MENU OVERVIEW ................................................................................3-30

3.2 HUMAN MACHINE INTERFACE (HMI)
3.2.1 DISPLAY...........................................................................................................3-31
3.2.2 FRONT LED INDICATORS ..............................................................................3-32
3.2.3 PUSHBUTTONS...............................................................................................3-32
3.2.4 FRONT PORT AND COVER SEALING SYSTEM............................................3-33
3.2.5 TEXT MENUS...................................................................................................3-34
3.2.6 GRAPHIC DISPLAY.........................................................................................3-53
3.3 WEB SERVER
3.3.1 HOME...............................................................................................................3-62
3.3.2 SNAPSHOT EVENTS.......................................................................................3-63
3.3.3 CONTROL EVENTS.........................................................................................3-64
3.3.4 ALARMS...........................................................................................................3-65
3.3.5 OSCILLOGRAPHY...........................................................................................3-66
3.3.6 FAULT REPORT ..............................................................................................3-67
3.3.7 DATA LOGGER................................................................................................3-68
3.3.8 METERING.......................................................................................................3-69
4. SECURITY 4.1 ADDING USERS
4.1.1 USER RIGHTS ...................................................................................................4-1
4.2 CHANGING PASSWORDS
4.3 ENABLING SECURITY
4.4 LOGING INTO ENERVISTA 650 SETUP
5. BOOTCODE AND
FIRMWARE UPGRADE 5.1 INTRODUCTION
5.1.1 COMMUNICATION PARAMETERS...................................................................5-2
5.2 BOOT CODE UPGRADE
5.3 FIRMWARE VERSION UPGRADE
5.3.1 FIRMWARE UPGRADE .....................................................................................5-9
5.4 STEP LIST SUMMARY FOR VERSIONS 1.70 AND LATER
5.4.1 BOOT CODE UPGRADE (*).............................................................................5-12
5.4.2 FIRMWARE UPGRADE (*)...............................................................................5-12
6. COMMISSIONING 6.1 VISUAL INSPECTION
6.2 GENERAL CONSIDERATIONS ON THE POWER SUPPLY NETWORK
6.3 ISOLATION TESTS
6.4 INDICATORS
6.5 POWER SUPPLY TESTING
6.6 COMMUNICATIONS
6.7 VERIFICATION OF MEASUREMENT
6.7.1 VOLTAGES ........................................................................................................6-7
6.7.2 PHASE CURRENTS...........................................................................................6-7
6.7.3 ACTIVE, REACTIVE POWER, AND COSJ METERING....................................6-8
6.7.4 FREQUENCY.....................................................................................................6-8
6.8 INPUTS AND OUTPUTS
6.8.1 DIGITAL INPUTS................................................................................................6-9
6.8.2 CONTACT OUTPUTS......................................................................................6-10
6.8.3 CIRCUIT CONTINUITY SUPERVISION INPUTS ............................................6-10
6.8.4 LATCHING CIRCUITS......................................................................................6-10

GEK-113000T F650 Digital Bay Controller 3
TABLE OF CONTENTS
6.9 CONNECTIONS FOR TESTING PROTECTION ELEMENTS
6.10 INSTANTANEOUS OVERCURRENT (50PH, 50PL, 50N, 50G Y 50SG)
6.11 TIME OVERCURRENT (51PH, 51PL, 51N, 51G AND 46)
6.12 DIRECTIONAL ELEMENTS (67P, 67N, 67G, 67SG)
6.12.1 67P ELEMENT.................................................................................................6-14
6.12.2 67N ELEMENT.................................................................................................6-14
6.12.3 67G ELEMENT ................................................................................................6-16
6.12.4 67SG ELEMENT..............................................................................................6-17
6.13 UNDERVOLTAGE ELEMENTS (27P, 27X)
6.13.1 27P ELEMENT.................................................................................................6-18
6.13.2 27X ELEMENT.................................................................................................6-18
6.14 OVERVOLTAGE ELEMENTS (59P, 59X, 59NH, 59NL, 47)
6.14.1 59P ELEMENT.................................................................................................6-19
6.14.2 59X ELEMENT.................................................................................................6-19
6.14.3 59NH AND 59NL ELEMENTS .........................................................................6-20
6.14.4 47 ELEMENT - NEG SEQ OV .........................................................................6-21
6.15 FREQUENCY ELEMENTS (81O/81U)
6.16 RECLOSER (79)
6.16.1 RECLOSING CYCLE.......................................................................................6-23
6.16.2 RECLOSER STATUS......................................................................................6-24
6.16.3 EXTERNAL RECLOSE INITIATION ................................................................ 6-24
6.17 THERMAL IMAGE ELEMENT (49)
7. FREQUENTLY ASKED
QUESTIONS 7.1 COMMUNICATIONS
7.2 PROTECTION
7.3 CONTROL AND HMI
7.4 RELAY CONFIGURATION
8. F650TROUBLESHOOTING
GUIDE 8.1 SYMPTOMS AND RECOMMENDED ACTIONS
A. LOGIC OPERANDS A.1 LOGIC OPERANDS
B. FACTORY DEFAULT LOGIC B.1 FACTORY DEFAULT LOGIC
C. FACTORY DEFAULT
CONFIGURATION C.1 FACTORY DEFAULT SETTINGS
C.2 FACTORY DEFAULT CONFIGURATION
D. MISCELLANEOUS D.1 GE MULTILIN WARRANTY

4 F650 Digital Bay Controller GEK-113000T
TABLE OF CONTENTS

GEK-113000T F650 Digital Bay Controller 1-1
1 GETTING STARTED 1.1 IMPORTANT PROCEDURES
1
1 GETTING STARTED 1.1IMPORTANT PROCEDURES 1.1.1 CAUTIONS AND WARNINGS
To help ensure years of trouble free operation, please read through the following chapter for information to help guide you
through the initial installation procedures of your new relay.
BEFORE ATTEMPTING TO INSTALL OR USE THE RELAY, IT IS IMPERATIVE THAT ALL WARNINGS AND CAUTIONS
IN THIS MANUAL ARE REVIEWED TO HELP PREVENT PERSONAL INJURY, EQUIPMENT DAMAGE, AND/OR
DOWNTIME.
CAUTION: THE OPERATOR OF THIS INSTRUMENT IS ADVISED THAT IF THE EQUIPMENT IS USED IN A MANNER
NOT SPECIFIED IN THIS MANUAL, THE PROTECTION PROVIDED BY THE EQUIPMENT MAY BE IMPAIRED.
Figure 1–1: FRONT VIEW OF F650 UNITS

1-2 F650 Digital Bay Controller GEK-113000T
1.1 IMPORTANT PROCEDURES 1 GETTING STARTED
11.1.1.1 COMMUNICATION BOARDS WITHDRAWAL / INSERTION
The modular design of the relay allows for the withdrawal and insertion of the communication module.
Figure 1–2: shows the location of communication modules on the rear part of the relay. Qualified personnel must carry out
the insertion or extraction of the communication boards only after interrupting the relay auxiliary voltage and ensuring that
all the rear terminals are potential free.
Communication boards are installed on the rear of the unit, the upper port being reserved for the asynchronous
communications board and CAN, and the lower port for the ETHERNET board in any of its configurations.
Figure 1–2: MODULE WITHDRAWAL/INSERTION
WARNING: MODULE WITHDRAWAL AND INSERTION SHALL ONLY BE PERFORMED BY DULY QUALIFIED
SERVICE PERSONNEL. FOR PERSONAL SECURITY PURPOSES, BEFORE ACCOMPLISHING ANY
WITHDRAWAL OR INSERTION OPERATION, THE RELAY MUST BE POWERED OFF AND ALL THE REAR
TERMINALS MUST BE POTENTIAL FREE. THE RELAY MUST BE GROUNDED USING THE REAR GROUNDING
SCREW.
Before performing any of these actions, control power must be removed from the relay and all the rear terminals
must be potential free. A grounded antistatic wristband must be used when manipulating the module in order to avoid
electrostatic discharges that may cause damage to the electronic components.
WITHDRAWAL: Loosen the small screws that keep the faceplate in place and extract the module.
INSERTION: Insert the module and press it firmly in the case, until it is completely fixed. After this, bolt the faceplate
screws and replace the control power. Check that the relay is fully operative.
GE Multilin will not be responsible for any damage of the relay, connected equipment or personnel whenever
these safety rules are not followed.

GEK-113000T F650 Digital Bay Controller 1-3
1 GETTING STARTED 1.1 IMPORTANT PROCEDURES
1
1.1.1.2 MAGNETIC MODULE TERMINALS
The transformer module for the VTs and CTs is already connected to a female connector screwed to the case. The
current inputs incorporate shorting bars, so that the module can be extracted without the need to short-circuit the
currents externally. It is very important, for safety reasons not to change or switch the terminals for CTs and VTs.
Figure 1–3: REAR VIEW OF F650 UNIT
GE Multilin will not be responsible for any damage of the relay, connected equipment or personnel
whenever these safety rules are not followed.
AC Input Terminals

1-4 F650 Digital Bay Controller GEK-113000T
1.1 IMPORTANT PROCEDURES 1 GETTING STARTED
11.1.2 INSPECTION CHECKLIST
Unwrap the relay and inspect the relay for physical damage.
Verify that the model on the label on the side of the relay matches the model ordered.
Figure 1–4: IDENTIFICATION LABEL (A4455P6)
Please ensure that you received the following items with your relay:
• Mounting screws for fixing the relay to a cabinet
• CD containing EnerVista 650 Setup software
• Wiring diagram
• Certificate of Compliance

GEK-113000T F650 Digital Bay Controller 1-5
1 GETTING STARTED 1.1 IMPORTANT PROCEDURES
1
For product information, instruction manual updates, and the latest software updates, please visit the GE Multilin Home
Page www.geindustrial.com/multilin.
Note: If there is any physical damage detected on the relay, or any of the contents listed are missing, please
contact GE Multilin immediately at:
EUROPE, MIDDLE EAST AND AFRICA:
GE MULTILIN
Av. Pinoa, 10
48170 Zamudio, Vizcaya (SPAIN)
Tel.: (34) 94-485 88 54, Fax: (34) 94-485 88 38
E-mail: [email protected]
AMERICA, ASIA AND AUSTRALIA:
GE MULTILIN
215, Anderson Avenue
L6E 1B3 Markham, ON (CANADA)
Tel.: +1 905 294 6222, Fax: +1 905 201 2098
E-mail: [email protected]
The information provided herein is not intended to cover all the details of the variations of the equipment, nor does
it take into account the circumstances that may be present in your installation, operating or maintenance
activities.
Should you wish to receive additional information, or for any particular problem that cannot be solved by referring
to the information contained herein, please contact GENERAL ELECTRIC MULTILIN.

1-6 F650 Digital Bay Controller GEK-113000T
1.1 IMPORTANT PROCEDURES 1 GETTING STARTED
11.1.3 SAFETY INSTRUCTIONS
The F650 ground screw shown in Figure 1–5: must be correctly grounded.
Figure 1–5: LOCATION OF GROUNDING SCREW
Before communicating with a F650 unit through the front serial port, please ensure that the computer is grounded.
In case of using a laptop, it is recommended not to have it connected to its power supply. In many cases it might not be
correctly grounded either due to the power supply or to the connector cables used.
This is required not only for personal protection, but also to avoid a potential voltage difference between the
relay’s serial port and the computer’s port, which could produce permanent damage to the computer or the relay.
GE Multilin will not be responsible for any damage to the relay or connected equipment whenever this elemental
safety rule is not followed.

GEK-113000T F650 Digital Bay Controller 1-7
1 GETTING STARTED 1.2 OVERVIEW
1
1.2OVERVIEW 1.2.1 INTRODUCTION TO 650 FAMILY OF RELAYS
Historically, substation protection, control and metering functions were performed with electromechanical equipment. This
first generation of equipment was gradually replaced by analog electronic equipment (called static devices), most of which
emulated the single-function approach of their electromechanical precursors. Both of these technologies required
expensive cabling and auxiliary equipment to produce functioning systems.
Recently, digital electronic equipment has begun to provide protection, control and metering functions. Initially, this
equipment was either single function or had very limited multi-function capability, and did not significantly reduce the
cabling and auxiliary equipment required. However, recent digital relays have become quite multi-functional, reducing
cabling and auxiliaries significantly. These devices also transfer data to central control facilities and Human Machine
Interfaces using electronic communications. The functions performed by these products have become so broad that many
users prefer the term IED (Intelligent Electronic Device).
It is obvious to station designers that the amount of cabling and auxiliary equipment installed in stations can be even further
reduced, to 20% to 70% of the levels common in 1990, to achieve large cost reductions. This requires placing even more
functions within the IEDs.
Users of power equipment are also interested in reducing cost by improving power quality and personnel productivity, and
as always, in increasing system reliability and efficiency. These objectives are realized through software which is used to
perform functions at both the station and supervisory levels. The use of these systems is growing rapidly.
High speed communications are required to meet the data transfer rates required by modern automatic control and
monitoring systems. In the near future, very high speed communications will be required to perform protection signalling.
This has been established by the IEC 61850 standard.
IEDs with capabilities outlined above will also provided significantly more power system data than is presently available,
enhance operations and maintenance, and permit the use of adaptive system configuration for protection and control
systems. This new generation of equipment must also be easily incorporated into automation systems, at both the station
and enterprise levels.
1.2.2 HARDWARE ARCHITECTURE
650 family of relays has been designed to meet the goals described above that are appearing nowadays in the environment
of new substations.
The 650 is a digital-based device containing a central processing unit (CPU) that handles multiple types of input and output
signals. The 650 family can communicate over a local area network (LAN) with an operator interface, a programming
device, or another 650 or UR device.
The CPU module contains firmware that provides protection elements in the form of logic algorithms, as well as
programming logic gates, timers, and latches for control features. It incorporates two internal processors, one for generic
use and a second one dedicated for communications.
Input Elements accept a variety of analog or digital signals from the field. The 650 isolates and converts these signals into
logic signals used by the relay.
Output Elements convert and isolate the logic signals generated by the relay into digital signals that can be used to control
field devices.

1-8 F650 Digital Bay Controller GEK-113000T
1.2 OVERVIEW 1 GETTING STARTED
1
Figure 1–6: 650 CONCEPT BLOCK DIAGRAM
Contact Inputs/Outputs are signals associated to the physical input/output contacts in the relay
CT and VT inputs are signals coming from the inputs of current and voltage transformers, used for monitoring the power
system signals. Not available for C650 models.
CAN Bus Inputs/Outputs: are signals associated to physical input/output contacts from independent modules connected
to the 650 unit via a CAN Bus. Not available for W650 models.
PLC: Programmable Logic Controller. Control module that enables the unit configuration (assignment of inputs/outputs)
and the implementation of logic circuits.
Protection Elements: Relay protection elements, for example: Overcurrent, overvoltage, etc. Not available for C650
models.
Remote inputs and outputs provide a means of sharing digital point state information between remote devices using IEC
61850 GSSE and GOOSE messages. Not available for G650 and C650 models.
Analog Inputs are signals associated with transducers.

GEK-113000T F650 Digital Bay Controller 1-9
1 GETTING STARTED 1.2 OVERVIEW
1
1.2.3 SOFTWARE ARCHITECTURE
The firmware (software embedded in the relay) has been designed using object oriented programming techniques (OOP).
These techniques are based on the use of objects and classes, and provide the software architecture with the same
characteristics as the hardware architecture, i.e., modularity, scalability and flexibility.
1.2.4 COMMUNICATIONS ARCHITECTURE
The main processor performs protection, control, and communication functions, incorporating two internal processors, one
for generic use and a second one dedicated for communications.
A dedicated serial port is used for communication between the main processor and the human-machine interface. The
serial connection provides great immunity against electromagnetic disturbances, thus increasing system safety.
All F650 units incorporate an RS232 serial port on the front of the relay. There is also a possibility to incorporate up to two
additional communication modules on the rear.
One of the modules provides asynchronous serial communications, using different physical media (RS485, plastic or glass
fiber optic) depending on the selected model. The module incorporates two identical ports, COM1 and COM2. The COM2
port is multiplexed with the front port. Additionally, this module may incorporate a port for CAN BUS communications, used
for the connection to the Remote CAN BUS I/O module. This feature allows increasing up to 100% the I/O capability, when
the maximum number of I/Os available inside the relay is not enough for a specific application.
Available options are:
Table 1–1: REAR SERIAL COMMUNICATIONS BOARD 1
The other module provides Ethernet communications (COM3 port), using 10/100BaseTX (self-negotiable speed) or
100BaseFX connectors, depending on the selected model. The most complete models include a double redundant
100BaseFX fiber optic port. Redundancy is provided at the physical level; the unit incorporates internally duplicated and
independent controllers for extended system reliability and accessibility.
Available Options are:
Table 1–2: REAR ETHERNET COMMUNICATIONS BOARD 2
For options C and D it is required to select the active physical media, by means of an internal selector inside the module.
The factory configuration for this selection is the 10/100BaseTX port.
Finally, internal communication with input and output modules is performed via an internal CAN bus, independent from the
one used for remote CAN BUS I/Os. This fact provides increased communication speed, as well as the possibility of
acknowledgement of modules, abnormalities, etc. As this is a serial port supporting a communications protocol, it provides
extraordinary immunity against external or internal disturbances.
BOARD CODE FUNCTIONALITY
F Without additional communication ports
A Two RS485 ports
P Two Plastic F.O. ports
G Two Glass F.O. ports
X Two RS485 ports and a CAN port for remote CAN Bus Inputs/Outputs
Y Two Plastic F.O. ports and a CAN port for remote CAN Bus Inputs/Outputs (fiber)
Z Two Glass F.O. ports and a CAN port for remote CAN Bus Inputs/Outputs (fiber)
C CAN port for remote CAN Bus I/O (cable)
M RS485 + RS485 port and a CAN port for remote CAN bus I/O (cable)
BOARD CODE FUNCTIONALITY
B One 10/100BaseTX port (self-negotiable speed)
C One 10/100BaseTX port and one 100BaseFX port.
D One 10/100BaseTX port and redundant 100BaseFX ports
E Redundant 10/100BaseTX ports

1-10 F650 Digital Bay Controller GEK-113000T
1.2 OVERVIEW 1 GETTING STARTED
1
Figure 1–7: COMMUNICATIONS ARCHITECTURE (B6816F1)

GEK-113000T F650 Digital Bay Controller 1-11
1 GETTING STARTED 1.3 ENERVISTA 650 SETUP SOFTWARE
1
1.3ENERVISTA 650 SETUP SOFTWARE 1.3.1 SYSTEM REQUIREMENTS
The EnerVista 650 Setup software interface is the preferred method to edit settings and view actual values because the PC
monitor can display more information in a simple comprehensible format.
The following minimum requirements must be met for the EnerVista 650 Setup software to properly operate on a PC:
• Pentium® class or higher processor (Pentium® II 300 MHz or higher recommended)
• Windows® NT 4.0 (Service Pack 3 or higher), Windows® 2000, Windows® XP
• Internet Explorer® 5.0 or higher
• 64 MB of RAM (128 MB recommended)
• 40 MB of available space on system drive and 40 MB of available space on installation drive
• RS232C serial and/or Ethernet port for communications to the relay
1.3.2 INSTALLATION
After ensuring the minimum requirements for using EnerVista 650 Setup are met (see previous section), use the following
procedure to install the EnerVista 650 Setup from the GE EnerVista CD.
1. Insert the GE EnerVista CD into your CD-ROM drive.
2. Click the Install Now button and follow the installation instructions to install the no-charge EnerVista software.
3. When installation is complete, start the EnerVista Launchpad application.
4. Click the IED Setup section of the Launch Pad window.
Figure 1–8: LAUNCHPAD WINDOW

1-12 F650 Digital Bay Controller GEK-113000T
1.3 ENERVISTA 650 SETUP SOFTWARE 1 GETTING STARTED
15. In the EnerVista Launch Pad window, click the Add Product button and select the “F650 Bay Controller” relay from the
Install Software window as shown below. Select the “Web” option to ensure the most recent software release, or select
“CD” if you do not have a web connection, then click the Add Now button to list software items for the F650.
Figure 1–9: ADD PRODUCT WINDOW
6. If “Web” option is selected, choose the F650 software program and release notes (if desired) from the list and click the
Download Now button to obtain the installation program.
Figure 1–10: WEB UPGRADE WINDOW

GEK-113000T F650 Digital Bay Controller 1-13
1 GETTING STARTED 1.3 ENERVISTA 650 SETUP SOFTWARE
1
7. EnerVista Launchpad will obtain the installation program from the Web or CD. Once the download is complete, double-
click the installation program to install the EnerVista 650 Setup software.
8. Select the complete path, including the new directory name, where the EnerVista 650 Setup will be installed.
9. Click on Next to begin the installation. The files will be installed in the directory indicated and the installation program
will automatically create icons and add EnerVista 650 Setup to the Windows start menu.
10. Follow the on-screen instructions to install the EnerVista 650 Setup software. When the Welcome window appears,
click on Next to continue with the installation procedure.
Figure 1–11: ENERVISTA 650 SETUP INSTALLATION
11. When the Choose Destination Location window appears, and if the software is not to be located in the default
directory, click Change… and type in the complete path name including the new directory name and click Next to
continue with the installation procedure.
Figure 1–12: ENERVISTA 650 SETUP INSTALLATION CONT.

1-14 F650 Digital Bay Controller GEK-113000T
1.3 ENERVISTA 650 SETUP SOFTWARE 1 GETTING STARTED
112. The default program group where the application will be added to is shown in the Selected Program Folder window.
Click Next to begin the installation process, and all the necessary program files will be copied into the chosen directory.
Figure 1–13: SELECT PROGRAM FOLDER
13. To finish with the installation process, select the desired language for startup.
Figure 1–14: LANGUAGE WINDOW

GEK-113000T F650 Digital Bay Controller 1-15
1 GETTING STARTED 1.3 ENERVISTA 650 SETUP SOFTWARE
1
14. Click Finish to end the installation. The F650 device will be added to the list of installed IEDs in the EnerVista
Launchpad window, as shown below.
Figure 1–15: ENERVISTA LAUNCHPAD
1.3.3 CONNECTING ENERVISTA 650 SETUP WITH F650
This section is intended as a quick start guide to using the EnerVista 650 Setup software. Please refer to section 4.1 in this
manual for more information about the EnerVista 650 Setup software interface.
a) CONFIGURING AN ETHERNET CONNECTION
Before starting, verify that the Ethernet network cable is properly connected to the Ethernet port on the back of the relay.
1. Install and start the latest version of the EnerVista 650 Setup software (available from the GE EnerVista CD or online
from http://www.GEindustrial.com/multilin (see previous section for installation instructions).
2. Go to “Communication>Computer” and enter the following data referring to communications:
3. Select Control Type as MODBUS TCP/IP from the drop-down list. This option will display a number of interface
parameters that must be entered for proper Ethernet communications.
4. Enter the relay IP address (from “Setpoint>Product Setup >Communication Settings>Network>IP ADDRESS”) in
the IP Address field in MODBUS TCP/IP SETUP.
5. Enter the relay ModBus address (from “Setpoint>Product Setup >Communication Settings>ModBus
Protocol>ModBus Address COM1/COM2 setting”) in the Unit Identifier (Slave Address) field.
6. Enter the ModBus port address (from “Setpoint>Product Setup >Communication Settings>ModBus
Protocol>ModBus Port Number” setting) in the ModBus Port field.
7. The Device has now been configured for Ethernet communications. Proceed to press the ON button to begin
communicating.
This manual suits for next models
1
Table of contents
Other GE Controllers manuals

GE
GE Becker VRP-B-CH Series User manual

GE
GE Masoneilan 37 User manual

GE
GE CR1062RL User manual

GE
GE Masoneilan 12400 Series User manual

GE
GE ACUXL16 User manual

GE
GE Becker VRP-SB-PID Series User manual

GE
GE IC3645SR4R333AS2 User manual

GE
GE 90-30 PLC Assembly Instructions

GE
GE IC3645SR7A353E1 User manual

GE
GE PACSystems* RX3i User manual