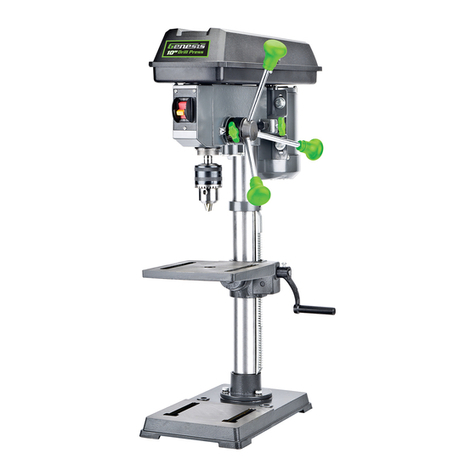
Genesis GDP1012A User manual

10" 12-Speed Drill Press
Perceuse à colonne de 10 po., 12 vitesses
Taladro de pie de 10”, 12 velocidades
GDP1012A
Operator’s Manual
Manuel d’utilisation
Manual del operario
888-552-8665
TOLL FREE
HELP LINE:
WEBSITE: www.genesispowertools.com

English
10" Drill Press
Operator’s Manual GDP1012A
2
10" 12-Speed Drill Press 3.85AMP
Operator’s Manual
SPECIFICATIONS:
• Model: -------------------------------- GDP1012A
• Rated Power: ------------------------- 120V~ /60 Hz, 3.85 Amp
• No Load Speed: -----------------------12 Speeds (300- 2900 RPM)
• Chuck Size: --------------------------- 5/8” (16 mm)
• Spindle Travel: ------------------------ 2-3/8” (60mm)
• Swing: -------------------------------- 10” (254 mm)
• Table Movement:---------------------- 45° bevel, 360° swivel
• Table Size: ---------------------------- 7-5/8” x 7-5/8” (200 mm x 200 mm)
• Base Size: ---------------------------- 14” x 9-1/4 ” (355mm x 235 mm)
• Max. Distance from Spindle End to Surface of Table:-------- 11-3/8” (290 mm)
• Max Distance from Spindle End to Surface of Base: --------- 16-1/4” (414 mm)
• Max Distance from Spindle Axis to Surface of Column: ----- 5 ” (127 mm)
• Net Weight: ------------------------------------------------- 55 Lbs
Includes: Chuck Key, Allen Wrenches and Drift key
WARNING: To reduce the risk of injury, user must read and understand this
operator’s manual before operating this tool. Save this Manual for future reference.
Toll-Free Help Line: 1-888-552-8665
WARNING: The operation of any power tool can result in foreign
objects being thrown into your eyes, which can result in severe eye damage. Before
beginning tool operation, always wear safety goggles or safety glasses with side
shields and a full face shield when needed. We recommend Wide Vision Safety Mask
for use over eyeglasses or standard safety glasses with side shields. Always wear eye
protection which is marked to comply with ANSI Z87.1.
Look for this symbol to point out important safety
precautions. It means attention!!! Your safety is
involved.
GENERAL SAFETY RULES
WARNING: Some dust created by power sanding, sawing, grinding, drilling, and
other construction activities contains chemicals known to cause cancer, birth defects or
other reproductive harm. Some examples of these chemicals are:
• Lead from lead-based paints,
• Crystalline silica from bricks and cement and other masonry products, and
• Arsenic and chromium from chemically treated lumber.
Your risk from these exposures varies, depending on how often you do this type of work. To reduce your
exposure to these chemicals: work in a well ventilated area, and work with approved safety equipment, such as
those dust masks that are specially designed to filter out microscopic particles.
WEAR YOUR
FORESIGHT IS BETTER
THAN NO SIGHT
SAFETY GLASSES

3
English
WARNING: Read and understand all warnings, cautions and operating
instructions before using this equipment. Failure to follow all instructions listed below
may result in electric shock, fire and/or serious personal injury.
SAVE THESE INSTRUCTIONS
WORK AREA SAFETY
• Keep your work area clean and well lit. Cluttered benches and dark areas invite accidents.
• Do not operate power tools in explosive atmospheres, such as in the presence of
flammable liquids, gases, or dust. Power tools create sparks which may ignite the dust or fumes.
• Keep bystanders, children, and visitors away while operating a power tool.
Distractions can cause you to lose control.
ELECTRICAL SAFETY
• Power tool plugs must match the outlet. Never modify the plug in any way. Do not use any
adapter plugs in any earthed (grounded) power tools. Double insulated tools are equipped with a polarized
plug (one blade is wider than the other). This plug will fit in a polarized outlet only one way. If the plug does not
fit fully in the outlet, reverse the plug. If it still does not fit, contact a qualified electrician to install a polarized
outlet. Do not change the plug in any way. Double insulation eliminates the need for the three wire grounded
power cord and grounded power supply system.
• Do not expose power tools to rain or wet conditions. Water entering a power tool will
increase the risk of electric shock.
• Avoid body contact with earthed or grounded surfaces such as pipes,
radiators, ranges and refrigerators. There is an increased risk of electric shock if your body is
grounded.
• Do not abuse the cord. Never use the cord for carrying, pulling or unplugging the power tool. Keep
cord away from heat, oil, sharp edges or moving parts. Damaged cords increase the risk of electric shock.
• When operating a power tool outside, use an extension cord suitable for
outdoor use. These cords are rated for outdoor use and reduce the risk of electric shock.
• Do not use AC only rated tools with a DC power supply. While the tool may appear to
work. The electrical components of the AC rated tool are likely to fail and rate a hazard to the operator.
PERSONAL SAFETY
• Stay alert, watch what you are doing and use common sense when operating a power tool. Do not use
tool while tired or under the influence of drugs, alcohol, or medication. A moment of inattention while operating
power tools may result in serious personal injury.
• Use safety equipment. Always wear eye protection. Safety equipment such as dust mask, non-skid
safety shoes, hard hat, or hearing protection for appropriate conditions will reduce personal injuries.
• Dress properly. Do not wear loose clothing or jewelry. Keep your hair, clothing and gloves away from
moving parts. Loose clothes, jewelry or long hair can be caught in moving parts. Air vents may cover moving
parts and should be avoided.
• Avoid accidental starting. Ensure the switch is in the off position before plugging in. Carrying power
tool with your finger on the switch or plugging in power tools that have the switch on invites accidents.
• Remove any adjusting keys or wrenches before turning the power tool on. A
wrench or key that is left attached to a rotating part of the tool may result in personal injury.
• Do not overreach. Maintain proper footing and balance at all times. Loss of balance can cause an injury
in an unexpected situation.
• If devices are provided for connection of dust extraction and collection
facilities, ensure these are connected and properly used. Use of these devices can
reduce dust related hazards.
• Do not use a ladder or unstable support. Stable footing on a solid surface enables better
control of the tool in unexpected situations.
English
10" Drill Press
Operator’s Manual GDP1012A
4
• Keep tool handles dry, clean and free from oil and grease. Slippery handles cannot
safely control the tool.
TOOL USE AND CARE
• Secure the work piece. Use a clamp or other practical way to hold the work piece to a stable platform.
Holding the work piece by hand or against your body is unstable and may lead to loss of control.
• Do not force the power tool. The tool will perform the job better and safer at the feed rate for which
it is designed. Forcing the tool could possibly damage the tool and may result in personal injury.
• Use the correct power tool for the job. Don’t force the tool or attachment to do a job for which
it is not designed.
• Do not use tool if switch does not turn it on or off. Any tool that cannot be controlled with
the switch is dangerous and must be repaired or replaced by an authorized service center.
• Turn power tool off, and disconnect the plug from the power source and/or battery pack
from the power tool before making any adjustments, changing the accessories, or storing the tools. Such
preventive safety measures reduce the risk of an accidental start up which may cause personal injury.
• Store idle tool out of reach of children and other inexperienced persons. It is
dangerous in the hand of untrained users.
• Maintain power tools with care. Check for improper alignment, binding of moving parts,
component breaks, or any other conditions that may affect the tool’s operation. A guard or any other part that is
damaged must be properly repaired or replaced by an authorized service center to avoid risk of personal injury.
• Use recommended accessories. Using accessories and attachments not recommended by the
manufacturer or intended for use on this type tool may cause damage to the tool or result in personal injury to
the user. Consult the operator’s manual for recommended accessories.
• Keep cutting tools sharp and clean. Properly maintained cutting tools with sharp cutting edges
are less likely to bind and are easier to control.
• Feed the work piece in the correct direction and speed. Feed the work piece into a
blade, cutter, or abrasive surface against the direction of the cutting tool’s direction of rotation only. Incorrectly
feeding the work piece in the same direction may cause the work piece to be thrown out at high speed.
• Never leave the tool running unattended, turn the power off. Do not leave the tool until
it comes to a complete stop.
• Never start the power tool when any rotating component is in contact with
the work piece.
WARNING: USE OF THIS TOOL CAN GENERATE AND DISBURSE DUST OR
OTHER AIRBORNE PARTICLES, INCLUDING WOOD DUST, CRYSTALLINE SILICA DUST
AND ASBESTOS. Direct particles away from face and body. Always operate tool in a well-
ventilated area and provide for proper dust removal. Use dust collection system wherever
possible. Exposure to the dust may cause serious and permanent respiratory or other
injury, including silicosis (a serious lung disease), cancer, and death. Avoid breathing the
dust, and avoid prolonged contact with the dust. Allowing dust to get into your mouth or
eyes, or lay on your skin may promote absorption of harmful material. Always use properly
fitting NIOSH/OSHA approved respiratory protection appropriate for dust exposure, and
wash exposed areas with soap and water.
SERVICE
• Have your power tool serviced by a qualified repair person using only identical
replacement parts. This will ensure that the safety of the power tool is maintained.
• Service your power tool periodically. When cleaning a tool, be careful not to disassemble any
portion of the tool since internal wires may be misplaced or pinched.
SAVE THESE INSTRUCTIONS

5
English
EXTENSION CORDS
Grounded tools require a three wire extension cord. Double insulated tools can use
either a two or three wire extension cord. As the distance from the power supply outlet increases, you must use a
heavier gauge extension cord. Using extension cords with inadequately sized wire causes a serious drop in voltage,
resulting in loss of power and possible tool damage. Refer to the table shown below to determine the required
minimum wire size.
The smaller the gauge number of the wire, the greater the capacity of the cord. For example: a 14-gauge cord
can carry a higher current than a 16-gauge cord. When using more than one extension cord to make up the total
length, be sure each cord contains at least the minimum wire size required. If you are using one extension cord for
more than one tool, add the nameplate amperes and use the sum to determine the required minimum wire size.
Guidelines for Using Extension Cords
• If you are using an extension cord outdoors, be sure it is marked with the suffix “W-A” (“W” in Canada) to
indicate that it is acceptable for outdoor use.
• Be sure your extension cord is properly wired and in good electrical condition. Always replace a damaged
extension cord or have it repaired by a qualified person before using it.
• Protect your extension cords from sharp objects, excessive heat, and damp or wet areas.
SPECIFIC SAFETY RULES FOR DRILL PRESSES
WARNING: DO NOT LET COMFORT OR FAMILIARITY WITH PRODUCT (GAINED
FROM REPEATED USE) REPLACE STRICT ADHERENCE TO PRODUCT SAFETY RULES. If
you use this tool unsafe or incorrectly, you can suffer serious personal injury!
• Make sure the drill press is on a firm, level surface and properly secured to avoid injury
from unexpected movement. Firmly clamp or bolt the drill press to a support surface to prevent slipping or
sliding during the operation.
• Unplug the drill press before making adjustments, repairs, maintenance or storing.
• Always switch off the drill press before unplugging it to avoid accidental starting when re-
plugging the tool into a power source.
• Use recommended speeds for drill accessories and work piece material.
• Allow the motor to come up to full speed before drilling to avoid binding or stalling.
• Wear eye protection. Do not wear gloves, necktie, or loose clothing.
• Before starting the operation, jog the motor switch to make sure the drill bit or other
cutting tool does not wobble or cause vibration.
• Keep hands away from work area. Keep hands away from the bit.
• Be sure drill bit or cutting tool is securely locked in the chuck.
• Always clamp work piece or brace against column to prevent rotation. Never use your
hand to hold the work piece while drilling.
• Make sure the pulley housing cover is down and the chuck is installed properly before
engaging the power switch.
• Keep bits clean and sharp. Sharp bits minimize stalling.
• Lock the switch off when leaving the drill press.
Recommended Minimum Wire Gauge for Extension Cords (120 Volt)
Nameplate
Amperes
(At Full Load)
Extension Cord Length
25 Feet 50 Feet 75 Feet 100 Feet 150 Feet 200 Feet
0–2.0 18 18 18 18 16 16
2.1–3.4 18 18 18 16 14 14
3.5–5.0 18 18 16 14 12 12
5.1–7.0 18 16 14 12 12 10
7.1–12.0 18 14 12 10 8 8
12.1–16.0 14 12 10 10 8 6
16.1–20.0 12 10 8 8 6 6

English
10" Drill Press
Operator’s Manual GDP1012A
6
• Before starting, be sure chuck key is removed from the chuck and the motor head and
table are locked.
• Never start the drill press when the bit or other cutting tool is in contact with the work piece.
• Adjust the table or depth stop to avoid drilling into the table.
• When using a drill press vise, always fasten the vise to the table.
• Do not operate in rain or in damp locations.
• Grounding required.
SAVE THESE INSTRUCTIONS
KNOWING YOUR 10" DRILL PRESS
1
11
9
21
10
8
4
5
18
3
6
12
2
13
FIG 1
15 141716
7
20
19
1. Pulley Housing Cover
2. Motor
3. ON/OFF Switch
4. Chuck
5. Spindle
6. Crank Handle
7. Table Support Lock Handle
8. Table
9. Table Support
10. Column
11. Column Support
12. Feed Handle
13. Tension Lock Screw
14. Motor Pulley
15. Spindle Pulley
16. Middle Pulley
17. Belt
18. Depth Scale
19. Bevel Scale
20. Feed Return Spring and Cover
21. Base

7
English
UNPACKING AND CONTENT
IMPORTANT: Due to modern mass production techniques, it is unlikely the tool is
faulty or that a part is missing. If you find anything wrong, do not operate the tool until
the parts have been replaced or the fault has been rectified. Failure to do so could result
in serious personal injury.
CONTENTS IN PACKAGE: (FIG 2)
Item Description Q'TY Item Description Q'TY
WARNING: If any parts are missing or damaged, do not attempt to assemble
the saw, plug in power cord or turn the switch on until the missing or damaged parts are
replaced.
ASSEMBLY
WARNING: Always be sure that the tool is
switched off and unplugged from the power source
before adjusting, adding accessories, or checking a
function on the tool.
ATTACHING COLUMN TO BASE (FIG 3)
1. Set the Base (D) on a level, flat surface.
2. Place the Column & Support (C) on the Base (D), align the three
holes in the column support with the holes in the base.
3. Install a set of Bolts and Washers (N) in each column support
hole and tighten with a wrench.
FIG 3
C
N
D
A
B
D
C
FIG 2
K
HO
M
E
JF
N
IL
A Head Assembly 1
B Table Assembly 1
C. Column & Support 1
D. Base 1
E. Spindle Feed Handles 3
F 5/8" Chuck 1
G. Operator's Manual (not shown) 1
H. Crank Handle 1
I. Chuck Key 1
J. Drift Key 1
K. Rack 1
L. Column Ring 1
M. Housing Cover Knob 1
N. Bolts and Washers 3 Sets
O. Allen Wrenches 2

English
10" Drill Press
Operator’s Manual GDP1012A
8
INSTALLING THE TABLE ASSEMBLY (FIG 4,5)
1. Insert the rack (K) into the geared groove of the table support
(9). Make sure the rack is engaged with the teeth of the gear.
2. Slide the table support and rack assembly down together onto
the column (C). Insert the bottom edge of the rack into the lip
of the column support (11). Hold its position.
3. Place the column ring (L) bevel side down over the rack.
Tighten the set screw (L1) with Allen wrench provided to hold
the rack in position.
NOTE: Make sure there is enough clearance to allow the
table to rotate around the column. The ring should sit loosely
over the rack.
4. Insert the table support crank handle (H) into the worm shaft
(B2). Make sure the set screw is aligned to the flat of the shaft
and as close to the table support as possible. Tighten the set
screw.
5. Position the table in the same direction as the base. Tighten
the table support lock handle (7).
INSTALLING HEAD ASSEMBLY, FEED
HANDLES AND CHUCK (FIG 6, 7)
1. With the aid of a second personnal, carefully lift the head
assembly (A) onto the column top.
NOTE: The head assembly is heavy! Use care when lifting
onto the column.
2. Rotate head assembly until sides of the pulley housing cover
are parallel with sides of the base.
3. Tighten two set screws (A3) with a Allen wrench until they
are snug.
4. Install three down feed handles (E) into the handle hub (A4).
5. Raise the table to approximately 7 inches below spindle
assembly, and lock the table in place.
6. Place a piece of scrap wood on the table. (See FIG 7)
7. Thoroughly clean spindle, arbor and chuck (F).
8. Twist the chuck to retract the chuck jaws if they are exposed.
9. Install the chuck (F) onto the arbor.
10. Lower the down feed handle so that the chuck meets the scrap
wood. Put pressure on the down feed handle to seat the arbor
and chuck into the spindle.
FIG 5
C
L
L1
7
H11
FIG 4
B
C
K
9
B2
FIG 6
A3
E
A4
A
FIG 7
ARBOR
F

9
English
REMOVING THE CHUCK AND ARBOR
(FIG 8)
1. Unplug the machine from the power source.
2. Raise the table until it is about 7 inches below the chuck.
3. Lower quill by using the down feed handles.
4. Rotate spindle to align the key hole in the spindle with the key
hole in the quill.
5. Insert the drift key (J) into the aligned slots and tap lightly. The
chuck and arbor assembly should fall from the spindle.
ADJUSTMENTS
WARNING: Always be sure that the tool is
switched off and unplugged from the power source
before adjusting, adding accessories, or checking a
function on the tool
.
ADJUSTING SPEEDS AND BELT TENSION
(FIG 9, 10)
1. Unplug the machine from the power source.
2. Open the drill press pulley cover (1).
3. Loosen the belt tension knobs (13) on the each side of the drill
press head assembly.
4. Pull the motor (2) as close to the column (C) as possible.
5. Change the belt locations according the speed chart (FIG 10)
and speed you desire.
6. Push the motor away from the column (C) to tension the belts.
7. The belt (17) should be tight enough to prevent slippage. Correct
tension is set if the belt flexes about 1/2" when thumb pressure
is applied at the midpoint of the belt between the pulleys.
8. Tighten the belt tension knobs (13).
ADJUSTING TABLE HEIGHT (FIG 11)
1. Loosen the table support lock handle (7).
2. Turn the crank handle (6) to raise or lower the table to the
desired height.
3. Tighten the lock handle (7) before drilling.
ROTATING THE TABLE ASSEMBLY
AROUND THE COLUMN (FIG 11)
1. Loosen the table support lock handle (7).
2. Rotate the table assembly (8) around the column to the
desired position.
3. Tighten the lock handle (7) before drilling.
ADJUSTING TABLE BEVEL (FIG 11,12)
The table can be tilted 0° to 45° to the left and right.
1. Loosen the bevel lock bolt (B4) with a wrench.
2. Tilt the table (8) to the desired angle, using the bevel scale (19)
as a basic guide.
3. Re-tighten the bevel lock bolt (B4).
4. To return the table to its original position, loosen the bevel lock
bolt. Realign the bevel scale (19) to the 0° setting.
5. Tighten the bevel lock bolt (B4) with the wrench.
FIG 10
FIG 8
J
FIG 9
1
2
13
1
C
17
FIG 11
7
6
19
8
FIG 12
B4
8

English
10" Drill Press
Operator’s Manual GDP1012A
10
SETTING DRILL DEPTH (FIG 13)
The drill depth scale (18) is located on the hub (A4). See FIG 13. The
scale pointer (A5) indicates the spindle travel distance.
To stop the drill at a specific depth for consistent and repetitive
drilling:
1. Loosen the depth scale lock (A6)
2. Rotate the scale hub (A4) until pointer (A5) is aligned to the
desired depth on the scale.
3. Tighten the depth scale lock (A6). The chuck will stop after
traveling downward to the distance selected.
ADJUSTING RETURN SPRING (FIG 14)
The return spring is adjusted at the factory and should not need
further adjustment. If adjustment is deemed necessary:
1. Unplug the machine from the power source.
2. Loose the two jam nuts (A7). Do not remove.
3. Firmly hold the coil spring cover (A8). Pull out the cover and
rotate until the pin (A9) on the return spring plate engages the
next notch in the cover. Turn the cover clockwise to decrease
tension and counterclockwise to increase tension.
4. Tighten two jam nuts. Do not over-tighten. The jam nuts should
be tightened against each other.
SQUARING THE TABLE TO THE HEAD
(FIG 15)
1. Install a 3" long drill bit into the chuck (4) and tighten.
2. Raise and lock the table (8) about 1" from the end of the drill bit.
3. Place a combination square on the table as shown. The drill bit
should be parallel to the straight edge of the square.
4. If an adjustment is needed, loosen the bevel lock bolt
(B4-FIG 12 ) with a wrench.
5. Square the table to the bit by tilting the table.
6. Tighten the bevel lock bolt (B4-FIG 12) when square.
OPERATION
ON/OFF SWITCH (FIG 16)
1. To turn the tool ON, move the switch (3) to the"ON" position.
2. To turn the tool OFF, move the switch (3) to the "OFF" position.
3. To lock the switch in the OFF position, remove the yellow safety
key from the switch. Store the key in a safe place.
INSTALLING OR REMOVING BITS
WARNING: To reduce the risk of injury, only
use the chuck key provided with this drill press or a
duplicate of it. This chuck key is self-ejecting and will
“pop” out of the chuck when you let go. This action is
designed to help prevent throwing of the chuck key
from the chuck when power is turned “ON”. Do not
use any other key as a substitute; order a new one if
damaged or lost.
FIG 16
3
SAFETY
KEY
FIG 15
8
4
FIG 14
A9
A8
A7
FIG 13
A6
A5
18
A4

11
English
To install a drill bit (FIG 17)
1. Unplug the drill press.
2. Place the chuck key (I) into the side keyhole of the chuck (4),
meshing the gear teeth.
3. Turn the chuck key counterclockwise to open the chuck jaws.
4. Insert a drill bit into the chuck far enough to obtain maximum
gripping of the chuck jaws.
5. Center the drill bit in the chuck jaws before final tightening of
the chuck.
6. Use the chuck key for the final tightening to make sure the drill
bit will not slip while drilling.
To remove the bit, reverse the steps listed above.
WARNING: Make sure the chuck key is removed from the chuck before starting
any drilling operation.
APPLICATION
You may use this drill press for the following applications:
1. Drilling in wood.
2. Drilling in ceramics, plastics, fiberglass, and laminates.
3. Drilling in metals.
WARNING: Read and understand the following items about your drill press
before attempting to use it.
POSITION THE TABLE AND WORK PIECE
Always place a piece of backup material (wood, plywood, etc.) on the table underneath the work piece This will
prevent splintering on the underside of the work piece as the drill bit breaks through. To keep the material from
spinning out of control, it must contact the left side of the column, and be clamped to the table.
For small work pieces that cannot be clamped to the table, use a drill press vise (not included). The vise must be
clamped or bolted on the table.
WARNING: Always make sure the work piece is not in contact with the bit
before operating the switch to start the tool. Failure to heed this warning may cause the
work piece to be kicked back toward the operator and result in serious personal injury.
WARNING: Make sure the chuck key is removed from the chuck before starting
any drilling operation.
WARNING: Always make sure the work piece is secured to the table by clamps
or other clamping devices.
GENERAL DRILLING INSTRUCTIONS
1. Using a clamping device, secure the work piece to the worktable. If drilling a through hole, place a piece of
backup material (wood, plywood, etc.) on the table underneath the work piece to prevent splintering on the
underside of the work piece. To protect the top surface of the work piece, use a piece of scrap wood between
the vise and the work piece.
2 Select the proper drill bit based on the hole size desired. For large holes, drill a pilot hole first, using a smaller
size bit.
3 Select and set the recommended spindle speed.
4. Set table assembly to desired height.
5. If desired, set feed shaft at desired spindle depth. Refer to "Set Drill Depth" section.
6. Make sure the work table is free of all loose objects and the bit is not in contact with the work piece.
7. Plug in power supply and turn switch ON. Make sure spindle rotates freely.
8. Slowly lower drill bit into work piece. Do not force the bit; let the drill press do the work.
9. Once the hole is completed, allow the spindle to return to its normal position.
FIG 17
4
I

English
10" Drill Press
Operator’s Manual GDP1012A
12
WARNING: Make sure the chuck key is removed from the chuck before starting
any drilling operation.
DRILLING TIPS
1. If a large hole is needed, it’s a good idea to drill a smaller pilot hole before drilling the final one. Your hole will be
more accurately positioned, rounder, and the bits will last longer.
2. If the hole is deeper than it is wide, back off occasionally to clear the chips.
3. When drilling metal, lubricate the bit with oil to improve drilling action and increase bit life.
4. Smaller drill bits require greater speed than large drill bits. Softer materials require greater speed than harder
materials.
5. If drilling a through hole, make sure place a piece of backup material (wood, plywood, etc.) on the table underneath
the work piece to prevent splintering on the underside of the work piece.
MAINTENANCE
CLEANING
Avoid using solvents when cleaning plastic parts. Most plastics are susceptible to damage from various types of
commercial solvents and may be damaged by their use. Use clean cloths to remove dirt, dust, oil, grease, etc.
WARNING: Do not at any time let brake fluids, gasoline, petroleum-based
products, penetrating oils, etc, come in contact with plastic parts. Chemicals can damage,
weaken or destroy plastic which may result in serious personal injury.
Electric tools used on fiberglass material, wallboard, spackling compounds, or plaster are subject to accelerated
wear and possible premature failure because the fiberglass chips and groundings are highly abrasive to bearings,
brushes, commutators, etc. Consequently, we do not recommend using this tool for extended work on these types
of materials. However, if you do work with any of these materials, it is extremely important to clean the tool using
compressed air.
LUBRICATION
1. Lower spindle to maximum depth and oil moderately once every three months.
2. Oil the column lightly every two months.

13
English
TWO-YEAR WARRANTY
This product is warranted free from defects in material and workmanship for 2 years after date of
purchase. This limited warranty does not cover normal wear and tear or damage from neglect or
accident. The original purchaser is covered by this warranty and it is not transferable. Prior to returning
your tool to store location of purchase, please call our Toll-Free Help Line for possible solutions.
ACCESSORIES INCLUDED IN THIS KIT ARE NOT COVERED BY THE 2 YEAR WARRANTY.
TOLL-FREE HELP LINE
For questions about this or any other GENESIS Product, please call Toll-Free: 888-552-8665.
Or visit our web site: www.genesispowertools.com
©Richpower Industries, Inc. All Rights reserved
Richpower Industries, Inc.
736 Hampton Road
Williamston, SC 29697
Printed in China, on recycled paper

Français
Perceuse à colonne de 10 po.
Manuel d’utilisation GDP1012A
14
Perceuse à colonne de 10 po.
Manuel d’utilisation GDP1012A
PERCEUSE À COLONNE DE 10 PO., 12 VITESSES 3.85A
Manuel d’utilisation
SPÉCIFICATIONS
• Modèle:------------------------------------------ GDP1012A
• Tension nominale:-------------------------------- 120V~ 60HZ
• Puissance d'entrée nominale : --------------------3,85 A
• Vitesse de rotation sans charge:------------------ 12 vitesses de 300-2900 RPM
• Capacité maximum de perçage:------------------ 16 mm (5/8 po.)
• Déplacement de l'axe: --------------------------- 80 mm (2-3/8 po.)
• Pivotement: -------------------------------------- 254 mm (10 po.)
• Mouvements de la table: ------------------------ 45° à la vertical; 360° à l’horizontale
• Dimensions de la table: -------------------------- 200 mm x 200 mm (7-5/8 po. x 7-5/8 po.)
• Dimensions de la base:--------------------------- 355 mm x 235 mm (14 po. x 9-1/4 po.)
• Distance maximum entre l'extrémité de l'axe et la surface de la table: -----290 mm (11-3/8 po.)
• Distance maximum entre l'extrémité de l'axe et la surface de la base:------414 mm (16-1/4 po.)
• Distance maximum entre l'extrémité de l'axe et la surface de la colonne: --127mm (5 po.)
• Poids net : --------------------------------------------------------------------25 kgs
Inclut: clé du mandarin, clé allen et clé coin
AVERTISSEMENT: Pour réduire le risque de blessure, l’utilisateur doit lire
et assimiler ce manuel d’utilisation avant de se servir de l’outil. Conservez ce manuel
comme référence ultérieure.
Numéro d’aide sans frais: 1-888-552-8665.
AVERTISSEMENT: L’utilisation de tout outil électrique peut
causer la projection d’objets étrangers dans vos yeux, pouvant entraîner de sérieux
dommages. Avant de commencer à vous servir de l’outil, portez toujours des lunettes
de sécurité ou avec des écrans latéraux de protection, et une protection faciale
complète si nécessaire. Nous recommandons le port d’un masque à vision large par
dessus les lunettes. Portez toujours une protection oculaire qui est marquée comme
en conformité avec ANSI Z87.1.
Repérez ce symbole qui signale d’importantes précautions de
sécurité. Cela veut dire faites attention ! Votre sécurité est en jeu.
RÈGLES GÉNÉRALES DE SÉCURITÉ
AVERTISSEMENT: Certaines poussières produites par des appareils
électriques de ponçage, sciage, meulage, perçage et autres travaux de construction
contiennent des produits chimiques connus pour causer cancer, anomalies congénitales
et autres atteintes à la reproduction. Voici quelques exemples de ces produits nocifs :
• Plomb des peintures au plomb,
• Silice cristalline des briques et du béton et d’autres matériaux de construction,
• Arsenic et chrome de bois d’œuvre traité chimiquement.
Votre risque en cas d’exposition varie, selon la fréquence d’exécution de ce type de tâches. Pour réduire votre
exposition à ces produits : travaillez dans une zone bien ventilée en portant un équipement de sécurité approuvé,
tel que masque à poussières spécialement conçu pour filtrer les particules microscopiques.
PORTEZ VOS LUNETTES DE
PRÉVOIR EST MIEUX
QUE NE PLUS VOIR
SÉCURITÉ

Perceuse à colonne de 10 po.
Manuel d’utilisation GDP1012A
Perceuse à colonne de 10 po.
Manuel d’utilisation GDP1012A 15
Français
AVERTISSEMENT: Lisez et assimilez tous les avertissements, mises en
garde et instructions d’utilisation avant de vous servir de cet équipement. Sinon vous
risquez commotion électrique, début d’incendie et/ou blessures corporelles.
CONSERVEZ CES INSTRUCTIONS
LIEU DE TRAVAIL:
• Gardez propre la zone de travail. Les zones et établis en désordre attirent les accidents.
• Ne pas utiliser d’outils électriques dans des atmosphères explosives, par
exemple en présence de liquidés, gaz ou poussières inflammables. Les outils électriques produisent des
étincelles risquant d’enflammer les poussières ou vapeurs.
• Garder les badauds, enfants et visiteurs à l’écart pendant l’utilisation d’un
outil électrique. Les distractions peuvent causer une perdre le contrôle.
SÉCURITÉ ÉLECTRIQUE
• La puissance des bouchons outil doit correspondre à la prise électrique. Ne jamais
modifier la prise en aucune façon. Ne pas utiliser d'adaptateur de bouchons dans toute la terre (la terre) les
outils électriques. Les outils à double isolation sont équipés d’une fiche polarisée (une broche est plus large
que l’autre).. Cette fiche ne peut être branchée sur une prise polarisée que dans un seul sens. Si la fiche ne
peut pas être insérée dans la prise, l’inverser. Si vous ne pouvez toujours pas être l’insérer, faire installer une
prise polarisée par un électricien qualifié. Ne pas modifier la fiche, de quelque façon que ce soit. La double
isolation élimine le besoin de cordon d’alimentation à trois fils et d’un circuit secteur mis à la terre.
• NE PAS exposer les outils électriques à la pluie ou l’humidité. La pénétration
d’eau dans ces outils accroît le risque de choc électrique.
• Éviter tout contact du corps avec des surfaces mises à la terre, telles que tuyaux,
radiateurs, cuisinières et réfrigérateurs. Le risqué de choc électrique est accru lorsque le corps est mis à la
terre.
• NE PAS maltraiter le cordon d’alimentation. Ne jamais utiliser le cordon d’alimentation
pour transporter l’outil et ne jamais débrancher ce dernier en tirant sur le cordon. Garder le cordon à l’écart
de la chaleur, de l’huile, des objets tranchants et des pièces en mouvement. Remplacer immédiatement tout
cordon endommagé. Un cordon endommagé accroît le risque d’électrocution.
• Lorsque l'exploitation d'un pouvoir en dehors des outils, l'utilisation d'une rallonge
électrique pour une utilisation extérieure. Ces cordons sont prévus pour une utilisation à l'extérieur et de
réduire le risque de choc électrique.
• NE PAS utiliser l'AC notées les outils d'une alimentation en courant continu.
Même si l'outil semble fonctionner, les composants électriques de l'AC notées outil sont susceptibles
d'échouer et d'accroître le risque pour l'opérateur.
SÉCURITÉ PERSONNELLE
• Rester attentif, prêter attention au travail et faire prévue de bon sens lors
de l’utilisation de tout outil électrique. Ne pas utiliser cet outil en état de fatigue ou sous
l’influence de l’alcool, de drogues ou de médicaments. Un moment d’inattention pendant l’utilisation d’un outil
électrique peut entraîner des blessures graves.
• Utiliser l’équipement de sécurité. Toujours porter une protection oculaire.
Suivant les conditions, le port d’un masque filtrant, de chaussures de sécurité, d’un casque ou d’une
protection auditive est recommandé.
• Portez une tenue appropriée. Ne portez pas de vêtements flottants, gants, cravate, bracelets,
montre de poignet ou autres bijoux qui peuvent être happés par des pièces en mouvement. Le port de
chaussures antidérapantes est recommandé, ainsi que le port d’une couverture des cheveux s’ils sont longs..
• Évitez d'un démarrage accidentel. S'assurer que le commutateur est en position arrêt avant
de brancher po. De transport outil avec le doigt sur l'interrupteur ou de brancher des outils électriques qui
sont le commutateur invite accidents.
• Enlevez les clés et outils de réglage avant de mettre en marche. Les clés,
clavettes, déchets et autres débris peuvent être projetés à grande vitesse, et ainsi causer des graves
blessures.

Français
Perceuse à colonne de 10 po.
Manuel d’utilisation GDP1012A
16
Perceuse à colonne de 10 po.
Manuel d’utilisation GDP1012A
• NE travaillez pas à bout de bras. Gardez une bonne posture et un bon équilibre en permanence,
un déséquilibre peut amener votre chute sur la machine en action, avec possibilité de blessure.
• SI dispositifs sont prévus pour la connexion d'extraction des poussières
et des installations de collecte, d'assurer ceux-ci sont connectés et utilisés correctement.
L'utilisation de ces appareils peut réduire les risques liés à la poussière. Ne pas utiliser l’outil sur une échelle
ou un support instable. Une bonne tenue et un bon équilibre permettent de mieux contrôler l’outil en cas de
situation imprévue.
• Maintenez l’outil sec, propre et sans huile ou graisse. Utilisez toujours un chiffon propre
pour le nettoyage. N’utilisez jamais de fluide pour freins, d’essence, de produits à base de pétrole, ni n’importe
quel type de solvant pour nettoyer l’outil.
UTILISATION ET ENTRETIEN DE L’OUTIL
• Sécurisation de la pièce à travailler. Utilisez des serre-joints ou un étau pour maintenir la pièce
travaillée quand c’est possible. C’est plus sûr que de se servir de sa ou ses mains et permet de garder ses
deux mains libres pour actionner l’outil. La perte de contrôle de la pièce travaillée peut entraîner des blessures
corporelles.
• NE forcez pas sur l’outil. L’outil effectuera la tâche de façon meilleure et plus sûre à la vitesse de
pénétration pour laquelle il a été conçu. Forcer sur l’outil peut éventuellement endommager la machine et
entraîner des blessures.
• Utilisez le bon outil pour la tâche. Ne forcez pas sur l’outil ou accessoire pour exécuter une tâche
pour laquelle il n’a pas été conçu. N’utilisez pas l’outil pour une finalité non prévue car vous risquez des dégâts
matériels et/ou des blessures corporelles.
• N’utilisez pas l’outil si son interrupteur de marche/arrêt fonctionne mal. Faites
immédiatement remplacer les interrupteurs défectueux par un centre de réparations agréé.
• Débrancher l’outil avant d’effectuer des réglages, de changer d’accessoire ou de ranger
l’outil. Ces mesures de sécurité réduisent les risques de démarrage accidentel de l’outil.
• Ranger les outils non utilisés hors de portée des enfant set des personnes
n’ayant pas reçu de formation adéquate. Entre les mains de personnes n’ayant pas reçu de
formation adéquate, les outils sont dangereux.
• Entretenir soigneusement les outils. Vérifier qu’aucune pièce mobile n’est mal alignée, grippée
ou brisée et s’assurer qu’aucun autre problème ne risqué d’affecter le bon fonctionnement de l’outil. En cas de
dommages, faire réparer l’outil avant de l’utiliser de nouveau. De nombreux d’accidents sont causés par des
outils mal entretenir.
• N’utilisez que des accessoires recommandés. L’utilisation d’accessoires et équipements
annexes non recommandés parle constructeur ou non prévus pour être utilisés sur ce type d’outil peut causer
des dégâts matériels et/ou des blessures corporelles pour l’utilisateur. Consultez le manuel d’utilisation pour
connaître les accessories recommandés.
• Maintenir des outils de coupe nette et propre. Bien entretenu avec des outils de coupe de
pointe sont moins susceptibles de lier et sont plus faciles à contrôler.
• Poussez la pièce à travailler dans la bonne direction à la bonne vitesse.
N’envoyez la pièce vers la lame le couteau ou la surface abrasive, selon la machine, que en sens opposé à la
rotation de l’outil de coupe. Une mauvaise présentation de la pièce dans le même sens que la rotation de l’outil
de coupe fait que la pièce est projetée à grande vitesse.
• NE jamais laisser l'outil en marche sans surveillance. Éteignez l'appareil. Ne laissez pas
l'outil jusqu'à ce qu'il arrive à un arrêt complet.
• NE démarrez jamais un outil quand un composant rotatif est déjà en contact
avec la pièce travail lée.

Perceuse à colonne de 10 po.
Manuel d’utilisation GDP1012A
Perceuse à colonne de 10 po.
Manuel d’utilisation GDP1012A 17
Français
AVERTISSEMENT: L’UTILISATION DE CET OUTIL PEUT GÉNÉRER ET
BRASSER DE LA POUSSIÈRE ET D’AUTRES PARTICULES EN SUSPENSION DANS L’AIR,
COMME SCIURE, SILICE CRISTALLINE ET AMIANTE. Dirigez le flot de particules hors
de votre visage et de votre corps. Faites toujours fonctionner l’outil dans une zone bien
ventilée, et veillez à une bonne évacuation de la poussière. Utilisez un système de collecte
de poussières dans la mesure du possible. L’exposition aux poussières peut causer des
troubles respiratoires ou autres sérieux et permanents, incluant la silicose (une sérieuse
affection des poumons), le cancer et la mort. Évitez de respirer la poussière et évitez un
contact prolongé avec elle. Si vous laissez entrer la poussière dans votre bouche ou vos
yeux, ou se déposer sur votre peau, vous risquez de provoquer l’absorption de matières
dangereuses. Portez toujours une protection respiratoire approuvée NIOSH/OSHA bien
ajustée convenant à la protection contre les poussières, et lavez les surfaces de peau
exposées à l’eau et au savon.
SERVICE
• Demandez à votre outil électrique à être desservie par une personne
qualifiée en utilisant uniquement des pièces identiques. Cela permettra de s'assurer que la sécurité
de l'outil électrique est maintenue.
• L'entretien de votre outil électrique périodiquement. Lors du nettoyage d'un outil, faire
attention à ne pas démonter une partie de l'outil en raison de câbles électriques peuvent être égarés ou pincé.
CONSERVEZ CES INSTRUCTIONS
CORDONS RALLONGES
Les outils mis à la terre nécessitent un cordon rallonge à trois fils. Les outils à
double isolation peuvent utiliser des cordons rallonge indifféremment à deux ou trois conducteurs. Plus augmente
la distance depuis la prise d’alimentation, plus le calibre de la rallonge devra être important. L’utilisation de
cordons rallonges avec des fils mal calibrés peut provoquer une importante chute de tension d’entrée, d’où une
perte de puissance et de possibles dommages pour l’outil. Reportez-vous au tableau pour déterminer la taille
minimum requise pour les fils.
Plus le numéro de calibre de fil est faible, plus importante est la capacité en courant du cordon. Par exemple
un calibre 14 peut transporter un courant plus fort qu’un fil de calibre 16. Quand vous utilisez plus d’un cordon
d’extension pour obtenir la longueur totale, assurez-vous que chacun contient au moins le calibre minimum de fils
requis. Si vous utilisez un câble d’extension pour alimenter plus d’un outil, ajoutez les ampérages de leurs plaques
signalétiques et utilisez cette somme pour déterminer le calibre minimum des fils.
Conseils d’utilisation de cordons rallonges
•
Si vous utilisez un cordon rallonge à l’extérieur, assurez-vous qu’il est marqué du suffixe « W-A» (W seulement
au Canada), qui indique qu’il convient bien à une utilisation à l’extérieur.
• Assurez-vous que votre cordon rallonge est correctement câblé et en bonne condition électrique. Remplacez
toujours un cordon rallonge endommagé ou faites-le réparer par une personne qualifiée avant de l’utiliser.
• Protégez vos cordons rallonges des angles et objets tranchants, de la chaleur excessive, et des zones humides
ou mouillées.
Calibre de fil minimum recommandé pour cordons de rallonge (en 120 Volts)
Ampérage
nominal
(à pleine
charge)
Longueur du cordon de rallonge
7.6 m
25 Feet
15.2 m
50 Feet
22.9 m
75 Feet
30.5 m
100 Feet
45.7 m
150 Feet
61.0 m
200 Feet
0–2.0 18 18 18 18 16 16
2.1–3.4 18 18 18 16 14 14
3.5–5.0 18 18 16 14 12 12
5.1–7.0 18 16 14 12 12 10
7.1–12.0 18 14 12 10 8 8
12.1–16.0 14 12 10 10 8 6
16.1–20.0 12 10 8 8 6 6

Français
Perceuse à colonne de 10 po.
Manuel d’utilisation GDP1012A
18
Perceuse à colonne de 10 po.
Manuel d’utilisation GDP1012A
RÈGLES DE SÉCURITÉ SPÉCIFIQUES POUR PERCEUSES À
COLONNE
AVERTISSEMENT: NE laissez PAS une fausse sécurité s’installer provoquée
per confort et familiarité avec le produit (suite à des utilisations répétées) remplacer la
stricte application des règles de sécurité pour la scie à onglets. Si vous utilisez cet outil
dangereusement et incorrectement, vous pouvez subir de sérieuses blessures.
• Assurez-vous que la perceuse à colonne est sur une surface ferme et
de niveau, et qu’elle est correctement assujettie pour éviter tout risque de blessure à la suite d’un
mouvement inattendu est éviter qu’elle ne se balance. Boulonnez ou fixez à l’aide de serre-joint la perceuse à
colonne sur une surface de support pour empêcher tout glissement ou dérapage pendant l’opération.
• Débranchez la perceuse à colonne avant de procéder à des changements,réglages, les
réparations, l'entretien ou l'entreposage.
• Arrêtez toujours la perceuse à colonne avant de la débrancher afin d’éviter un démarrage
accidentel lors du rebranchement de la perceuse à colonne.
• Utiliser la vitesse recommandée pour l’accessoire de perceuse et le
matériau.
• Attendez que le moteur atteigne sa vitesse maximale avant de percer pour
évitez coincement ou calage.
• Portez une protection oculaire. Ne pas porter des gants, cravate, ou des
vêtements amples.
• Avant de commencer l’opération, actionnez l’interrupteur du moteur pour
vous assurer que la mèche de la perceuse ou un autre outil de coupe ne tremble pas ou de ne cause
pas de vibrations.
• Garder les mains à l’écart de la zone de travail. Garder les mains à l’écart
du foret
• S’assurer que le foret ou l’accessoire utilisé est solidement maintenu dans
le mandrin.
• Toujours bloquer la pièce à percer ou la caler contre la colonne, pour
empêcher la rotation. Ne jamais utiliser les mains pour tenir une pièce pendant le perçage.
• S’assurer que le carter de la courroie est abaissé et que le mandrin est correctement
installé avant de mettre le commutateur en position de marche.
• Garder les forets propres et bien affûtés. Des forets bien affûtés réduisent le risque de
blocage.
• Verrouiller le commutateur du moteur avant de quitter la perceuse à
colonne.
• S’assurer que la clé de serrage du mandrin est retirée avant de brancher la
perceuse ou de la mettre en marche.
• Ne mettez jamais la perceuse à colonne en MARCHE lorsque le bit ou un autre outil
de coupe est en contact avec la pièce.
• Régler la table ou la butée de profondeur pour éviter de percer dans la
table.
• Lorsque vous utilisez un étau pour perceuse à colonne, attachez le toujours
à la table.

Perceuse à colonne de 10 po.
Manuel d’utilisation GDP1012A
Perceuse à colonne de 10 po.
Manuel d’utilisation GDP1012A 19
Français
• N’utilisez pas la scie avec la porte couvercle ouvert.
• N’exposez pas à la pluie et n’utilisez pas dans des endroits humides.
• Mise à la terre requise.
CONSERVEZ CES INSTRUCTIONS
VOTRE PERCEUSE À COLONNE DE 10 PO.
1
11
9
21
10
8
4
5
18
3
6
12
2
13
FIG 1
15 141716
7
20
19
1. Cache du logement des poulies
2. Moteur
3. Interrupteur Marche/Arrêt
4. Mandrin
5. Arbre creux
6. Poignée de manivelle
7. Poignée de verrouillage du table
8. Table
9. Support de la table
10. Colonne
11. Support de la colonne
12. Poignées d’alimentation
13. Bouton de tension de la
courroie
14. Poulie du moteur
15. Poulie de la broche
16. Poulie milieu
17. Courroie
18. Échelle des profondeurs
19. Échelle des angles
20. Ressort de rappel
d’alimentation et cache
21. Base

Français
Perceuse à colonne de 10 po.
Manuel d’utilisation GDP1012A
20
Perceuse à colonne de 10 po.
Manuel d’utilisation GDP1012A
OUVERTURE DE L`EMBALLAGE ET CONTENU
IMPORTANT: Grâce à des techniques modernes de production de masse, il est peu
probable que l'outil est défectueux ou qu'une pièce est manquante. Si vous trouvez
quelque chose de mal, ne pas faire fonctionner l'outil jusqu'à ce que les parties ont été
remplacés ou la faute a été corrigée. Le fait de ne pas le faire pourrait entraîner des
blessures graves.
CONTENU DE CARTON DE PIÈCES EN VRAC: (FIG 2)
Item Description Quan Item Description Quan
AVERTISSEMENT: Si des pièces sont manquantes ou endommagées,
n'essayez pas d'assembler la scie, branchez le cordon d'alimentation ou mettez le
contacteur sur marche jusqu'à ce que les pièces absentes ou endommagées soient
remplacées.
ASSEMBLAGE
AVERTISSEMENT:oujours du lieu de
la interrupteur éteint dans la position verrouillée
et débranché de la source d'alimentation avant
d'effectuer tout le montage, de réglages ou de
changer d'accessoires.
FIXATION DE LA COLONNE À LA BASE
(FIG 3)
1. Placez la base (D) sur le niveau, plancher surface.
2. Mettez la colonne (C) sur la base (D), et alignez les trois
trous de support de la colonne avec les trous dans la
base.
A
B
D
C
FIG 2
K
HO
M
E
JF
N
IL
FIG 3
C
N
D
A Ensemble de tête 1
B Ensemble de table 1
C. Colonne et Support 1
D. Base 1
E. Poignées d’alimentation 3
F Mandrin 16 mm 1
G. Manuel de l’opérateur (Non illustré) 1
H. Poignée de manivelle 1
I. Clé du mandrin 1
J. Clé coin 1
K. Crémaillère 1
L. Collier de la colonne 1
M. Bouton pour le couvercle 1
N. Boulons et rondelles 3 Sets
O. Clés Allen 2
Table of contents
Languages:
Other Genesis Power Tools manuals

Genesis
Genesis GMT15A User manual

Genesis
Genesis GLSI08B User manual

Genesis
Genesis GRT2103-40 User manual

Genesis
Genesis GES40 User manual

Genesis
Genesis GHG350 User manual

Genesis
Genesis nG1 User manual

Genesis
Genesis VS GMT16V User manual

Genesis
Genesis GMT25T User manual

Genesis
Genesis GLVC08B User manual

Genesis
Genesis GLSS08B User manual

Genesis
Genesis GJS450 User manual

Genesis
Genesis GJS500 User manual

Genesis
Genesis GLRT08B-65 User manual

Genesis
Genesis GDP805P User manual

Genesis
Genesis GHD1260 User manual

Genesis
Genesis GMT35T User manual

Genesis
Genesis GDP1005A User manual

Genesis
Genesis GLMT12 User manual

Genesis
Genesis GDP500 User manual

Genesis
Genesis GLRT04V50 User manual