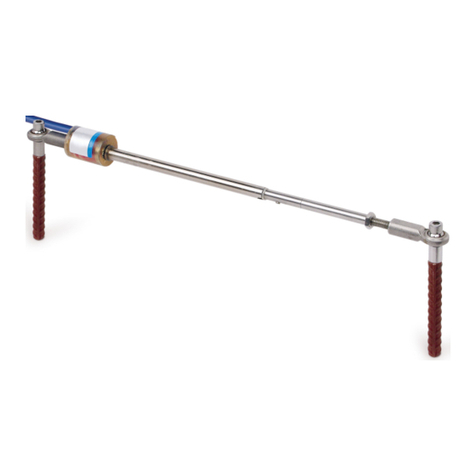
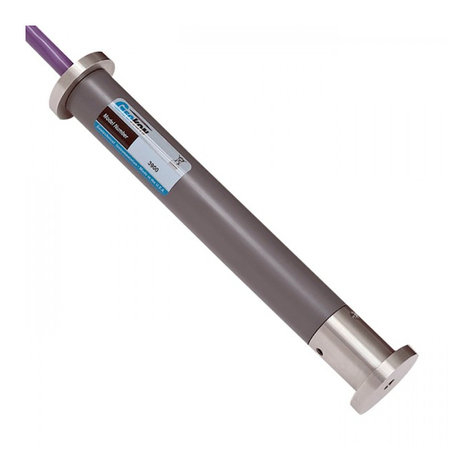
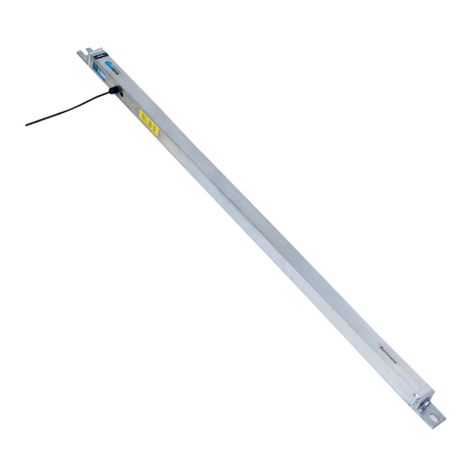
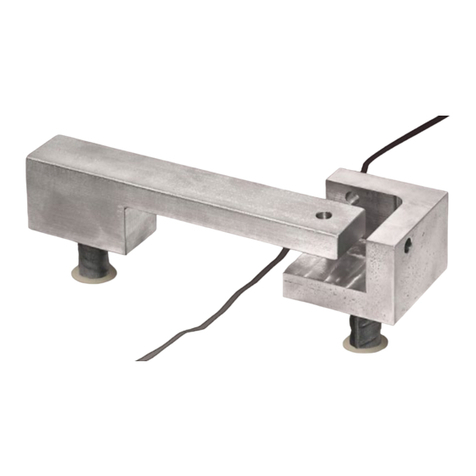
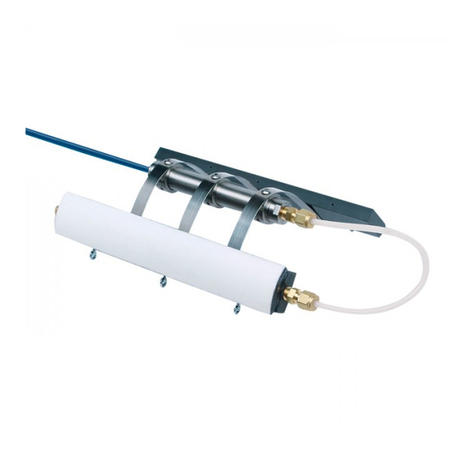
Geokon 4427 User manual

Instruction Manual
Model 4427
VW Long Range Displacement Meter
No part of this instruction manual may be reproduced, by any means, without the written consent of Geokon®.
The information contained herein is believed to be accurate and reliable. However, Geokon®assumes no responsibility for errors,
omissions or misinterpretation. The information herein is subject to change without notification.
Copyright © 2003-2019 by Geokon®
(Doc Rev L, 05/31/19)


Warranty Statement
Geokon warrants its products to be free of defects in materials and workmanship, under normal
use and service for a period of 13 months from date of purchase. If the unit should malfunction,
it must be returned to the factory for evaluation, freight prepaid. Upon examination by Geokon,
if the unit is found to be defective, it will be repaired or replaced at no charge. However, the
WARRANTY is VOID if the unit shows evidence of having been tampered with or shows
evidence of being damaged as a result of excessive corrosion or current, heat, moisture or
vibration, improper specification, misapplication, misuse or other operating conditions outside of
Geokon's control. Components which wear or which are damaged by misuse are not warranted.
This includes fuses and batteries.
Geokon manufactures scientific instruments whose misuse is potentially dangerous. The
instruments are intended to be installed and used only by qualified personnel. There are no
warranties except as stated herein. There are no other warranties, expressed or implied, including
but not limited to the implied warranties of merchantability and of fitness for a particular
purpose. Geokon is not responsible for any damages or losses caused to other equipment,
whether direct, indirect, incidental, special or consequential which the purchaser may experience
as a result of the installation or use of the product. The buyer's sole remedy for any breach of this
agreement by Geokon or any breach of any warranty by Geokon shall not exceed the purchase
price paid by the purchaser to Geokon for the unit or units, or equipment directly affected by
such breach. Under no circumstances will Geokon reimburse the claimant for loss incurred in
removing and/or reinstalling equipment.
Every precaution for accuracy has been taken in the preparation of manuals and/or software,
however, Geokon neither assumes responsibility for any omissions or errors that may appear nor
assumes liability for any damages or losses that result from the use of the products in accordance
with the information contained in the manual or software.


TABLE of CONTENTS
1. INTRODUCTION ...................................................................................................................................................1
2. SYSTEM COMPONENTS .....................................................................................................................................2
3. INSTALLATION ....................................................................................................................................................3
3.1 PIPE MOUNTED ...................................................................................................................................................3
3.2 PEDESTAL MOUNTED..........................................................................................................................................3
3.3 INSTALLING THE WEAK LINK AND EXTENSION CABLE ....................................................................................4
3.4 CABLE INSTALLATION ........................................................................................................................................4
3.5 ELECTRICAL NOISE ............................................................................................................................................5
3.6 LIGHTNING PROTECTION ...................................................................................................................................5
4. TAKING READINGS.............................................................................................................................................7
4.1 GK-404 READOUT BOX ......................................................................................................................................7
4.2 GK-405 READOUT BOX ......................................................................................................................................8
4.2.1 Connecting Sensors with 10-pin Bulkhead Connectors Attached.................................................................8
4.2.2 Sensors with Bare Leads...............................................................................................................................8
4.2.3 Operating the GK-405 ..................................................................................................................................8
4.3 GK-403 READOUT BOX (OBSOLETE MODEL) ...................................................................................................9
4.3.1 Connecting Sensors with 10-pin Bulkhead Connectors Attached.................................................................9
4.3.2 Connecting Sensors with Bare Leads ...........................................................................................................9
4.3.3 Operating the GK-403 ..................................................................................................................................9
4.4 MEASURING TEMPERATURES.............................................................................................................................9
5. DATA REDUCTION ............................................................................................................................................10
5.1 DISPLACEMENT CALCULATION........................................................................................................................10
5.2 TEMPERATURE CORRECTION...........................................................................................................................10
5.2.1 The Transducer Alone ................................................................................................................................10
5.2.2 The Extension Cable...................................................................................................................................11
5.3 ENVIRONMENTAL FACTORS .............................................................................................................................12
6. TROUBLESHOOTING........................................................................................................................................13
APPENDIX A. SPECIFICATIONS.........................................................................................................................14
A.1 MODEL 4427 LONG RANGE DISPLACEMENT METER .....................................................................................14
A.2 THERMISTOR (SEE APPENDIX BALSO)............................................................................................................14
APPENDIX B. THERMISTOR TEMPERATURE DERIVATION.....................................................................15
APPENDIX C. TYPICAL CALIBRATION REPORTS .......................................................................................16
C.1 MODEL 4427 CALIBRATION REPORT ..............................................................................................................16
C.2 MODEL 4400 CALIBRATION REPORT ..............................................................................................................17
FIGURES
FIGURE 1-4427 INTERNAL MECHANISM ....................................................................................................................... 1
FIGURE 2-THE WEAK LINK .......................................................................................................................................... 2
FIGURE 3-PIPE MOUNTED LONG RANGE DISPLACEMENT METER ................................................................................ 3
FIGURE 4-PEDESTAL MOUNTED LONG RANGE DISPLACEMENT METER....................................................................... 4
FIGURE 5-ATYPICAL INSTALLATION ON AN UNSTABLE SLOPE ................................................................................... 5
FIGURE 6-LIGHTNING PROTECTION SCHEME ............................................................................................................... 6
FIGURE 7-LEMO CONNECTOR TO GK-404 ................................................................................................................... 7
FIGURE 8-LIVE READINGS –RAW READINGS............................................................................................................... 8
FIGURE 9-TYPICAL CALIBRATION REPORT FOR MODEL 4427 LONG RANGE DISPLACEMENT TRANSDUCER................16
FIGURE 10 -TYPICAL CALIBRATION REPORT FOR MODEL 4400 DISPLACEMENT TRANSDUCER ...................................17
TABLES
TABLE 1-THERMAL COEFFICIENTS .............................................................................................................................11
TABLE 2-MODEL 4450 DISPLACEMENT TRANSDUCER SPECIFICATIONS......................................................................14
TABLE 3-THERMISTOR RESISTANCE VERSUS TEMPERATURE .....................................................................................15
EQUATIONS
EQUATION 1-DIGITS CALCULATION............................................................................................................................10
EQUATION 2-DISPLACEMENT CALCULATION ..............................................................................................................10
EQUATION 3-THERMALLY CORRECTED DISPLACEMENT CALCULATION .....................................................................11
EQUATION 4-THERMAL COEFFICIENT CALCULATION .................................................................................................11
EQUATION 5-ELONGATION CORRECTION....................................................................................................................11
EQUATION 6-RESISTANCE TO TEMPERATURE .............................................................................................................15

1
1. INTRODUCTION
The Geokon Model 4427 Long Range Displacement Meter, (LRDM), is designed to measure
displacements of up to two meters magnitude between two points. Typical applications include
the monitoring of crack openings due to mining, and the monitoring of unstable slopes.
Figure 1 - 4427 Internal Mechanism

2
2. SYSTEM COMPONENTS
The Device consists of a drum on which is wound a length of 1/16 inch, nylon-jacketed, stainless
steel aircraft cable. As movement occurs, the cable reels off the drum, and the drum turns. (The
tension on the cable is maintained by a constant force spring inside the drum). The drum is
connected to a lead-screw in such a way that the rotation of the drum is converted into a linear
motion of the lead screw. The lead-screw is connected to a Model 4450 Vibrating Wire
Displacement Transducer, which measures the linear motion. In this way a one-meter movement
of the aircraft cable is converted into roughly 25 mm movement of the Transducer. The whole
mechanism is enclosed within a rainproof enclosure.
A thermistor is included with the transducer so that temperature changes can be monitored.
The enclosure has a gasketed, hinged cover and is mounted on a three-inch threaded PVC pipe
flange, which will mate with a three-inch pipe designed to be installed and grouted inside a
borehole drilled perpendicular to the slope. This standpipe can be provided by the installer or is
available at Geokon.
Also included with the enclosure is a “weak link” for attachment between the tensioned aircraft
cable inside the sensor enclosure and the extension cable, which stretches between the two points
being monitored.
Figure 2 - The Weak Link
Experience has shown that unless this extension cable is fenced off there is a danger of large
animals or pieces of equipment blundering into it; this can seriously damage the internal sensor
mechanism. Should this happen, the weak link is designed to break at a relatively low cable
tension, thus preventing damage to the mechanism from over-ranging. Also supplied is a
compression spring which absorbs the shock of the recoil of the cable if the weak link is broken.

3
3. INSTALLATION
Two styles of installation are available: - pedestal mounted and pipe mounted.
3.1 Pipe Mounted
The Transducer enclosure can be mounted on a three-inch steel pipe threaded at its upper end to
mate with the flange on the underside of the sensor enclosure. In the case of an unstable slope the
enclosure will probably be at the up-hill point and the three-inch pipe will be grouted or firmly
wedged into a borehole drilled perpendicular to the slope. The second moving point should
consist of a similar three-inch pipe grouted or wedged in place at the desired distance from the
first mounting point. Figure 3 shows a typical set-up
Figure 3 - Pipe Mounted Long Range Displacement Meter
3.2 Pedestal Mounted
At locations where drilling a hole is not possible the readout enclosure can be mounted on a
pedestal. Here the Transducer Enclosure is bolted to a steel Mounting Plate which is then bolted
to a flat surface measuring approximately nine-inch square. Ideally, the plane of this surface
should be inclined to be parallel to the plane of the extension wire; (in the case of measurements
down a slope this would mean parallel to the slope). Once this surface has been created, in wood
or concrete then four bolt holes need to be drilled in it with the same bolt pattern as the four 3/8-
inch holes drilled in the Mounting Plate, these holes are then used to install 1/4-inch Rawl drop
in anchors for concrete, (available through Geokon), or 1/4-inch lag screws in wood. A typical
set up is shown in Figure 4 on the following page. Instructions for the Rawl drop-in anchors are
as follows:
Using a masonry drill or other suitable equipment, drill two 3/8 inch, (10 mm), diameter holes
1.25", (32 mm), deep at the proper locations.

4
Insert the expansion anchors into the holes, with the slotted end down and then, insert the setting
tool provided, small end first, into the anchor and expand the anchor by hitting the large end of
the setting tool with several sharp hammer blows.
Figure 4 - Pedestal Mounted Long Range Displacement Meter
3.3 Installing the Weak Link and Extension Cable
The extension cable is used to cover the distance between the two points. A length of plastic
coated 1/16-inch aircraft cable is supplied for this purpose. The cable has two loops which are
shipped loosely held by two cable clamps. When the Transducer enclosure has been installed and
the remote anchoring station, attach the extension cable to the anchor station and tighten the two
cable clamps. Using the snap-swivel hooks the ends of the weak link, hook the weak link onto
the extension cable loop and on to the end loop of the cable wound on the drum in the enclosure.
Adjust the extension cable length by pulling cable through the two cable clamps until the wire is
tight and the wire tension is taken by the drum. Connect the readout cable to the readout box.
Pull approximately four inches of cable off the drum so that there is some movement of the
transducer as revealed by a change of reading on the readout box. Tighten the two extension
cable clamps and the two clamps on the weak link assembly.
3.4 Cable Installation
The cable should be routed and protected in such a way to minimize the possibility of damage
due to moving equipment, debris or other causes. Cables can be spliced to lengthen them,
without affecting gauge readings. Always waterproof the splice completely, preferably using an
epoxy-based splice available from the factory.

5
Figure 5 - A Typical Installation on an Unstable Slope
3.5 Electrical Noise
Care should be exercised when installing instrument cables to keep them as far away as possible
from sources of electrical interference such as power lines, generators, motors, transformers, arc
welders, etc. Cables should never be buried or run with AC power lines. The instrument cables
will pick up the 50 or 60 Hz (or other frequency) noise from the power cable and this will likely
cause a problem obtaining a stable reading. Contact the factory concerning filtering options
available for use with the Geokon dataloggers and readouts should difficulties arise.
3.6 Lightning Protection
The Model 4427 Vibrating Wire Long Range Displacement Meter can be supplied with integral
lightning protection components, i.e. transzorbs or plasma surge arrestors. If the instrument cable
is exposed, it might be appropriate to install lightning protection components, as the transient
could travel down the cable to the gauge and possibly destroy it.
Note the following suggestions;
•If the gauge is connected to a terminal box or multiplexer components such as plasma surge
arrestors (spark gaps) can be installed in the terminal box/multiplexer to provide a measure of
transient protection. Terminal boxes and multiplexers available from Geokon provide locations
for installation of these components.

6
•Lighting arrestor boards and enclosures are available from Geokon that can be installed
inside the enclosure. The enclosure has a hinged lid, so that if the protection board (LAB-3) is
damaged, the user can service the components (or replace the board). A connection is made
between this enclosure and earth ground to facilitate the passing of transients away from the
gauge. (As shown in Figure 6.)
•Alternatively, plasma surge arrestors can be included inside the enclosure close to the sensor.
A ground strap would connect the surge arrestor to earth ground, either a grounding stake or
other suitable earth ground.
Consult the factory for additional information on these or alternate lightning protection schemes.
Terminal Box/Multiplexer
Instrument Cable
LAB-3 Enclosure LAB-3 Board
Model 4450 Transducer
Ground Connections
Surface
(usually buried)
(inside extensometer housing)
Extensometer
Figure 6 - Lightning Protection Scheme

7
4. TAKING READINGS
4.1 GK-404 Readout Box
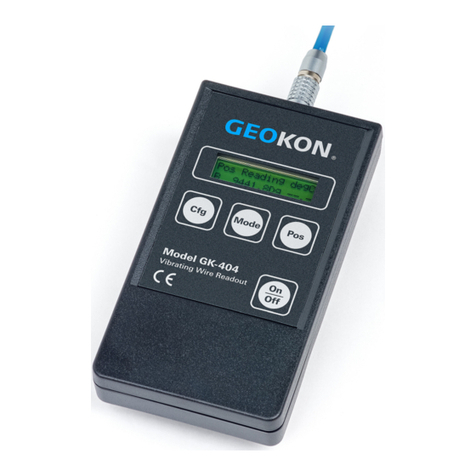
The Model GK-404 Vibrating Wire Readout is a portable, low-power, handheld unit that can run
continuously for more than 20 hours on two AA batteries. It is designed for the readout of all
Geokon vibrating wire gauges and transducers; and is capable of displaying the reading in either
digits, frequency (Hz), period (µs), or microstrain (µε). The GK-404 also displays the
temperature of the transducer (embedded thermistor) with a resolution of 0.1 °C.
Before use, attach the flying leads to the GK-404 by aligning the red circle on the silver “Lemo”
connector of the flying leads with the red line on the top of the GK-404 (Figure 7). Insert the
Lemo connector into the GK-404 until it locks into place.
Figure 7 - Lemo Connector to GK-404
Connect each of the clips on the leads to the matching colors of the sensor conductors, with blue
representing the shield (bare). To turn the GK-404 on, press the “ON/OFF” button on the front
panel of the unit. The initial startup screen will be displayed. After approximately one second,
the GK-404 will start taking readings and display them based on the settings of the POS and
MODE buttons.
The unit display (from left to right) is as follows:
•The current Position: Set by the POS button, displayed as a letter A through F.
•The current Reading: Set by the MODE button, displayed as a numeric value followed by the
unit of measure.
•Temperature reading of the attached gauge in degrees Celsius.
Use the POS button to select position Band the MODE button to select Dg (digits). (Other
functions can be selected as described in the GK-404 Manual.)
The GK-404 will continue to take measurements and display readings until the unit is turned off,
either manually, or if enabled, by the Auto-Off timer. If no reading displays or the reading is
unstable, consult Section 6 for troubleshooting suggestions.
For further information, please refer to the GK-404 manual.

8
4.2 GK-405 Readout Box
The GK-405 Vibrating Wire Readout is made up of two components: The Readout Unit,
consisting of a Windows Mobile handheld PC running the GK-405 Vibrating Wire Readout
Application; and the GK-405 Remote Module, which is housed in a weatherproof enclosure and
connects via a cable to the vibrating wire gauge to be measured. The two components
communicate wirelessly. The Readout Unit can operate from the cradle of the Remote Module,
or, if more convenient, can be removed and operated up to 20 meters from the Remote Module.
4.2.1 Connecting Sensors with 10-pin Bulkhead Connectors Attached
Align the grooves on the sensor connector (male), with the appropriate connector on the
readout (female connector labeled senor or load cell). Push the connector into place, and
then twist the outer ring of the male connector until it locks into place.
4.2.2 Sensors with Bare Leads
Attach the GK-403-2 flying leads to the bare leads of a Geokon vibrating wire sensor by
connecting each of the clips on the leads to the matching colors of the sensor conductors,
with blue representing the shield (bare).
4.2.3 Operating the GK-405
Press the button labeled “POWER ON”. A blue light will begin blinking, signifying that
the Remote Module is waiting to connect to the handheld unit. Launch the GK-405
VWRA program by tapping on “Start” from the handheld PC’s main window, then
“Programs” then the GK-405 VWRA icon. After a few seconds, the blue light on the
Remote Module should stop flashing and remain lit. The Live Readings Window will be
displayed on the handheld PC. Choose display mode “B”. Figure 8 shows a typical
vibrating wire output in digits and thermistor output in degrees Celsius. If no reading
displays or the reading is unstable, see Section 6 for troubleshooting suggestions. For
further information, consult the GK-405 Instruction Manual.
Figure 8 - Live Readings – Raw Readings

9
4.3 GK-403 Readout Box (Obsolete Model)
The GK-403 can store gauge readings and apply calibration factors to convert readings to
engineering units. The following instructions explain taking gauge measurements using Mode
“B”. Consult the GK-403 Instruction Manual for additional information.
4.3.1 Connecting Sensors with 10-pin Bulkhead Connectors Attached
Align the grooves on the sensor connector (male), with the appropriate connector on the
readout (female connector labeled senor or load cell). Push the connector into place, and
then twist the outer ring of the male connector until it locks into place.
4.3.2 Connecting Sensors with Bare Leads
Attach the GK-403-2 flying leads to the bare leads of a Geokon vibrating wire sensor by
connecting each of the clips on the leads to the matching colors of the sensor conductors,
with blue representing the shield (bare).
4.3.3 Operating the GK-403
1) Turn the display selector to position “B”.
2) Turn the unit on.
3) The readout will display the vibrating wire output in digits. The last digit might
change one or two digits while reading.
4) The thermistor reading will be displayed above the gauge reading in degrees
centigrade.
5) Press the “Store” button to record the value displayed.
If the no reading displays or the reading is unstable, see Section 6 for troubleshooting
suggestions. The unit will automatically turn off after approximately two minutes to
conserve power.
4.4 Measuring Temperatures
All vibrating wire transducers are equipped with a thermistor, which gives a varying resistance
output as the temperature changes. The white and green leads of the instrument cable are
normally connected to the internal thermistor. The GK-404, and GK-405 readout boxes will read
the thermistor and display the temperature in degrees C.
To read temperatures using an ohmmeter: Connect an ohmmeter to the green and white
thermistor leads coming from the displacement transducer. Since the resistance changes with
temperature are large, the effect of cable resistance is usually insignificant. For long cables a
correction can be applied, equal to approximately 14.7 Ωfor every 1000 ft. (48.5Ωper km) at 20
°C. Multiply these factors by two to account for both directions. Look up the temperature for the
measured resistance in Appendix B, Table 3.

10
5. DATA REDUCTION
5.1 Displacement Calculation
The basic units utilized by Geokon for measurement and reduction of data from Vibrating Wire
Displacement Meters are “digits”. The units displayed by the GK-404 and GK-405 in position
“B” are digits. Calculation of digits is based on the following equation:
Digits = 1
Period2
x 10-3
Or
Digits=Hz2
1000
Equation 1 - Digits Calculation
The magnitude of any movement is calculated from the following equation:
Displacement = D = (R1- R0) ×F
Equation 2 - Displacement Calculation
Where;
R0 is the initial reading taken at installation (Using channel B on the readout, the initial reading
should be around 3000 digits.)
R1is a subsequent reading.
F is the linear gauge factor (in mm or inches per digit), taken from the model 4427 calibration
report supplied with the equipment. Figure 9 in Appendix C.1 shows a typical model 4427 long
range displacement transducer calibration report.
For example:
If;
R0= 3083 digits
R1= 4228
F = 0.2223 mm/digit
Then;
Displacement = (4228 −3083) ×0.2223 = +254.5 mm
Note that increasing readings (digits) indicate increasing extensions.
5.2 Temperature Correction
5.2.1 The Transducer Alone
The Model 4427 Long Range Vibrating Wire Displacement Transducer uses a Model
4400 displacement transducer which has a small thermal response; small enough that in
many cases correction may not be necessary. However, if maximum accuracy is desired

11
or the temperature changes are large (>10° C) corrections can be applied by applying the
following equation:
Dcorrected = F(R1- R0) + K(T1- T0)G
Equation 3 - Thermally Corrected Displacement Calculation
Where;
Fis the linear gauge factor (in mm or inches per digit) from the model 4427 calibration
report supplied with the equipment. (Figure 9 in Appendix C.1 shows a typical model
4427 long range displacement transducer calibration report.)
R1is the current reading.
R0is the initial reading.
T1is the current temperature ºC.
T0is the initial temperature ºC.
K is the thermal coefficient (see Equation 4).
Gis the linear gauge factor (in mm or inches per digit) from the model 4400 calibration
report supplied with the equipment. (Figure 10 in Appendix C.2 shows a typical model
4400 displacement transducer calibration report.)
Tests have determined that the thermal coefficient, K, changes with the position of the
transducer shaft. The first step in the temperature correction process is determination of
the proper thermal coefficient based on the following equation:
K = MR1+B
Equation 4 - Thermal Coefficient Calculation
Where;
R1is the current reading.
M is the multiplier from Table 1.
B is the constant from Table 1.
Model:
4427-1-1M
4427-1-2M
Multiplier (M):
0.000369
0.000376
Constant (B):
0.572
0.328
Table 1 - Thermal Coefficients
5.2.2 The Extension Cable
The elongation of the extension cable (stainless steel aircraft cable) under ambient
temperature rises can be compensated by using the following compensation factor:
+ L x 17.3 x 10⁻⁶ (T1-T0) inches or mm
Equation 5 - Elongation Correction
Where;
L is the length of the aircraft cable in inches or millimeters
T0is the initial temperature reading in degrees Centigrade.
T1is a subsequent temperature reading in degrees Centigrade.

12
5.3 Environmental Factors
Since the purpose of the displacement transducer installation is to monitor site conditions,
factors, which may affect these conditions, should always be observed and recorded. Seemingly
minor effects can have a real influence on the behavior of the situation being monitored and may
give an early indication of potential problems. Some of these factors include, but are not limited
to: blasting, rainfall, tidal levels, excavation and fill levels and sequences, traffic, temperature
and barometric changes, changes in personnel, nearby construction activities, seasonal changes,
etc.

13
6. TROUBLESHOOTING
Consult the following list of problems and possible solutions should difficulties arise. Consult
the factory for additional troubleshooting help.
Symptom: Displacement Transducer Readings are Unstable
Is the readout box position set correctly? If using a datalogger to record readings
automatically are the swept frequency excitation settings correct? Try reading the displacement
transducer on a different readout position.
Is there a source of electrical noise nearby? Most probable sources of electrical noise are
motors, generators, transformers, arc welders and antennas. Make sure the shield drain wire is
connected to ground whether using a portable readout or datalogger. If using the GK-403, GK-
404 or GK-405 connect the clip with the blue boot to the shield drain wire. (Green for the GK-
401.)
Does the readout work with another displacement transducer? If not, the readout might have
a low battery or be malfunctioning. Consult the appropriate readout manual for charging or
troubleshooting directions.
Has the transducer gone outside its range? If so, the transducer can be reset using the
installation instructions in Section 3.
Symptom: Displacement Transducer Fails to Read
Is the cable cut or crushed? This can be checked with an ohmmeter. Nominal resistance
between the two gauge leads (usually red and black leads) is 180Ω, ±10Ω. Remember to add
cable resistance when checking (22 AWG stranded copper leads are approximately 14.7Ω/1000
ft. or 48.5Ω/km, multiply by two for both directions). If the resistance reads infinite, or very high
(megohms), a cut wire must be suspected. If the resistance reads very low (<100Ω) a short in the
cable is likely.
Does the readout or datalogger work with another transducer? If not, the readout or
datalogger might be malfunctioning. Consult the readout or datalogger manual for further
direction.

14
APPENDIX A. SPECIFICATIONS
A.1 Model 4427 Long Range Displacement Meter
Range:
1 meter
2 meters
Resolution:
0.025% FS
Linearity:
0.5% FS
Stability:
< 0.2%/yr (under static conditions)
Overrange:
10%
Cable Tension:
7 to 13 Kgm
Weak-Link Capacity:
18 Kgm
Dimensions Enclosure:
590 x 150 x 150 mm
Temperature Range:
-40 to +80 degrees C
Weight:
13 Kgm
Frequency Range:
(standard model)
1200 - 2800 Hz
Coil Resistance:
180 Ω, ±10 Ω
Cable Type:
Two twisted pair (four conductor) 22 AWG
Foil shield, PVC jacket
1
, nominal OD=6.3 mm (0.250")
Table 2 - Model 4450 Displacement Transducer Specifications
Notes:
1Polyurethane jacket cable available.
A.2 Thermistor (see Appendix B also)
Range: -80 to +150° C
Accuracy: ±0.5° C
Other manuals for 4427
1
Table of contents
Other Geokon Measuring Instrument manuals

Geokon
Geokon 4425 User manual

Geokon
Geokon 6150F User manual

Geokon
Geokon 3400 Series User manual

Geokon
Geokon GK-604D User manual

Geokon
Geokon GK-604D User manual

Geokon
Geokon 4200ER User manual

Geokon
Geokon 4415 User manual

Geokon
Geokon 6165 User manual

Geokon
Geokon 4911 User manual

Geokon
Geokon 4300 Series User manual