Geokon GK-604D User manual

Model GK-604D
Digital Inclinometer Reader
Application
Instruction Manual
©2022, GEOKON. All rights reserved.
Document Revision: A | Release date: 8/1/22


WARRANTY STATEMENT
GEOKON warrants its products to be free of defects in materials and
workmanship, under normal use and service for a period of 13 months from
date of purchase. If the unit should malfunction, it must be returned to the
factory for evaluation, freight prepaid. Upon examination by GEOKON, if the unit
is found to be defective, it will be repaired or replaced at no charge. However,
the WARRANTY IS VOID if the unit shows evidence of having been tampered
with or shows evidence of being damaged as a result of excessive corrosion or
current, heat, moisture or vibration, improper specification, misapplication,
misuse or other operating conditions outside of GEOKON's control. Components
that wear or are damaged by misuse are not warranted. This includes fuses and
batteries.
GEOKON manufactures scientific instruments whose misuse is potentially
dangerous. The instruments are intended to be installed and used only by
qualified person el. There are no warranties except as stated herein. There
are no other warranties, expressed or implied, including but not limited to the
implied warranties of merchant-ability and of fitness for a particular purpose.
GEOKON is not responsible for any damages or losses caused to other
equipment, whether direct, indirect, incidental, special or consequential which
the purchaser may experience as a result of the installation or use of the product.
The buyer's sole remedy for any breach of this agreement by GEOKON or any
breach of any warranty by GEOKON shall not exceed the purchase price paid by
the purchaser to GEOKON for the unit or units, or equipment directly affected by
such breach. Under no circumstances will GEOKON reimburse the claimant for
loss incurred in removing and/or reinstallingequipment.
Every precaution for accuracy has been taken in the preparation of manuals
and/or software, however, GEOKON neither assumes responsibility for any
omissions or errors that may appear nor assumes liability for any damages or
losses that result from the use of the products in accordance with the
information contained in the manual or software.
No part of this instruction manual may be reproduced, by any means, without the written consent of GEOKON. The
information contained herein is believed to be accurate and reliable. However, GEOKON assumes no responsibility for
errors, omissions or misinterpretation. The information herein is subject to change without notification.
The GEOKON® wordmark and logo are registered trademarks with the United States Patent and Trademark Office.

I
TABLE OF CONTENTS
1. INTRODUCTION ............................................................................... 1
1.1 READOUT UNIT ............................................................................................. 1
1.1.1 GK-604D READER APPLICATION ...........................................................................1
2. INSTALLATION AND OPERATION ..................................................... 2
2.1 BEFORE USING THE GK-604D READER APPLICATION ................................... 2
2.2 INSTALLING THE GK-604D READER APP....................................................... 2
2.2.1 INSTALLING GK-604D READER FROM GOOGLE PLAY STORE..............................2
2.2.2 INSTALLING GK-604D READER VIA USB LINK TO HOST PC......................................3
3. STARTING THE GK-604D READER APP THE FIRST TIME................... 4
3.1 CREATING A NEW “HOLE” ............................................................................ 5
3.2 SETTING THE SYSTEM PARAMETERS ........................................................... 7
3.2.1 STABLE INDICATION ..............................................................................................7
3.2.2 STABILITY FILTER...................................................................................................7
3.2.3 STABLE SOUND......................................................................................................8
3.2.4 UNSTABLE SOUND ...............................................................................................8
3.2.5 AUTO RECORD DATA .............................................................................................8
3.2.6 FINISH SURVEY WITH............................................................................................8
3.2.7BLUETOOTH DEVICE ..............................................................................................8
3.2.8 EMAIL ADDRESS ....................................................................................................8
4.
GK-604D READER APPLICATION MAIN SCREEN .............................. 9
4.1 OVERVIEW..................................................................................................... 9
5.
CONNECTING TO THE REEL AND CONDUCTING A SURVEY ............ 10
5.1 LIVE READINGS WINDOW ........................................................................... 13
5.1.1 LIVE READINGS SCREEN KEBAB OPTIONS .........................................................14
5.2 CONDUCTING A SURVEY............................................................................. 17
5.3 AUTO RECORD SEQUENCE .......................................................................... 19
6.
WORKING WITH APPLICATION CONFIGURATION ELEMENTS ........ 22
6.1 HOLE CONFIGURATION ............................................................................... 22
6.2 INCLINOMETER CONFIGURATION ............................................................... 24
6.3 PROJECT CONFIGURATION ......................................................................... 25
7. IMPORTING AND SHARING (EXPORTING) ...................................... 26
7.1 IMPORT....................................................................................................... 26
7.2 SHARING (EXPORTING) ............................................................................... 28
8. PLOTS/REPORTS ............................................................................ 32
8.1 RAW DATA FILE REPORT............................................................................. 33
8.2 AXIS PROFILE REPORT................................................................................ 33
8.3 AXIS DEFLECTION REPORT ......................................................................... 34

II
8.4 AXIS PROFILE PLOT .................................................................................... 35
8.5 AXIS DEFLECTION PLOT.............................................................................. 35
9. TERMINAL WINDOW PAGE ............................................................ 36
10. DATABASE BACKUP ...................................................................... 37
11. ABOUT GK-604D READER .............................................................. 38
APPENDIX A. HOLE DATA GKN FILE FORMAT......................................... 40
APPENDIX B. TEXT REPORTS................................................................ 41
B.1 RAW DATA TEXT REPORT ........................................................................... 41
B.2 A-AXIS PROFILE DATA TEXT REPORT.......................................................... 42
B.3 B-AXIS PROFILE DATA TEXT REPORT .......................................................... 43
B.4 A-AXIS DEFLECTION DATA TEXT REPORT ................................................... 44
B.5 B-AXIS DEFLECTION DATA TEXT REPORT ................................................... 45
B.6 COMPASS SURVEY DATA TEXT REPORT ..................................................... 46
APPENDIX C. REMOTE MODULE COMMAND STRUCTURE ..................... 47
APPENDIX D. DATA REDUCTION FORMULAS......................................... 49
D.1 DEFLECTION CALCULATION ........................................................................ 49
D.2 PROFILE CALCULATION............................................................................... 49
D.3 GTILT USERS............................................................................................... 50
D.4 SITEMASTER USERS ................................................................................... 50

III
FIGURES
Figure 1: FPC-3 Running the GK-604D Reader App............................................................1
Figure 2: GK-604D Reader Icon ..........................................................................................2
Figure 3: Google Play icon ..................................................................................................2
Figure 4: GK-604D Install page ...........................................................................................3
Figure 5: Permission Request..............................................................................................4
Figure 6: Main Screen ........................................................................................................4
Figure 7: Main Screen "Kebab" Menu Items........................................................................5
Figure 8: Holes Screen........................................................................................................5
Figure 9: Hole Editor Screen ...............................................................................................6
Figure 10: Holes Screen (with new hole shown) .................................................................6
Figure 11: System Settings Editor.......................................................................................7
Figure 12: Live Readings Screen.......................................................................................10
Figure 13: Problem Connecting to Reel.............................................................................11
Figure 14: New Probe Found ...........................................................................................11
Figure 15: Inclinometer Editor ..........................................................................................12
Figure 16: Probe Not Assigned.........................................................................................12
Figure 17: Live Inclinometer Data .....................................................................................13
Figure 18: Data History.....................................................................................................13
Figure 19: Survey Status and RECORD Button (STABLE)..................................................14
Figure 20: Survey Status and RECORD Button (UNSTABLE) ............................................14
Figure 21: Live Readings "Kebab" Options ........................................................................14
Figure 22: Previous Survey Data Viewer...........................................................................15
Figure 23: Meta Data Editor .............................................................................................15
Figure 24: Initial Compass Calibration Screen ...................................................................16
Figure 25: Calibration In-Process Screen...........................................................................16
Figure 26: Auto Record Enabled.......................................................................................19
Figure 27: Auto Record is Active.......................................................................................19
Figure 28: Auto Record Paused, Dataset 2 Selected .........................................................20
Figure 29: Unsaved Data Prompt......................................................................................21
Figure 30: Edit Hole Parameters, Screen 1 .......................................................................23
Figure 31: Edit Hole Parameters, Screen 2 .......................................................................23
Figure 32: Edit Inclinometer Parameters ...........................................................................25

IV
Figure 33: Project Parameters .......................................................................................... 25
Figure 34: Import Screen ................................................................................................. 26
Figure 35: Import File Selection........................................................................................ 26
Figure 36: Importing Page................................................................................................ 27
Figure 37: Importing Page, Import Done.......................................................................... 28
Figure 38: Survey Export Options..................................................................................... 28
Figure 39: Survey List ...................................................................................................... 29
Figure 40: Select Survey Export Method .......................................................................... 29
Figure 41: Folder Chooser................................................................................................ 30
Figure 42: Choose Email Provider .................................................................................... 30
Figure 43: Email Composer.............................................................................................. 31
Figure 44: Plots/Reports Screen....................................................................................... 32
Figure 45: Two Surveys Selected ..................................................................................... 32
Figure 46: Report Types List............................................................................................. 33
Figure 47: Raw Data Report (Landscape View) ................................................................ 33
Figure 48: Profile Report (Landscape View)...................................................................... 34
Figure 49: Deflection Report (Portrait View) ..................................................................... 34
Figure 50: Deflection Report (Scrolled .............................................................................. 34
Figure 51: A & B Axis Profile Plot ..................................................................................... 35
Figure 52: A & B Axis Deflection Plots.............................................................................. 35
Figure 53: Terminal Window Page ................................................................................... 36
Figure 54: Terminal Window Page (Connected) ............................................................... 36
Figure 55: Android Folder Choose.................................................................................... 37
Figure 56: About GK-604D Reader................................................................................... 38
Figure 57: Attempting to Connect Dialog.......................................................................... 38
Figure 58: About GK-604D with Probe Status .................................................................. 39

V
TABLES
Table 1: Hole Data GKN File Format .................................................................................40
Table 2: Raw Data Text Report..........................................................................................41
Table 3: Axis A Profile Data Text Report ............................................................................42
Table 4: Axis B Profile Data Text Report ............................................................................43
Table 5: Axis A Deflection Data Text Report ......................................................................44
Table 6: Axis B Deflection Data Text Report.......................................................................45
Table 7: Compass Survey Data Text Report .......................................................................46
Table 8: Remote Module Commands ................................................................................47
Table 9: Data Reduction Variables (Deflection) ..................................................................49
Table 10: Data Reduction Variables (Profile)......................................................................49

VI
EQUATIONS
Equation 1:Change in Digits Calculation (Deflection) ....................................................... 49
Equation 2:Deflection Calculation.................................................................................... 49
Equation 3:Change in Digits Calculation (Profile) ............................................................. 50
Equation 4: Profile Calculation.......................................................................................... 50

MODEL GK-604D INCLINOMETER READER APPLICATION | INTRODUCTION |
1
1. INTRODUCTION
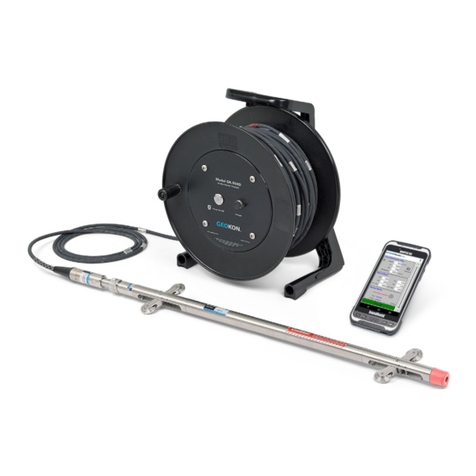
The GK-604D is made up of four components: An Inclinometer Probe, the
Remote Module, a Pulley Assembly and the Readout Unit. The Readout Unit
must have an Android operating system of at least version 6.0 (Marshmellow)
and the GK-604D Reader | aos application installed on it. This application is
available on Google Play or on the GEOKON website. Primarily, this manual will
cover the operation of the GK-604D Reader | aos application.
1.1 READOUT UNIT
The Readout Unit consists of a handheld field PC (Model FPC-3), running the
GK- 604D Reader | aos Application (see Figure 1).
Figure 1: FPC-3 Running the GK-604D Reader App
Features Include:
■
Rugged
■
Reliable
■
All the benefits of an Android device (Cell capability, Wi-Fi, file system, USB
and Bluetooth connectivity). Many apps available via Google Play
■
Long battery life
■
Ease of use
1.1.1 GK-604D READER APPLICATION
The GK-604D Inclinometer Reader | aos Application installs and runs on an
Android Device such as the Model FPC-3, (see Figure 1) and is designed to
communicate via Bluetooth with Remote Modules connected to digital MEMS
probes.

2 | INSTALLATION AND OPERATION | GEOKON
2. INSTALLATION AND OPERATION
2.1 BEFORE USING THE GK-604D READER APPLICATION
The readout software runs as an application under the Android operating
system (OS) installed on a handheld PC (FPC-3) or other Android device. If an
FPC-3 has been purchased from GEOKON then the GK-604D Reader | aos will
already be installed.
Note: Please consult the GK-604D Inclinometer System manual for inclinometer
equipment setup, measurement procedures, inclinometer theory and
maintenance. Before installing the GK-604D Reader, the user should familiarize
themselves with the following:
■
The operation of the FPC-3 (or other Android device).
■
Use of the Back and Home buttons, Settings and Files applications and have
the ability to launch other applications.
■
Tapping the keyboard icon to use the on-screen keyboard for text and
number entry.
If the icon shown in Figure 2 does not appear in the Apps drawer of the FPC-3
(or other Android device) then the GK-604D Reader application must be
installed. Proceed to Section 2.2.
Figure 2: GK-604D Reader Icon
2.2 INSTALLING THE GK-604D READER APP
The installation of the GK-604D Reader App requires the following:
•Android device with cell phone capability (and data plan) or wireless internet
connection to allow access to Google Play Store.
•Alternatively, a USB connection from the Android device to a host PC,
allowing file transfer of the application “.apk” install file.
•Android device with version 6.0 (Marshmellow) or higher operating system.
•The Android device must have at least 50 Mbytes of free memory and be
Bluetooth enabled.
2.2.1 INSTALLING GK-604D READER FROM GOOGLE PLAY STORE
From the Android device, tap on the Google Play icon to launch the Google Play
application. This icon is usually found on the main screen of the Android device
as well as in the Apps drawer (see
Figure 3). Enter the text string “GK-604D Reader” into the Google Play search
bar to find the GK-604D reader app Install page (see Figure 4 ).
Figure 3: Google Play icon

MODEL GK-604D INCLINOMETER READER APPLICATION | INSTALLATION AND OPERATION |
3
Figure 4: GK-604D Install page
After tapping on “Install”, the app will begin the install process. Follow the on-
screen instructions to finish the GK-604D Reader install.
2.2.2 INSTALLING GK-604D READER VIA USB LINK TO HOST PC
The GK-604D Reader | aos application can also be installed by copying an
Android Application Package (.apk) file to the Android device from a host PC.
The process is as follows:
1. Download the zipped installer from GEOKON’s software download
webpage. The file is called: “com.GEOKON.GK604D_Reader.zip “.
2. Open a Windows Explorer window and unzip the downloaded GK-604D
Reader installer.
3. Copy this installer (com.GEOKON.GK604D_Reader.apk) to a directory on the
Android device that can be easily accessed from the device’s internal File
Manager such as “Card” or “Internal Storage”.
Note: directory names can vary with different versions of Android as well as
different manufacturers of Android devices.
4. Disconnect the USB cable from the PC to the Android device.
5. Using an Android file manager application, find the file copied from the PC
and tap on it to start the install process.
6. If asked, select “Complete action using Package Installer”.
7. Follow the on-screen instructions to finish the install.

4 | STARTING THE GK-604D READER APP FOR THE FIRST TIME | GEOKON0
3. STARTING THE GK-604D READER APP THE FIRST
TIME
The readout software is launched by entering the Android Apps drawer, then
selecting the GK-604D Reader | aos icon (see Figure 2). When starting the
application for the first time, the screen shown in Figure 5 will be shown.
Figure 5: Permission Request
Click “ALLOW” to grant permission to the application to save surveys and
photos to the Android file system. Clicking “DENY” will not allow the application
to start up. If permission is denied, the app will request the same permissions
the next time the app is launched. After file access permission is granted, the
screen shown in Figure 6 is shown.
Figure 6: Main Screen

MODEL GK-604D INCLINOMETER READER APPLICATION | STARTING THE GK-604D READER APP FOR THE FIRST TIME |
5
While a default project is created automatically, new projects can be created by
tapping the “kebab” menu (3 vertical dots in the top-right corner) and selecting
“Projects” from the Menu Items (see Figure 7).
(For a detailed description of all menus items see Section 4.1.)
Figure 7: Main Screen "Kebab" Menu Items
3.1 CREATING A NEW “HOLE”
Since most boreholes are unique, no default “Hole” exists
when the app is first launched. From the Main Screen (see
Figure 6), tap the “Holes” button to view the “Holes” screen
(see Figure 8).
Figure 8: Holes Screen

6 | STARTING THE GK-604D READER APP FOR THE FIRST TIME | GEOKON0
To create a new “hole”, tap the circular “+” icon which displays the Hole
Editor screen (see Figure 9)
Figure 9: Hole Editor Screen
To create a hole, a user must supply a Name, Units, Starting Level and Interval
from the hole editor. To save the new hole, tap the back button, “<”.
Figure 10: Holes Screen (with new hole shown)
Tap the back button again to return to the Main Screen (see Figure 6).

MODEL GK-604D INCLINOMETER READER APPLICATION | STARTING THE GK-604D READER APP FOR THE FIRST TIME |
7
3.2 SETTING THE SYSTEM PARAMETERS
From the Main Screen Menu Items (see Figure 7) select “System Settings” to
display the System Settings Editor (see Figure 11).
Figure 11: System Settings Editor
The System Settings are individually described below:
3.2.1 STABLE INDICATION
Valid choices for this parameter are:
None:
When “None” is selected, the only indication of the inclinometer reading's
stability is to monitor the A and B readings on the Live Readings Screen.
Visual Only:
When “Visual Only” is selected, the “Record” button on the Live Readings
Screen will be displayed red if the A and B readings are unstable and green if
the readings are stable. Text will also be displayed in the Survey Status pane,
either “Stable” or “Unstable”.
Visual/Audible:
When “Visual/Audible” is selected, in addition to the “Visual” display described
above, an audible indication is played, indicating the reading's stability or
instability.
3.2.2 STABILITY FILTER
If the "Stable Indication" (see Figure 11) selection is set to something other than
"None", this parameter will be used to determine readings stability (a value less
than 10 is recommended).
When taking live readings, if the difference between two subsequent readings of
the A and B channels are less than or equal to the "Stability Filter" then the
reading will be deemed stable.

8 | STARTING THE GK-604D READER APP FOR THE FIRST TIME | GEOKON0
3.2.3 STABLE SOUND
Tapping this parameter (see Figure 11) will display a dropdown list of choices of
sounds that the FPC-3 can make when the reading in the "Live Readings" screen
is determined to be stable. This parameter has no effect if “Visual/Audible” was
not selected as the “Stable Indication”.
Tapping plays a preview of the actual sound heard.
3.2.4 UNSTABLE SOUND
Tapping this parameter (see Figure 11) will display a dropdown list of choices of
sounds that the FPC-3 can make when the reading in the "Live Readings" screen
is determined to be unstable. This parameter has no effect if “Visual/Audible”
was not selected as the “Stable Indication”.
Tapping plays a preview of the actual sound heard.
3.2.5 AUTO RECORD DATA
This parameter (see Figure 11) determines whether a survey is taken in a semi-automatic
fashion or completely manual. Sliding the “switch” to the right will enable the Auto
Record function and will take effect the next time a survey is taken. See Section 5.3
for more info on Auto Record.
3.2.6 FINISH SURVEY WITH
This parameter (see Figure 11) deals exclusively with "unfinished" survey data
files. A survey is unfinished if readings were not taken at each level from starting
up to the zero level. Many surveys may not completely finish because the
geometry of the probe will not allow the last reading or two to be taken while
the probe is still in the casing.
Valid choices for this selection include:
NOTHING:The survey will not be filled in and will remain unfinished.
"READINGS" will be modified to reflect the actual number taken.
NAN(S): Each missing level "row" of the survey will be filled in with "NaN(s)"
which is the floating-point representation of a non-numerical value.
NaN is an abbreviation for "Not a Number”.
BLANKS: Each missing level "row" of the survey will be filled in with blank
characters.
3.2.7 BLUETOOTH DEVICE
This parameter must be a previously paired Bluetooth device that is selected
from a list of known Bluetooth devices.
NOTE: No connection will be possible to the Remote Module and a survey will
not be performed if this parameter is not set correctly. Please see Section 3.2
(Establishing Contact with the Remote Module) of the Digital Inclinometer
System Manual for more information regarding Bluetooth pairing.
3.2.8 EMAIL ADDRESS
This parameter allows entry of an email address so that the Android device can
export a data file as an email attachment.

MODEL GK-604D INCLINOMETER READER APPLICATION | GK-604D READER APPLICATION MAIN SCREEN |
9
4.
GK-604D READER APPLICATION MAIN SCREEN
4.1 OVERVIEW
The GK-604D Reader Main Screen (see Figure 6) contains several “Button” and
menu controls designed to make it easy to select features of the application.
These controls are described below:
Tapping the “Holes” button causes the “Holes” screen to be
displayed. This screen (see Figure 10) is where existing holes
can be selected or edited and where new holes can be created.
The Holes screen is covered in Section 3.1 and Section 6.1.
Tapping the “Begin Survey” button begins the process of
connecting to the Remote Module. See Section 5 for a full
description of the “Live Readings” screen and connecting to
the Remote Module.
Tapping the “Plots/Reports” button displays the
“Plots/Reports” Selection screen (see Figure 44). See Section 8
for a full description of the various plots and reports available
for the Reader application.
Tapping the “Share Data” button begins the process of
exporting survey data either to a file or via email. The process is
described in more detail in Section.
7.2
The “Status” pane of the Main Screen displays
the currently selected elements of the Reader
application. In the example to the left the
current project is “Project1”, the selected hole
is “Hole1”, and the current inclinometer probe
is “mine”.
The project can be changed by tapping the project name and selecting the
desired project from the list of available projects. A different hole will need to be
selected because “Holes” are contained within “Projects”.
Additional functions are available from the Main Screen “kebab” menu
(shown left). These menu items are described below:
System Settings: Described in Section 3.2 above, these parameters are used
to determine readings stability, survey operation and Remote Module
connection.
Import:This feature is described in Section 7.1
Inclinometers: Tapping this menu item displays the Inclinometers Screen. The
Inclinometers Screen is described in Section 6.2.
Projects: Tapping this menu item displays the Projects Screen, allowing
creation, editing and removal of Projects. See Section 6.3 for more information.
Terminal Window: Tapping this menu item displays the Terminal Window,
allowing direct diagnostic connection to the Remote Module. See Section 9 for
more information.
Backup Database: See Section 10 for more information.
About GK-GK604D Reader: See Section 11 for more information.

10 | CONNECTING TO THE REEL AND CONDUCTING A SURVEY | GEOKON
5.
CONNECTING TO THE REEL AND CONDUCTING A
SURVEY
The “Live Readings” window is the main interface seen while a survey is being
taken. It shows the status of the probe and keeps track of where the probe is,
vertically, in the casing. Tapping on the “Begin Survey” button from the main
screen initiates the Remote Module connection process and after a successful
connection, the Live Readings screen will be displayed (see Figure 12). Should
the connection attempt fail, the window shown in Figure 13 will be displayed
with suggestions for correcting any issues before retrying.
Note: When attempting to connect to the Remote Module (reel), please
ensure that the “Power On/Off” button on the Remote Module has been
pressed (blue light will be blinking) before tapping the “Begin Survey” button.
After the Remote Module successfully connects to the Android device, the blue
POWER ON indicator will transition from blinking to steadily lit. If the GK-604D
Reader app recognizes the attached inclinometer AND if the selected hole
references this inclinometer, then the Live Readings screen will be displayed
(see Figure 12).
Figure 12: Live Readings Screen
Other manuals for GK-604D
4
Table of contents
Other Geokon Measuring Instrument manuals

Geokon
Geokon 4420 User manual

Geokon
Geokon 1100 User manual

Geokon
Geokon GK-405 User manual

Geokon
Geokon 4422 User manual

Geokon
Geokon 3400 Series User manual

Geokon
Geokon 4820 User manual

Geokon
Geokon GK-604D User manual

Geokon
Geokon 4427 User manual

Geokon
Geokon BGK-408 User manual

Geokon
Geokon 4855 User manual