manuals.online logo
Brands
  1. Home
  2. •
  3. Brands
  4. •
  5. GeoVision
  6. •
  7. Security Camera
  8. •
  9. GeoVision GV-LPR CAM V2.0 Series User manual

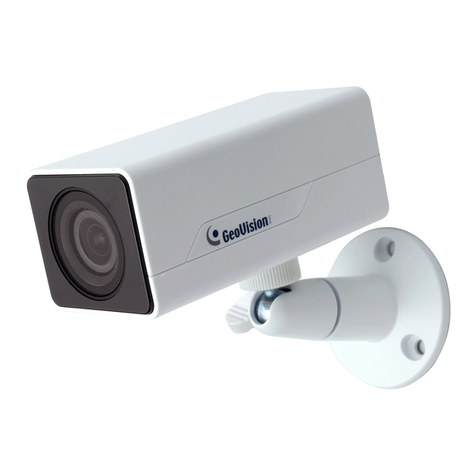
GeoVision GV-LPR CAM V2.0 Series User manual

GV-LPR CAM V2.0
Installation Guide
© 2010 April GeoVision Inc. All rights reserved.
LPRCAMV20-A
Before attempting to connect or operate this product,
please read these instructions carefully and save this manual for future use.
The GV-LPR CAM gives a 570TVL high-contrast license plate recognition video to the GV-LPR
software that identifies license plates. The camera features 24 high-efficient LEDs for an
illumination range of 30 meters. The camera also features a weather-sealed IP66-compliant
housing with the heater and blower inside. This installation guide will take you through the
functionality and use of the GV-LPR CAM.
List of Models
AC Power Cable (110-125V, 10A) x 1
Power Adapter (100-240V, 12V/5A) x 1
Outdoor Mounting Bracket x 1
Models
Packing List
Model
GV-LPR CAM 20M EIA DC12V
GV-LPR CAM 20M CCIR DC12V
IR Optimal Distance
20 m / 65.61 ft
20 m / 65.61 ft
Video Format
NTSC
PAL
Specifications
Sensor
Heater
Resolution
Construction
Protection classification
Temperature
LED Quantity
IR Distance
Illumination View Angle
Illuminator Life
Power Supply
Power Consumption
1/3" B/W EXview CCD
≤5˚C (ON) , > 5˚C (OFF) ; 20W
570 TVL
Robust aluminum with weatherproof sun-shield
IP 66
Operation: -30˚C ~ 50˚C / -22˚F ~ 122˚F
Storage: -30˚C ~ 70˚C / -22˚F ~ 158˚F
24 high-efficient LEDs
30 m / 98.43 ft
20 ± 5 m / 65.62 ± 16.4 ft (optimal)
30°
25,000 hrs
DC 12V
30W (normal), 50W (heater on)
GV-LPR CAM 20M EIA DC12VModel GV-LPR CAM 20M CCIR DC12V
Installing Camera Module
Push the sun shield forward to align with
the back of camera enclosure.
1. Slightly lift the camera module and slide it
out completely.
4.
2.
Pull out the camera module.
Sun Shield
Camera Enclosure Back
Camera Module
Completely slide the camera
module out
Loosen the set screws on the back of the
camera enclosure.
3.
Loosen the screw cap on the left.5.
Insert the video cable through the screw
cap.
6.
Screw Cap
Attach the video cable to the BNC
connector and plug it into the “VIDEO OUT”
jack.
7.
Adjust the length of the video cable and
then tightly screw the cap.
8.
Loosen the screw cap on the right, insert
the power cable through the screw cap.
9.
Remove the terminal block. Plug black and
white wires of the power cable to the
terminal block. Reinsert the terminal block
onto the camera. The white wire is required
to connect to the positive pin (+) on the
camera and the black wire to the negative
pin (-).
10.
VIDEO OUT
Jack
Adjust the length of the cable and then
tightly screw the cap (see Steps 8 for the
pictures).
11.
OSD Menu Options and Functions
LED Brightness Settings
Function
Manually adjust the camera lens.
Press SET to adjust the lens brightness.
Includes these options: 1/60, 1/100, 1/250,
1/500, 1/2000, 1/5000, 1/10000, 1/100000.
Press SET to manually adjust the shutter
speed.
Not available when the LENS is set at DC.
Turn off BLC function.
Press SET to configure the areas.
Press SET to adjust the sensitivity values.
Turn off AGC function.
Press SET to adjust the AGC ratio values.
Auto Tracking White Balance
Automatic White Balance
Press SET to select the mode from 1 to 4.
Press SET to adjust Red and Blue gain.
Adjust the Contrast from values 0 to 255.
Adjust the Sharpness from values 0 to 255.
Adjust CB_GAIN from values 0 to 255.
Adjust CR_GAIN from values 0 to 255.
Press SET to name the camera.
Select ON to reverse the image.
Select ON and press SET to configure
MOTION areas.
Select ON and press SET to configure
PRIVACY areas.
Adjust the gamma values to control brightness.
Higher gamma value shows darker images.
Press SET to change the language setting of
OSD menu options.
Press SET to restore to the factory defaults.
Close the OSD menu.
Main Menu
LENS
SHUTTER
BLC
(Backlight
Compensation)
AGC (Automatic
Gain Control)
WHITE BAL.
(White Balance)
ADJUST
FUNCTION
RESET
EXIT
Sub Menu
MANUAL
DC
FIXED
MANUAL
AUTO
OFF
ON BLC AREA
BLC RATIO
OFF
ON
ATW
AWB
FIXED
MANUAL
CONTRAST
SHARPNESS
CB_GAIN
CR_GAIN
CMAERA ID
MIRROR
MOTION
PRIVACY
GAMMA
LANGUAGE
-
-
Default Setting

-
1/500
-
Brightness: 70

-
-

-

-
-
-
87
10
176
176
OFF
OFF
OFF
OFF
1
English
-
-
The GV-LPR CAM is designed with 24 high-efficient LEDs which you can adjust the brightness.
You can push up (ON) and down (OFF) the switches of SW2, SW3 and SW4 for LED
brightness settings. See the table below for 8 LED brightness setting values.
Note: The factory default setting of SW1 is ON. If you find the images of license plates captured
in the day time or sufficient lights are unclear, check the SW1 and make sure it is switched to
ON.
Adjusting Camera Settings
Overview
Shutter Speed
6
5
4
3
7
89 No
1
2
3
4
5
6
7
8
9
Function
Auto Iris lens connector
Video out
Power Terminal (It is already connected. Follow
Steps 11 to 12 in Installing Camera Module to
insert the Power Cable.)
Moves down the OSD menu.
Moves the focus rightward to select menu options.
Power LED
Moves up the OSD menu.
Enters the OSD menu option and confirms the
selection
Moves the focus leftward to select menu options.
See the lists below for shutter speed settings.
1
2
165 SEC
182 SEC
183 (*) SEC
184 SEC
185 SEC
225 SEC
Distance between the object and the
camera is 550 cm (18.04 ft).
Notes:
1. The default settings are marked with (*).
2. The gray areas in the charts are not recommended for use.
145 SEC
150 SEC
155 SEC
170 SEC
180 SEC
200 SEC
Distance between the object and the
camera is 1100 cm (36.08 ft).
1
2
3
4
5
6
7
8
SW2
ON
ON
ON
ON
OFF
OFF
OFF
OFF
LED Brightness (mA)
470 (Default Setting)
400
350
300
250
200
150
100
Note: The factory default GAMMA value is set to be 1. It will be adjusted to 0.45 every time when you select
RESET. For optimal image performance, it is recommended to adjust the GAMMA value to 1.
SW3
ON
ON
OFF
OFF
ON
ON
OFF
OFF
SW4
ON
OFF
ON
OFF
ON
OFF
ON
OFF
Installing Camera Enclosure
After the installation of camera module and settings adjustment, you are now ready to install the
camera enclosure back.
1. Adjust the lens focus. 2. Lift the camera module.
Align the camera module to the camera
enclosure and slide it back.
3. Secure the camera enclosure with the
screws on both sides.
4.
Push the sun shield back.5.
9F, No. 246, Sec. 1, Neihu Rd.,
Neihu District, Taipei, Taiwan
Tel: +886-2-8797-8377
Fax: +886-2-8797-8335
[email protected]
http://www.geovision.com.tw

This manual suits for next models

2

Other GeoVision Security Camera manuals

GeoVision GV-GDR4900 User manual

GeoVision

GeoVision GV-GDR4900 User manual

GeoVision GV-FEC5302 User manual

GeoVision

GeoVision GV-FEC5302 User manual

GeoVision 86-PPTZ730-P01U User manual

GeoVision

GeoVision 86-PPTZ730-P01U User manual

GeoVision GV-FER12700 User manual

GeoVision

GeoVision GV-FER12700 User manual

GeoVision GV-BL8714 User manual

GeoVision

GeoVision GV-BL8714 User manual

GeoVision GV-EBD2702: GV-EBD4700 User manual

GeoVision

GeoVision GV-EBD2702: GV-EBD4700 User manual

GeoVision GV-FD5300 User manual

GeoVision

GeoVision GV-FD5300 User manual

GeoVision GV-BX120D series User manual

GeoVision

GeoVision GV-BX120D series User manual

GeoVision GV-IRCAM Series User manual

GeoVision

GeoVision GV-IRCAM Series User manual

GeoVision GV-Hybrid LPR Camera 20R User manual

GeoVision

GeoVision GV-Hybrid LPR Camera 20R User manual

GeoVision GV-BX130D-0 User manual

GeoVision

GeoVision GV-BX130D-0 User manual

GeoVision GV-VD8700 User manual

GeoVision

GeoVision GV-VD8700 User manual

GeoVision GV-IPCam H.264 Series User manual

GeoVision

GeoVision GV-IPCam H.264 Series User manual

GeoVision GV-OPAL S1 User manual

GeoVision

GeoVision GV-OPAL S1 User manual

GeoVision GV-SD200 User manual

GeoVision

GeoVision GV-SD200 User manual

GeoVision 84-FD220-D02U User manual

GeoVision

GeoVision 84-FD220-D02U User manual

GeoVision GV-IP Speed Dome User manual

GeoVision

GeoVision GV-IP Speed Dome User manual

GeoVision GV-VR360 User manual

GeoVision

GeoVision GV-VR360 User manual

GeoVision GV-FEC5302 User manual

GeoVision

GeoVision GV-FEC5302 User manual

GeoVision GV-EBD4711 User manual

GeoVision

GeoVision GV-EBD4711 User manual

GeoVision GV-TFD Series User manual

GeoVision

GeoVision GV-TFD Series User manual

GeoVision GV-IRCAM 10M EIA DC12V User manual

GeoVision

GeoVision GV-IRCAM 10M EIA DC12V User manual

GeoVision GV Series User manual

GeoVision

GeoVision GV Series User manual

GeoVision GV-PDR8800 User manual

GeoVision

GeoVision GV-PDR8800 User manual

Popular Security Camera manuals by other brands

TRENDnet TV-IP410WN Quick installation guide

TRENDnet

TRENDnet TV-IP410WN Quick installation guide

Foscam FI9803 user manual

Foscam

Foscam FI9803 user manual

ESP REKIPC36FBW quick start guide

ESP

ESP REKIPC36FBW quick start guide

LEGRAND VADDIO EasyIP 30 installation guide

LEGRAND

LEGRAND VADDIO EasyIP 30 installation guide

Interlogix TruVision TVB-2401 installation guide

Interlogix

Interlogix TruVision TVB-2401 installation guide

Lorex VANTAGE LDC6050 quick start guide

Lorex

Lorex VANTAGE LDC6050 quick start guide

OmniEye OmniOutlet user manual

OmniEye

OmniEye OmniOutlet user manual

Panasonic BB-HCM580 Specifications

Panasonic

Panasonic BB-HCM580 Specifications

Digital Watchdog PTZ39X user manual

Digital Watchdog

Digital Watchdog PTZ39X user manual

Panasonic WV-S4576L BASIC INFORMATION

Panasonic

Panasonic WV-S4576L BASIC INFORMATION

Vivotek FD8365EHV Quick installation guide

Vivotek

Vivotek FD8365EHV Quick installation guide

Intellisystem IT3G50 user manual

Intellisystem

Intellisystem IT3G50 user manual

Provision ISR Light Cruiser LC-10 user manual

Provision ISR

Provision ISR Light Cruiser LC-10 user manual

Nuvico EasyTrak SC-P36N installation manual

Nuvico

Nuvico EasyTrak SC-P36N installation manual

Vimar ELVOX 46212.036C.01 quick start guide

Vimar

Vimar ELVOX 46212.036C.01 quick start guide

Panasonic WVCL350 - COLOR CAMERA operating instructions

Panasonic

Panasonic WVCL350 - COLOR CAMERA operating instructions

Jovision IPC quick start guide

Jovision

Jovision IPC quick start guide

Vicon i-onyx MP-980DN Installation & operating instructions

Vicon

Vicon i-onyx MP-980DN Installation & operating instructions

manuals.online logo
manuals.online logoBrands
  • About & Mission
  • Contact us
  • Privacy Policy
  • Terms and Conditions

Copyright 2025 Manuals.Online. All Rights Reserved.