Gewa DP340G User manual

USER MANUAL
GEWA Digital Piano DP 340 G
Bedienungsanleitung | User manual | Mode d’emploi | Manual de instrucciones
www.gewakeys.com
Read these operating instructions before use and observe the
safety information!
Keep the instruction manual for future reference.

2
Manufacturer:
GEWA music GmbH
Werkstraße 1
08626 Adorf
GERMANY
www.gewamusic.com
Version 1.0
Last update: 10.04.2019

3
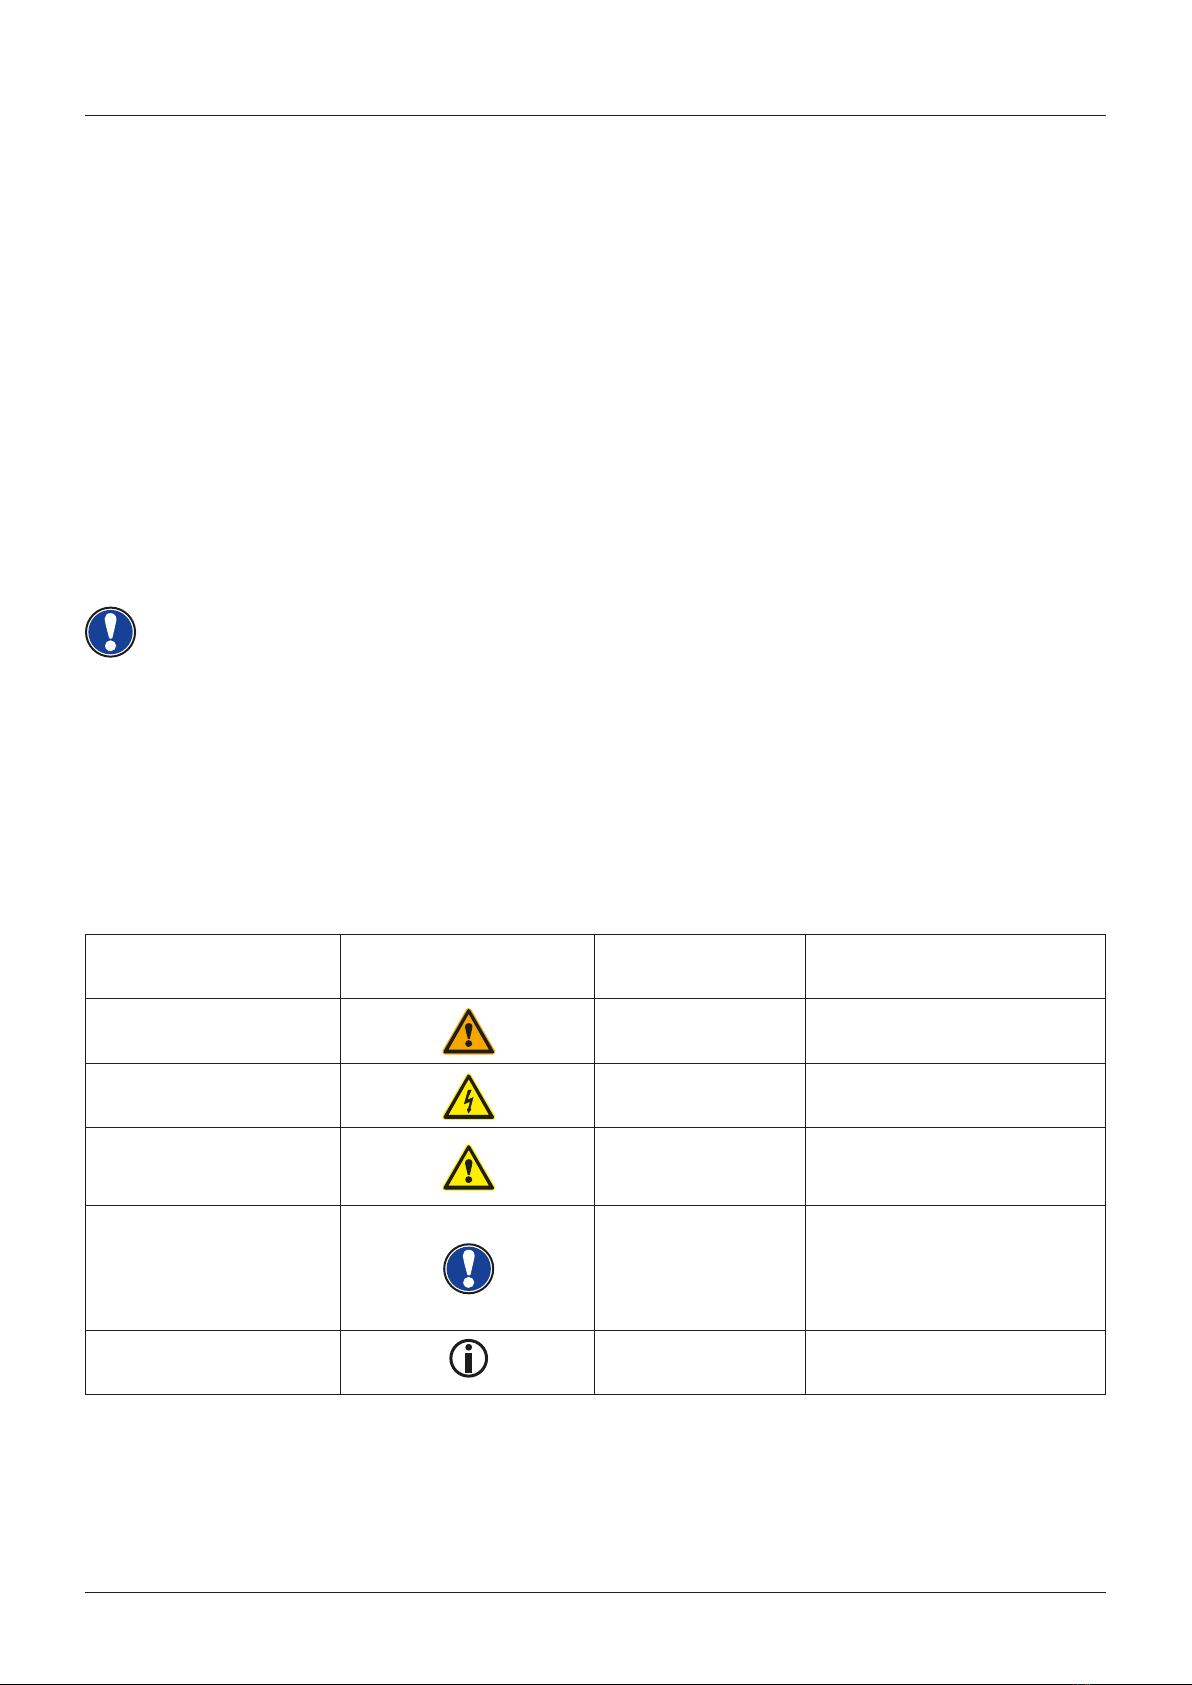
1 SAFETY INFORMATION ................................................................................................................. 5
1.1 Key ......................................................................................................................................... 5
1.2 Intended use .......................................................................................................................... 6
1.3 Improper use ......................................................................................................................... 6
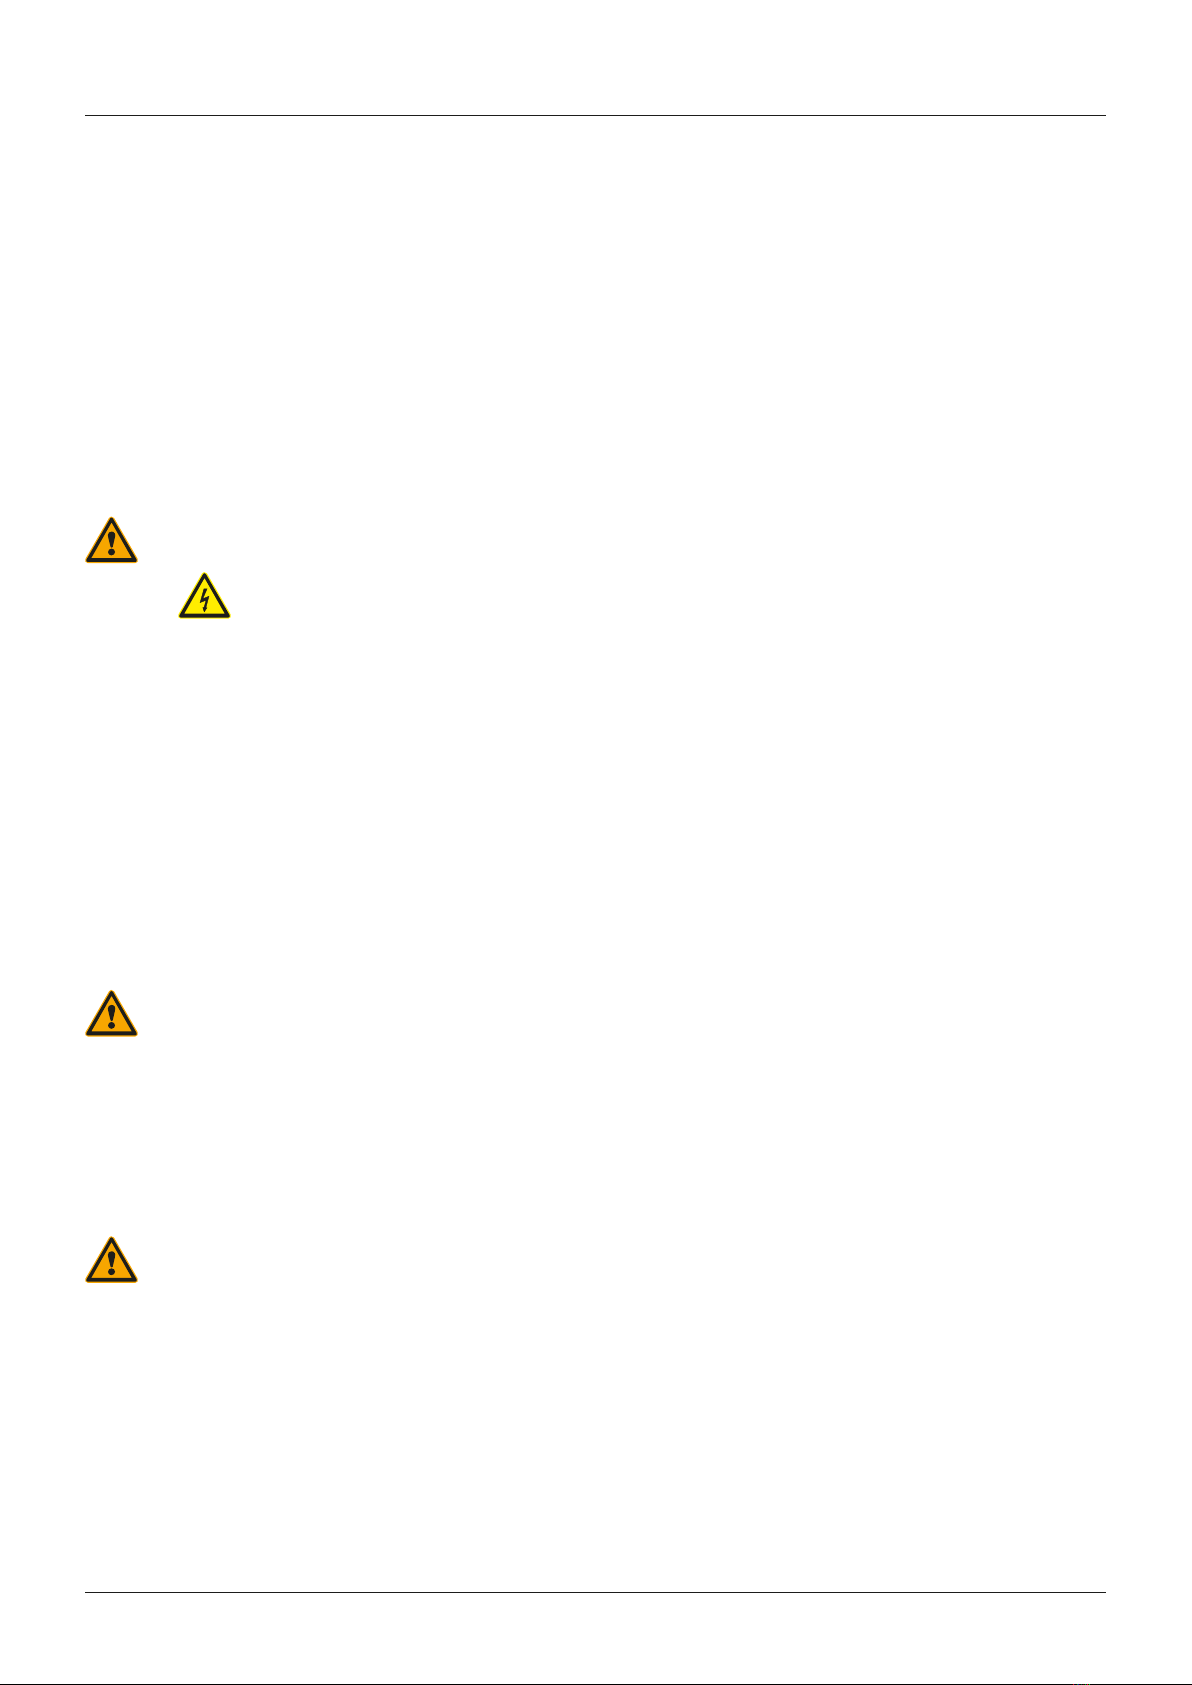
1.4 Precautions ............................................................................................................................ 7
1.5 CE mark ................................................................................................................................. 8
1.6 Disposal ................................................................................................................................ 8
2 DELIVERY........................................................................................................................................ 9
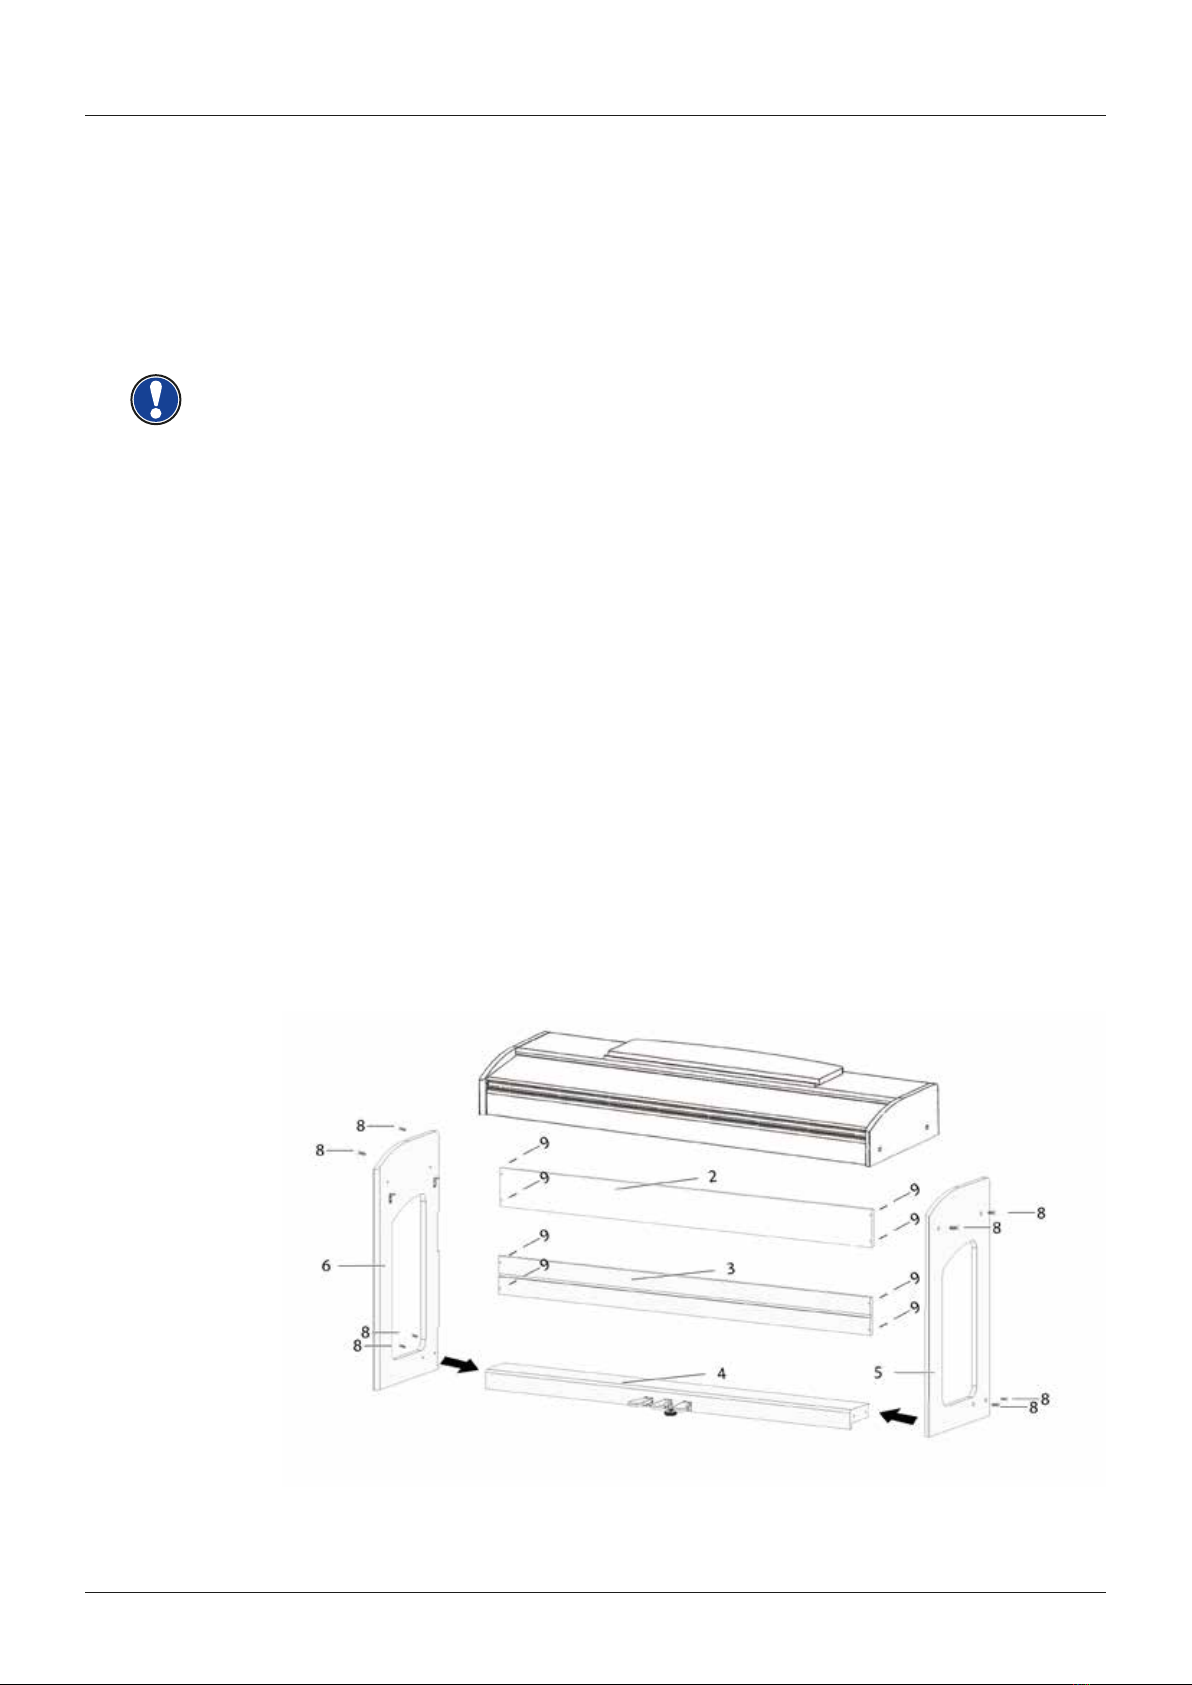
3 ASSEMBLY INSTRUCTIONS ....................................................................................................... 10
4 FIRST STEPS ................................................................................................................................ 12
4.1 Control elements of your digital piano ............................................................................... 12
4.2 Control buttons and pedals ................................................................................................. 13
4.3 Keyboard / Connections panel / Back.................................................................................. 15
5 OPERATING USE ......................................................................................................................... 17
5.1 Switching on ........................................................................................................................ 17
5.2 DEMO function ................................................................................................................... 17
5.3 Choice of sounds ................................................................................................................ 17
5.3.1 Dual Mode .................................................................................................................. 18
5.4 Reverb and Chorus ............................................................................................................. 18
5.4.1 Reverb ........................................................................................................................ 18
5.4.2 Chorus and other effects ............................................................................................ 19
5.5 Metronome .......................................................................................................................... 19
5.5.1 Metronome - switching on/off ..................................................................................... 19
5.5.2 Metronome - changing speed ................................................................................... 20
5.5.3 Changing time signature ........................................................................................... 20
5.5.4 Metronome - volume adjustment ................................................................................ 20
6 FUNCTIONS MENU ...................................................................................................................... 20
6.1 Settings ............................................................................................................................... 21
6.2 Transposition ....................................................................................................................... 21
6.3 Fine-tuning the sounds ........................................................................................................ 22
6.4 Touch function / touch sensitivity ........................................................................................ 22
6.5 Balance settings .................................................................................................................. 22
6.6 Brilliance settings . ............................................................................................................... 23
6.7 MIDI transmission channel .................................................................................................. 23
6.8 Local Control ....................................................................................................................... 23
6.9 Program Change function .................................................................................................... 24
6.10 Piano mode ........................................................................................................................ 24
6.11 Changing the tuning ........................................................................................................... 25
6.11.1 Changing the root note ........................................................................................... 25
6.12 Adjusting string resonance ................................................................................................. 25
6.13 Adjusting damper resonance .............................................................................................. 26
6.14 Adjusting LINE IN input volume .......................................................................................... 26
6.15 Auto Power Off ...................................................................................................................... 26
6.16 Layer Pedal ........................................................................................................................... 26
7 RECORDING AND PLAYBACK FUNCTIONS ............................................................................. 27
7.1 Recording music ................................................................................................................. 27
7.2 Playback of recordings ....................................................................................................... 27
7.3 Deleting recordings ............................................................................................................. 27
CONTENTS

4
CONTENTS
8 USER CALIBRATION OF THE KEYBOARD .................................................................................28
8.1 Selecting the calibration mode ........................................................................................... 28
8.2 Creating a user calibration .................................................................................................. 28
8.3 Comparing factory and user calibration ............................................................................. 29
8.4 Exit calibration mode ........................................................................................................... 29
9 CONNECTING EXTERNAL DEVICES (ACCESSORIES) ........................................................... 30
9.1 Connecting headphones ..................................................................................................... 30
9.2 Connecting a playback device .......................................................................................... 30
9.3 Connectinganamplier ...................................................................................................... 30
9.4 Connecting to PC ................................................................................................................ 30
10 USEFUL INFORMATION .............................................................................................................. 31
10.1 INDEX .................................................................................................................................. 31
10.2 Warranty .............................................................................................................................. 32
11 TROUBLESHOOTING .................................................................................................................. 33
12 TECHNICAL SPECIFICATIONS ................................................................................................... 34

5
Level of danger Symbol Importance Denition
Severe injury WARNING Severe to fatal injuries if
disregarded
Severe injury through
electric shock WARNING Additional symbol for danger of
electric shock
Slight injury and property
damage CAUTION
Slight injury and / or property
damage can occur if the safety
instructions are disregarded.
Note NOTE
Crucial information
concerning the handling of
the device
Tip TIP Application tips
SAFETY INFORMATION
KEY
Dear Customer,
Thank you for choosing a digital piano from GEWA music!
You have chosen a high-quality digital piano that will give you an impressive sound
experience and lots of fun.
Additional functions extend the capabilities of your digital piano far beyond piano
playing.
Your safety is very important to us!
Please read the safety information carefully and pay close attention to it. Retain this
manual and hand it over to the respective user.
1SAFETY INFORMATION
The manufacturer is not liable for personal injury or property damage resulting from
improper use of the device!
Only use your digital piano as directed!
1.1 KEY
The following symbols are used in this operating manual to identify hazards and notes.
NOTE

6
1.2 INTENDED USE
The digital piano is intended for use in dry rooms.
• Devices for audio playback (as input or output) or for data communication can be
connected.However,therespectivetechnicalspecicationsmustbecompliedwith
(see the section “Technical data“).
• The electrical connection may only be made to correctly installed power supplies,
fulllingtherespectiveregulations.Themainsvoltageontheidenticationplatemust
correspond to the mains voltage of the country of use.
• The digital piano is only to be used in the original delivery condition described below.
Conversions of any kind are not permitted and cause the immediate loss of the warranty
claim.
• The digital piano must be placed on securely fastened and weight-suitable, stable and
leveloorsorplatforms.
1.3 IMPROPER USE – EXAMPLES:
• Use outdoors or in rain
• Use in damp rooms
• Connection to incorrect supply voltage or improperly installed electrical power supplies.
• Use in close proximity to electrical or electronic equipment such as stereos, televisions,
radios or mobile phones.
• These devices may cause interference and affect the sound quality.
• Electrical leads that are too long can also affect sound quality.
• Transport and installation in places or vehicles with strong vibration, dust and strong heat
e.g. direct sunlight.
The manufacturer accepts no liability for damage for the following reasons:
• Disregard of the safety instructions
• Improper handling
• Use with devices that are not compatible with the technical data listed below
NOTE
SAFETY INFORMATION
INTENDED USE

7
SAFETY INFORMATION
PRECAUTIONS
1.4 PRECAUTIONS
Please follow the the precautions listed here. Disregard of precautionary measures can
have serious consequences:
• Severe injury or even fatal accidents
• Electric shock
• Short circuit
• Damage
• Fire
Other threats are conceivable; this is not an exhaustive list.
WARNING Fatal electric shocks
• Even low electrical currents can lead to serious injuries and death.
• Never open the digital piano’s casing.
• Never use damaged power cables.
• Lay the power cable in such a way that it can not be damaged.
•Neverplacecontainers(vases,glassesetc)lledwithwateroruidsonthepiano.
• Never pour water or liquids on to the digital piano or keyboard.
• Never clean the digital piano with a wet cloth.
• Never plug in or pull out the mains plug with wet hands. Never pull on the cable; it can
cause damage.
• If liquid accidentally gets into the digital piano, immediately unplug the power.
Then have your digital piano checked by your GEWA service representative.
WARNING Unusual circumstances
• Turn off the digital piano or unplug the power cable if:
- There is a sudden loss of sound while using the digital piano
- The digital piano generates an unusual smell or smoke
• Be sure to have the digital piano checked by your GEWA service representative
WARNING Protectionagainstre
•Openamessuchascandlesortealightscantipoverandcauseare
•Neverplaceobjectswithopenamesonthedigitalpiano!

8
SAFETY INFORMATION
CE MARK
CAUTION Damage to the digital piano
• Inappropriate electrical voltages can damage the digital piano.
• Only operate the digital piano in the permissible voltage range (as indicated on the
respectiveidenticationplate).
• Only use the supplied power cable.
• Never place the power cable near to sources of heat, such as radiators or freestanding
heaters.
• Do not bend or kink the power cable, or damage it in any other way.
• Lay the power cable so that nobody can step on it, trip on it or roll over it.
• Do not place objects on the power cable.
• Regularly check the power cable and remove any dust or dirt that may be present.
CAUTION Damage to the digital piano through thunderstorms
• Thunderstorms can generate electrical surges that can damage electrical equipment.
• In the event of a thunderstorm or long periods of non-use (such as travel), unplug the
appliance from the mains.
1.5 CE MARK
CE MARK
This device complies with EU directive requirements: Directive 2014/53/EU
EN55020:2007+A11:2011
EN55024:2010
EN55032:2012
EN61000-3-2:2014
EN61000-3-3:2013
EN301489-17:V2.2.1
EN301489-17:V3.2.0
EN62479:2010
EN300328:V2.1.1
TheconformitywiththeregulationslistedaboveisconrmedbytheCEsignonthedevice.
The declaration of conformity can be viewed at the following address:
GEWA music GmbH, Werkstraße 1, 08626 Adorf, GERMANY
1.6 DISPOSAL
To dispose of the old device, please take it to your local waste management authority
(e.g. disposal company or recycling centre).
The adjacent symbol indicates that the device must be disposed of separately from
household waste. In accordance with the Electrical and Electronic Equipment Act, owners
of old appliances are legally required to dispose of old electrical and electronic appliances
at a separate and designated waste disposal point.
Please help in contributing to protect the environment by not disposing of the old device
in household waste.

9
DELIVERY
2DELIVERY
Check that the contents of the package is complete before commencing with assembly.
No. Description Quantity
1 Keyboard with keyboard cover 1
1a Music desk 1
2 Brace pedalboard 1
3 Brace back panel, above 1
4 Pedalboard 1
5 Right side panel 1
6 Left side panel 1
7 Connecting cable power supply 1
8a Phillips screw M6 x 16 (headphone hanger) 1
8b Phillips screw M6 x 35 8
9a Phillips wood screw 3.5 x 25 8
9b Phillips wood screw 3.5 x 30 2
10 Quick Start Guide 1
11 Rubber cover 8
12 Headphone hanger 1
13 Adjustment screw 1
not shown
Cable clips 2

10
ASSEMBLY INSTRUCTIONS
3ASSEMBLY INSTRUCTIONS
This section tells you how to correctly set up your digital piano. For assembly you will
need:
• A size 2 phillips screwdriver
• Another person
Do not tighten the phillips screws until all parts of your digital piano have been pre-
assembled and aligned.
How to assemble your digital piano:
1. Unfold the pedal cable (not shown) and screw the adjustment screw ( 13 ) into the
pedal board ( 4 ).
2. Connect the side panels (5 and 6) with the pedal board using the phillips screw (7b)
3. Now insert the pedal board brace ( 2 ). Make sure that the pedalboard is inserted
into the groove provided. Then attach it to the side panels with 4 screws (9a) and
2 screws (9b) in the middle of the brace.
4.Thenxthebackpanelbrace(3)withphillipswoodscrewsaswell(9a).
5. Then you can attach the keyboard from above. For stability, this must rest evenly on the
xedanglesonthesidepanels.Thenthekeyboard(1)mustbeconnectedandxed
with the four phillips screws (8b).
6. Now screw the headphone hanger (12) on to the left underside of the keyboard by
using the phillips screw ( 8a )..
7. Then align your digital piano and tighten all the screws.
8.Finally,ttherubbercovers(11)intoallholesinthesidepanels(5and6).
NOTE

11
ASSEMBLY INSTRUCTIONS
9. Place your digital piano at the desired location and make sure that the adjustment
screw(13)touchestheoorasshownbelow.
10. Insert the pedal cable true to side into the pedal cable socket on the underside of the
keyboard ( 1 ). It should slide easily into the socket. Then plug the power cable ( 7 )
into the power socket on the back of the piano (not shown).
11. Set up the music desk as shown below.
OPENING THE KEYBOARD LID
Please always use both hands to open the keyboard lid.
Open the keyboard cover as shown in the diagram. Proceed in reverse order to close it.
Pedal cable
Pedal cable socket
CAUTION

12
ASSEMBLY INSTRUCTIONS / FIRST STEPS
CONTROL ELEMENTS / KEYBOARD
4FIRST STEPS
In this section, we familiarise you with the controls on your digital piano.
4.1 THE CONTROL ELEMENTS OF YOUR DIGITAL PIANO
Your GEWA digital piano has the following controls:
USE WITH A KEYBOARD STAND
It is also possible to use a keyboard stand instead of the supplied rack. In this case place
the keyboard stand on level ground and position the piano centrally on top. If possible,
the speakers on the bottom of the piano should not be covered or partly touched by the
stand. For the connection with a standard sustain pedal you can use the 6.3mm jack socket
labeled ‘sustain’ on the rear panel.
NOTE
Control Panel
Diagram A
Indicator LED Keyboard
Pedals
Diagram B
Speakers

13
P 1
FIRST STEPS
CONTROL BUTTONS AND PEDALS
4.2 CONTROL BUTTONS AND PEDALS
Diagram A 1 Display
Shows information about the chosen settings.
2 Cursor keys
Navigate through the functions here and adjust settings.
3 Volume
Adjusts the volume.
4 Voice
Choose from your digital piano’s different sounds
(–> page 17).
5 Metronome
Switch the metronome on or off here (–> page 19)
.
6 DEMO
Press the Voice and Metronome buttons at the same time
to get to the DEMO function (–> page 17).
7 Reverb
Change the simulated room sound (–> page 18).
8 Chorus
Add effects to the sound (–> page 19).
9 Function
Activate the function menu to change various settings
(–> page 20).
10 REC
This puts your GEWA digital piano into Recording mode
(–> page 27).
11 Play/Stop
Start and Stop recorded music playback (–> page 27).
12 Song Select
Choose a memory space to record or play a song
(-> page 27).

14
Diagram B
FIRST STEPS
CONTROL BUTTONS AND PEDALS
Sustain Pedal (right side)
The Sustain- or Damper Pedal on an acoustic grand piano
lifts up all the dampers that sit on the strings. Thereby all
played notes continue to sustain after the keys are released.
Furthermore, all the other strings can freely resonate, so their
frequencies contribute to a richer sound.
All this is simulated by the pedal of your Gewa piano. It is also
possible to play with half pedal, which means the simulated
dampers are only lifted slightly, so that the sustaining notes
are decaying faster than with the pedal fully depressed.
Piano Pedal (left side)
When the Piano- or Una Corda Pedal is being operated, the
Gewa Piano simulates shifting the keyboard action slightly
to the right. The altered striking line of the imaginary piano
hammers results in a differently colored tone and a slightly
softer volume.
Sostenuto Pedal (middle position)
The Sostenuto Pedal resembles the Sustain Pedal. The only
difference is that only those notes are sustaining whose keys
were being depressed at the moment of actuating the pedal.
All the other notes are dampened as usual.

15
FIRST STEPS
CONNECTIONS
A
BC
4.3 KEYBOARD / CONNECTIONS / UNDERSIDE
Speakers Speakers
A1 Power On/Off Turn your digital piano on and off.
A2 Headphone sockets Connect one or two sets of headphones here.
B Pedal cable socket Connect the pedal cable here.
A1 A2 B
Diagram A Diagram B
General View

16
FIRST STEPS
CONNECTIONS
C1 C2 C3 C4 C5 C6
KEYBOARD / CONNECTIONS REAR PANEL
Diagram C
C1 LINE IN This port is for external sound source playback (e.g. MP3
players) through the speaker system via a 3.5 mm jack
socket. (-> page 26)
C2 SUSTAIN You can connect a standard sustain pedal to this 6.3 mm
jack socket, if you want to use your digital piano with an
external stand.
C3 LINE OUT L/R This connection is split into the stereo channels L(eft) and
R(ight). Using 6.3 mm jack cables, you can connect these
outputs to a receiver, e.g. an amplier or a recorder
(-> page 30).
C4 MIDI IN/OUT Connect MIDI devices here. (-> pages 23, 24, 30)
C5 USB-B Connection Connect your digital piano with your PC via this connection
(-> page 30).
C6 Power Supply Connect your digital piano to the power supply here, using
the power cable.

17
CONTROLS
DEMO-FUNCTION
5CONTROLS
Any settings you change will be reset when your digital piano is turned off. Exceptions are
settings on the volume control.
5.1 SWITCHING ON
Turn the volume control to its middle position before switching the digital piano on.
1. Press the On/Off button on the underside of your digital piano.
2. The Reverb and Voice LEDs light up. In addition, so will the LED indicator on the front
of your digital piano.
3. Your digital piano is ready for use.
5.2 DEMO FUNCTION
The DEMO function gives you an overview of the variety of sound options that your digital
piano has.
To activate the DEMO function:
1. Simultaneously press the Voice and Metronome buttons. The display shows the number
of the currently selected DEMO songs.
2. Press the top and bottom cursor keys to scroll through the different demo songs.
3. Press the Play/Stop buttons to start or stop playing a song. You can accompany a
DEMO song on your digital piano.
4. Press the Voice button to exit the DEMO mode.
5.3 CHOICE OF SOUNDS
Your GEWA digital piano contains more than 20 sounds:
NOTE
TIP
Press the Voice button and press the left or right cursor buttons to navigate through the
different sounds. The currently selected sound is shown in the display.
Sounds 1 - 10 Sounds 11 - 20
Display Sound Display Sound
P1 Piano 1 Cho Choir
P2 Piano 2 Sy1 Synth strings 1
P3 Piano 3 Sy2 Synth strings 2
P4 Piano 4 OG1 Organ 1
HAr Harpsichord OG2 Organ 2
EP1 E-Piano 1 OG3 Organ 3
EP2 E-Piano 2 Git Guitar
EP3 E-Piano 3 CL Clavinet
EP4 E-Piano 4 Vib Vibraphone
Str Strings Acc Accordion

18
CONTROLS
REVERB AND CHORUS
5.3.1 DUAL MODE
Your digital piano can be set to play two different sounds as you play.
To combine two sounds together:
1. Select a sound, as described above.
2.PressandholdtheVoicebutton.TheVoicebuttonLEDwillstarttoash.
The display will show OFF.
3. Use the Left or Right cursor button to select a second sound.
4. If you play the keyboard now, both sounds will be played simultaneously.
5. You can change the volume ratio of the two sounds stored on the piano
(–> Balance settings on page 22).
6. To undo the settings, press and hold the Voice button again and use the Left cursor
key to reset until OFF appears in the display.
You can determine the behaviour of the Sustain Pedal in Dual Mode. (-> page 25)
5.4 REVERB AND CHORUS
Your digital piano has the ability to use the Reverb or Chorus button to mix different effects
into the sounds.
• For some sounds, a reverb or chorus effect has already been added to the sound
during factory production to make it more realistic. In this case, you can also disable the
effects as described.
• All effect settings are retained until your digital piano is turned off. When you turn it on
again, the factory settings are restored.
5.4.1 REVERB
The Reverb effect simulates the ambient sound of different environments. Your digital
piano has the following reverb effects:
Display Simulation
R01 a furnished living room
R02 a slightly larger space
StG a small stage
HA1 a larger concert hall
HA2 a cathedral
Press the Reverb button to turn the effect on or off. When the Reverb function is active, its
LED lights up.
IfyouhaveactivatedtheReverbfunction,thecorrespondingeffectwillbrieybeshownin
the display. During this time, you can use the Left or Right cursor keys to select an effect,
and use the upper and lower cursor keys to adjust the effect level.
The selected Reverb settings are adopted immediately.
NOTE
TIP

19
CONTROLS
METRONOME
5.4.2 CHORUS AND OTHER EFFECTS
The Chorus function includes the following effects:
Press the Chorus button to turn the effect on or off. When the Chorus effect is active, the
LED on the Chorus button lights up.
IfyouhaveselectedtheChorusfunction,thecorrespondingeffectisbrieyshowninthe
display. During this time, you can use the Left and Right cursor keys to select an effect,
and the Upper and Lower cursor keys to adjust the effect level.
The changes in effects and effect intensity take place immediately.
5.5 METRONOME
Yourdigitalpianohasabuilt-inmetronomethathelpsyoundandmaintaintherightbeat
while you are playing.
The metronome has 7 time signatures (1/4, 2/4, 3/4, 4/4, 5/4, 3/8 and 6/8), can be adjusted
in volume, and is adjustable between 32 and 250 beats per minute (Bpm).
5.5.1 METRONOME – SWITCHING ON/OFF
1. Press the Metronome button. The Metronome button’s LED lights up and the metronome
is activated.
2. The next time you press the Metronome button, the LED goes out and the metronome
is deactivated.
Display Name Description
CH1 Chorus1 Makes the sound fuller and gives the same
richness of sound as in an ensemble.
CH2 Chorus2 Like CH1 but more intense.
Great for E-piano and string instruments.
FLG Flanger Similar to Chorus, with slight changes in pitch.
Well suited to synthetic sounds.
PH1 Phaser1
Similar to Chorus, with periodically varying
frequency changes.
Well suited to synthetic sounds.
PH2 Phaser2 Like PH1 but more intense.
TR1 Tremolo1 Rhythmicinuenceonsoundvolume.
Well suited to synthetic sounds.
TR2 Tremolo2 Like TR1 but more intense.
rot Rotary Simulates rotating speaker cabinets.
Suitable for organ sounds.

20
CONTROLS
FUNCTIONS MENU
5.5.2 METRONOME – CHANGING SPEED
1. Switch the metronome on.
2. Use the upper and lower cursor keys to increase/decrease the tempo in increments of
10, and press the left and right cursor keys to increase/decrease the tempo in increments
of one. The current tempo is shown in the display.
5.5.3 CHANGING TIME SIGNATURE
1. Press and hold the Metronome button. The currently set time signature appears in the
display.
2.Presstherightorleftcursorkeystondthedesiredtimesignature.
3. Release the Metronome button. The selected time signature is set and played back.
5.5.4 METRONOME – VOLUME ADJUSTMENT
1. Press and hold the Metronome button. The set time signature is shown in the display.
2. Press the upper or lower cursor keys to adjust the volume of the metronome.
3. Release the Metronome button. The set metronome volume will be played back.
6FUNCTIONS MENU
Any settings you change will be reset when your digital piano is turned off.
You can change a variety of settings in the Functions Menu. To enter the Functions Menu,
press the Reverb and Chorus buttons simultaneously.
Navigating the Functions Menu:
1.SimultaneouslypresstheReverbandChorusbuttons.Thedisplayalternatelyashes
the abbreviation for the setting to be made and the set value.
2. Press the left or right cursor keys to change from setting to setting.
3. Press the upper or lower cursor keys to change the values of the settings. Changes to
the values are applied immediately.
4. Press the Reverb button to exit the menu.
NOTE
Table of contents
Other Gewa Musical Instrument manuals