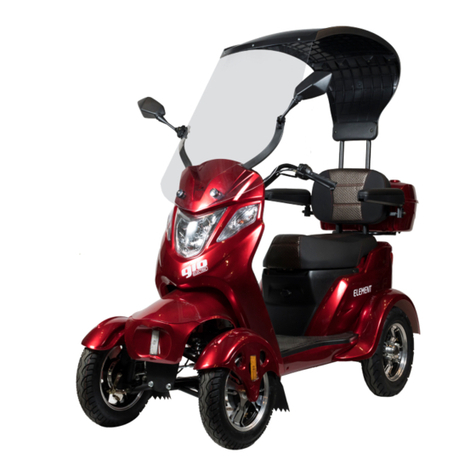
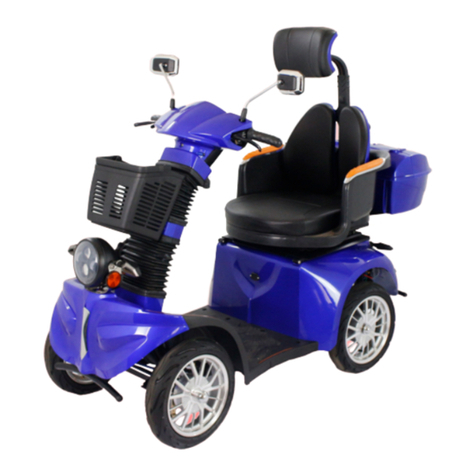
Gio Electric WISP User manual


PLEASE INSPECT YOUR GIO ELECTRIC WISP E-eScooter UPON
ARRIVAL AND REPORT ANY DAMAGES THAT MAY HAVE
OCCURRED DURING SHIPPING
⚠
Before operating, please read this manual carefully and familiarize
yourself with GIO Electric eScooter components and how they
function
1. Please observe all local traffic laws. Remember: ignorance of the law is no excuse.
The rider is responsible for their actions and the correct operation of the eScooter at all
times.
2. For your safety always correctly wear proper protective equipment
3. This eScooter is designed only for one adult only. Do not exceed the max load
capacity of the vehicle. 220lbs(100kg)
4. Do not lend to or let someone else operate this eScooter without them reading this
manual and agreeing to follow its instructions.
5. Always perform an initial inspection of the eScooter, prior to riding to ensure proper
function.
6. Avoid disassembling the bike or wiring without proper knowledge.
7. Please be responsible and dispose of all old batteries through a local battery recycler.
8. Illustrations/images in this manual may differ from the final product.
9. As GIO Electric is always striving for a better product, details and specifications in
this manual may vary from the final product
10. To ensure the safety and reliability of your eScooter, do not modify your eScooter,
and always use parts, i.e. charger, specifically designed for the GIO Wisp
11. If you have any concerns or questions in regards to you eScooter please contact
GIO Electric Customer Service
1

Table of Contents
Safe Operation Guide 2
Assembly
- Rear Fender & Footrests 5
- Handlebars 6
- Pedals 7
- Battery 8
Operating your eScooter
- Accelerating 5
- Braking 6
- Charging your eScooter 7
Maintenance and Care
- Pre-ride Checklist 9
- Schedule 9
- Cleaning 10
- Lubrication
- Battery 12
Warranty 17
Safe Operation Guide
Never ride while using headphones/cell phones as they mask traffic sounds and
emergency vehicle sirens, and cause distracted driving which can lead to accidents.
Never consume drugs or alcohol before or while operating your GIO electric eScooter,
they can impair your judgment and reaction time.
Never operate your GIO electric eScooter without wearing an approved helmet that fits
properly. Additional safety equipment will also further prevent injury.
Never stand on a eScooter whether moving or not.
Never attempt to repair when power is ON.
Never make sudden or sharp turns at excessive speeds.
Never store your eScooter by hanging it from the handle bars. Doing so may result in
incorrect operation leading to loss of control and injury.
Always be alert to your surroundings and follow local traffic laws. Use vehicle lights
when operating in darker conditions
Always apply both front and rear brakes simultaneously. Always apply brakes while
going downhill to regulate speed.
2

Always keep both hands on the handlebars and both feet on the footrest/pedals during
operation. Do not operate one handed. (eg. while holding an umbrella in the other hand)
Always allow proper distance for stopping especially when driving in slippery conditions
such as rain or snow.
Always drive on smooth paved surfaces to avoid excess tire wear or loss of control.
Always maintain proper tire pressure as described in this manual. Type of tire and
inflation can affect eScooter handling.
Always inspect your GIO eScooter before each use to make sure it is in safe operating
condition. Check for loose screws, nuts, bolts, parts, brakes, drive chain, etc.
Always keep your eScooter as dry as possible. Avoid driving in heavy rain or through
water deeper than the ground clearance. Not doing this can result in damage to the
electronics/battery.
Always turn the power off when not in use and park carefully on a level surface.
Always store your eScooter in a dry temperature regulated area. Excess moisture may
lead to corrosion of components causing short circuits. Avoid extreme temperatures
cold/hot to prevent battery damage. Do not store in direct sunlight, near sources of heat,
open flame or corrosive substances.
Always follow the inspection and maintenance procedures described in this manual.
⚠
DO NOT MAKE ANY ALTERATIONS OR MODIFICATIONS TO THIS GIO ELECTRIC
ESCOOTER OR ADD ANY PARTS NOT AUTHORIZED BY GIO EXCEPT THOSE
DISCUSSED IN THIS MANUAL OR THOSE REQUIRED BY LAW. DO NOT REMOVE
ANY REFLECTORS, LIGHTS OR OTHER STANDARD EQUIPMENT. FAILURE TO
FOLLOW THESE OPERATION INSTRUCTIONS CAN RESULT IN SERIOUS INJURY
OR DEATH OR COULD RESULT IN AN ELECTRICAL SHORT AND OR FIRE.
⚠
GIO ELECTRIC IS NOT RESPONSIBLE FOR THE CONSEQUENCES OF FAILURE
TO COMPLY WITH STATE AND LOCAL REGULATIONS RELATING TO THE USE OF
THIS ELECTRIC SCOOTER!
3

Assembly
Unpack and ensure you have all of the following components. We
recommend saving all packing materials until your eScooter is fully
assembled to prevent the accidental disposal of small parts/hardware.
Please note assembly requires a Phillips Screwdriver, 4mm & 6mm Allen
wrenches and a 14mm open ended wrench.
Rear Fender
& Bracket (Not shown)
Fender Hardware
M5*12 (x2) & M5*10 (x4)
Footrest Brackets
Left (x1) & Right (x1)
Footrest Covers (x2)
Left (x1) & Right (x1)
Footrest Hardware
M6*12 (x4) & M5*10 (x4)
Footrest Plugs
Handlebar Stem Cover
Handlebar Cover
Handlebar Plug & Bolt
Pedals
Charger
Key & Fob (x2)
4

Rear Fender and Footrests
Begin and position the rear fender over the rear wheel. Secure the front of
the fender with the provided 2x M5*12 bolts. Then attach the fender
brackets to the sides of the fender with the 4x M5*10 bolts, 2 bolts on each
side.
Next align the holes of fender bracket with the mounting holes above the
axle, then align the the holes of the footrest bracket with the same
mounting homes and secure into place with 2x M6*12 bolts. Repeat for the
other side, making sure to mount the correct side bracket on each side.
Slide the plastic foot rest on to the footrest bracket and bolt into place with
2x M5*10 bolts. Repeat on the other side and cover holes with footrest
plugs.
Continued next page…
5

Handlebars
Begin handlebar installation by sliding the handlebar stem cover over the
stem as shown. (Handlebars depicted upside down in photo) Insert the
handlebar stem into the steering tube, correctly align the handlebar
perpendicular to the front wheel and secure the handlebars into place by
tightening the hex bolt with a 6mm Allen wrench. (25NM recommended)
Place the handlebar cover over the completed handlebar stem connection,
secure into place with M5*10 bolt and cover with the handlebar plug.
6

Pedals
Begin pedal installation by correctly matching the corresponding pedal to
each side of the eScooter. (Pedals are labeled) Twist pedal into place and
tighten into place with the open ended wrench, in the following directions;
left pedal tighten counterclockwise,right pedal tighten clockwise.
(Recommended 40NM)
Battery Connection
Remove the 4 bolts holding the footboard in place and carefully set aside.
Lift off the foot board to reveal the battery compartment. Locate the
disconnected battery wires ensuring to reconnect positive red to positive
red and negative black to negative black. Replace the footboard and bolts,
you are now ready to charge your eScooter.
⚠
PLEASE NOTE YOUR WISP ESCOOTER DOES NOT ARRIVE FULLY CHARGED
AND MUST BE CHARGED COMPLETELY BEFORE FIRST USE.
7

Operating your eScooter
Accelerating
Acceleration for your eScooter is controlled by the twist grip throttle on the
handlebar. Rotate throttle towards you to accelerate and away from you to
slow down. It’s more efficient if you add power gradually when accelerating
and coast as far as possible before braking.
⚠
ALWAYS KEEP YOUR HANDS ON THE BRAKE LEVERS IN ORDER TO CONTROL
THE SPEED AND TO BE ABLE TO DISENGAGE CRUISE CONTROL.
Braking
Brakes are applied by squeezing the levers that are located on both sides
of the handlebars. Please take extra care to balance between the brakes in
slippery or wet conditions. It is recommended to apply front and rear brakes
together, leading with squeezing the rear lever first.
Charging
⚠
YOUR WISP ESCOOTER SHIPS WITH THE BATTERY PACKS DISCONNECTED
PLEASE REFER TO THE INSTRUCTIONS ON PAGE #5 TO RECONNECT THE
BATTERIES PRIOR TO YOUR FIRST CHARGING!
To charge your eScooter, first make sure the ignition key is switched to off,
then plug the output plug from the charger into the charging port.
Once connected plug the eScooter plug the charger into a standard wall
socket. The light on the charger should turn red which indicates that it is
charging and then turn green when the battery is fully charged. Remove the
charger from the wall outlet and then from the eScooter/battery as soon as
charging is complete.
8
Table of contents
Other Gio Electric Scooter manuals


